Miele CVA 5060 Operating Instructions Manual
Built-in coffee machines
Hide thumbs
Also See for CVA 5060:
- Quick start manual (8 pages) ,
- Operating and installation manual (80 pages) ,
- User manual (80 pages)
Table of Contents

Related Manuals for Miele CVA 5060


Summary of Contents for Miele CVA 5060
-
Page 1: Operating Instructions
Operating instructions Built-in coffee machines CVA 5060 CVA 5068 en - AU, NZ To avoid the risk of accidents or damage to the appliance, it is essential to read these instructions before it is installed and used for the first time. -
Page 2: Table Of Contents
Contents Caring for the environment ......... . 5 Guide to the machine . - Page 3 Contents User profile drinks ..........28 After use.
- Page 4 Contents Programming the amount: setting the portion sizes ....50 Programming the amount of espresso, coffee, hot milk and milk froth via the OK sensor .
-
Page 5: Caring For The Environment
Caring for the environment Disposal of the packing Disposal of your old machine material Electrical and electronic machines often contain materials which, if The transport and protective packing handled or disposed of incorrectly, has been selected from materials which could be potentially hazardous to are environmentally friendly for human health and to the environment. -
Page 6: Guide To The Machine
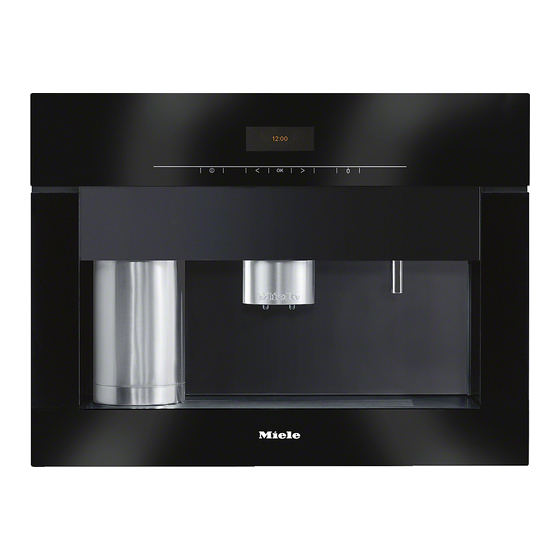
Guide to the machine Exterior view a On/Off sensor for switching the coffee machine on and off b Display c Left arrow, for scrolling through the various programme options d OK sensor, for confirming the selection of a programme option and for saving a setting e Right arrow, for scrolling through the various programme options f Sensor for selecting hot water... -
Page 7: Interior View
Guide to the machine Interior view a Master switch b Ground coffee chute cover c Ground coffee chute d Slide control to select fineness of ground coffee e Coffee bean container f Drip tray with grid for easier carrying g Water container h Brew unit i Waste container j Central spout connector (connecting the brew unit and the central coffee spout) -
Page 8: Accessories Supplied
Accessories supplied Stainless steel milk flask For storing and keeping milk cold, with lid (with handle) and additional cap (not suitable for cleaning in a dishwasher) Containers Large and small containers for cleaning and rinsing the milk pipework Coffee spoon For adding the correct amount of ground coffee Cleaning powder (sufficient for 30 days) For daily cleaning of the milk pipework... -
Page 9: Optional Accessories
Optional accessories Stainless steel milk flask with cap For storing and keeping milk cold (not suitable for cleaning in a dishwasher) Cleaning powder (sufficient for 100 days) For daily cleaning of the milk pipework Cleaning tablets For cleaning the brew unit Descaling tablets For descaling the water pipework E-Cloth (microfibre cloth) -
Page 10: Warning And Safety Instructions
Warning and Safety instructions Safety with children This machine conforms with all Keep children away from the relevant legal safety requirements. machine at all times. It is not a toy! To Improper use can, however, lead to avoid the risk of injury do not allow personal injury and damage to children to play on or near it or to play property. - Page 11 The machine must only be operated Faulty components must only be when built in, to ensure that all replaced by genuine Miele original electrical components are shielded. spare parts. The manufacturer can only Ensure power is not supplied to the...
-
Page 12: Correct Use
(except when it is combined with The ground coffee chute must never a Miele built-in plate warming drawer). be filled with anything other than In areas which may be subject to ground coffee or brew unit cleaning infestation by cockroaches or other tablets. - Page 13 The manufacturer cannot be held liable for damage arising from insufficient descaling. Only use the descaling tablets supplied by Miele and follow the instructions on the packet carefully. Use the exact proportions recommended. Otherwise the machine will be damaged.
-
Page 14: Functions
Functions This machine can be used to prepare The amount of espresso, milk or milk espresso, coffee, cappuccino, latte froth can also be programmed for macchiato, milk froth, hot milk and making cappuccino and latte hot water . macchiato. Milk can be stored for several hours in If two cups of coffee or espresso are the stainless steel milk flask required at the same time, the OK... - Page 15 Functions To ensure that the flavour can develop fully and be maintained for longer the machine has an additional function to automatically rinse and pre-warm the system when the machine is cold. The same function is used to flush coffee remains out of the system and the central spout after use.
-
Page 16: Using The Coffee Machine - First Steps
Using the coffee machine - first steps Operating sequence The following notes should help you get to know your coffee machine before starting to use it. Controls This machine has sensors controls which react to touch. To operate the machine you only need to touch the relevant sensor. -
Page 17: Before Using For The First Time
Using the coffee machine - first steps Before using for the first time The machine must be correctly installed and connected (see "Electrical connection " and "Installation") and also cleaned (see "Cleaning and care") before it is used for the first time. -
Page 18: Switching Off
Using the coffee machine - first steps ^ Enter the time of day: First set the hour with the arrow sensors and then touch the OK sensor. Then set the minutes in the same way. ^ Now decide when you want the time of day to be displayed and press the OK sensor. -
Page 19: Filling The Water And Coffee Bean Containers
Filling the water and coffee bean containers The coffee machine must be cleaned thoroughly (see "Cleaning and care") before you fill it with water and coffee beans. It is vital that you programme the water hardness level of your water (see "Settings: Water hardness"). Filling the water container The quality of the water plays an important part in the overall quality of the coffee. -
Page 20: Filling The Coffee Bean Container
Filling the water and coffee bean containers ^ Take off the lid and fill the water container with cold, clean drinking water up to the "Max." mark. A valve at the front of the water container will ensure that water cannot escape. ^ Put the lid back on and replace the water container in the machine, pushing it right to the back until it clicks into position. -
Page 21: Making Drinks
Making drinks Important: The water piping must be rinsed through every day and the machine cleaned thoroughly before the first drink of the day is prepared. This will take place automatically if the Rinsing programme option has been set to "On" and the machine is cold. Hot water will run out of the central spout into the drip tray once the machine has heated up. -
Page 22: Pre-Warming Cups
Making drinks Pre-warming cups The cups should always be pre-warmed to allow the flavour to develop and be retained. The aroma of espresso does not react well to cold. The smaller the volume of coffee/espresso, the more important it is to pre-warm the cup. Use a plate warming drawer if you have one. -
Page 23: Preparing Espresso And Coffee From Freshly Ground Beans
Making drinks Preparing espresso and coffee from freshly ground beans You can programme the size of portion dispensed for espresso and coffee according to taste (see "Programming the amount - Setting the portion sizes"). Espresso, coffee, double espresso and double coffees are all dispensed in the same way: ^ Place a cup under the central spout. -
Page 24: Double Portion
Making drinks Double portion If you want to dispense a double portion of coffee or espresso: ^ touch the OK sensor twice whilst "Double portion" is in the display. If you select a double espresso or coffee, two portions will be dispensed one after the other. -
Page 25: Making Espresso And Coffee Using Ready Ground Coffee
Making drinks Making espresso and coffee using ready ground coffee Adding ground coffee If you want to use ready ground coffee, you can add ground coffee to the specially designed coffee chute. To do this: ^ Pull the cover for the coffee chute right out of the machine and open up the lid (1.) to the chute. -
Page 26: Making Espresso And Coffee Using Ready Ground Coffee
Making drinks Making espresso and coffee using ready ground coffee ^ Place a cup under the central spout. ^ Touch the OK sensor. The machine will prepare espresso or coffee, which will then be dispensed from the central spouts. Do not open the machine door during the brewing process. -
Page 27: Cappuccino, Latte Macchiato, Hot Milk, Milk Froth
Making drinks It is important to keep the top of the flask and the seals clean (whilst filling it and carrying it). Any soiling can lead to a malfunction of the flask in the machine. Good milk froth can be made with cow's milk that has a fat content of 0.3 - 3.8 %, lactose free milk, soya milk, goats milk and rice milk. -
Page 28: User Profile Drinks
Making drinks Cappuccino ^ Touch the right arrow sensor until symbol for the drink you want is highlighted and then touch the OK sensor once. ^ Touch the OK sensor again to stop dispensing. ^ After making your drink "Clean the milk pipework" will appear in the display. -
Page 29: Setting The Coffee Grinder
Setting the coffee grinder A good espresso or coffee with a thick, even crema depends not only on the quality, pressure and temperature of the water and the quality of the coffee beans, but also on the quantity of beans and how finely they are ground. The crema should have an even colour with dark stripes running through it. - Page 30 Setting the coffee grinder To alter the grinder setting: ^ Push the slide control one setting to the left (for finer grinding) or one setting to the right (for coarser grinding). You should be able to feel the notches when moving the slide control.
-
Page 31: Settings: Customising Your Machine
Settings: Customising your machine It is easy to customise your machine to suit your exact requirements. Using the "Settings" programme and selecting options To select the various programme options: Settings F ^ Touch the right arrow sensor until "Settings" is highlighted and then touch the OK sensor. - Page 32 Settings: Customising your machine Programming the amount: Espresso, coffee, cappuccino, latte macchiato, hot milk, milk froth and hot water, (see "Programming the amount: Setting the portion sizes"). Amount of coffee: You can set different amounts of coffee for espresso, coffee, cappuccino and latte macchiato. Pre-brewing: Long, Normal, Without Temperature: The temperature for espresso, coffee, cappuccino, latte macchiato and hot water can be set from...
-
Page 33: Selecting A Language
Settings: Customising your machine Selecting a language If you want to change the language used in the display, use the Settings menu and follow the flag symbol. ^ Select "Settings F" from the main menu and touch the OK sensor. Settings Language F Time... - Page 34 Settings: Customising your machine There are three options: Display The Time of day display can be switched on or off: ^ Use the arrow sensors to select "Display". You can now choose one of three options: "On": the display will always show the time of day (even when the machine is switched off), "On for 60 seconds": the display will show the time for 60 seconds and then go dark after the machine is switched off,...
-
Page 35: Setting The Timer
Settings: Customising your machine Setting the timer ^ Select "Settings F" from the main menu and touch the OK sensor. Settings Timer Prog. the amount ^ Touch the right arrow sensor until "Timer" is highlighted and touch the OK sensor. ^ Select "Set"... -
Page 36: Switch Off After
Settings: Customising your machine If the machine has switched itself on automatically 3 times and no drinks or hot water have been dispensed, the machine will not switch itself on again automatically! The programmed times will, however, remain in memory and will be reactivated after manually switching the machine on again. -
Page 37: Switch Off At
Settings: Customising your machine Switch off at: If you always use your machine at a particular time of the day you can set it to switch off automatically at a specific time. ^ Select "Switch off at" with the arrow sensors and touch the OK sensor. -
Page 38: Amount Of Coffee
Settings: Customising your machine Amount of coffee Both the flavour and the crema on the coffee depend on the quantity of ground coffee used. 6 to 14 grams of coffee beans are used per cup, depending on the type of coffee. The greater the quantity, the stronger the espresso, coffee, cappuccino, or latte macchiato. -
Page 39: Pre-Brewing
Settings: Customising your machine Pre-brewing You can programme the machine to pre-brew for a standard length of time, a longer time or you can switch off the pre-brewing function. The machine is delivered with Pre-brewing set at Off (= Without). When the pre-brewing function is switched on, the freshly ground coffee is first moistened with a little hot water. -
Page 40: Automatic Rinsing
Settings: Customising your machine ^ Select "Settings F" from the main menu and touch the OK sensor. Settings Temperature Automatic rinsing ^ Touch the right arrow sensor until "Temperature" is highlighted and touch the OK sensor. ^ Use the arrow sensors to highlight the drink for which you wish to set the temperature and then touch the OK sensor. -
Page 41: Steam System
Settings: Customising your machine Settings Automatic rinsing Steam system ^ Touch the right arrow sensor until "Automatic rinsing" is highlighted and touch the OK sensor. ^ Touch one of the arrow sensors to select "On" or "Off" and touch the OK sensor. It is a good idea to set this option to "On"... -
Page 42: Lighting - Brightness
Settings: Customising your machine Lighting - Brightness You can set how bright the lighting should be on the machine: ^ Select "Settings F" from the main menu and touch the OK sensor. Settings Lighting Info ^ Touch the right arrow sensor until "Lighting" is highlighted and touch the OK sensor. -
Page 43: Info: No. Of Drinks Or Portions Until Descaling
Settings: Customising your machine ^ Select the switch off time you want with the arrow sensors and touch the OK sensor. The lighting will switch off automatically after the duration set. INFO: No. of drinks or portions until descaling The "Info" option enables you to check how many drinks the machine has already dispensed or how many you can still dispense before it has to be descaled. -
Page 44: Deactivating The System Lock To Dispense A Drink
Settings: Customising your machine ^ Use an arrow sensor to highlight "System lock" and then touch the OK sensor. ^ Select "On" with the arrow sensors and touch the OK sensor. The machine will now lock as soon as it is switched off and cannot be switched on again. - Page 45 Settings: Customising your machine Your local water authority will be able to tell you the hardness of water in your area. Alternatively, you can measure the hardness yourself using the enclosed test strip: ^ Dip the strip in your drinking water for approximately a second, then shake off any excess water.
-
Page 46: Display (Contrast, Brightness)
Settings: Customising your machine ^ Select "Settings F" from the main menu and touch the OK sensor. Settings Water hardness Display ^ Use the arrow sensors to highlight "Water hardness" and then touch the OK sensor. ^ Touch one of the arrow sensors to set the water hardness and touch the OK sensor. -
Page 47: Showroom Programme
Settings: Customising your machine Settings Volume Showroom prog. ^ Touch the right arrow sensor until "Volume" is highlighted and touch the OK sensor. ^ Touch one of the arrow sensors to select "Buzzer tones" or "Keypad tone" and touch the OK sensor. ^ Touch one of the arrow sensors to set the volume quieter or louder. -
Page 48: Factory Default Settings
Settings: Customising your machine Various options will then be available: All settings This option sets "All settings" back to the factory default. ^ Use an arrow sensor to highlight "All settings" and then touch the OK sensor. ^ Select "Reset" with the arrow sensors and touch the OK sensor. - Page 49 Settings: Customising your machine User profiles You can delete all user profiles except for the standard one under "User Profiles". ^ Use the arrow sensors to highlight "User profiles" and then touch the OK sensor. ^ Select "Reset" with the arrow sensors and touch the OK sensor.
-
Page 50: Programming The Amount: Setting The Portion Sizes
Programming the amount: setting the portion sizes The flavour of the coffee produced depends on the type of coffee, how finely the beans are ground and the quantity of water used. Not all espresso and coffee cups are the same size. -
Page 51: Programming The Amount Of Cappuccino Or Latte Macchiato Via The Ok Sensor
Programming the amount: setting the portion sizes Programming the amount of cappuccino or latte macchiato via the OK sensor ^ Place the appropriate cup or glass for the drink you want to programme under the spouts. ^ Select cappuccino or latte macchiato. ^ Touch the OK sensor until the display shows the options for cappuccino (milk froth, espresso) or latte macchiato (hot milk, milk froth, espresso). -
Page 52: Programming The Amount Of Hot Water Using The Hot Water Sensor
Programming the amount: setting the portion sizes Programming the amount of hot water using the hot water sensor ^ Place the appropriate cup for the drink you want to programme under the hot water spout. ^ Touch the Hot water sensor until "Prog. the amount" appears in the display. -
Page 53: Setting Up User Profiles
Setting up user profiles To cater for different tastes and preferences, you can enter up to 9 individual user profiles and also allocate different portion sizes to them (see "Setting the portion sizes). User profile ^ Touch the right arrow sensor until "User profile" is highlighted, and then touch the OK sensor. - Page 54 Setting up user profiles Selecting a user profile ^ Select the user profile you want with the arrow sensors and touch the OK sensor. Espresso Mustermann To show that a user has been selected the top line of the display will now show a large symbol for a user! Creating a user profile ^ Use the arrow sensors to highlight "create", and then touch...
- Page 55 Setting up user profiles Saving an entry ^ When you have finished making your entry, use the arrow sensors to highlight the word "OK" and then touch the OK sensor. The menu for user profiles will appear in the display. To leave this menu: ^ Use the arrow sensors to select "Back A"...
-
Page 56: Manual
Setting up user profiles Revert You can programme the machine so that it always reverts to the Standard user profile or so that it continues to operate using a user profile you have set. To set the profile to be used: ^ Select "Revert"... - Page 60 Alteration rights reserved / 1908 M.-Nr. 07 306 160 / 01 CVA 5060, CVA 5068...