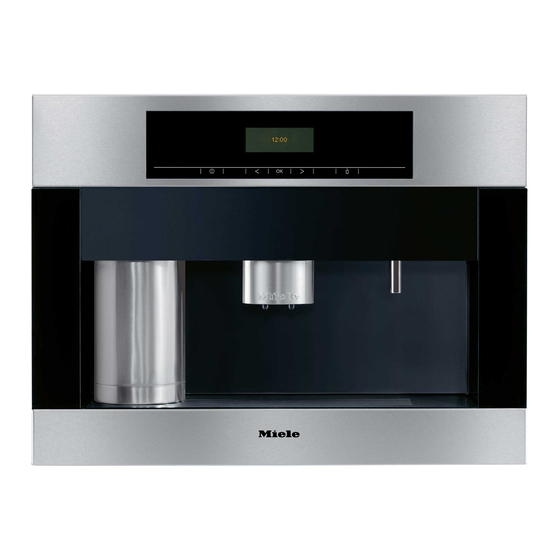
Miele CVA 5065 Operating And Installation Manual
Built-in coffee machine for connection to mains water supply
Hide thumbs
Also See for CVA 5065:
- User manual (80 pages) ,
- Operating and installation instructions (80 pages) ,
- Installation and maintenance manual (40 pages)
Table of Contents
Advertisement
Advertisement
Table of Contents

Related Manuals for Miele CVA 5065


Summary of Contents for Miele CVA 5065
- Page 1 Operating and installation instructions Built-in coffee machine for connection to mains water supply CVA 5065 en - GB To avoid the risk of accidents or damage to the appliance, it is essential to read these instructions before it is installed and used for the first time.
-
Page 2: Table Of Contents
Contents Caring for the environment ......... . 5 Guide to the machine . - Page 3 Contents Settings: Customising your machine ....... . 27 Settings menu ........... . 27 Selecting the language .
- Page 4 Contents Cleaning and care ..........49 Quick guide .
-
Page 5: Caring For The Environment
Caring for the environment Disposal of the packing Disposal of your old machine material Electrical and electronic machines often contain materials which, if The transport and protective packing handled or disposed of incorrectly, has been selected from materials which could be potentially hazardous to are environmentally friendly for human health and to the environment. -
Page 6: Guide To The Machine
Guide to the machine Exterior view a On/Off sensor for switching the coffee machine on and off b Display c Left arrow, for scrolling through the various programme options d OK sensor, for confirming the selection of a programme option and for saving a setting e Right arrow, for scrolling through the various programme options f Sensor for selecting hot water... -
Page 7: Interior View
Guide to the machine Interior view a Master switch b Ground coffee chute cover c Ground coffee chute d Slide control to select fineness of ground coffee e Coffee bean container f Drip tray with grid for easier carrying g Water container with inlet device h Brew unit i Waste container j Central spout connector (connecting the brew unit and the central coffee spout) -
Page 8: Accessories Supplied
Accessories supplied Stainless steel milk flask For storing and keeping milk cold, with lid (with handle) and additional cap (not suitable for cleaning in a dishwasher) Containers Large and small containers for cleaning and rinsing the milk pipework Coffee spoon For adding the correct amount of ground coffee Cleaning agent for milk pipework For daily cleaning of the milk pipework... -
Page 9: Optional Accessories
Optional accessories Miele accessories and cleaning and conditioning products are available for your coffee machine. These can be ordered via the internet at www.miele-shop.com, from the Miele Spare Parts Department or from your Miele Dealer. Stainless steel milk flask with cap... -
Page 10: Warning And Safety Instructions
They contain important information on installation, safety, use and The appliance can only be used by maintenance. Miele cannot be held people with reduced physical, sensory liable for damage caused by or mental capabilities, or lack of non-compliance with these Warning experience and knowledge, if they are and Safety instructions. -
Page 11: Technical Safety
If the coffee machine is to be built in wrappings, must be kept out of the above another appliance, there must reach of babies and children. be a full-width, closed shelf between them (except when it is combined with a Miele built-in plate warming drawer). - Page 12 CVA 5060 offers protection from water damage, coffee machine may only be used for provided the following conditions are connecting a Miele EGW 4000-14, EGW met: 4000-29 or EGW 5000-14 plate warmer. – The machine is correctly installed Otherwise the machine will be and plumbed in.
-
Page 13: Correct Use
– Keep well away from the area faults. underneath the spouts when hot Only use genuine original Miele liquids and steam are being accessories with this machine. Using dispensed. spare parts or accessories from other –... - Page 14 – Descale the coffee machine regularly filled with ground coffee as this could using the appropriate number of damage the grinder. Miele descaling tablets for the water hardness level in your area. Descale The ground coffee chute must never the machine more frequently in areas be filled with anything other than with very hard water.
- Page 15 Only use the descaling tablets Do not use sticky notes, transparent supplied by Miele and follow the adhesive tape, masking tape or other instructions on the packet carefully. types of adhesive on the stainless steel Use the exact proportions front.
-
Page 16: Using The Coffee Machine - First Steps
Using the coffee machine - first steps G Maintenance programme for milk The following notes should help you get to know your coffee machine before pipework, brew unit, descaling, starting to use it. rinsing Settings: Customising your Controls machine This machine has sensor controls which ^ The arrow sensors are used to select react to touch. -
Page 17: Switching Off
Using the coffee machine - first steps When you use the machine for the very If everything has been entered first time, you will be prompted to correctly, Set up successful will select a language. appear in the display. ^ Use the right or left arrow until the ^ Confirm this message by touching language you want appears in the the OK sensor. -
Page 18: Filling The Water And Coffee Bean Containers
Filling the water and coffee bean containers The coffee machine must be cleaned thoroughly (see "Cleaning and care") before you fill it with water and coffee beans. It is vital that you programme in the water hardness level of your water (see "Settings: Customising your machine - Setting the water ^ Open the front of the machine. -
Page 19: Filling The Coffee Bean Container
Filling the water and coffee bean containers Filling the coffee bean container Only put roasted espresso or coffee beans in the container. Anything else, including ground coffee, will damage the grinder. Do not use coffee beans which have been treated with caramel, sugar or other substances. -
Page 20: Making Drinks
Making drinks Switching on Pre-warming cups When you switch the coffee machine on The cups should always be it will start heating up and the pipework pre-warmed to allow the flavour to will be rinsed through. This cleans and develop and be retained. The aroma of pre-heats the pipework in preparation espresso does not react well to cold. -
Page 21: Adjusting The Height Of The Central Spout
Making drinks Adjusting the height of the central spout The height of the central spout can be adjusted to suit the height of the cup so that the drink will not cool down as quickly as it would if the spout were further away from the cup. -
Page 22: Double Portion
Making drinks Making espresso and coffee Double portion using ready ground coffee If you want to dispense a double portion of coffee or espresso or to Adding ready ground coffee dispense two portions at the same time: If you want to make espresso or coffee ^ touch the OK sensor a second time using ready ground coffee, you can whilst "2 portions?"... -
Page 23: To Make A Drink
Making drinks Drinks with milk If you not added any ground coffee, you must select "No". Otherwise the machine will Stainless steel milk flask assume that there is ground coffee in If using animal milk, only use only the chute, and only water will be pasteurised milk to avoid a build-up dispensed the next time coffee is made! -
Page 24: Cappuccino, Latte Macchiato, Hot Milk, Milk Froth
Making drinks To make drinks with milk, Cappuccino, latte macchiato, hot milk, milk froth ^ Place a suitable cup or glass under both jets. For best results with latte macchiato, the glass should be placed beneath the jets such that the espresso flows into the centre of the milk froth. -
Page 25: User Profile Drinks
Making drinks User profile drinks After use The User profile function is used to If you have made a drink with milk, the select the quantity of water and milk for following message appears in the your drink, as well as the fineness of the display after two minutes: ground, temperature and pre-brewing Start the rinsing... -
Page 26: Setting The Coffee Grinder
Setting the coffee grinder A good espresso or coffee with a thick, The crema is evenly coloured but even crema depends not only on the pale quality, pressure and temperature of The beans have been ground too the water and the quality of the coffee coarsely. -
Page 27: Settings: Customising Your Machine
Settings: Customising your machine It is easy to customise your machine to Timer: You can set or activate the suit your exact requirements. Timer here. The following options are available in the "Set" menu: Settings menu – Switch on at: The machine can be set to switch on at a specific time of To select the various programme day. -
Page 28: Selecting The Language
Settings: Customising your machine Selecting the language Water hardness: soft 1, medium 2, hard 3, very hard 4 If you want to change the language Display: Contrast, Brightness used in the display, use the Settings menu and follow the flag symbol. Volume: Buzzer tones, Keypad tone ^ Select "Settings F"... -
Page 29: Setting The Time Of Day
Settings: Customising your machine Setting the time of day Clock format ^ Select "Settings F" from the Main ^ Use the arrow sensors to select menu, and then touch the OK sensor. "Clock format". ^ Use the right arrow to select a 24 h or Settings 12 h clock. -
Page 30: Setting The Timer
Settings: Customising your machine Setting the timer If Automatic rinsing is set to "On", the ^ Select "Settings F" from the Main machine will automatically carry out menu, and then touch the OK sensor. a brief rinse when it switches itself Settings If the System lock is activated, the Timer... - Page 31 Settings: Customising your machine ^ First set the hour with one of the Activate arrow sensors. Touch the OK sensor. ^ Select "Activate" with the arrow ^ Then use the arrow sensors to set the sensors and touch the OK sensor. minutes.
-
Page 32: Coffee Jug (Making Several Cups One After The Other)
Settings: Customising your machine Coffee jug (making several Setting the amount of coffee cups one after the other) Both the flavour and the crema on the coffee depend on the quantity of This function can be used to make up ground coffee used. -
Page 33: Setting Pre-Brewing
Settings: Customising your machine ^ Use the arrow sensor to select the ^ Use the arrow sensors to highlight drink that you wish to set the amount the Pre-brewing option. of coffee for and then touch the OK ^ Touch the OK sensor to save the sensor. -
Page 34: Setting Automatic Rinsing
Settings: Customising your machine Setting Eco mode ^ Use the arrow sensors to highlight the temperature option. Eco mode is an energy saving mode in ^ Touch the OK sensor to save the which the steam system for preparing setting. hot milk or milk froth has to heat up. -
Page 35: Lighting: Setting The Brightness
Settings: Customising your machine Lighting: Setting the ^ Touch the OK sensor whilst the machine is off. brightness ^ Select "Lighting" and touch the OK You can set how bright the lighting sensor. should be on the machine: ^ Select "Switch off after" and touch the ^ Select "Settings F"... -
Page 36: Info (Showing The Number Of Drinks)
Settings: Customising your machine Info (showing the number of Safety (activating the System drinks) lock) The "Info" option enables you to check The machine can be locked to ensure how many drinks the machine has that it is not operated by unsupervised already dispensed or how many you children or persons who are can still dispense before it has to be... -
Page 37: To Override The System Lock
Settings: Customising your machine To override the System lock ^ Touch the OK sensor for about 3 seconds. The machine is now temporarily unlocked and can be used to make drinks again. It locks itself as soon as the machine is switched off. Setting the water hardness ^ Dip the strip in your drinking water for For trouble-free operation of the coffee... -
Page 38: Setting The Display
Settings: Customising your machine Setting the display If the water is harder than 40°dH/7.0 You can adjust both the contrast and mmol/l, limescale will build up more the brightness of the display: rapidy than with soft water. ^ Select "Settings F" from the Main Descaling will need to be carried out more regularly than stated to menu, and then touch the OK sensor. -
Page 39: Setting The Volume (Keypad Tone, Buzzer)
Settings: Customising your machine Setting the volume (keypad Activating the plate warmer tone, buzzer) You can connect a Miele EGW 4000-14, -29 or an EGW 5000-14 to the coffee You can choose for a tone to sound machine using a special connection each time a sensor is touched. -
Page 40: Plumbed In Water Supply
Settings: Customising your machine Plumbed in water supply You can switch the plate warmer on The machine is designed to be and off manually whenever you want, plumbed into the mains drinking water independently of the coffee machine. supply. Water is automatically taken into the water container when the machine is set up for a plumbed supply. -
Page 41: Resetting The Factory Default Settings
Settings: Customising your machine Resetting the factory default Factory default settings (the coffee machine is delivered with the settings following settings) The "factory default" setting is used to – Amount of coffee (medium) reset the various settings back to the default status. - Page 42 Settings: Customising your machine User profiles You can delete all user profiles except for the standard one under "User Profiles". ^ Select "Reset" under "User profiles", and touch the OK sensor. User profiles are then deleted. If you select "Reset" by mistake, switch the coffee machine off: Resetting to the factory defaults will not be carried out.
-
Page 43: Programming The Amount: Setting The Portion Sizes
Programming the amount: setting the portion sizes Programming the amount of The flavour of the coffee produced depends on the type of coffee, how espresso, coffee, hot milk and finely the beans are ground and the milk froth via the OK sensor quantity of water used. -
Page 44: Programming The Proportions For Cappuccino Or Latte Macchiato
Programming the amount: setting the portion sizes Programming the proportions ^ Once sufficient has flowed into the cup or glass and "Save" shows in the for cappuccino or latte display, touch the OK sensor to save macchiato via the OK sensor the amount. -
Page 45: Programming The Amount For Hot Water Via The Hot Water Sensor
Programming the amount: setting the portion sizes Programming the amount for Programming the amount via hot water via the Hot water "Settings" sensor ^ Select "Settings F" from the Main menu, and then touch the OK sensor. ^ Place the appropriate cup for the amount you want to programme Settings under the hot water spout. -
Page 46: Setting Up User Profiles
Setting up User profiles To cater for different tastes and The following options only appear if you preferences, you can enter up to 9 have already entered a new User individual User profiles. For each User profile in addition to the Standard User profile, you can select the following profile: individual settings:... -
Page 47: Creating A User Profile
Setting up User profiles Creating a User profile Saving an entry ^ Use the arrow sensors to highlight ^ When you have finished making your "Create", and then touch the OK entry, use the arrow sensors to sensor. highlight the word "OK" and then touch the OK sensor. -
Page 48: Deleting A User Profile
Setting up User profiles Deleting a User profile After each use If you want to delete the User profile The machine will automatically revert to completely, the Standard User profile each time a drink is dispensed. ^ Select "Delete User profile" using the ^ Select "After each use"... -
Page 49: Cleaning And Care
Cleaning and care Quick guide Clean the coffee machine every day to prevent a build-up of bacteria. Recommended frequency What do I have to do? Rinse milk pipework Each time milk is used to make a drink, if more than one hour has passed since the last drink was made Rinse the system (pipework) - Page 50 Cleaning and care Always allow the machine to cool All surfaces are susceptible to down before cleaning. Please be scratching. Scratches on glass aware that the water in the drip tray surfaces could even cause a will be hot. breakage. Danger of scalding.
-
Page 51: Rinse The System
Cleaning and care Rinse the system Milk pipework Before switching the machine off for All parts of the milk system need to any length of time, the pipework, brew be cleaned thoroughly and regularly system and central spout need to be cleaned. -
Page 52: Clean Milk Pipework
The cleaning agent has been specially developed for use in Miele coffee machines and is available via the internet at www.miele-shop.com or from the Miele Spare Parts Department. -
Page 53: Clean Milk Pipework Of Any Blockages
Cleaning and care Clean milk pipework of any blockages If you are getting steam instead of milk from the central spout the milk pipework in the machine is probably blocked up. If the milk pipework in the lid is clogged, ^ use the cleaning brush to clean it ^ Take the cover off together with the under running water. - Page 54 Cleaning and care ^ Take hold of the second holder by pin (c) and pull it upwards and off. The hoses can now be cleaned with a brush under running water. ^ Fit the cover with the milk pipes back into position behind the machine front.
-
Page 55: Stainless Steel Milk Flask With Lid
Cleaning and care Stainless steel milk flask with The stainless steel milk flask with lid must be washed by hand using hot water. It is important to keep the top of the flask and the seals clean (whilst filling it and carrying it). -
Page 56: The Central Spout
Cleaning and care The central spout ^ Remove the two rubber stoppers (a) and manually clean these and the jets thoroughly. If required, remove ^ Pull the central spout down as far as the air intake tube (b). Any it will go (a), and pull the cover to blockages can be dislodged by the spout forwards to remove it (b). -
Page 57: Water Container
Cleaning and care Water container Waste container Empty the water container daily and - if After a certain period of time a reminder you are not using the plumbed in water to empty the waste container will supply - fill with fresh, cold tap water appear in the display. -
Page 58: Drip Tray
Cleaning and care Drip tray There is a sensor in the drip tray which causes a message to appear in the display when the drip tray is full and needs to be emptied. Remove the tray and empty and clean it when this message appears. -
Page 59: Coffee Bean Container
Cleaning and care Coffee bean container Interior and machine front ^ First take out all removable parts and The coffee bean container must be then clean the interior and the cleaned by hand with hot water and machine front with a mild solution of a little washing-up liquid. -
Page 60: Brew Unit
Cleaning and care Brew unit Leave the handle in the same The brew unit must be cleaned once position, otherwise the brew unit will a week by hand and without using be out of alignment and you will not cleaning agent, because the be able to push it back into the moving parts are lubricated and the coffee machine. -
Page 61: Degreasing The Brew Unit
Miele Dealer or from Miele continue. (see "Optional accessories"). To remind you to degrease the brew unit, the message "Please run the... -
Page 62: Machine Front
^ Place a cleaning tablet into the coffee without the use of chemicals chute. (available from the Miele Spare Parts Dept. or over the internet via ^ Close the lid, replace the coffee www.miele-shop.com). -
Page 63: Descaling The Machine
These have been specially before the next descaling programme formulated for use in this coffee has to be run, the following message machine and are available Miele will appear in the display: No. of (see "Optional accessories"). portions until descaling: 50. -
Page 64: To Run The Descaling Programme
Descaling the machine To run the descaling To dissolve the descaling tablets programme ^ take the water container out and fill it to the k mark with lukewarm water. (Do not use less water than this Maintenance because this would cause the descaling programme to finish before ^ Touch the right arrow sensor until it has been completed properly). - Page 65 Descaling the machine When Programme finished appears in the display, ^ touch the OK sensor. The descaling programme is finished and the machine can be used for making drinks again. Plumbed in machines will automatically revert to using the plumbed in water supply if set up to do so before the descaling programme was run.
-
Page 66: Problem Solving Guide
^ Switch it back on (see "Settings: automatically within 20 seconds to customising your machine - Lighting: avoid damage. Call the Miele Service Setting the switch-off time"). Department. ^ If not, then the lighting is defective. - Page 67 Problem solving guide . . . the lighting suddenly switches ... only a little or no coffee or itself off. espresso is dispensed from the central spout. If the machine has not been used for 15 minutes the lighting will switch itself off Is the central spout connector cap automatically.
- Page 68 ^ If the bean container is not empty finest setting, or if the amount of call the Miele Service Department. If coffee to be ground has been set at it is empty fill the container with fresh the largest amount.
- Page 69 ^ If this fault message continues to If the water container empties whilst a drink is being prepared, a message will appear, please call the Miele Service appear in the display to ask if you wish Department. for the drink preparation to continue after the water container has been .
- Page 70 Problem solving guide ^ If the cap is faulty, replace it with the . . . water or milk stops flowing whilst spare part supplied. programming in the amount to dispense..the descaling programme was The flow stops automatically when the started by mistake.
- Page 71 If neither is the case be dark patches in the crema. and the fault message still appears in Reduce the temperature (see the display, call the Miele Service "Settings: customising your machine - Department. Setting the temperature"). The crema will not form correctly if stale...
- Page 72 If the fault message appears in the display again, contact the Miele Service ^ Remove the water container and Department. empty it. ^ Push the water container into the .
- Page 73 ^ Take the brew unit out of the machine If the fault message appears in the and clean it thoroughly (see display again, contact the Miele Service "Cleaning and care - Brew unit"). Department..the message "Check the brew unit"...
- Page 74 Problem solving guide . . . it is difficult to open or close the door of the machine. ^ Align the door using the hinges (see "Installation - Adjusting the door hinges"). ^ Lubricate the cap on the central spout connector with the silicone grease supplied (see Cleaning and care - Central spout connector").
-
Page 75: After Sales / Guarantee
In the event of a fault which you cannot correct yourself, or if the appliance is under guarantee, please contact: – your Miele Dealer – Miele (see back cover for contact details). Please note that telephone calls may be monitored and recorded for training purposes (UK only). -
Page 76: Saving Energy
Saving energy AItering the following settings from the factory default, will increase the energy consumption of the coffee machine: – Eco mode – Lighting – Time of day display – Timer – Connection of a plate warmer When altering these settings, the message "This setting increases energy consumption"... -
Page 77: Plumbed In Water Supply
Plumbed in water supply Notes on connecting to the – The stainless steel hose is 1.5 m long. The hose may not be mains water supply lengthened as too much water would then remain in the hose, adversely Connection to the mains water affecting the quality of the coffee. -
Page 78: Connection To The Water Inlet
Plumbed in water supply Connection to the water inlet The connection point is subject to Before making plumbing mains water pressure. Turn on the connections, ensure the appliance is stopcock slowly and check for leaks. disconnected from the mains Correct the position of the seal and electricity supply. -
Page 79: Electrical Connection U.k., Za, Irl
Electrical connection U.K., ZA, IRL All electrical work should be carried out Non-rewireable plugs BS 1363 by a suitably qualified and competent The fuse cover must be refitted when person only, in strict accordance with changing the fuse, and if the fuse cover current national and local safety is lost, the plug must not be used until a regulations (BS 7671 in the UK). -
Page 80: Installation
The appliance is designed to be built into a tall unit. It can also be combined with other Miele built-in appliances. If the coffee machine is to be built in above another appliance, there must be a full-width, closed shelf between them (except when it is combined with a Miele built-in plate warming drawer). -
Page 81: Ventilation
^ If the housing unit niche is not fitted and damage the machine or the with a sealing strip you should fit a housing unit. Miele sealing strip to the machine before installing it. This is fitted from Installation the back of the machine. -
Page 82: Adjusting The Door Hinges
Installation If it is not: Adjusting the door hinges ^ realign the machine by adjusting the If the machine door becomes difficult to four feet. open or close after installation you can adjust the hinges to realign it: The feet can be unscrewed by up to approx. - Page 84 Alteration rights reserved / 4112 M.-Nr. 09 249 350 / 01 CVA 5065...