Table of Contents
Advertisement
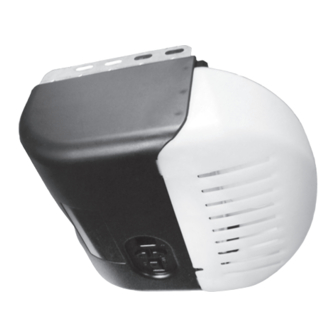
BELT/CHAIN DRIVE
GARAGE DOOR OPENER MODELS
Standard Drive
& Legacy
OPERATION &
MAINTENANCE
MANUAL
Includes
CODEDODGER
For use only with residential sectional overhead garage doors.
Homelink® and Car2U® compatible
INSTALLER: LEAVE THIS MANUAL WITH HOMEOWNER
HOMEOWNER: SAVE THIS MANUAL FOR FUTURE REFERENCE
To reduce the risk of injury to persons or damage to property—Use this opener only with a residential sectional door.
©2013 Overhead Door Corporation, Overhead Door, the Ribbon logo, Standard Drive Legacy, CodeDodger and Safe-T-Beam, are trademarks of Overhead Door Corporation.
All other trademarks are property of their rightful owners. Consistent with our policy of continuing product improvements, we reserve the right to change product specifications without prior notice or obligations.
HomeLink is a registered trademark of Johnson Controls Technology Company. Car2U is a registered trademark of Lear Corporation.
650
®
850
®
® Remote Control. Safe-T-Beam® System must be installed to close the door.
Need help or have questions?
For answers and assistance, visit www.overheaddoor.com
or call Customer Service at: 1-800-929-3667
PREPROGRAMMED
REMOTE
FOR QUICK
& EASY
INSTALL
38485502355
Advertisement
Table of Contents
Troubleshooting

Related Manuals for Overhead door Standard Drive 650


Summary of Contents for Overhead door Standard Drive 650
- Page 1 To reduce the risk of injury to persons or damage to property—Use this opener only with a residential sectional door. ©2013 Overhead Door Corporation, Overhead Door, the Ribbon logo, Standard Drive Legacy, CodeDodger and Safe-T-Beam, are trademarks of Overhead Door Corporation.
-
Page 2: Table Of Contents
Safety Information Safety Notifications ..........3 Important Safety Instructions ......3 Important Installation Instructions ....3 Features Safety ..............4 Opener ............4 Infrared Protection Function ......4 Programming Information Required Wall Console Installation ....5 Series II Wall Consoles with White Button ..5 Introduction .............6 Overhead of Powerhead Controls ....6 Travel Limits ..........7–8... -
Page 3: Safety Information
Safety Information OVERVIEW OF POTENTIAL HAZARDS READ THIS SAFETY INFORMATION Garage doors are large, heavy objects that move with the help of springs under high tension and electric motors. Since moving objects, springs under tension, and electric motors can cause injuries, your safety and the safety of others depend on you reading the information in this manual. -
Page 4: Features
Begin here ONLY AFTER completing assembly and installation of the opener. Review the Assembly and Installation Poster to ensure all steps have been performed. Contact your Overhead Door Distributor for an installation poster, or if needed, visit www.overheaddoor.com to download a PDF file. SAFETY FEATURES OPENER FEATURES Safe-T-Beam®... -
Page 5: Required Wall Console Installation
Required Wall Control Installation @ www.overheadhoor.com In your carton you will find one of the following wall controls. NOTE: Wall consoles from other manufactures may not work with these openers. Use only the wall console provided with this unit. See warning. SERIES II WALL CONSOLE WITH WHITE BUTTONS WALL BUTTON This is a lighted wall button. -
Page 6: Introduction
–These show you how to program your remotes to sync with additional remote control devices, wall consoles, Now that your Overhead Door® garage door opener is installed, you keypads and the powerhead. will want to program the opener so that the door open and closes 3. -
Page 7: Programming
Programming Information TRAVEL LIMITS NOTE: If bullet has NOT been engaged to carriage, do so now. See page 12. NOTE: Before setting limits confirm wall console red indicator backlight in ON. If not illuminated, check for correct wiring or the Sure-Lock switch may be activated. -
Page 8: Opening Garage Door (Up Limit)
Programming Information Opening Garage Door (Up Limit) NOTE: Beginning with garage door closed is recommended but not necessary. NOTE: While setting limits, the powerhead has a 30 second time-out. You have 30 seconds to execute each step. Of you see two solid red or flashing LEDs on the Powerhead, you have run out of time and must go back to the beginning of the step and start over. -
Page 9: Force Control
Wall Control Operation Force Control Contact Reverse Test NOTE: The limit and Force settings MUST BE COMPLETED The force controls are automatically set when you use the wall control before performing the Control Reverse Test. for the first time with your garage door. The door MUST complete one full cycle, from full open to full close and then, full close to full open, before the setting are automatically recorded. -
Page 10: Remote Control Programming
“Accessory” position. Follow the Car2U or HomeLink instruction included in your vehicle manual to set the button in the car to Overhead Door mode. NOTE: Your older CodeDodger remote transmitters will operate this new... -
Page 11: Optional Programming
Optional Programming NOTE: The garage door opener will operate normally using the Wall Control. NOTE: When the remote is pressed the round LED will flash blue but will not activate the door opener. NOTE: Clearing Remotes from the Powerhead memory will clear ALL programmed Remotes and wireless Keypads. -
Page 12: Maintenance And Adjustments
Maintenance and Adjustments For help, call customer service at: 1-800-929-3667 or visit www.overheaddoor.com C. Safe-T-Beam (STB) System Check ® Check that both the RED and GREEN LEDs are ON steady. This indicates the system is working properly. If both LEDs are not ON steady, check the appropriate items below: •... -
Page 13: Corrective Maintenance
Maintenance and Adjustments CORRECTIVE MAINTENANCE Remote Battery Replacement (1-button) Changing Light Bulbs Replace the remote battery with a CR2032 coin cell type battery. 1. Slide the battery cover off (it’s the lower half of the remote’s case) by pressing on the case just below the indentation at the top of the cover and sliding it down. -
Page 14: Force Adjustments
Maintenance and Adjustments ADJUSTMENT GUIDES Force Settings Force setting are pre-programmed at the factory and “learned” during the Open/Closed Limit settings steps (see pages 7–8). For normal use, these settings should not need adjustments with this unit. However, conditions possibly requiring adjustments are: 1. -
Page 15: Locating Safe-T-Bean
Maintenance and Adjustments Multiple Garage Doors • NEVER position Safe-T-Beam® modules where signals will cross. • Place the Source (Red LED) Safe-T-Beams on adjacent doors facing in opposite directions. NOTE: Direct sunlight creates interference with Safe-T-Beam ® sensors (Green LED). Sensor modules CAN be positioned further away from the door opening if necessary to avoid sunlight but no further off the wall to maintain alignment with the Source (Red LED) module. -
Page 16: Troubleshooting
• Check for interference from adjacent Safe-T-Beam® units. • Contact Overhead Door at 1-800-929-3667. • Check Safe-T- Beam® wire connection at powerhead and at STBs. See page 5, STB instruction, poster or website. Door starts down, then •... -
Page 17: Troubleshooting
Troubleshooting Troubleshooting OPERATION (continued) PROBLEM WHAT TO DO • Be sure all door fasteners are tight. Noisy operation. • Be sure garage door is in good repair, properly lubricated and balanced. • Be sure opener is in good repair. Door opener runs •... -
Page 18: Warranty
Warranty... -
Page 19: Accessories
Garage Door Opener Accessories Overhead Door has the Answer “RETRO” REPLACEMENT UPGRADE WITH STYLE Check out NEW ACCESSORIES and PRODUCTS; visit www.overheaddoor.com or call 1-800-929-3667. - Page 20 P.O. BOX 67 MT. HOPE, OHIO 44660 www.overheaddoor.com 1-800-929-3667...