Table of Contents
Advertisement
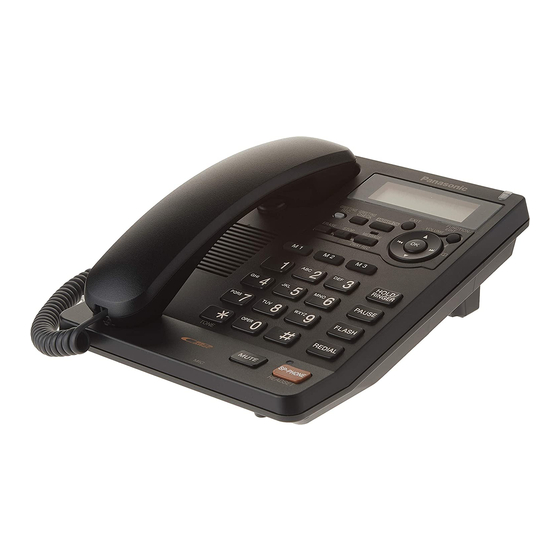
Operating Instructions
Telephone Answering System
KX-TS620CB
Model No.
This unit is compatible with Call Display. To use this feature, you must subscribe to
the appropriate service offered by your service provider.
Please read these Operating Instructions before using the unit and save for future
reference.
For assistance, please call 1-800-561-5505 or visit us at www.panasonic.ca
Advertisement
Table of Contents

Related Manuals for Panasonic KX-TS620CB


Summary of Contents for Panasonic KX-TS620CB
-
Page 1: Operating Instructions
This unit is compatible with Call Display. To use this feature, you must subscribe to the appropriate service offered by your service provider. Please read these Operating Instructions before using the unit and save for future reference. For assistance, please call 1-800-561-5505 or visit us at www.panasonic.ca... -
Page 2: Table Of Contents
Table of Contents Introduction Phonebook Accessory Information....... 3 Storing Names and Numbers in the Phonebook ........33 Preparation Dialing from the Phonebook ....35 Important Information ......4 Chain Dial ........36 Important Safety Instructions .... 5 Editing ..........37 Location of Controls ......7 Erasing ..........37 Display.......... -
Page 3: Introduction
Introduction Thank you for purchasing your new Panasonic telephone answering system. For your future reference Serial No. Date of purchase (found on the bottom of the unit) Name and address of dealer Accessory Information ∑ AC Adaptor (p. 10) : one ∑... -
Page 4: Preparation
Preparation NOTICE: Important Information The Ringer Equivalence Number (REN) assigned to each terminal device provides NOTICE: an indication of the maximum number of This equipment meets the applicable terminals allowed to be connected to a Industry Canada Terminal Equipment telephone interface. The termination on an Technical Specifications. -
Page 5: Important Safety Instructions
Preparation dangerous voltages or other risks. Important Safety Incorrect reassembly can cause electric shock when the unit is Instructions subsequently used. When using this unit, basic safety 12. Unplug this unit from the power outlet precautions should always be followed to and refer servicing to an authorized reduce the risk of fire, electric shock, or service center when the following... - Page 6 Preparation • The AC adaptor is used as the main CAUTION: disconnect device. Ensure that the AC Installation outlet is installed near the unit and is easily accessible. • Never install telephone wiring during a lightning storm. Routine care • Never install telephone jacks in wet •...
-
Page 7: Location Of Controls
Preparation Location of Controls Direct Dial ({M1} {M2} {M3}) (p. 31, 38) Headset Jack (p. 57) Display (p. 9) RINGER Indicator {£} (TONE) (p. 40) (p. 24, 25) Navigator Key {OK}) (p. 12, 19, 35) MIC (Microphone) {HOLD/RINGER} (p. 16, 24) (p. - Page 8 Preparation {ANSWER ON} (p. 47) {GREETING CHECK} (p. 18) {GREETING REC} (p. 17) {EXIT} (p. 12, 19, 27, 35) {ERASE} (p. 18, 32, 39, 49) {FUNCTION/EDIT} (p. 12, 19, 29) {MESSAGE/2WAY REC} and Indicator (p. 48, 49) {STOP} (p. 18, 48)
-
Page 9: Display
Preparation Display (This display shows all the possible 123456789 123456 configurations.) ABCDEFGHIJKLMNOP abcdefghijklmnop When the handset is on the cradle, the AC adaptor is 34AM DEC.31 missed calls connected and the SP-PHONE/HEADSET indicator 5 messages light is off, the display shows the current time and date, the number of new calls, and the number of recorded messages. -
Page 10: Settings
• USE ONLY WITH Panasonic AC ADAPTOR PQLV207. • Use only a Panasonic Handset for the KX-TS620CB. • The AC adaptor must remain connected at all times. (It is normal for the adaptor to feel warm during use.) •... -
Page 11: Connecting A Communication Device
Settings If you subscribe to a DSL service: • Please attach a noise filter (contact your DSL provider) to the telephone line between the unit and the telephone line jack in the event of the following: Noise is heard during conversations. Call Display feature (p. -
Page 12: Programming Summary
Settings Programming Summary You can program the following functions. The display shows the programming instructions. See the corresponding pages for function details. Make sure that the handset is on the cradle, the AC adaptor is connected and the SP-PHONE/HEADSET indicator light is off. Press {FUNCTION/EDIT}. -
Page 13: Time And Date
Settings Press {OK} (Next key). Time and Date • If numbers between 0000 and 0059, or 1300 and 2359 are You can select AM/PM or 24-hour clock entered, the time will automatically by programming. be set using the 24-hour clock. Go to the step 9. -
Page 14: Display Language
Settings Press {OK} (Save key). Display Language • A long beep sounds. • The clock starts working. You can select either “English” or • The display will return to step 2. To “French” as the display language. exit the programming mode, press Your phone comes from the factory set {EXIT} or wait for 60 seconds. -
Page 15: Dialing Mode
Settings Dialing Mode LCD Contrast If you have touch tone service, set to You can select the LCD contrast level Tone. If rotary or pulse service is used, from 1 to 4 by programming. To make set to Pulse. Your phone default setting the display clearer, set to a high level. -
Page 16: Ringer Volume
Settings Ringer Volume Time Adjustment (Call Display subscribers only) Make sure that the AC adaptor is connected and the unit is not being Using this feature, the unit’s date and used. time setting will be automatically adjusted when caller information is To select HIGH (default), MID or received. -
Page 17: Preparing The Answering System
Preparing the Answering System Greeting Message You can record a personal greeting message of up to 1 minute. If a greeting message is not recorded, one of the two pre-recorded greetings will be played when a call is received (p. 18). All messages (incoming, etc.) are stored in flash memory (p. - Page 18 Preparing the Answering System When finished, press {STOP}. • After a few seconds, the display will change. Greeting message sample “Hello, this is (your name and/or number). Sorry I cannot take your call. Please leave a message after the beep. Thank you.” •...
-
Page 19: Programming Summary For The Answering System
Preparing the Answering System Programming Summary for the Answering System You can program the following functions. The display shows the programming instructions. See the corresponding pages for function details. Make sure that the handset is on the cradle, the AC adaptor is connected and the SP-PHONE/HEADSET indicator light is off. -
Page 20: Number Of Rings
Preparing the Answering System Select the number of rings by Number of Rings pressing { } or { • You can also select the number of You can select the number of times the rings by pressing dialing buttons unit rings before the answering system {2} to {7} or {0} (Toll saver*). -
Page 21: Caller's Recording Time
Preparing the Answering System If you select “Greeting only”, the unit will Caller’s Recording Time answer a call with the greeting message, and then hang up. The unit will not record You can select “1 minute”, “2 minutes”, any incoming messages. “3 minutes”... -
Page 22: Making/Answering Calls
Making/Answering Calls Making Calls You can make a call by simply lifting the handset. To hang up, place the handset on the cradle. Using the speakerphone Press {SP-PHONE/HEADSET}, then dial a phone number. Dial a phone number, then press 12 : 34PM NOV.24 123456789 {SP-PHONE/HEADSET}. - Page 23 Making/Answering Calls To redial the last number dialed Using the handset: Lift the handset press {REDIAL}. Press {REDIAL} Lift the handset. Using the speakerphone: Press {SP-PHONE/HEADSET} press {REDIAL}. Press {REDIAL} press {SP-PHONE/HEADSET}. To redial using the redial list (Memory Redial) The last 20 phone numbers dialed are stored in the redial list.
-
Page 24: Answering Calls
Making/Answering Calls To put a call on hold Press {HOLD/RINGER} during a conversation. • The SP-PHONE/HEADSET indicator flashes. • If using the handset, you can place it on the cradle. • During the hold, the caller will hear music. For canceling music, see page 43. To release the hold If the handset is on the cradle, lift the handset. -
Page 25: Call Display Service
Call Display Service This unit is compatible with a Call Display service offered by your telephone company. If you subscribe to a Call Display service, the calling party’s information will be displayed when the unit is ringing. The unit can record information of up to 50 incoming calls, including the time and date received in the Caller List. -
Page 26: Call Waiting Deluxe Service
Call Display Service • If you receive a call with the Call Display information while viewing the Caller List, the redial list, the Phonebook list or the Direct Dial memory, while programming or while playing back the message, the caller’s information may not be displayed. •... -
Page 27: Viewing The Caller List
Call Display Service Viewing the Caller List If you have received 10 missed calls, the number of 12 : 34AM MAY 21 missed calls will be displayed as shown, while the unit missed calls message is not in use. To check who has called, follow the steps below. Press { } or { } to enter the Caller List. - Page 28 Call Display Service Example: When you search from the most recent call: Press { } or { } to enter the list. To return to the previous caller, press { Caller List 2 missed calls To exit the Caller List, press {EXIT}. Display meaning: Press { : You have checked this caller...
-
Page 29: Calling Back From The Caller List
Call Display Service Press {FUNCTION/EDIT} Calling Back from the Caller repeatedly until the number is shown in the desired format. List • Each time you press {FUNCTION/ EDIT}, the number is rearranged Press { } or { } to enter the into one of 3 patterns. -
Page 30: Storing Caller List Information In The Phonebook
Call Display Service To store the number in the a) If you need to change the Phonebook memory, follow steps name, enter the name (p. 34) 4 to 5 on page 30 to complete When finished, press {OK} the operation. (Next key). -
Page 31: Storing Caller List Information In The Direct Dial Memory
Call Display Service • To cancel during programming, press a) If you need to change the {EXIT}. Start again from step 1. name, enter the name (p. 34) • You cannot store caller information in the When finished, press {OK} (Next key). -
Page 32: Erasing Caller List Information
Call Display Service To overwrite, press {OK} Press {ERASE}. (Yes key). To select the other empty Direct Erased Dial memory, press { } (No key) and press an empty Direct Dial button ({M1}, {M2} or {M3}). • A long beep sounds and the •... -
Page 33: Storing Names And Numbers In The Phonebook
Phonebook Press {OK} (Save key). Storing Names and • A long beep sounds. Numbers in the Phonebook • To continue storing other items, repeat from step 2. You can store up to 50 names and Tom Jones phone numbers in the memory. 98-765-4321 Make sure that the handset is on the cradle, the AC adaptor is connected... -
Page 34: Selecting Characters To Enter Names
Phonebook Selecting characters to enter names The dialing buttons ({0} to {9}, {£} and {#}) can be used to enter letters and symbols. Pressing each button selects a character as shown below. Number of times key is pressed & ’ –... -
Page 35: Dialing From The Phonebook
Phonebook Dialing from the Phonebook Make sure that the handset is on the cradle, the AC adaptor is connected and the SP-PHONE/HEADSET indicator light is off. Press { } or { } to enter the Phonebook. Scroll to the desired item by pressing Press { Press { } or {... -
Page 36: Chain Dial
Phonebook Index table Keys Index Keys Index Symbols, 1 P, Q, R, S, 7 A, B, C, 2 T, U, V, 8 D, E, F, 3 W, X, Y, Z, 9 ¢ G, H, I, 4 {£} J, K, L, 5 , Space M, N, O, 6 Chain Dial... -
Page 37: Editing
Phonebook Editing Erasing Make sure that the handset is on the Make sure that the handset is on the cradle, the AC adaptor is connected cradle, the AC adaptor is connected and the SP-PHONE/HEADSET and the SP-PHONE/HEADSET indicator light is off. indicator light is off. -
Page 38: Direct Dial (M1, M2, M3)
Direct Dial (M1, M2, M3) Press one of the Direct Dial Storing Names and button ({M1}, {M2} or {M3}) (Save key). Numbers in the Direct Dial (Example: {M1} is pressed.) memory • A long beep sounds. You can store up to 3 names and phone •... -
Page 39: Dialing A Stored Number From The Direct Dial Memory
Direct Dial (M1, M2, M3) To erase a stored number Dialing a Stored Number Press the required Direct Dial from the Direct Dial button ({M1}, {M2} or {M3}). memory Press {ERASE}. Lift the handset or press • To stop erasing, press { {SP-PHONE/HEADSET}. -
Page 40: Special Features
Special Features {ERASE} {EXIT} {£} (TONE) {FUNCTION/EDIT} }, { }, {OK} {PAUSE} {FLASH} {MUTE} Temporary Tone Dialing (For Rotary or Pulse Service Users) Press {£} (TONE) before entering access numbers which require tone dialing. • The dialing mode changes to tone. You can enter numbers to access an answering service, electronic banking service, etc. -
Page 41: For Call Waiting Service Users
Special Features For Call Waiting Service Users Press {FLASH} if you hear a call-waiting tone while talking. • The first call is put on hold and you can answer the second call. • To return to the first caller, press {FLASH} again. •... - Page 42 Special Features When you hear a call-waiting After selecting “Conf” tone while talking, the second- (Conference): caller’s information is displayed. You can choose one of the following options: SMITH,JACK Drop caller1 — “ ” to hang up 111-444-7777 the first call. Drop caller2 —...
-
Page 43: Setting Hold Music To On/Off
Special Features Select “Off” or “On” by pressing Setting Hold Music to ON/ } or { Press {OK} (Save key). You can set music play during the hold • A long beep sounds. as follows. Your phone default setting is •... -
Page 44: Flash Button
Special Features Select the desired time by FLASH Button pressing { } or { Pressing {FLASH} allows you to use Press {OK} (Save key). special features of your host PBX such • A long beep sounds. as transferring an extension call or •... -
Page 45: Setting The Password
} or { } and press Please write down your password. If you {OK} (Yes key). forget your password, consult your nearest Panasonic service center. Scroll to “Change password?” by pressing { } or { } and press {OK} (Yes key). -
Page 46: Call Restriction
Special Features If you changed the password Call Restriction “1111” (default), the display on the right will be shown. Follow You can prevent the unit from dialing the following steps 1 and 2. phone numbers beginning with 1. Enter the password (p. 45). specified digit(s) (1 digit or 2 digits). -
Page 47: Answering System
Answering System Automatic Answering Operation When the unit answers a call, a greeting message is played and the caller’s message is recorded. When recording, “– Answering –” will flash on the display. • The recording time is about 15 minutes. If messages are recorded in noisy rooms, the time may be shortened by up to 3 minutes. -
Page 48: Listening To Messages
Answering System Listening to Messages You can see the total number of recorded messages on the display. If the MESSAGE indicator flashes (only when the Answering System is ON), new messages have been recorded. To play back messages, press {MESSAGE/2WAY REC}. When you have new MESSAGE Indicator messages:... -
Page 49: Recording Your Telephone Conversation
Answering System Recording Your Telephone Conversation You can record your conversation while talking using the handset or {SP-PHONE/ HEADSET}. During a conversation, press {MESSAGE/2WAY REC}. • “Recording” is displayed. Continue your conversation. To stop recording the conversation, press {MESSAGE/2WAY REC} or {STOP}. -
Page 50: Remote Operation From A Touch Tone Phone
Answering System Remote Operation from a Touch Tone Phone You can operate the answering system from any touch tone phone. A synthesized voice menu will guide you on how to operate the unit (p. 52). • To skip the voice menu and operate the unit directly, see page 54. -
Page 51: Remote Code
Answering System Remote Code The remote code prevents unauthorized people from accessing your unit and listening to your messages. Choose any 2-digit number (00–99). Your phone default remote code is “11”. If you do not program your own remote code, you can use “11”. Make sure that the handset is on the cradle, the AC adaptor is connected and the SP-PHONE/HEADSET indicator light is off. -
Page 52: Voice Menu
Answering System Voice Menu The shaded boxes are voice prompts. Press 1 to play back all messages. Press {1}. All message Press 2 for other functions. playback. Press {2}. Press {1}. Press 1 to play back new messages. New message Press 2 for other functions. - Page 53 Answering System All Messages Playback All recorded messages are played back. At the end of the last message, “ ” is heard. The unit will announce the End of final message remaining recording time if it is less than 3 minutes. New Message Playback Only new messages are played back.
-
Page 54: Direct Remote Operation
Answering System Direct Remote Operation Once you have entered the remote code, you can also control your unit by direct commands instead of using the voice menu. To end the remote operation, hang up anytime. Direct commands NEW MESSAGE • Only new messages are played back. PLAYBACK ALL MESSAGES •... - Page 55 Answering System Turning on the answering system Call your unit and wait for 15 rings. • The unit will answer and the greeting message will be played. • The answering system will turn on. Hang up or enter the remote code for other options. •...
-
Page 56: Useful Information
Useful Information Wall Mounting This unit can be mounted on a wall. Press the tabs in the direction of the arrows (1), then remove the wall mounting adaptor (2). Connect the AC adaptor. Tuck the telephone line cord inside the wall mounting adaptor, and push it in the direction of the arrow. -
Page 57: Optional Headset
Useful Information Optional Headset Plugging the optional headset into the unit allows a hands-free phone conversation. Please use only a Panasonic RP-TCA86, RP-TCA91, RP-TCA92, RP-TCA94 or RP-TCA95. Connecting the optional headset to the unit Connect the optional headset to the headset jack as shown below. -
Page 58: Troubleshooting
Useful Information Troubleshooting Problem Cause and Remedy The unit does not work. Check the settings (p. 10 16). • – • Unplug the AC adaptor to reset. Plug in, and try again. The unit does not ring. The ringer volume is set to OFF and “ ”... - Page 59 Useful Information Problem Cause and Remedy You cannot redial by • If the last number dialed was more than 32 digits long, pressing {REDIAL}. the number will not be redialed correctly. The unit does not • You need to subscribe to a Call Display service. display the caller’s •...
- Page 60 Useful Information Answering System Problem Cause and Remedy The answering system • The recording time is set to “Greeting only”. Select is on, but incoming “1 minute”, “2 minutes” or “3 minutes” (p. 21). messages are not • Memory is full. Erase some, or all, of the messages recorded.
-
Page 61: Specifications
Useful Information Specifications Power Supply: AC adaptor (AC 120 V, 60 Hz) Power Consumption: Standby: Approx. 2.4 W Maximum: Approx. 3.0 W Dimensions (H x W x D): Approx. 91 mm x 165 mm x 220 mm " " " Approx. - Page 62 Notes...
- Page 63 Senai Malaysia Copyright This material is copyrighted by Panasonic Communications (Malaysia) Sdn. Bhd., and may be reproduced for internal use only. All other reproduction, in whole or in part, is prohibited without the written consent of Panasonic Communications (Malaysia) Sdn. Bhd.
-
Page 64: Warranty
5770 Ambler Drive, Mississauga, Ontario L4W 2T3 PANASONIC PRODUCT – LIMITED WARRANTY Panasonic Canada Inc. warrants this product to be free from defects in material and workmanship and agrees to remedy any such defect for a period as stated below from the date of original purchase.