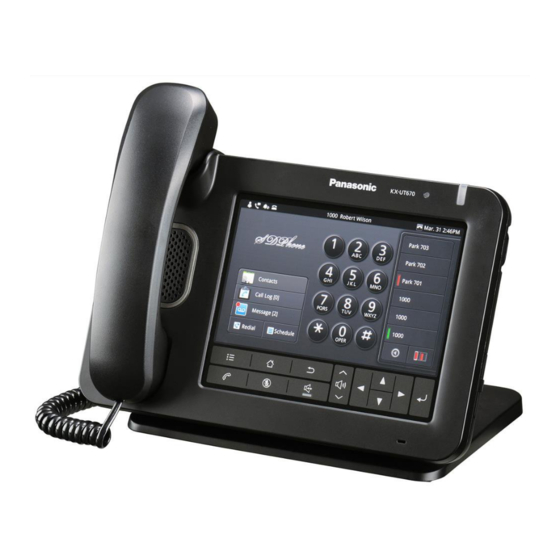
Panasonic KX-UT670 Operating Instructions Manual
Smart desk phone
Hide thumbs
Also See for KX-UT670:
- Administrator's manual (250 pages) ,
- Getting started (181 pages) ,
- Operating instructions manual (144 pages)
Table of Contents
Advertisement
Quick Links
Operating Instructions
Smart Desk Phone
KX-UT670
Model No.
Thank you for purchasing this Panasonic product.
Please read this manual carefully before using this product and save this manual for future use.
KX-UT670: Software File Version 01.100 or later
In this manual, the suffix of each model number (e.g., KX-UT670NE) is omitted unless necessary.
Document Version: 2012-12
Advertisement
Table of Contents

Related Manuals for Panasonic KX-UT670


Summary of Contents for Panasonic KX-UT670
-
Page 1: Operating Instructions
Thank you for purchasing this Panasonic product. Please read this manual carefully before using this product and save this manual for future use. KX-UT670: Software File Version 01.100 or later In this manual, the suffix of each model number (e.g., KX-UT670NE) is omitted unless necessary. -
Page 2: Feature Highlights
By registering your Google account, your contacts and calendar will be synchronised between this unit and your Google account (Page 129). Data synchronisation with Google Contacts is not available when you connect to a Panasonic KX-NS1000 PBX. Operating Instructions Document Version 2012-12... -
Page 3: Operating Instructions
Notes for Connecting to a Panasonic PBX • If the unit is connected to a Panasonic KX-NS1000 PBX, refer to the documentation of the KX-NS1000 for information about the operation, programming, and maintenance of the unit. For details, consult your dealer. -
Page 4: Other Information
Operating Instructions (this manual) Describes the parts of the unit, operation procedures, maintenance, etc. Administrator Guide Describes information about programming the unit. Manuals and supporting information are provided on the Panasonic web site at: http://panasonic.net/pcc/support/sipphone Note • The contents and design of the software are subject to change without notice. - Page 5 ® [About phone] ® [Legal information]. At least three (3) years from delivery of products, Panasonic System Networks Co., Ltd. will give to any third party who contacts us at the contact information provided below, for a charge of no more than the cost of physically distributing source code, a complete machine-readable copy of the corresponding source code and the copyright notices covered under GPL and LGPL.
-
Page 6: For Your Safety
For Your Safety For Your Safety WARNING To reduce the risk of injury, loss of life, electric shock, General Safety fire, malfunction, and damage to equipment or property, always observe the following safety precautions. Do not disassemble this unit. Dangerous electrical shock could result. -
Page 7: Wall Mounting
For Your Safety This handset earpiece is magnetised and may Only use the optional wall mount kit with the retain small ferrous objects. unit. The wall mount kit includes the necessary screws, washers, and wall The use of excessive sound volume through mounting adaptor. -
Page 8: Data Security
– interference or suspension of use caused by an • Use only the correct Panasonic handset. unauthorised party We cannot be responsible for damages resulting from the misuse of this product. User information is defined as the following: –... - Page 9 • Security settings, such as passwords, cannot be violated or sensitive information may be transmitted undone at Panasonic service centres. Take to unauthorised parties. measures to prevent passwords from being lost or forgotten.
-
Page 10: Additional Information
Additional Information Additional Information For Users in New Zealand • This equipment shall not be set to make automatic calls to the Telecom ‘111’ Emergency Service. Important Safety Instructions PTC General Warning When using this unit, basic safety precautions should •... -
Page 11: About The Touch Screen
Contact to Authorised Representative: two symbol examples): Panasonic Testing Centre This symbol might be used in combination Panasonic Marketing Europe GmbH with a chemical symbol. In this case it Winsbergring 15, 22525 Hamburg, Germany complies with the requirement set by the Directive for the chemical involved. - Page 12 This data may then be leaked onto the Internet and used improperly. • Panasonic cannot accept any responsibility if an installed application causes performance problems or losses of any kind to the user or a third party. Operating Instructions...
-
Page 13: Table Of Contents
Table of Contents Table of Contents Unit Overview ..................17 Included Accessories .....................17 Optional Accessories .....................17 Location of Controls .......................18 Before Operating the Telephone ............23 Touch Display Operations ....................23 Basic Telephone Operations ..................24 Entering Text ........................25 Using the On-screen Keyboard ..................25 Using a USB Keyboard ....................29 Emergency Number Registration ..................30 The Display and Icons ................31... - Page 14 Table of Contents Changing How Contacts are Displayed ................61 Joining/Separating Contacts ..................62 Saving/Loading Contact Information to/from an SD Card ..........62 Save Format for Contact Data ..................62 Sending Contact Information as an E-mail Attachment ..........63 Assigning Ringtones to Specific Contacts ..............64 Network Camera ..................65 Registering a Network Camera ..................65 Selecting a Network Camera ..................66...
- Page 15 Table of Contents Adding an Account ......................84 Deleting an Account .......................85 Changing Account Settings ....................85 Gallery ..........................86 Displaying an Image .......................86 Viewing Images as a Slideshow ..................86 Deleting an Image ......................86 Using Gallery’s Menu .....................87 Music ..........................88 Playing Music .........................88 Making a Playlist ......................88 Editing a Playlist ......................89 Search for Related Content in Browser ................89...
- Page 16 Table of Contents Revision History ...................141 Software File Version 01.030 ..................141 Software File Version 01.100 ..................141 Index......................143 Operating Instructions Document Version 2012-12...
-
Page 17: Unit Overview
Unit Overview Unit Overview Included Accessories If any parts are missing or have other problems, contact your dealer. Handset (1) Handset Cord (1) Stand (1) Note • The illustrations may differ from the appearance of the actual product. Optional Accessories The following optional accessories are available for purchase: AC Adaptor •... -
Page 18: Location Of Controls
Green (steady on) Missed calls If KX-UT670 is connected to a Panasonic KX-NS1000 PBX, the Message/Ringer Lamp shows the current status as follows: – Green (flashing rapidly): You are receiving an intercom call, or you are receiving a Hold Recall or Transfer Recall from an extension. - Page 19 Unit Overview Key Sheet For KX-UT670X For KX-UT670NE/KX-UT670RU Note • In this manual, the key sheet icons from the KX-UT670X are used in explanations and procedures. Menu Display the menu. The contents of the menu differ depending on the current screen or application. Home Return to the Home screen (Page 31).
-
Page 20: Right Side View
Unit Overview Right Side View USB Port Connect a USB keyboard (Page 108). The cord used to connect a USB keyboard to the USB port must be less than 3 m in length. SD Card Slot Insert an SD card. An SD card can be used for saving information stored on the unit, such as your contacts list, and for loading information onto the unit (Page 127). -
Page 21: Left Side View
Unit Overview Left Side View Modular Handset Jack EHS Jack Used to connect an EHS headset (Page 107). Headset Jack (Page 107) Document Version 2012-12 Operating Instructions... -
Page 22: Rear View
Unit Overview Rear View Message/Ringer Lamp (Page 18) Ventilation Opening (4 locations) RESET Button Reinitialises the unit’s settings (Page 130). DC Jack LAN Port PC Port Wire Openings For attaching an anti-theft cable or wire. Operating Instructions Document Version 2012-12... -
Page 23: Before Operating The Telephone
Before Operating the Telephone Before Operating the Telephone Touch Display Operations In this manual, touch operations are explained using the following terminology: Touch Touch and hold Touch the display with your Touch the display only Touch the display and keep finger. -
Page 24: Basic Telephone Operations
Before Operating the Telephone Basic Telephone Operations With this unit, there are several ways to make and answer calls. Going Off-hook In this manual, when you see the phrase "go off-hook", you can do any of the following: • Lift the handset off of its cradle. •... -
Page 25: Entering Text
Before Operating the Telephone Entering Text With this unit, you can enter text and other characters using either the on-screen software keyboard or an external USB keyboard (available commercially). Tap the text box in which you want to enter text. Use the keyboard to enter text. -
Page 26: Function Keys
Before Operating the Telephone Note • Depending on the input mode, the appearance of the keyboard may differ. Function keys Description Deletes the character in front of the cursor. Moves the cursor one character to the left. Moves the cursor one character to the right. Displays the Symbol/Emoticon input screen. -
Page 27: Using The Android Keyboard
Before Operating the Telephone Using the Android Keyboard This section explains how to input letters and numbers using the Android keyboard. Sample screen shot of the keyboard Note • Depending on the input mode, the appearance of the keyboard may differ. Function keys Explanation Tapping once switches between uppercase and lowercase input. - Page 28 Before Operating the Telephone Note • For details about Android keyboard settings, see Page 124. Operating Instructions Document Version 2012-12...
-
Page 29: Using A Usb Keyboard
Before Operating the Telephone Using a USB Keyboard You can connect a standard USB keyboard and use it instead of the on-screen keyboard to enter text. The following keys can be used: Explanation Alphanumeric characters and symbols Used in the same way as input keys on the on-screen keyboard. (including the numeric keypad) Deletes the character in front of the cursor. -
Page 30: Emergency Number Registration
For details about activating the screen lock, see page 95. • If the unit is connected to a Panasonic KX-NS1000 PBX, enter the idle line access number before emergency number. For details, refer to the documentation of the KX-NS1000. Operating Instructions... -
Page 31: The Display And Icons
The Display and Icons The Display and Icons The Display Home Screen The Home screen is initially displayed when the unit is turned on. Also, pressing displays the Home screen. Status bar (Page 32) Swipe left or right on the screen to display another Home screen. The Home screen is comprised of three screens, and you can freely position shortcuts, etc., on each screen. -
Page 32: Status Bar
The Display and Icons Status Bar The status bar displays the status of the unit and is displayed on all screens. Tapping the status bar displays the notification screen. Displays the status of unit settings, new mail notifications, etc. Displays the user’s name and the unit’s phone number. If multiple lines are configured on your unit, the phone number of the default line is displayed. -
Page 33: Notification Screen
The Display and Icons Notification Screen You can tap the items on the notification screen to display additional information. Clears all notifications. Displays settings and status information for the unit. You can tap each item to display additional information, change settings, etc. Displays current notifications. -
Page 34: Application Screen
The Display and Icons Application Screen The Application screen displays the applications installed on the unit. This screen is displayed when you tap on the Home screen. Displays the applications installed on the unit (Page 72). Tap here to close the Application screen. Operating Instructions Document Version 2012-12... -
Page 35: Phone Screen
The Display and Icons Phone Screen After the unit is turned on and the Home screen is displayed, the Phone screen is displayed automatically. You can also press or tap on the Home screen to display the Phone screen. Dial Key display Schedule display Document Version 2012-12 Operating Instructions... - Page 36 Note • If the unit is connected to a Panasonic KX-NS1000 PBX, you can select "Feature access code" to set Group Paging, Directed Group Call Pickup, Directed Call Pickup and Data Line Security, when you press . For details, refer to the documentation of the KX-NS1000.
-
Page 37: Calling Screen
The Display and Icons Calling Screen During a call, the [Current] tab is displayed. [Current] tab Displays information about the call in progress. [Hold] tab Displays information about calls on hold. Personal information If the other party is registered in your contacts, that person’s information will be displayed. [Incoming] tab Displays information about incoming calls. -
Page 38: Soft Keys
The Display and Icons Soft Keys Description Deletes the last digit entered. Cancels pre-dialling and returns to the Phone screen (Page 51). Answers a call. Puts the current call on hold (Page 54). Retrieves a call on hold and resumes the call (Page 54). Transfers the call (Page 55). - Page 39 Opens the door connected to a doorphone camera. This key is displayed when you are on a call with the doorphone. Note • This key is available only if the unit is connected to a Panasonic KX-NS1000 PBX. Note •...
-
Page 40: Call Log Screen
The Display and Icons Call Log Screen Tapping [Call Log] on the Phone screen displays the Call Log screen. The Call Log screen displays the outgoing call log, incoming call log, and missed call log. The most recent 100 records are kept for each type of call log. [Outgoing Call] tab Displays the outgoing call log. -
Page 41: Contacts Screen
The Display and Icons Contacts Screen Tapping [Contacts] on the Phone screen or tapping on the Home screen displays the Contacts screen. Displays all contacts. Displays only contacts set as favourites (Page 58). Enter a name to search for contacts (Page 61). Add a new contact (Page 58). -
Page 42: Flexible Button Screen
The Display and Icons Flexible Button Screen Single-row display Full-screen display Tapping a button activates the feature assigned to the flexible button. Switches between single-row display and full-screen display. Displays the next column. Note • For details about assigning features to flexible buttons, see page 92. Operating Instructions Document Version 2012-12... -
Page 43: Network Camera Viewer
Calls the phone number (paging number) associated with the network camera (Page 68). Note • For details about adding network cameras, see page 65. • is available only if the unit is connected to a Panasonic KX-NS1000 PBX. Document Version 2012-12 Operating Instructions... -
Page 44: Lock Screen
The Display and Icons Lock Screen When someone taps the display while the screen lock is activated, the following screen is displayed. When using a pattern When using a PIN Operating Instructions Document Version 2012-12... - Page 45 The Display and Icons When using a password Call an emergency number (Page 52). Trace the unlock pattern, enter the PIN, or enter the password to unlock the screen (Page 95). Note • For details about activating the screen lock, see page 95. Document Version 2012-12 Operating Instructions...
-
Page 46: Icons
The Display and Icons Icons Home Screen (Page 31) Icon Description Displays the Application screen. Hides or displays the application dock. Closes the Application screen. Drag unneeded shortcuts, widgets, or folders to this icon to delete them (Page 98). Status Bar (Page 32) Icon Description Displays the status of headset mode. - Page 47 The Display and Icons Icon Description Displayed when an event’s notification time is reached. Displayed as an alert for the following events: • The SD card has been removed. • An unsupported USB device has been connected to the unit. •...
- Page 48 The Display and Icons Icon Description Indicates whether there are new voice messages (Page 57). : No new messages. : There are one or more new messages. Redials the last dialled phone number (Page 51). Displays the schedule. Displays the dial keys. Switches between the single-row display and the full-screen display or flexible buttons.
- Page 49 The Display and Icons Icon Description Calls the other party. Contact Screen (Page 41) Icon Description Enter a name to search for a contact (Page 61). Adds a new contact (Page 58). Calls the contact’s default phone number. Sends an e-mail to the contact’s default e-mail address. Displays the details screen for the selected contact.
- Page 50 (Page 68). Opens the door connected to a doorphone camera during a conversation with the doorphone (Page 67). Note • This icon is available only if the unit is connected to a Panasonic KX-NS1000 PBX. Lock Screen (Page 44) Icon Description Call an emergency number (Page 52).
-
Page 51: Phone
Phone Phone Note • In step 1, tapping [Redial] without going off-hook enables hands-free mode. Making Calls Calling from the Contacts Go off-hook. Screen Enter the phone number. To end the call, go on-hook. Calling Using "Quick Contact" Note Go off-hook. •... -
Page 52: Calling From The Call Log
Phone Calling from the Call Log Calling Using a Flexible Button Set as a One-touch Dialling Go off-hook. Tap [Call Log]. Button Select the [Outgoing Call] tab, the [Incoming Call] tab, or the [Missed Call] tab. You can use a flexible button configured as One-touch Tap the record for the party you want to call. -
Page 53: Receiving Calls
When you have incoming calls from multiple parties at Note the same time, you can select which one to answer. • If the unit is connected to a Panasonic On the [Incoming] tab, select the call you want to KX-NS1000 PBX, you cannot reject an answer. -
Page 54: Holding A Call
Phone Rejecting Specific Calls Holding a Call You can set the unit to reject specific phone numbers. On the [Current] tab, tap [Hold]. Note Note • Rejected phone numbers will not be stored in • When a call has been left on hold for a certain the incoming call log. -
Page 55: Transferring A Call
During a three-party conference call, select the call. party you want to remove on the [Current] tab. If the unit is connected to a Panasonic KX-NS1000 PBX, you Tap [Disconnect]. cannot transfer a call. Document Version 2012-12... -
Page 56: Mute
Phone Ending a Conference Call Mute Go on-hook. During a call, you can mute the microphone so that the other party cannot hear you. You will still be able to hear the other party, but they cannot hear you. The unit’s microphone, the handset, and a connected headset will all be muted. -
Page 57: Checking Voice Messages
Phone Checking Voice Messages When you have unheard voice messages, the [Message] icon appears as on the Phone screen. Also, the Message/Ringer lamp lights red. On the Phone screen, tap [Message]. Follow the voice guidance. Note • To use this feature, the voice mail access number must be enabled through configuration file programming. -
Page 58: Contacts
Contacts Contacts – If the unit is connected to a Panasonic KX-NS1000 PBX, the synchronisation is not available. – Photos in your contacts are not The Contact screen is displayed when you tap synchronised. [Contacts] on the Phone screen or tap on the –... -
Page 59: Adding A Contact From The Call Log
Select the contact to add the phone number to. • This function is available only if the unit is Enter information as necessary. connected to a Panasonic KX-NS1000 PBX. When you finish entering information, tap [Done]. • For details about the entry items, see page 58. -
Page 60: Editing A Contact
Contacts Editing a Contact Deleting a Contact Deleting One Contact You can edit the information registered to a contact. On the Phone screen, tap [Contacts]. You can delete a contact. Tap the name of the contact you want to edit. On the Phone screen, tap [Contacts]. -
Page 61: Searching For A Contact
Contacts Searching for a Contact Changing How Contacts are Displayed You can search for a contact within your registered contacts. You can change how contacts are displayed in the On the Phone screen, tap [Contacts]. contact list. , and enter the name of the On the Phone screen, tap [Contacts]. -
Page 62: Joining/Separating Contacts
Contacts Joining/Separating Saving/Loading Contact Contacts Information to/from an SD Card You can join the information of two separate contacts into a single contact, and you can separate joined contacts. You can save (export) contact information to an SD card or load (import) contact information from an SD card. Joining Contacts Notice •... -
Page 63: Sending Contact Information As An E-Mail Attachment
Contacts Sending Contact On the [Confirm export] screen, tap [OK]. Note Information as an E-mail • Tapping [Cancel] returns you to the Contacts Attachment screen. You can send contact information as an e-mail Loading from an SD Card attachment. On the Phone screen, tap [Contacts]. Notice On the Contacts screen, press •... -
Page 64: Assigning Ringtones To Specific Contacts
Contacts Assigning Ringtones to Specific Contacts You can assign different ringtones to specific contacts. On the Phone screen, tap [Contacts]. On the Contacts screen, tap the name of the contact to which you want to assign a ringtone. Press Tap [Options]. Tap [Ringtone]. -
Page 65: Network Camera
(VGA or 720p). following web site: http://panasonic.net/pcc/support/sipphone Stream If the camera is configured to output multiple Note streams, select which stream from the video camera to view (Stream 1/Stream 2). -
Page 66: Selecting A Network Camera
Network Camera Selecting a Network Controlling a Network Camera Camera Changing the View Area On the Home screen, tap In Network Camera Viewer, press On the Home screen, tap Tap [Camera Select]. Swipe across the network camera’s video-feed Tap a camera’s name in the [Camera Select] list. display. - Page 67 On the Network Camera Viewer, tap Note • This function is available only if the unit is connected to a Panasonic KX-NS1000 PBX. Returning the View to Home Position (set in the camera) On the Home screen, tap In Network Camera Viewer, tap Note •...
-
Page 68: Calling A Phone Number Associated With A Camera
Network Camera Calling a Phone Number Switching Automatically Associated with a among Multiple Cameras Camera You can have the unit cycle through the registered network cameras and display each video feed in turn. You can call a phone number that is associated with a On the Home screen, tap network camera, called a paging number. -
Page 69: Using Network Camera Presets
Network Camera Using Network Camera Editing a Preset’s Name Presets On the Home screen, tap In Network Camera Viewer, press You can select a viewing position that has been Tap [Preset]. registered in the network camera’s settings beforehand. In the [Preset] list, touch and hold the preset whose These are called "presets". -
Page 70: Configuring Display Properties
Network Camera Configuring Display On the [Auto Mode] screen, tap [Preset Sequence]. Properties Note • Tapping [Cancel] returns you to the [Camera You can adjust the brightness of the network camera Settings] screen. and set up automatic mode. Automatic Tracking Adjusting the Brightness of the You can have the camera automatically follow a moving Picture... -
Page 71: Receiving Alarms From Network Cameras
Network Camera • Receiving Alarms from If you are viewing the video feed from a camera when it issues an alarm, only a notification Network Cameras alarm will sound. • Notifications on the Notification screen are displayed in order, newest first. New When an alarm from a network camera (movement notifications from a network camera overwrite detection, error, abnormality, etc.) is detected, this unit... -
Page 72: Built-In Applications
Built-in Applications Built-in Applications This unit comes with a number of built-in applications you can use. Starting an Application On the Application screen, tap the icon of the application you want to start. Clock The unit can be used as a desktop alarm clock. Displaying the Date and Time When you start the Clock application, the current date and time are displayed prominently. -
Page 73: Deleting An Alarm
Built-in Applications Specify the alarm tone or other items as necessary. Tap [Done]. Editing an alarm On the Application screen, tap Tap the alarm you want to edit. Change the time, alarm tone or other items as necessary. Tap [Done]. Turning an alarm on or off On the Application screen, tap Tap the icon next to the alarm you want to turn on or off. -
Page 74: Using Alarm Clock's Menu
Built-in Applications Cancelling Snooze Tap the status bar. On the notification screen, tap [Alarm (snoozed)]. Using Alarm Clock’s Menu On the Application screen, tap Press You can configure the following settings: Displays the clock over the entire display. Desk clock Add and set a new alarm. -
Page 75: Browser
Built-in Applications Browser You can browse and view web pages. Displaying a Web Page in Browser On the Application screen, tap Tap the URL input box, and then enter a URL or some text to search the web for. Tap [Go]. Note •... -
Page 76: Setting The Home Page
Built-in Applications Closing a Window While viewing a web page in the browser, press Tap [Windows]. in the row of the window you want to close. Setting the Home Page You can set which web page is displayed when you open a new window. On the Application screen, tap Press Tap [More]. - Page 77 Built-in Applications Display the image pointed to by the link. This action is View image available only if the link points to an image file. This item is displayed only if an e-mail account is configured. (To configure an e-mail account, see page 82.) Using the Menu Displayed by Pressing the Menu Button On the Application screen, tap While viewing a page in the web browser, press...
-
Page 78: Calculator
Built-in Applications Calculator You can use the calculator application to perform mathematic calculations. On the Application screen, tap Note • Touching and holding in the calculation field shows editing options such as [Select text], [Copy all], and [Paste]. • Tapping [CLEAR] deletes the character in front of the cursor. Touching and holding [CLEAR] deletes the entire calculation. -
Page 79: Calendar
Built-in Applications Calendar You can add and manage events. Events that you have registered are displayed in the Schedule display on the Phone screen (Page 35). When a notification set for an event is activated, is displayed in the status bar. Displaying Calendar On the Application screen, tap Press... -
Page 80: Checking An Event
Built-in Applications Checking an Event On the Application screen, tap Press Tap [Day], [Week], [Month] or [Agenda] to change the view. Tap the event you want to check. Editing an Event On the Application screen, tap Press Tap [Day], [Week], [Month] or [Agenda] to change the view. Tap the event you want to edit. -
Page 81: Configuring Calendar's Settings
Built-in Applications Configuring Calendar’s Settings On the Application screen, tap Press Tap [More]. Tap [Settings]. Configure the settings as necessary. Select the notification method. Alert: At the specified date and time, is displayed in the status bar, and the Notification screen is also displayed. If a notification ringtone is Set alerts &... -
Page 82: Email
Built-in Applications Email You can compose e-mail messages. You can also attach photos to messages. Setting Up an E-mail Account On the Application screen, tap Enter an e-mail address and its associated password. Tap [Next]. Following the on-screen instructions, configure the settings. Note •... -
Page 83: Reading E-Mail
Built-in Applications Reading E-mail On the Application screen, tap Tap the e-mail message you want to read. Note • If you have configured multiple accounts, select an account after step 1. • To manually receive e-mail, tap [Load more messages]. •... -
Page 84: Displaying A List Of Folders
Built-in Applications Note • Attachments cannot be forwarded. When forwarding an e-mail message that has an attachment, first save the attachment to an SD card, and then attach it in step 4 to the message you are forwarding. (For details about saving an attachment to an SD card, see page 83. For details about attaching a file to an e-mail message, see page 82.) Displaying a List of Folders You can display and view the contents of folders such as your inbox, sent messages, drafts, etc. -
Page 85: Deleting An Account
Built-in Applications Deleting an Account On the Application screen, tap Press Tap [Accounts]. Touch and hold the account you want to delete. Tap [Remove account]. Tap [OK]. Note • If you have configured multiple accounts, steps 2 to 3 are unnecessary. Changing Account Settings On the Application screen, tap Press... -
Page 86: Gallery
Built-in Applications Gallery You can display and edit (rotate, crop, delete) images saved on an SD card. Displaying an Image On the Application screen, tap Select an image folder. Tap the image you want to view. Icons Displayed while Viewing an Image You can perform the following operations by using the icons that are displayed while you are viewing an image. -
Page 87: Using Gallery's Menu
Built-in Applications Using Gallery’s Menu When you press while viewing an image, the following actions are available. Image Folder View Configure various settings, such as the display size for thumbnail Settings images and slideshow settings. Thumbnail View Slideshow Play a slideshow. Select multiple images, which you can then delete. -
Page 88: Music
Built-in Applications Music You can play music that was attached to an e-mail message or is saved on an SD card. Playing Music On the Application screen, tap Select the [Artists], [Albums], [Songs], or [Playlists] tab. Select an item as necessary, and then tap the song you want to play. Note •... -
Page 89: Editing A Playlist
Built-in Applications Select an item as necessary, and then touch and hold a song you want to add to a playlist. Tap [Add to playlist]. Select the playlist you want to add the song to. Note • If you select [New] in step 5, enter a name for the playlist. Editing a Playlist On the Application screen, tap Tap the [Playlists] tab. - Page 90 Built-in Applications Play through all the songs on the SD card in a random order. Shuffle all Display the screen that was displayed before you started playing music. Library Add the selected song to a playlist. Add to playlist Set to ringtone list Add the selected song as a selection for incoming ringtones (Page 99).
-
Page 91: Advanced Settings
Do Not Disturb Prevent calls from ringing at your unit. When you have finished, tap [OK]. If the unit is connected to a Panasonic KX-NS1000 PBX, this setting is available. Note • FWD/DND can be enabled only when the unit is idle or during pre-dialling. -
Page 92: Automatic Answer
Tapping the flexible button allows you to view the video feed from the specified network camera. If the unit is connected to a Panasonic KX-NS1000 PBX, "Phone function" settings cannot be made through Flexible Button Configuration Mode. Refer to the documentation of the KX-NS1000 for information about programming "Phone... - Page 93 Advanced Settings Tap the desired key. Colour (State) Line Status On the [Select] screen, select the function you want to assign. Idle Follow the on-screen instructions. Green (steady on) Dialling/On a call Note Green (flashing Incoming call • During steps 4 to 6, if you do not perform any rapidly) operations for 1 minute the unit returns to Green (flashing slowly)
-
Page 94: Using A Headset
Advanced Settings Using a Headset Shows the status of another local phone’s line. You can use a flexible button set as a BLF (Busy Lamp Field) To use a headset, you must enable headset mode. button to call or transfer a call to the phone assigned to the button. -
Page 95: Activating The Screen Lock
Advanced Settings Activating the Screen Lock When you activate the screen lock, you can lock access to normal phone functions and to applications. This feature is useful for preventing unwanted use of the unit while you are away from your seat. Phone numbers set beforehand as emergency numbers can still be dialled, and calls can still be received. -
Page 96: Customising The Phone
Customising the Phone Customising the • The following file formats can be used for the Home screen wallpaper: JPEG, BMP, GIF, Phone PNG. • Depending on configuration file programming, you may not be able to change the wallpaper. For details, consult your system administrator Changing the Wallpaper or dealer. -
Page 97: Adding And Deleting Shortcuts, Widgets And Folders
Customising the Phone • Adding and Deleting The following file formats can be used for the Phone screen wallpaper: JPEG, GIF, PNG. Shortcuts, Widgets and • Depending on configuration file programming, you may not be able to change the wallpaper. Folders For details, consult your system administrator or dealer. -
Page 98: Displaying Your Schedule On The Phone Screen
Customising the Phone Deleting a Shortcut, Widget or Folder Displaying Your On the Home screen, touch and hold the shortcut, Schedule on the Phone widget or folder you want to delete. Drag the item to Screen On the Phone screen, you can change the area where Adding to the Application Dock the dial keys are displayed to display your schedule instead. -
Page 99: Setting A Ringtone
Customising the Phone Setting a Ringtone Using Music on an SD Card as the Ringtone You can change the ringtone that plays when the unit receives a call. You can use music on an SD card as the ringtone. On the Home screen, press Tap [Settings]. -
Page 100: Web User Interface Programming
Each time you want to access the Web user interface, you must enable Web programming (Page 117). • If the unit is connected to a Panasonic KX-NS1000 PBX, Web User Interface programming is not available. Operating Instructions Document Version 2012-12... -
Page 101: Accessibility
Accessibility Accessibility For users with difficulties operating the touch display directly, this unit supports navigation of the interface and operation of phone functions with a USB keyboard. Most navigation features are available simply by connecting a USB keyboard. However, by enabling Accessibility mode (Page 125), more functions can be accessed directly with the keyboard. - Page 102 Accessibility Key Sheet Accessibility Mode On Accessibility Mode Off Equivalent [F8] Disables Automatic Answer (Page 92). (no function) — When you press this key, a confirmation tone (double) is heard. [F9] Redial (Page 51). (no function) — [F10] Accesses voice mail (Page 57). (no function) —...
-
Page 103: Connections And Installation
Connections and Installation Connections and Installation Notice Panasonic assumes no responsibility for injuries or property damage resulting from failures arising out of improper installation or operation inconsistent with this documentation. Attaching the Stand (Adjusting the Angle of the Unit) The stand can be attached to the unit in two ways in order to change the angle of the unit. - Page 104 Connections and Installation To fasten the stand, slide the stand to the left until it clicks. Notice • If you place the display face down when you attach the stand, be sure to place a soft cloth under the display. Failure to do so may result in damage to the display. Removing the Stand Gently lift up the tab on the back (A) with your finger, slide the stand to the right, and then remove it.
-
Page 105: Connections
Connections and Installation Connections Connections for Ethernet Cables, AC Adaptor, Headset Optional AC adaptor* To a switching hub* To a PC Ethernet cables EHS jack AC adaptor Headset jack If power is supplied over Ethernet (PoE), an AC adaptor is unnecessary. To use PoE, use a PoE switching hub that is PoE Class 3 compliant. - Page 106 Connections and Installation When connecting an Ethernet cable Connect the Ethernet cable as shown in the following figures. • If the distance from the end of the connector to the bend in the cable is 30 mm or less Ethernet cable 30 mm or less •...
- Page 107 Connections and Installation Notice Optional AC adaptor • For this Smart Desk Phone, you must use only the following Panasonic AC adaptors: – For KX-UT670X: KX-A422CE (PNLV228)/KX-A422UK (PNLV228)/KX-A422AL (PNLV228)/KX-A422X (PNLV228)/ KX-A422BR (PNLV228) – For KX-UT670NE: KX-A422CE (PNLV228)/KX-A422UK (PNLV228) – For KX-UT670RU: KX-A422CE (PNLV228) •...
-
Page 108: Connecting The Handset
Connections and Installation Connecting the Handset Connecting a USB Keyboard You can connect a standard USB keyboard (available commercially). To a USB keyboard Notice • Return to the Home screen before connecting or disconnecting a USB keyboard. • Ensure that the USB cable has slack. Pulling the cord too tightly can result in damage to the connectors. Note •... -
Page 109: Wall Mounting
Connections and Installation Wall Mounting To mount the unit on a wall, you must purchase the wall mount kit (Page 17). If the stand is attached, remove it (Page 104). Carefully read the safety notices regarding wall mounting before mounting the unit on a wall (Page 6). Notice •... - Page 110 Connections and Installation Connect the cables to the unit, and run the cables through the wall mounting adaptor, as shown in the illustration below. Note • The cables can also be run from the bottom of the unit. • For details about connecting the cables, see page 105. Screw the 2 screws for wall attachment with their washers into the wall as shown in the following figure, and then mount the unit on the wall.
- Page 111 Connections and Installation Turn the handset hook up-side-down. Slide the handset hook back into its slot until it clicks. • The handset will be safely hooked when it is in the cradle. Hooking the Handset During a Conversation Hook the handset over the top edge of the unit. Document Version 2012-12 Operating Instructions...
-
Page 112: Configuration
Configuration Configuration You can configure the settings required to connect the unit to the network, as well as other various settings. Making Settings On the Home Screen, press Tap [Settings]. Navigate to and tap the desired setting. Make changes to the setting as required. Setting Items The following items for the unit can be configured. - Page 113 Configuration Main Category Sub-Category Setting Reference Display Brightness Page 118 Animation Page 118 Screen timeout Page 119 Touch panel Cleaning mode Page 119 Security Set up screen lock None Page 119 (Change screen lock) Pattern Page 119 Page 119 Password Page 119 Use visible pattern Page 119...
- Page 114 Configuration Main Category Sub-Category Setting Reference Format SD card Page 121 Clear cache Page 121 Available space Page 122 Search Google search Show web Page 122 suggestions Searchable items Page 122 Apps Page 122 Contacts Page 122 Music Page 122 Clear shortcuts Page 122 Language &...
- Page 115 Configuration Main Category Sub-Category Setting Reference User dictionary Page 124 Accessibility Key command on Page 125 USB keyboard Date & time NTP Server Use NTP server Page 125 Set date Page 125 Select time zone Page 125 Set time Page 125 Use 24-hour format Page 125 Select date format...
-
Page 116: Setting Item Details
Configuration Setting Item Details Screen lock now Setting Description Value Range Default Screen lock now Activates the screen lock. — — Network Setting Description Value Range Default MAC Address Displays the MAC address. — — Selects whether to automatically acquire an IP address from a DHCP Connection DHCP server (DHCP Settings) or enter an... - Page 117 Configuration Setting Description Value Range Default Enables the use of a proxy server. If Use proxy you enable this feature, specify On/Off server values in [Proxy server address], and [Proxy server port]. Proxy server —Proxy xxx.xxx.xxx.xxx settings Enter the address of the proxy *1*2 server -or-...
- Page 118 Configuration Incoming calls Setting Description Value Range Default Sets the incoming ringtone. If multiple lines are configured on your unit, you must first select which line to use the ringtone for. You can assign a different ringtone to each Automatic, Phone ringtone Automatic line.
-
Page 119: Touch Panel
Configuration Setting Description Value Range Default 1 minute 5 minutes 10 minutes Sets the amount of time before the 30 minutes Screen timeout screen backlight automatically turns 60 minutes 1 minute off. 120 minutes 180 minutes 300 minutes Always On Touch panel Setting Description... - Page 120 Configuration Credential storage Setting Description Value Range Default Allows applications to access credentials and to use them on a Use secure credentials secured network. When enabling On/Off this, enter a password in [Set password]. Installs encrypted credentials from Install from SD card —...
- Page 121 Configuration Manage accounts Setting Description Value Range Default Automatic Specifies the interval at which to (Push) automatically synchronise data. Every 5 If you select [Automatic (Push)], minutes synchronised contacts and calendar Every 10 Synchronizat Every 15 events are updated on the unit soon minutes ion interval minutes...
- Page 122 Configuration Internal phone storage Setting Description Value Range Default Displays the amount of available Available space — — space of the unit’s internal memory. Search Setting Description Value Range Default Sets whether search suggestions are Google Show web displayed as search text is being On/Off search suggestions...
- Page 123 Configuration Text settings Setting Description Value Range Default Dutch, English (UK), English (US), French, French Select Selects the language to use for the English (Canada), Language iWnn IME keyboard. (US) German, Italian, Japanese, Russian, Spanish Sound on Key Sets whether sounds are heard each On/Off Press time a key is tapped.
- Page 124 Configuration Setting Description Value Range Default Sets whether to allow applications to Mushroom use the Mushroom application for Use/No use No use inputting common phrases. iWnn IME User Edit the words in the user dictionary. — — (continued) Dictionary Clear Delete all the content from the Learning —...
- Page 125 Configuration Accessibility Setting Description Value Range Default Sets whether telephone functions Key command on USB can be performed by using a USB On/Off keyboard keyboard. Date & time Setting Description Value Range Default Specifies whether to use an NTP Use NTP server.
-
Page 126: About Phone
Configuration Network Camera Alarm settings Setting Description Value Range Default Pop up live screen Pop up live screen or Alarm notification Sets the alarm notification method. status bar notification Status bar notification 2 seconds 3 seconds 4 seconds Specifies the length of time after an 5 seconds Alarm disarm time alarm is issued for which subsequent... -
Page 127: Miscellaneous Information
Miscellaneous Information Miscellaneous Using an SD Card Information With an optional SD card, you can do the following: • Add a photo stored on an SD card to a contact (Page 58) • Save and load contacts to and from an SD card Updating the Firmware (Page 62) •... - Page 128 For up-to-date information about SD cards that have remove it. been tested with this unit, refer to the following web site: Note http://panasonic.net/pcc/support/sipphone • The SD card can also be unmounted through settings (Page 121). • Depending on the type of SD card, the time required for reading and writing operations may vary.
-
Page 129: Setting Up A Google Account For Synchronising
Miscellaneous Information Synchronising Manually Setting up a Google On the Home screen, press Account for Tap [Settings]. Synchronising Tap [Accounts & sync]. Tap the account name. By registering your Google account, you can Press synchronise contacts and calendar events between this Tap [Sync now]. -
Page 130: Initialising The Unit
Miscellaneous Information Initialising the Unit Cleaning the Unit Initialising the unit resets all its settings to their factory When you clean the unit, turn off the unit by unplugging default values. For details, consult your administrator or the AC adaptor and/or disconnecting the Ethernet dealer. - Page 131 Miscellaneous Information • When in cleaning mode, the message/ringer lamp flashes green. • If you receive a call, cleaning mode will be cancelled and you can answer the call. Exiting Cleaning Mode You can exit cleaning mode by lifting the handset off its cradle.
-
Page 132: Troubleshooting
Troubleshooting Troubleshooting If you experience trouble, refer to the information in this section. If the problem persists, disconnect and then reconnect the AC adaptor and/or Ethernet cable. Before troubleshooting, confirm all connections (Page 105), and ensure that power is being supplied from the Ethernet cable. -
Page 133: Making And Receiving Calls
Troubleshooting Issue Possible Cause & Solution • The display goes dark while You have not performed any operations for a certain length of time. registering or editing → If no operations are performed for a certain length of time, the information. - Page 134 Troubleshooting Issue Possible Cause & Solution • You are in a 3-party conference call. I cannot transfer a call. → When the 3-party conference call ends, try the operation again (Page 55). • You are either in the middle of transferring a call or you are in a 3-party conference call.
- Page 135 Troubleshooting Issue Possible Cause & Solution • Just after a call begins, the unit may not have yet adjusted itself to the call’s environment. → Just after a call begins, take turns with the other party talking to each other. The unit will adjust itself in accordance with the call environment so that both you and the other party can hear each other as clearly as possible.
- Page 136 Troubleshooting Contacts Issue Possible Cause & Solution • The maximum number of contacts are already registered. I cannot add a new contact. → Delete unnecessary contacts (Page 60). • Contact information I loaded The character encoding of the vCard file you imported was not UTF-8. from an SD card contains →...
- Page 137 Troubleshooting Issue Possible Cause & Solution • The phone number registered on the [Camera Registration] screen is not correct. → Check whether the setting is correct, and enter the setting again Even when I tap , a call is as necessary (Page 65). not made.
-
Page 138: Function Settings
Troubleshooting USB Devices Issue Possible Cause & Solution • You connected a USB device that this unit does not support. → The USB device I connected This unit supports only standard USB keyboards. • does not work. The maximum number of chained hubs has been exceeded. →... - Page 139 Troubleshooting Issue Possible Cause & Solution • An NTP server is not specified. The clock is not adjusted → Tap [Enter NTP], and then configure the NTP server settings because an NTP server is (Page 125). Consult your administrator or dealer for details about not specified.
-
Page 140: Specifications
Specifications Specifications Item Specification Display 7-inch touch display WVGA (800 ´ 480 pixels) 262,000 colours VoIP Connection Method VoIP Audio Codec G.722, G.711, G.729a Network Camera Codec H.264 Ethernet Interface 10Base-T/100Base-TX/1000Base-T IP Address Mode Automatic (DHCP), Manual (Static) Speaker Microphone Ethernet Port (LAN) 2 (RJ45) USB Port... -
Page 141: Revision History
• Troubleshooting – SD Cards (Page 137) Software File Version 01.100 Added Contents • Notes for Connecting to a Panasonic PBX (Page 3) Changed Contents • Location of Controls (Page 18) • Emergency Number Registration (Page 30) • Phone Screen (Page 35) •... - Page 142 Revision History • Transferring a Call (Page 55) • Three-party Conference Call (Page 55) • Adding a New Contact (Page 58) • Adding Network Camera Information to a Contact (Page 59) • Controlling a Network Camera (Page 66) • Forward/Do Not Disturb (Page 91) •...
-
Page 143: Index
Index Index Current tab DC jack Dial key display AC adaptor Do Not Disturb Accessibility Doors Accessories Opening Alarm (network camera) Ambient light sensor Application dock Applications EHS jack Browser Emergency number Calculator Calling Calendar Registration Clock Enter (Key Sheet button) Email Ethernet cable Gallery... - Page 144 Index Lock screen Network Camera Viewer Making a call Notification screen Menu (Key Sheet button) Phone screen Message/Ringer lamp 18, 22 Status bar Microphone SD card Missed Call tab Formatting Multiple incoming calls Locking/Unlocking Mute SD card slot Mute (Key Sheet button) Shortcuts Soft keys Speaker...
- Page 145 One screw here WALL MOUNTING TEMPLATE 1. Drive the screws into the wall as indicated. 2. Hook the unit onto the screw heads. Note: Make sure to set the print size to correspond with the size of this page. If the dimensions of the paper output still deviate slightly from the measurements indicated here, use the measurements indicated...
- Page 146 Copyright: This material is copyrighted by Panasonic System Networks Co., Ltd., and may be reproduced for internal use only. All other reproduction, in whole or in part, is prohibited without the written consent of Panasonic System Networks Co., Ltd. Panasonic System Networks Co., Ltd. 2011...