Table of Contents
Advertisement
Available languages
Available languages
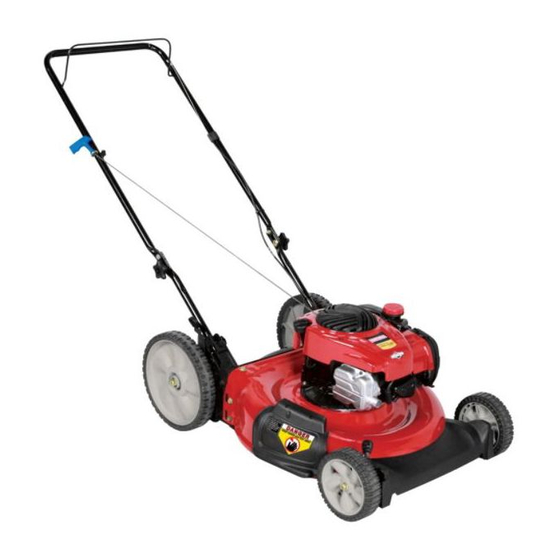
Operator's
Manual
CRRFTSMRH
21" LAWN MOWER
Model No. 247.37000
CAUTION:
Before
using
this product,
read this
manual
and follow
all
safety
rules
and operating
instructions.
o SAFETY
ASSEMBLY
OPERATION
MAINTENANCE
PARTS LIST
o ESPArqOL, p. 33
Sears Brands
Management
Corporation,
Hoffman
Estates,
IL 60179, U.S.A.
Visit our website:
www.craftsman.com
FORM1/O.769-07571
11/23/2011
Advertisement
Table of Contents

Related Manuals for Craftsman 247.37000


Summary of Contents for Craftsman 247.37000
- Page 1 Operator's Manual CRRFTSMRH 21" LAWN MOWER Model No. 247.37000 o SAFETY ASSEMBLY OPERATION CAUTION: Before using MAINTENANCE this product, read this PARTS LIST manual and follow o ESPArqOL, p. 33 safety rules and operating instructions. Sears Brands Management Corporation, Hoffman Estates, IL 60179, U.S.A.
-
Page 2: Specifications
D efectiveproductwill receivefree repairor free replacementif repairis unavailable. For warranty coverage details to obtain repair or replacement, visit the web site: www.craftsman.com. This warranty covers ONLYdefects in material and workmanship. Warranty coverage does NOT include: •... -
Page 3: California Proposition
This machinewas builtto be operatedaccordingto the safeopera- This symbolpointsout importantsafetyinstructionswhich,if not tion practicesin this manual.As with anytype of powerequipment, followed,couldendangerthepersonalsafetyand/orpropertyof carelessnessor error on the partof the operatorcan resultin serious yourselfand others. Readand followall instructionsin this manual injury.This machineis capableof amputatingfingers,hands,toes beforeattemptingto operatethis machine.Failureto complywith and feet and throwingdebris.Failureto observethe followingsafety these instructionsmay resultin personalinjury.Whenyou seethis... -
Page 4: Slope Operation
• The bladecontrolhandleis a safetydevice.Neverattemptto bypassits operation.Doingso makesthe safetydevice inopera- Mowacrossthefaced slopes;neverup and down.Exercise tive and may resultin personalinjurythroughcontactwith the extremecautionwhenchangingdirectionon slopes. rotatingblade.The bladecontrol handlemustoperateeasily • Watchfor holes,ruts, rocks,hiddenobjects,or bumpswhich can in bothdirectionsand automaticallyreturnto the disengaged causeyou to slip or trip. Tallgrass can hideobstacles. positionwhenreleased. -
Page 5: Spark Arrestor
• Extinguishall cigarettes,cigars,pipesand othersources Donot changethe engine'sgovernorsettingor over-speed the of ignition. engine.Thegovernorcontrolsthe maximumsafe operatingspeed of the engine. • Neverfuelmachineindoorsbecauseflammablevaporswill accumulatein the area. Checkfuel line,tank,cap, and fittings frequentlyfor cracksor leaks.Replaceifnecessary. • Neverremovegas cap or add fuel whileengineis hotor running. Allowengineto coolat leasttwo minutesbeforerefueling. Donot crankenginewith sparkplug removed. -
Page 6: Safety Symbols
SAFETY SYMBOLS This pagedepictsand describessafetysymbolsthat mayappear on this product. Read,understand,and followall instructionson the machine beforeattemptingto assembleand operate. READ THE OPERATOR'S MANUAL(S) Read, understand, and follow all instructions in the manual(s) before attempting to assemble operate DANGER -- ROTATING BLADES To reduce the risk of injury, keep hands and feet away. Do not operate unless discharge cover or grass catcher is in its proper place. - Page 7 15° Slope 15° Slope (OK) (TOO STEEP) _- _. Figure1 Figure 2 _O._daShed._ fine USETHiS SLOPE GAUGE TO DETERMINE iF A SLOPEiS TOOSTEEP FORSAFEOPERATION! Tocheckthe slope, proceedas follows: 1. Removethis pageand fold alongthe dashedline. Locatea vertical object on or behindthe slope(e.g. a pole, building,fence, tree, etc.) Align either side of the slope gaugewith the object (SeeFigure1 and Figure2 ).
- Page 8 IMPORTANT: T his unit isshippedwithoutgasolineor oil inthe engine. Be certain to serviceenginewithgasolineand oil as instructed inthe Operationsectionbeforestartingor runningyourmachine. NOTE:Referenceto rightand left hand sideof the LawnMoweris observedfrom the operatingposition. OPENING CARTON Cut eachcornerof the cartonverticallyfromtop to bottom. Removeall looseparts. Removeloosepackingmaterial. REMOVING UNIT FROM CARTON Lift unit from the rearto detach it from underlyingcarton material and roll unit out of carton.
- Page 9 Followthe stepsbelowto completehandleassembly: Pull upwardon the handle untilholesin lowerhandle (shown in Figure3 deck cutaway)line up with holesin handle bracket.See Figure4. NOTE:Whenpullingupwardon handle,makesureto not pull handle all the way out. Insertthe T-boltsremovedin stepearlier throughthe handle bracketsand lowerhandleand tightensecurelyto securethe handlein place.See Figure4. C.
- Page 10 Attaching Side Discharge Cover Side Mulching Yourmowerisshippedas a mulcher.Toconvertto side discharge, Cover makesuregrass catcherisoff of the unitand reardischargedoor is closed. On the sideof themower,lift the mulchingcover.See Figure7. Slidetwo hooksof side dischargecoverunder hingepin on mulchingcoverassembly.Lowermulchingcover.Do not remove side mulchingcoverat anytime, evenwhen youare not mulching. ADJUSTMENTS Side Discharge Cutting...
- Page 11 Recoil Starter ....Primer Cutting Height Cutting Height Adjustment Adjustment Lever Lever SideDischarge Cover Figure9 BLADE CONTROL SIDE DISCHARGE COVER Theblade controlis attachedto the upper handleof the mower. Your moweris shippedas a mulcher.Todischargethegrass clippings Depressand squeezeit againstthe upper handleto operatethe unit. to the side instead,followthe instructionsin the Assemblysectionto Releaseit to stop engineand blade.
-
Page 12: Gas And Oil Fill-Up
AND OiL FILL-UP "_ IMPORTANT: T his unit isshippedwithoutgasolineor oil inthe engine. Be certain to serviceenginewithgasolineand oil as instructed inthis sectionbeforestartingor runningyourmachine. Oil (one 15 ounce bottle shipped with unit) FirstTime Use Removeoil fill dipstick (G). See Figure10. Withthe moweron levelground,emptyentirecontentsof oil bottle providedintothe engineoil fill (H). -
Page 13: To Start Engine
TO START ENGINE Pushthe primerthreetimes. See Figure11.Do notprimeto restarta warmengine. NOTE:If you pushthe primertoomany times,excessivefuel willflood the carburetor and the enginewill be difficult to start. Standingbehindthe mower,squeezethe bladecontrolhandle againstupperhandle. Holdingthese two handlestogetherfirmly,grasprecoilstarter handleand pull ropeslowlyuntil resistance is felt, then pull with a rapid,continuous, f ull arm stroke.See Figure11.Keepinga firm grip on the startercord handle,let the rope rewindslowly.Repeat untilenginecranks. -
Page 14: Maintenance
MAINTENANCE SCHEDULE Followthe maintenanceschedulegivenbelow.This chart describes serviceguidelinesonly. Usethe ServiceLog columnto keeptrackof Before performing anytype ofmaintenance/service, disengage all completedmaintenance tasks.To locate the nearest Sears Service controls and stoptheengine. W aituntilall moving partshavecometo Centeror to scheduleservice,simplycontactSears at a completestop.Disconnect sparkplugwireandgroundit against t he 1-800-4-MY-HOME®. -
Page 15: General Recommendations
Alwaysstop engine,disconnectspark plugwire, and groundagainst enginebeforeperforming any type of maintenance on yourmachine. Electrode GENERAL RECOMMENDATIONS • Alwaysobservesafetyruleswhenperformingany maintenance. • Thewarrantyon this lawnmowerdoesnot coveritemsthat have been subjectedto operatorabuseor negligence. T o receivefull valuefromwarranty,operatormustmaintainthe equipment a s instructedhere. • Changingof engine-governed speedwill voidenginewarranty. •... - Page 16 Check Engine Checkoil levelbeforeeachoperation.Be sureoil levelis maintained. Checkthe oil with the enginestoppedand level. Removethe oil fill dipstickand wipeit clean. Insertand tightendipstick.Removeitto checkthe oil level. If the oil levelisnear or belowthe lowerlimit mark on the dipstick, removethe oil fillercap/dipstick,and fill with the recommended oil Air Filter to the upperlimit mark.Do not overfill.
-
Page 17: Blade Care
CLEANING DECK Cleanundersideof the mowerdeck once a seasonto preventbuild-up of grass clippingsor otherdebris. Followstepsbelowfor thisjob. Runengine untilit stopsfrom lack of fuel. Disconnectsparkplug wire. Tip mowersothat it restson the housing,keepingthe mufflerside down. Referbackto Figure14.Hold mowerfirmly. Nevertip the mowermorethan 900in any directionand do not leave the mowertippedfor any lengthof time. -
Page 18: Preparing The Lawn Mower
Neverstorelawnmowerwith fuel in tank indoorsor in poorly ventilatedareaswherefuel fumesmay reachan openflame,spark, or pilot lightas on a furnace,water heater,clothesdryer,or gas appliance. PREPARING THE ENGINE PREPARING THE LAWN MOWER Forenginesstoredover30 days: • Cleanand lubricatemowerthoroughly as describedin the lubrica- tion instructions. Topreventgum from formingin fuel systemor on carburetor parts,run engine untilit stopsfrom lack of fuel or add a gasoline •... - Page 19 Beforeperforming anytype d maintenance/service, disengage all controlsandstoptheengine. W aituntilall movingpartshavecometo a complete stop.Disconnect sparkplugwireand ground it against t he engineto prevent u nintended starting. A lwayswearsafetyglassesduring operation or whileperforming anyadjustments or repairs. Enginefails to start Bladecontroldisengaged. Engageblade control. Sparkplug bootdisconnected. Connectwireto spark boot.
- Page 20 Craftsman Mower B Model No. 247.37000...
- Page 21 Craftsman Mower B Model No. 247.37000 747-05184A Blade Control 749-04680-0637 UpperHandle 710-0895 Screw,1/4-15x .750 749-04608A-0637 LowerHandle 720-0279 WingNut 710-1205 RopeGuide 710-04998 CarriageScrew ,5/16-18 710-04995A Screw,5/16-14x .750 720-04072A HandKnob 731-07486 Side Chute 725-0157 CableTie 712-04222 Nut, Sq., 1/4-20 911-04143B FrontAxle Assembly...
- Page 22 Craftsman Engine Model No. 09P702=0008=F1 For Craftsman Mower Model No. 247.37000 i 48SHORTB'OOK i 10_80 PERATO_BMANU_' [ 1329_EP'_OEMENTE _G_E ] I 1330_ E_OA' 1264 1263_ 615 _ 404 '_ 22A _...
- Page 23 Craftsman Engine Model No. 09P702-0008-F1 For Craftsman Mower Model No. 247.37000 1036 EMISSIONSLABEL 332 @ 745A 4_ 75 (_...
- Page 24 Craftsman Engine Model No. 09P702=0008=F1 For Craftsman Mower Model No. 247.37000...
- Page 25 Craftsman Engine Model No. 09P702=0008=F1 For Craftsman Mower Model No. 247.37000 _30400 ® 104_ © 1127_ 1395_:_...
- Page 26 Craftsman Engine Model No. 09P702=0008=F1 For Craftsman Mower Model No. 247.37000 1029A % 1023 358 ENGINE GASKET SET 121 CARBURETOR OVERHAUL ® 842 _ 524 _ ] 63 868_...
- Page 27 Craftsman Engine Model No. 09P702=0008=F1 For Craftsman Mower Model No. 247.37000 590524 Camshaft 590519 CylinderAssembly 299819s Kit-Bushing/Seal ( MagnetoSide) ShortBlock (NotAvailableAt This Printing) 591108 Rope-Starter 590569 Sump-Engine 590525 Head-Cylinder 691915 Grip-StarterRope 799586 Gasket-Cylinder H ead 799716 Grip-StarterRope 590522 Tube-Breather 590546...
- Page 28 Craftsman Engine Model No. 09P702=0008=F1 For Craftsman Mower Model No. 247.37000 590534 Seal-Valve 692390 Wire-Stop 590584 Base-AirCleaner 590590 GasketSet-Engine 690272 Washer(GovernorCrank) 591103 Screw(RockerCover) 590545 Cup-Flywheel 692135 Spring-Brake 691487 Brake 590551 Bracket-Mounting (Carburetor) 590585 Guard-Rewind 793515 Nut (GovernorControlLever) 796503 Dipstick 591003...
- Page 29 Craftsman Mower Labels B Model No. 247.37000 777S33353 DISCHARGE COVER, ETC.) IN PLACE AND WORKING. iF DAMAGED REPLACEIMMEDIATE_. 777S33602 777123312...
- Page 30 (Thispage applicablein the U.S.A.and Canadaonly.) Sears Brands Management Corporation (Sears), the California Air Resources Board (CARD) and the United States Environmental Protection Agency (U.S. EPA) Emission Control System Warranty Statement (Owner's Defect Warranty Rights and Obligations) EMISSIONCONTROL WARRANTY COVERAGEISAPPLICABLE TO CERTI- YEAR 1997AND LATERENGINES WHICHARE PURCHASED AND USED FIEDENGINESPURCHASEDIN CALIFORNIAIN 1995ANDTHEREAF- ELSEWHERE IN THE UNITEDSTATES (ANDAFTERJANUARY1,2001 IN...
- Page 31 Look For Relevant Emissions Durability Period and Air index information On Your Engine Emissions Label Engines that are certified to meet the California Air Resources Board (CARB) Tier 2 Emission Standards must display information regarding the Emissions Durability Period and the Air Index. Sears Brands Management Corporation makes this information available to the consumer on our emission...
- Page 32 Congratulations on making a smart purchase. Your new Craftsman® product is designed manufactured for years of dependable operation. But like all products, it may require repair from time to time. That's when having a Repair Protection Agreement can save you money and aggravation.
- Page 33 Los productosdefectuososser_.n reparadossin costoo reemplazados sin costosi la reparaci6nno est,. disponiNe. Paraobtener informaci6n sobre el alcance de la garantiay solicitar la reparaci6no el reemplazo, v isiteel sitio Web: www.craftsman.com. Esta garantiacubre 0NICAMENTElos defectos en los materiales y en la mano de obra. Esta garantiaNOcubre: •...
- Page 34 Esta rn_.quina rueconstruidapara seroperadade acuerdocon La presenciade este sirnboloindicaque setrata de instrucciones las reglasde seguridadcontenidasen este manual.AI igualque irnportantes de seguridadque se deben respetarpara evitar concualquiertipo de equipo rnotorizado, u n descuidoo error por poneren peligrosu seguridadpersonaly/o materialy la de otras partedel operadorpuedeproducirlesionesgraves.Estarn_.quina personas.Lea y sigatodas lasinstruccionesde este manualantes es capazde arnputarrnanosy piesy de arrojarobjetoscon gran...
- Page 35 • Unacubiertade descargafaltanteo da_adapuede provocarel Nuncaopere la cortadorasin las guardasapropiadas,cubiertade contactocon la cuchillao lesionesporobjetosarrojados. descarga,guardapara recorte,rnanijade control de la cuchilla y otrosdispositivosde seguridady protecci6nen su lugary Muchaslesionesocurrencornoresultadode pasarla cortadora funcionando.Nuncaopere la cortadorasi los dispositivosde sobrelos piesduranteuna caida provocadapor derrapeso seguridadest_.nda_ados.Si no Io hace,esto puedetenet corno tropiezos.No se sostengade la podadorasi se est,.
- Page 36 N QOS • Nuncasaquela tapadel gasni agreguecombustible rnientrasel motorest,. calienteo en rnarcha.Dejeque el motorse enfriepor Puedenocurriraccidentestr_.gicos si el operadorno est,. atentoa la Io rnenosdos rninutosantesde volvera cargarcombustible. presenciade ni_os.Por Iogenerala los ni_osles atraenlas podadoras • Nuncarecargueel tanquede combustible.Lleneel tanqueno y la actividadde podarel c_sped.Noentiendenlos riesgosni los rn_.s de 1 pulgadapor debajode la basedel cuellode Ilenado peligros.Nuncad_ por sentadoque los ni_osperrnanecer_.n en el para dejar espacioparala expansi6ndel combustible.
- Page 37 NO MODIFIQUE EL MOTOR • Despu_sde golpearcon algOn objetoextrafio,detengael motor, desconecteel cablede la bujfay conecteel motora rnasa. Paraevitarlesionesgraveso la rnuerte,no rnodifiqueel motorbajo Inspeccionerninuciosarnente l a rn_.quina paradeterrninarsi est,. ningunacircunstancia. S i carnbiala configuraci6n del reguladordel da_ada.Repareel da_o antesde encenderlay operarla. motorel motor puededescontrolarse y operara velocidadesinsegu- •...
- Page 38 SilVIBOLOS DE SEGURIDAD Esta p&ginarepresenta y describela seguridadlos simbolosque puedenpareceren este producto.Lea,comprenda,y sigatodas instrucciones en la m_quinaantesprocurarpara reuniry operar. LEA EL MANUAL(S) DEL OPERADOR Lea, comprenda, y siga todas instrucciones en el manual (manuales) antes procurar para reunir y operar. PELIGRO-- GIRANDO HOJAS Para reducir el riesgo de herida, guarde manos y pies lejos.
- Page 39 15 ° Pendiente 15 ° Pendiente (ACEPTAR) (DElVlASlADO ESCARPADO) FiguraI Figura2 15°/fn US0 DE ESTEPENDIENTEDE CALIBREPARADETERMINAR SI UNA PENDIENTE ES DEMASIADOESCARPADO PARA UNA OPERACIONSEGURA! Para comprobar la pendiente, haga Io siguiente: Borrar esta p@ina y doble a Io largo de la linea discontinua. Localizar un objeto vertical sobre o detr_.sde la pendiente (un poste, un edificio, una valla, un _.rbol,etc.) Alinee cada lado de pendiente de calibre con el objeto vertical (consultar Figura 1 and Figura 2 ).
- Page 40 IMPORTANTE: Esta unidad se envfa sin gasolina ni aceite en el motor. Antes de comenzar o correr ia ma.quinacargue el motor con gasolina y aceite como se indica en la secci6n de operaci6n de este manual. NOTA: Las referencias a los lados derecho e izquierdo de ia cortadora de cesped se hacen observando la ma.quinadesde la posici6n de operaci6n.
- Page 41 Siga los siguientes pasos para completar conjuntodel mango: Tire hacia arriba en el asa hasta agujeros en la manija (que se muestra en la figura 3 corte de la cubierta) se alinean con los agujeros en el mango soporte. Vea la figura 4. NOTA: AI tirar hacia arriba la palanca, asegOrese de que no tire de manejar todo el camino.
- Page 42 Cone×i6n de Canal de Descarga Lateral Clavija para Su podadora ha side enviada come abonadora. Si hace ia conversi6n a abono lateral descarga lateral, asegurese de que el colector de cesped este fuera de la unidad y que ia puerta de descarga trasera este cerrada. En el costado de la podadora, levante el adaptador para abono.
- Page 43 Control de Arrancador de retroceso Cebador Tap6n de aceite/varUla de medici6n del nivel de aceite Palanca de Palancade ajuste de altura ajustede altura de corte de torte Canalde DescargaLateral Clavija para_ abono Figura9 CONTROL DE CUCHILLA CLAVIJA PARA ABONO El controlde la cuchillaest,. unidoa la rnanijasuperior.Presionela El adaptadorparaabono seutiliza Qnicarnente para prop6sitosde rnanijade controlde la cuchillacontra la rnanijasuperiorpara operarla abono.En vez de recolectarlos recortesdel c_speden un colector...
- Page 44 LLENADO DE GASOLINA Y ACEITE Aceite (se envia una botella junto con la unidad) Primer uso Saque la varilla del nivel de aceite (G). Con la cortadora de cesped ubicada en suelo nivelado, vierta el aceite bntamente pot dentro del tubo de Ilenadode aceite del motor (H) hasta la marca de limite alto en la varilla medidora del nivel de aceite (J).
- Page 45 PARA ENCENDER EL MOTOR Empuje el cebador tres veces. Yeaia Figura 11.No cebe el motor caiiente para reiniciarlo luego de una detenci6n breve. NOTA: Si se pulsa el primer dernasiadas veces, excesivo de combus- tible se inundate, el carburador y el motor va a ser dificil para ernpezar. Col6quese detras de la podadora, apriete la manija de control de la cuchilla y sostengala contra la manija superior.
- Page 46 PROGRAMA DE iVlANTENllVllENTO Siga el cronograma de mantenimientoque se presenta a continuaci6n. Esta tabla s61odescribe pautas de servicio. Utiiice ia columna Registro Antesde realizarcuaiquiertipo de mantenimiento o servicio,desenganche de Servicio para hacer ei seguimiento de las tareas de mantenimiento todos loscontrolesy detengael motor.Esperea que sedetengancomple- completadas.
- Page 47 Detenga siempreel motor,desconecte el cablede la bujiay hagamasa contrael motorantesde reaiizar c uaiquiertareade mantenimiento a su mfiquina. Electrodo RECONIENDACIONES GENERALES • Respete siemprelasreglasde seguridad cuandorealicetareasde mantenimiento. • La garanfiadeestacortadoranocubreelementos quehan estadosujetosal malusoo la negligencia deloperador. P ara recibirel reembolso totalde la garantia, e i operador deberfidar mantenimiento ai equipo tai y comoseindicaen estemanual.
- Page 48 Comprobar el aceite del motor Comprobar el nivel de aceite antes de cada operaci6n. Aseg_resede que el nivei de aceite se mantiene. Revise el aceite con ei motor parade y nivelado. Quite ia tapa del dep6sito de aceite/varilla medidora del nivel de aceite y limpiela.
- Page 49 LUBRICACION Control de la cuchilla Lubrique con aceite ligero los puntos de pivote del control de la cuchilla al menos una vez cada estaci6n. Este controle debe funcionar libremente en ambas direcciones. Vea la Figura 15. LIMPIEZA DE LA PLATAFORMA Debe limpiar la parte inferior de la plataforma de la cortadora de cesped una vez una temporada para prevenir la acumulaci6n de recortes de cesped u otros desechos.
- Page 50 CUIDADO DE LA CUCHILLA _" Cuando saque la cuchilla de corte para afilarla o reemplazarla, protejase las manos usando un par de guantes para trabajo rudo o un trapo gruesc para sostener la cuchilla. Inspeccione peri6dicamente el adaptador de la cuchiiia en busca de rajaduras, especialmente cuando golpee un objeto extra_o.
- Page 51 Nunca almacene la cortadora de cesped con combustible en el tanque en un espacio cerrado o en a.reascon poca ventilaci6n, donde los gases dei combustible puedan alcanzar el fuego, chispas o una luz piloto como ia que tienen algunos homos, calentadores de agua, secadores de ropa o aigQnotto dispositivo a gas.
- Page 52 hayanvenidoa una paradacompleta.Desconecte el alambrede bujfay b_.selo contrael motorpara prevenirel comienzoinvolun- SiempreIlevepuestoscristabs inastillables durantela operaci6no realizandocualquierajusteo reparaciones. El motor no arranca Control de ia cuchilla desenganchado. Engrane el control de la cuchiila. Se ha desconectado el capuch6n de la bujia. Conecte el cable al capuch6n de la bujia.
- Page 53 (Esta p_.ginase aplica s61oen EE.UU. y Canada.). Sears Brands Management Corporation, el Consejo de Recursos Ambientales de California (CARB) y la Agencia de Protecci6n Ambiental de los Estados Unidos (EPA) Declaraci6n de garantia del sistema de control de emisiones (derechos y obligaciones de la garanfia de defectos del propi= etario)
- Page 54 Busque el periodo de duraci6n de emisiones importantes yla informaci6n de clasificaci6n de aire en la etiqueta de emisiones de su motor Los motores cuyo cumpiimiento con los estAndares de emisi6n Tier 2 de la Comisi6n de Recursos Ambientales de California (CARB) est6 certificado deben exhibir la informaci6n relacionada con el periodo de duraci6n de ias emisiones y la clasificaci6n de aire.
- Page 55 Felicitaciones por haber realizado una adquisici6n inteligente. El producto Craftsman® que ha adquirido esta diseSado y fabricado para brindar muchos aSos de funcionamiento confiable. Pero como todos los productos a veces puede requerir de reparaciones. Es en ese momento cuando...
- Page 56 Your Home For troubleshooting, product manuals and expert advice: managernylife www.managemylife.com For repair - in your home - of all major brand appliances, lawn and garden equipment, or heating and cooling systems, no matter who made it, no matter who sold it! For the replacement parts, accessories owner's manuals that you need to do-it-yourself.