Miele PFD 401 Marine Operating Instructions Manual
Commercial dishwasher
Hide thumbs
Also See for PFD 401 Marine:
- Operating instructions manual (168 pages) ,
- Operating instructions manual (100 pages) ,
- Operating instructions manual (128 pages)
Table of Contents

Related Manuals for Miele PFD 401 Marine


Summary of Contents for Miele PFD 401 Marine
- Page 1 Operating instructions Commercial dishwasher PFD 401 Marine To avoid the risk of accidents or damage en-GB to the appliance, it is essential to read these instructions before it is installed and used for the first time. M.-Nr. 12 265 340...
-
Page 2: Table Of Contents
Contents Notes about these instructions..................Symbols used on the commercial dishwasher..............Definition of terms ......................Correct use ........................Guide to the appliance ....................Machine overview......................Control panel ........................10 LEDs in buttons ......................... 11 Warning and Safety instructions..................12 Warning signs and symbols attached to the dishwasher..........15 Disposal of your dishwasher .................... - Page 3 Contents Loading the dishwasher....................30 Loading the dishwasher ....................30 We recommend ......................... 31 Upper basket........................32 Adjusting the upper basket ....................33 Lower basket ........................34 Loading plastic trays ......................35 Cleaning agent and rinsing agent .................. 36 Dispensing systems ......................36 Dispensing module......................
- Page 4 Contents Further settings ......................57 Menu structure ........................57 Filter programme lock ....................... 59 Standby/Off ........................59 Log book ........................... 60 Release programme ......................61 Set favourites ........................61 Start screen layout ......................61 Setting favourites ......................62 Programme parameters..................... 62 Selecting a programme ....................
- Page 5 Contents Problem solving guide ....................79 Technical problems ......................79 Faults with water inlet or drainage..................80 Cancel with fault number ....................81 Door........................... 83 General problems with the dishwasher ................84 Noises..........................86 Unsatisfactory washing result ................... 87 Maintenance ........................89 Cleaning the water inlet filter .....................
-
Page 6: Notes About These Instructions
Notes about these instructions Warnings Warnings contain information which is important for safety. They alert you to the potential danger of injury to people or damage to property. Read these warning notes carefully and observe the procedural instructions and codes of practice they describe. Notes Notes provide information of particular importance that must be observed. -
Page 7: Symbols Used On The Commercial Dishwasher
Notes about these instructions Symbols used on the commercial dishwasher Symbol For warnings, see “Warnings and safety notes” VDE symbol EMC symbol of the VDE Do not dispose of electrical machines in household waste; they need to be disposed of separately, see “Disposal of your old machine”... -
Page 8: Correct Use
Correct use This Miele commercial dishwasher with its short programme running times and powerful cleaning performance is intended for commercial use. The commercial dishwasher can also be used on ships with a hull of longer than 24 metres, as well as on oil rigs. -
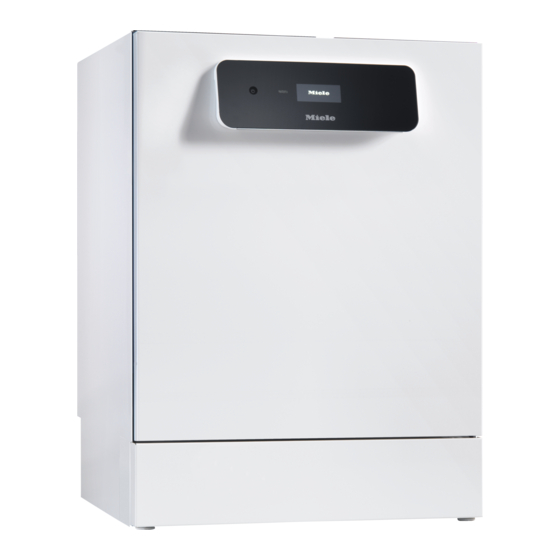
Page 9: Guide To The Appliance
Guide to the appliance Machine overview Door lock Rinsing agent container Upper basket runners Door lock latch Top machine spray arm Salt container Upper basket water connection Container for powder cleaning agents Lower machine spray arm Filter combination Lower basket runners Rear: –... -
Page 10: Control Panel
For starting or cancelling a programme button (door release) Service interface Testing and transmission point for the Open the door Miele Customer Service Department button (cancel or back) button (language selection) For cancelling a process in the user For selecting the display language... -
Page 11: Leds In Buttons
Guide to the appliance LEDs in buttons Light-emitting diodes are incorporated in the buttons. They indicate the status of the dishwasher. Button Display Status Display The dishwasher is switched on. (Reaction to The dishwasher is switched off. On/ Off button) Pulsing The dishwasher is in standby mode. -
Page 12: Warning And Safety Instructions
Faulty components must only be replaced by genuine Miele original spare parts. Only when these parts are fitted can Miele guarantee the correct functioning and safety of the appliance. The electrical safety of this dishwasher can only be guaranteed when correctly earthed. - Page 13 The dishwasher must not be used if the electrical connection cable is damaged. A damaged connection cable may only be replaced by a suitable connection cable of the same type. For safety reasons, such replacement may only be carried out by the Miele Customer Service Department or a qualified service technician.
- Page 14 The grille of dishwashers with active drying must not be blocked or sealed. Accessories Only use genuine Miele original spare parts and accessories with this dishwasher. Using spare parts or accessories from other manufacturers will invalidate the guarantee and Miele cannot accept liability.
-
Page 15: Warning Signs And Symbols Attached To The Dishwasher
Warning and Safety instructions Warning signs and symbols attached to the dishwasher Warning: Observe the operating instructions! Warning: Danger of electric shock! Warning: Hot surfaces: It can be very hot inside the wash cabinet when the door is opened! Risk of being cut: Wear cut-resistant protective gloves when transporting and setting up the machine! Disposal of your dishwasher... -
Page 16: Caring For The Environment
Use material- with household waste. specific collection points for valuable materials and take advantage of return options. Your Miele dealer will take the packaging material away. Instead, please make use of officially designated collection and disposal points to... -
Page 17: User Profiles
User profiles User groups Users can be divided into two groups: - Daily operators Daily operators must be instructed on operating and loading the dishwasher and trained regularly to guarantee safe daily use. - Experienced operators Experienced operators can additionally block access to programmes and modify programme parameters. -
Page 18: User Tips
User tips Operation Switching on Operation is carried out via the touch The dishwasher needs to be connected to display as well as via the buttons on the the electricity supply. control panel. Press and hold the button until the ... -
Page 19: Switching Off
User tips Switching off Display screens Press the button. čeština The dishwasher remains in standby mode ﺔﻴﺑﺮﻌﻟﺍ for about one minute before it switches off completely. Language dansk deutsch Standby/Off If the dishwasher has not been used for All display screens shown in these operating 10 minutes, it can be set to standby or instructions are examples, which can be... -
Page 20: Status Window
User tips The displays for the system settings and for System messages system and fault messages are divided into 3 columns. Refill salt -appliance will Water be disabled shortly. Information Log book Liquid cleaning agent The symbol denotes system messages. These give information about current processes and the status of the machine. -
Page 21: Commissioning
Commissioning Installation and connection WiFi setup In the next step, you can connect your Before commissioning, the dishwasher must dishwasher to the WiFi network. be securely installed, and the water inlet and drain hoses and the mains cable correctly connected. Follow the instructions Set up WiFi? in “Installation”, “Water connection”... -
Page 22: Setting The Date
Commissioning Setting the date Setting the water hardness Your local water authority can give you information about the exact water hardness in your area. 2022 Set date With varying water hardness, always set the highest level. If the water hardness fluctuates between, for instance, 1.4 and 3.1 mmol/l (8 and 17 °dH), the water Use the and arrow buttons to set the... -
Page 23: Selecting Water Connections
Confirm the message with Following commissioning, the water connections can be reinstated by the Miele Customer Service Department. Short Intensive 55 °C 65 °C Select one of the available water ... -
Page 24: Opening And Closing The Door
Opening and closing the door Comfort door lock Closing the door Make sure that no objects or load items The door of the wash cabinet is equipped protrude into the closing area of the door. with a Comfort door locking mechanism. When the door is closed, the Comfort door ... -
Page 25: Opening The Door Using The Emergency Release
Opening and closing the door Opening the door using the emergency If the machine is switched on, the following release message is shown on the display when the emergency release is triggered: The emergency release may only be used when it is no longer possible to open the door normally, e.g. -
Page 26: Filling The Container For Dishwasher Salt
Filling the container for dishwasher salt Water hardness Setting the water hardness In order to achieve excellent cleaning Water hardness can be set between 0 and results, the machine requires a supply of 12,5 mmol/l (0–70 °dH). soft water with a low calcium content. Hard The water hardness is preset to 2.5 mmol/l mains water results in the build-up of (14 °dH) ex-works. - Page 27 Filling the container for dishwasher salt Settings table °dH °f mmol/l Display °dH °f mmol/l Display 0 0 0 0 65 6.5 1 2 1 67 6.7 2 4 2 68 6.8 3 5 3 70 7.0 4 7 4 72 7.2 5...
-
Page 28: Salt Refill Indicator
Filling the container for dishwasher salt Salt refill indicator Machine blocked if salt is not available If the level in the salt container is low and a reactivation is carried out, the following If the salt in the water softener has been message appears on the display: used up, a fault appears on the display and the machine blocked from performing... - Page 29 Filling the container for dishwasher salt Filling the salt container Filling the salt reservoir Use only special, coarse-grained salt with a granula size of approx. 1- 4 mm. Do not under any circumstances use other types of salt such as table salt, agricultural or gritting salt.
-
Page 30: Loading The Dishwasher
Loading the dishwasher The spray arms must not be blocked by Loading the dishwasher items which are too tall or hang through Remove coarse food residues from the baskets. If in doubt, test for free crockery. movement by manually rotating the spray There is no need to pre-wash items under arms. -
Page 31: We Recommend
Loading the dishwasher We recommend - When purchasing new crockery and cutlery, make sure they are dishwasher- safe if you want to wash them in the dishwasher. - Clouding may occur on glasses after frequent washing in the dishwasher. When washing delicate glasses in the dishwasher, ensure that only a special glass-care programme with very low... -
Page 32: Upper Basket
Loading the dishwasher Cup rack Upper basket Use the upper basket for small, lightweight and delicate items such as cups, saucers, glasses, dessert bowls etc. Light, heat- resistant plastic items can also be loaded in the upper basket. Smaller shallow pots and pans can also be washed in the upper basket. -
Page 33: Adjusting The Upper Basket
Loading the dishwasher Adjusting the upper basket In order to obtain more space for taller items in the lower or upper basket, the upper basket can be adjusted between two positions that are approx. 5 cm apart. Pull out the upper basket. ... -
Page 34: Lower Basket
Loading the dishwasher Lower basket Place larger and heavier load items such as plates, serving platters, pots, bowls, etc. in the lower basket. Only place thin, delicate glasses in a suitable insert or lower basket. Always arrange plates with the top side facing inwards, as shown in the pictures, to achieve the best cleaning result. -
Page 35: Loading Plastic Trays
For further information on baskets, please contact your Miele dealer or the Miele Customer Service Department. Examples: (lower baskets) Push all four extenders into the base ... -
Page 36: Cleaning Agent And Rinsing Agent
Specific types of soiling may require chemicals and take all the protective different combinations of cleaning agents measures stipulated by the process and additives. The Miele Customer Service chemical manufacturers. Department will be able to advise you. Depending on the model, dishwashers are... -
Page 37: Cleaning Agent
Depending on the model, liquid cleaning agent is dispensed either via an internal dispensing pump or via an external dispensing module. Dispensing modules are connected by the Miele Customer Service Department and can be retrofitted at any time. Replacing the canister Place the liquid cleaning agent container ... -
Page 38: Refill Indicator
The level markers in the powder container The dispensing concentration is set by the with the door in the horizontal position Miele Customer Service Department. indicate the fill level in millilitres (ml). The max. capacity is approx. 60 ml of cleaning agent. -
Page 39: Tips For The Super Short Programme (Depending On The Model)
Cleaning agent and rinsing agent Tips for the Super Short programme Dispensing example: (depending on the model) Approx. 8,5 litres of water are taken into the machine for the main wash. With a With the Super Short programme, the final cleaning agent concentration of approx. rinse water is not pumped away at the end 3 g/l, you will need approx. -
Page 40: Rinsing Agent
Cleaning agent and rinsing agent Replacing the canister Rinsing agent Place the rinsing agent container (note the Rinsing agent is necessary to ensure water colour marking) on the open wash cabinet does not cling and leave marks on load door or on a surface which is robust and items, and to help load items dry faster after easy to clean. -
Page 41: Refill Indicator
Cleaning agent and rinsing agent Refill indicator When the fill level in the rinsing agent container is low, you are reminded to change the canister, e.g.: Change rinse aid canister. Empty status Information detected. Only add rinsing agent as far as the ... -
Page 42: Refill Indicator
- If clouding or smearing appears on load items, the dispensing concentration is set too high. In either case contact the Miele Customer Service Department and have the dispensing concentration reset. -
Page 43: Operation
Operation Switching on Selecting a programme Open the stopcock if it is closed. Choose your programme according to the type of load items and the degree of soiling. The dishwasher needs to be connected to As soon as you have selected a programme, the electricity supply. -
Page 44: Starting A Programme
Operation Programme list Starting a programme Programmes which cannot be selected Press the Start/Stop button (the LED of directly on the display can be selected from the Start/Stop button will light up). the programme list. Starting the programme using a timer Press the ... -
Page 45: Programme Sequence Display
Operation Deleting the timer Current time 09:32 Press the Start/Stop button. Start at 12:30 Finish at --:-- Start programme Delete timer immediately A summary follows, which you must confirm by pressing You can either delete the timer setting Universal Delete timer ) or delete the timer and start Start... -
Page 46: End Of A Programme
Operation End of a programme Interrupting a programme After a programme has ended normally, the A programme which is already running LED of the Start/Stop button will go out and should only be interrupted if strictly the following will appear on the display. necessary, e.g. -
Page 47: Cancelling A Programme
Operation If the temperature inside the wash cabinet is Risk of scalding and burning due to more than 50 °C at this point, the pressure hot load items. is equalised first. Then the programme The load items and the wash cabinet may continues. -
Page 48: Machine Functions
Machine functions The Machine functions menu includes Dispensing paths relevant functions to support daily routine The dispensing systems for liquid media tasks. can only dispense reliably if the dispensing The factory settings are indicated by a system has been purged of air and contains tick . -
Page 49: Rinsing Dispensing Paths
Machine functions Rinsing dispensing paths Cleaning ag. A dispensing system must be rinsed in the canister following situations: Fill disp. paths - If a dispensing system was accidentally Rinse aid filled with the wrong medium. canister - If deposits have formed in the dispensing Clean. - Page 50 Machine functions The menu is saved under the following input path. Further choices Machine functions Dispensing systems Rinse dispensing paths *) Only activated dispensing systems are displayed Cleaning ag. canister Rinse disp. Rinse aid paths canister Clean.
-
Page 51: Settings
Settings Basic parameters for machine control are Temperature unit stored in the Settings menu. °C The factory settings are indicated by a tick . A description of how to configure °F settings is provided after the overview. Menu structure ... -
Page 52: Time Of Day
Settings Set the time of day Time of day To set the format for the time of day: The time of day is required for the display and the delay start, for example. The date The menu is saved under the following input format and the current time of day have to path. -
Page 53: Date
Settings Set the date Date The menu is saved under the following input The date format and the current date have path. to be set. Further choices Select the date format The menu is saved under the following input ... -
Page 54: Display Brightness
Settings Display brightness Volume You can also set the brightness of the An acoustic signal transmitter is integrated display. in the control panel, which can provide acoustic feedback in the following The menu is saved under the following input situations: path. -
Page 55: Button Reaction
Settings Button reaction Welcome tone The button fields on the display can be There is a brief melody when the machine is configured to have a delayed reaction and switched on and off. You can use this option to only react when the button field is to switch this melody off and back on again. -
Page 56: Temperature Unit
Settings Temperature unit The temperature can be shown on the display in °C (degrees Celsius) or °F (degrees Fahrenheit). The menu is saved under the following input path. Further choices Settings Temperature unit °C °F Temp. unit °C Temperature display in Celsius. -
Page 57: Further Settings
Further settings The Further settings menu incorporates Release programmes all administrative processes and settings. All programmes Access to the Further settings menu is protected by a PIN code. Selection You must enter the correct PIN code to ... - Page 58 Further settings Rinse aid canister Dealer Dispens. concentration Demo mode Deactivate Cycles until empty Water hardness Software version 3,4 mmol/l 14° dh ) 1-SBAE ID XXXX Cycles bef. reactivation ...
-
Page 59: Filter Programme Lock
Further settings Filter programme lock Standby/Off The filter combination in the wash cabinet If the dishwasher has not been used for filters coarse dirt particles out of the wash 10 minutes, it can be set to standby or water. If dirt particles enter the circulation switched off automatically. -
Page 60: Log Book
The entire life cycle of the machine is recorded. Press the button to exit the menu. The Miele Customer Service Department can also use the log book to calculate a recommendation for service intervals. The menu is saved under the following input path. -
Page 61: Release Programme
Further settings programmes can be selected. You can Release programme choose from all the programmes available There is an option to block individual under Approved programmes . At least programmes. Blocked programmes are no 1 programme must be selected. Other longer available in the programme selection favourites can be added or removed. -
Page 62: Setting Favourites
Extended settings machine and its processes is required to modify programme parameters and this Set favourites should therefore be undertaken only by experienced users or by the Miele Customer Service Department. Short Intensive 55 °C 65 °C Start by selecting the programme you ... -
Page 63: Main Wash Temperature
Further settings Main wash temperature Final rinse temperature The main wash temperature is reached by The final rinse temperature is reached by heating up the wash water. The temperature heating up the wash water. The temperature needs to be adjusted to the task. needs to be adjusted to the task. -
Page 64: Increased Water Level
Further settings Increased water level Interim rinse It is then advisable to increase the water If required, an additional intermediate wash level when a lot of water is absorbed due to block can be activated for selected the structure of the load items or when the programmes. -
Page 65: Dispensing Systems
Further settings Door dispenser Dispensing systems The following menu allows you to activate, Cleaning agent door fill and rinse dispensing systems, to change their names if required and to set the This selection is only available if the dispensing concentration for all corresponding dispensing system is programmes. -
Page 66: Activating Dispensing From The Canister
Further settings Activating dispensing from the canister Rinse aid door Dispensing from the door dispensers is This selection is only available if the preset ex-works. corresponding dispensing system is For DOS dishwashers, integrated liquid present (depending on the model). dispensing is preset. -
Page 67: Deactivating Dispensing From The Canister
Further settings Deactivating dispensing from the Dispensing concentration canister The dispensing concentration for liquid You can subsequently switch dispensing process chemicals is set in the same way from the canisters to the door dispensers or for all dispensing systems. The setting deactivate it completely. -
Page 68: Cycles Until Empty
Further settings Cycles until empty Water hardness This function is only available on machines The water hardness setting is described in with fill level detection. “Filling the salt container”. When dispensing liquid process chemicals Reactivation notification from external canisters, the fill level in the canister is monitored. -
Page 69: Memory
The factory-assigned PIN code is 800. therefore not displayed, but it is still available. If a PIN code is lost, a new code must be issued by the Miele Customer Service The menu is saved under the following input Department. path. -
Page 70: Blocking Further Settings Or Making Them Available
A new code can also be assigned. possible to reinstate the old code. If a PIN code is lost, a new code must be The menu is saved under the following input issued by the Miele Customer Service path. Department. ... -
Page 71: Networking/Wifi
WiFi module. You can connect your dishwasher to your Which connection method do you local network in order to use digital want to use? solutions from Miele. An overview of these digital solutions is Soft AP available on the webpage: https://www.miele.co.uk/p/... -
Page 72: Soft Ap
Further settings Soft AP If Connection via WPS is not possible, you Deactivate can connect the dishwasher to your local network Via Soft AP. Network/WiFi Connection status A Soft-AP (Software-enabled Access Point) is a wireless access point provided by your dishwasher that can be used by other Deactivate wireless machines in the vicinity. -
Page 73: Remoteupdate
Further settings RemoteUpdate Showroom programme This menu option only appears if the For demonstration purposes only. dishwasher has been integrated into the The dishwasher is equipped with a demo WiFi network. mode for showroom use. When a new version of the dishwasher The menu is saved under the following input control system is available, you can decide path. -
Page 74: Factory Defaults
Further settings Factory defaults Selecting resets the programme settings or all settings, depending on the If necessary, the modified programme option chosen. parameters or all dishwasher parameters can be reset to the factory default settings. If you do not want to reset, select ... -
Page 75: Cleaning And Care
Miele Remove any soiling from the control panel Customer Service Department. and from the machine front straight away This maintenance will cover the following: where possible. -
Page 76: Cleaning The Machine Front
To help prevent re-soiling (fingerprints, etc.), removed with a proprietary dishwasher a suitable stainless steel care product can cleaner (available from Miele). be used after cleaning. Cleaning the door and the door Damage to the surfaces. -
Page 77: Cleaning Filters In The Wash Cabinet
Cleaning and care Cleaning filters in the wash cabinet Cleaning the flat and micro-fine filters Remove the coarse filter as described The filter combination in the base of the before. wash cabinet retains coarse soiling from the suds solution. It prevents soiling from entering the circulation system and causing blockages in the spray arms. - Page 78 Cleaning and care Cleaning the spray arms The dishwasher has three different spray arms. Particles of food can get stuck in the spray arm nozzles and bearings. The spray arms should therefore be checked and cleaned regularly. Switch the dishwasher off. ...
-
Page 79: Problem Solving Guide
With the aid of the following guide, most minor problems that can occur during daily operation can be corrected without contacting Miele. You can save time and money in many cases, as you do not need to call the Miele Customer Service Department. -
Page 80: Faults With Water Inlet Or Drainage
Problem solving guide Faults with water inlet or drainage Problem Cause and remedy One of the following fault Before rectifying the problem: messages or notifications Switch the dishwasher off with the button. appears on the display: F404 Water inlet, cold too Water inlet fault. -
Page 81: Cancel With Fault Number
The flow pressure at the water connection is too low (see “Technical data”). Contact the Miele Customer Service Department for advice. Fault F 413–414 Water inlet fault. If the flow pressure is too high, one of these fault numbers will appear on the display and the programme will be cancelled. - Page 82 Cause and remedy Fault F 550 The waterproof system has reacted. Close the stopcock. Call the Miele Customer Service Department. Fault F 578 The peak-load negotiation has lasted longer than 2 hours. Have your electrical system and your energy ...
-
Page 83: Door
Close the door and try to open it again using the button. If it is still blocked: Contact the Miele Customer Service Department. Anti-trap guard: To continue, This is not a fault! open door. The door is locked while the door locking mechanism retracts to the lock position. -
Page 84: General Problems With The Dishwasher
Problem solving guide General problems with the dishwasher Problem Cause and remedy Programme completed suc- This is not a fault! cessfully has appeared on Open and close the door. the display and you cannot The dishwasher must be switched on for this. select or start a pro- gramme. - Page 85 Problem solving guide Problem Cause and remedy Water remains in the wash Before rectifying the problem: cabinet at the end of a Switch the dishwasher off with the button. programme. The filter combination in the wash cabinet is clogged. (This does not apply to the Clean the filter combination (see “Cleaning and care”).
-
Page 86: Noises
Problem solving guide Noises Problem Cause and remedy Knocking noise in the A spray arm is knocking against an item in a basket. wash cabinet. Interrupt the programme, and rearrange the items which are obstructing the spray arm. Rattling noise in the wash Items are insecure in the wash cabinet. -
Page 87: Unsatisfactory Washing Result
Problem solving guide Unsatisfactory washing result Problem Cause and remedy The crockery is not clean. The crockery was not loaded correctly. Please observe the instructions in “Loading the dishwasher”. The programme was not suitable for the load. Select a suitable programme (see “Programme chart”). ... - Page 88 Problem solving guide Problem Cause and remedy White residue is visible on The rinsing agent dosage is set too low. crockery and cutlery, Increase the dosage (see “Further settings, Additional clouding occurs on glass- functions, Dispensing system”). ware; film can be wiped There is no salt in the salt reservoir.
-
Page 89: Maintenance
Maintenance Cleaning the water inlet filter A filter is incorporated in the screw thread to protect the water intake valve. If the filter is soiled, insufficient water flows into the wash cabinet. Risk of electric shock from mains voltage. The plastic housing of the water connection contains an electrical valve. -
Page 90: Cleaning The Drain Pump And Non-Return Valve
Maintenance Cleaning the drain pump and non- return valve If the water has not been pumped away at the end of a wash programme (excluding the Super short programme), there may be a foreign object blocking the drain pump or the non-return valve. -
Page 91: Customer Service
- Your Miele dealer - The Miele Customer Service Department Contact details for Miele are provided at the back of these operating instructions. When contacting the Customer Service Department, you will need the model number and 8-digit machine number of the dishwasher. -
Page 92: Programme Chart
Programme chart Programme Application Cleaning agent (if liquid cleaning agent is not dispensed) The following dosages are based on Miele detergents. Please follow the manufacturer's instructions. “Quick programme” for lightly soiled load items with fresh, easily 20–25 g Short removed food residues. - Page 93 Programme chart Programme sequence Pre-wash Pre-wash Main wash Interim Interim Final rinse (1)/(2) rinse rinse (1)/(2) 55 °C 60 °C 1 min 1 min 55 °C 60 °C 2 min 1 min 65 °C 60 °C 3 min 1 min 60 °C 55 °C 2 min 1 min 50 °C – (3) 1 min 1 min 70 °C 60 °C 10 min 1 min 50 °C 50 °C...
-
Page 94: Installation
*INSTALLATION* Installation Installation Built-under installation Damage caused by condensation. Risk of the machine tipping. In order to reduce the risk of damage To ensure stability, a built-under from condensation, the furniture in the dishwasher must only be installed area around the dishwasher should be beneath a continuous worktop that is designed for commercial use. -
Page 95: Adjustable Plinth Panel (Depending On The Model)
*INSTALLATION* Installation Adjustable plinth panel Removing the machine lid (depending on the model) If the dishwasher is fitted with a lid, it can be removed as follows: Dishwashers with internal dispensing or active drying have an adjustable plinth Remove both securing screws on the ... -
Page 96: Levelling And Securing The Dishwasher
*INSTALLATION* Installation Depending on the specific built-under Levelling and securing the installation situation, the stainless steel dishwasher cover plate supplied can be attached to the To guarantee stability, the dishwasher must lower edge of the worktop. The stainless- be secured to the worktop after levelling. steel cover plate protects the lower edge of the worktop against steam damage. -
Page 97: Moving The Dishwasher
*INSTALLATION* Installation Moving the dishwasher Before moving the dishwasher, screw in the adjustable feet fully so that they do not get damaged. Component damage caused by carrying. Do not lift the dishwasher by any protruding components, e.g. the control panel. -
Page 98: Electrical Connection
- Equipotential bonding should be carried following message, e.g.: out if required. - The mains connection cable may only be replaced by an original Miele spare part. Peak-load negotiation: heating mode temporarily - For technical data, see the data plate or Information disabled. -
Page 99: Plumbing
1000 kPa (overpressure). If the water pressure does not lie in the 200– 1000 kPa range, contact the Miele Customer Service Department for advice. - The dishwasher is supplied as standard for connection to cold water (blue coded hose) and hot water up to max. -
Page 100: Connecting The Drain Hose
*INSTALLATION* Plumbing Water Regulations compliance in the UK Connecting the drain hose For the dishwasher to comply with the - The dishwasher drainage system is fitted Water Supply (Water Fittings) Regulations with a non-return valve, which prevents and Bylaws, the supplied double check dirty water from flowing back into the valves must be fitted to the hot and cold dishwasher via the drain hose. -
Page 101: Technical Data
Machinery Directive 2006/42/EC UKCA mark (UK only) The Supply of Machinery (Safety) Regulations 2008 Manufacturer address Miele & Cie. KG, Carl-Miele-Straße 29, 33332 Gütersloh, Germany * If installation site is above 2.000 m, the boiling point of the wash water will be lower. For this reason, the programme... - Page 104 United Kingdom Malaysia Miele Sdn Bhd Miele Co. Ltd., Fairacres, Marcham Road Suite 12-2, Level 12 Abingdon, Oxon, OX14 1TW Menara Sapura Kencana Petroleum Professional Sales, Tel: 0845 365 6608 Solaris Dutamas No. 1, Jalan Dutamas 1 E-mail: professional@miele.co.uk 50480 Kuala Lumpur, Malaysia Internet: www.miele.co.uk/professional...