Bosch HB 78 Series User Manual And Installation Instructions
Hide thumbs
Also See for HB 78 Series:
- User manual and installation instructions (32 pages) ,
- Instruction manual (48 pages) ,
- Instruction manual (48 pages)
Table of Contents
Advertisement
Quick Links
Advertisement
Table of Contents

Related Manuals for Bosch HB 78 Series


Summary of Contents for Bosch HB 78 Series
- Page 1 Oven HB..78..6 User manual and installation instructions [en]...
-
Page 2: Table Of Contents
en Safety Futher information and explanations are available online: Table of contents 1 Safety Observe the following safety instructions. 1.1 General information USER MANUAL ¡ Read this instruction manual carefully. Safety .............. 2 ¡ Keep the instruction manual and the Preventing material damage ....... 5 product information safe for future refer- ence or for the next owner. - Page 3 Safety en Hot steam may escape when you open the 1.4 Safe use appliance door. Steam may not be visible, de- Always place accessories in the cooking com- pending on the temperature. partment the right way round. ▶ Open the appliance door carefully. → "Accessories", Page 8 ▶...
-
Page 4: Safety
en Safety ▶ Never clean accessories at the same time. If the appliance or the power cord is dam- The outside of the appliance gets very hot aged, this is dangerous. when the cleaning function is in progress. ▶ Never operate a damaged appliance. ▶... -
Page 5: Preventing Material Damage
Preventing material damage en 2 Preventing material damage Only leave the cooking compartment to dry with the ▶ 2.1 General door open if a lot of moisture was produced during operation. ATTENTION! Fruit juice dripping from the baking tray leaves stains Objects on the cooking compartment floor at over that cannot be removed. -
Page 6: Familiarising Yourself With Your Appliance
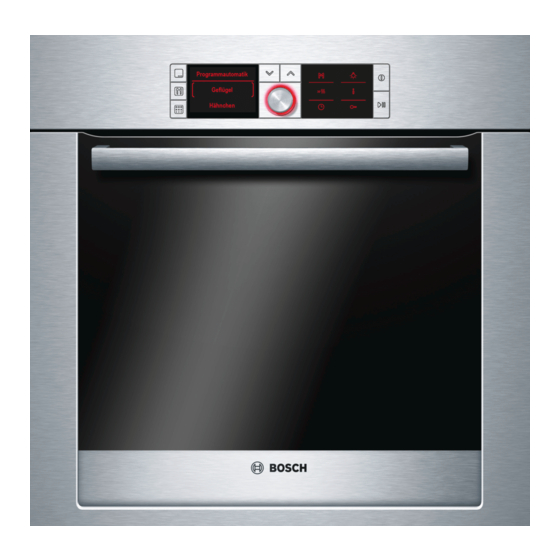
en Familiarising yourself with your appliance 4 Familiarising yourself with your appliance 4.1 Controls Buttons and display The buttons are touch-sensitive surfaces. To se- You can use the control panel to configure all functions lect a function, simply press lightly on the relev- of your appliance and to obtain information about the ant field. - Page 7 Familiarising yourself with your appliance en Symbol Type of heating and What it's used for/how it works temperature range 3D hot air Bake and roast on one or more levels. 30 - 275 °C The fan distributes the heat from the ring-shaped heating element in the back wall evenly around the cooking compartment.
- Page 8 en Accessories You can remove the shelf supports, e. g. for cleaning. Notes ¡ The heat-up indicator will only show the temperature → "Shelf supports", Page 22 increasing for types of heating for which a temperat- ure is set. For grill settings, for example, the heat-up indicator shows a full line from the beginning.
-
Page 9: Accessories
Accessories en Accessories Wire rack ¡ Cake tins ¡ Ovenproof dishes ¡ Cookware ¡ Meat, e.g. roasting joints or steak ¡ Frozen meals Universal pan ¡ Moist cakes ¡ Baked items ¡ Bread ¡ Large roasts ¡ Frozen meals ¡ Catching dripping liquids, e.g. fat when grilling food on the wire rack. - Page 10 6 Before using for the first time Configure the settings for initial start-up. Clean the ap- 6.2 Cleaning the appliance before using it pliance and accessories.
- Page 11 Rapid heating en Use the temperature selector to set the required ▶ temperature. 8 Rapid heating To save time, rapid heating can shorten the preheating Set a suitable type of heating and a temperature of time for set temperatures over 100 °C. at least 100 °C.
- Page 12 en Time-setting options a Once the calculated start time has been reached, Button Default value the appliance starts heating up and the cooking 10 minutes time starts counting down. 30 minutes a Once the time has elapsed, an audible signal sounds and the display shows the cooking time as The cooking time can be set in 1-minute increments zero.
-
Page 13: Programme
Programme en 10 Programme The programmes help you to use your appliance to Cookware made from the following material is not prepare different dishes by selecting the optimum set- suitable: tings automatically. ¡ Bright, shiny aluminium ¡ Unglazed clay ¡ Plastic or plastic handles 10.1 Cookware for programmes You should therefore use heat-resistant cookware that is suitable for temperatures up to 300 °C. - Page 14 en Programme No. Food Cookware Weight range Add liquid Shelf Information posi- Weight setting tion Roasting dish with 0.6 - 2.5 kg Place in the cook- 13 Chicken, unstuffed Ready to cook, glass lid Chicken weight ware with the breast seasoned facing up Roasting dish with 0.1–0.8 kg Cover the...
- Page 15 Programme en No. Food Cookware Weight range Add liquid Shelf Information posi- Weight setting tion Roasting dish with 0.5–2.5 kg Cover the Do not sear the meat 25 Joint of veal, lean E.g. tenderloin or eye Weight of meat bottom of the beforehand roasting dish, and add up...
-
Page 16: Childproof Lock
en Childproof lock For some programmes, the button can be When the programme ends: ‒ used to delay the end. Press any button to end the audible signal pre- ‒ → "Setting the end time", Page 12 maturely. To set a cooking time for further cooking, press a After a few seconds, the programme starts and the ‒... -
Page 17: Sabbath Mode
Home Connect en Display Basic setting Selection Button tone when pressing a button = off = on Brightness of the display illumination = dark = medium = bright Time display = hide the time = display the time ... - Page 18 en Home Connect Open the Home Connect app and scan the follow- 14.1 Setting up Home Connect ing QR code. Requirements ¡ The appliance is connected to the power supply and is switched on. ¡ You have a mobile device with a current version of the iOS or Android operating system, e.g.
-
Page 19: Cleaning And Servicing
Cleaning and servicing en 14.3 Operating the appliance with the Notes ¡ You can continue to use your appliance as normal Home Connect app while updates are downloading. Depending on your You can use the Home Connect app to set and start personal settings in the app, software updates can the appliance remotely. -
Page 20: Pyrolytic Self-Cleaning
en Cleaning and servicing Suitable cleaning agents Only use cleaning products that are suitable for the dif- Follow the instructions on cleaning the appliance. ferent surfaces on your appliance. → "Cleaning the appliance", Page 21 Appliance front Surface Suitable cleaning agents Information Stainless steel ¡... - Page 21 Pyrolytic self-cleaning en 15.2 Cleaning the appliance WARNING ‒ Risk of fire! Loose food remnants, fat and meat juices may catch In order to avoid damaging the appliance, you must fire. clean your appliance only as specified, and with suit- Before using the appliance, remove the worst of the able cleaning products.
- Page 22 en Shelf supports Once the appliance has cooled down sufficiently, Cleaning set- Cleaning Duration in hours the appliance door unlocks and goes out. ting level Prepare the appliance for use. → Page 22 Lightly soiled Approx. 1:15 Medium Approx. 1:30 16.3 Preparing the appliance for use High Approx.
- Page 23 Shelf supports en Push on the tab marked PUSH behind the rail, and 17.4 Attaching the pull-out rail push the rail to the rear. Note: The pull-out rails only fit on the right or left. Make sure when you fit them that you can pull them out to- wards the front.
- Page 24 en Appliance door Pull the pull-out rail out as far as it will go and slide it back in. 18 Appliance door To ensure that your appliance retains its appearance WARNING ‒ Risk of injury! and remains fully functioning for a long time, you can When the hinges are not secured, they can snap detach the appliance door and clean it.
- Page 25 Appliance door en Close the appliance door fully . Grab hold of the Using both hands, press down on the left and right appliance door with both hands (on the left and of the door cover from above to check whether the right) and pull it upwards and out ...
- Page 26 en Appliance door Undoing and removing the left- and right-hand Turn the intermediate pane until the arrow is in screws on the appliance door the top right. Place a folded-up tea towel in the appliance door. Pull the front pane up and out ...
-
Page 27: Troubleshooting
Troubleshooting en Put the door cover in position and push down on it Close the appliance door. until you hear it click into place. Note: Do not use the cooking compartment again until the door panes have been correctly fitted. 19 Troubleshooting You can rectify minor faults on your appliance yourself. -
Page 28: Customer Service
en Troubleshooting Fault Cause and troubleshooting flashes in the dis- The cooking compartment is too hot for the selected operation. play and the appli- Switch off the appliance and allow it to cool down. ance will not start. Restart the operation. appears in the The maximum cooking time has been reached. -
Page 29: Declaration Of Conformity
Service telephone number to find them again ciency class G. quickly. 22 Declaration of Conformity Robert Bosch Hausgeräte GmbH hereby declares that Hereby, Robert Bosch Hausgeräte GmbH declares that the appliance with Home Connect functionality con- the appliance with Home Connect functionality is in forms to the basic requirements and other relevant pro- compliance with relevant statutory requirements. - Page 30 en How it works 23 How it works Here, you can find the ideal settings for various types ¡ Turn the poultry, meat or fish after approx. 1/2 to of food as well as the best accessories and cookware. 2/3 of the time listed. We have perfectly tailored these recommendations to ¡...
- Page 31 How it works en 23.4 Food selection Food Accessories/cookware Shelf pos- Type of Temperature Cooking ition heating in °C/grill time in mins setting Sponge cake, delicate Loaf tin 150-170 60-80 Sponge cake, on 2 levels Loaf tin 140-150 70-85 Fruit tart or cheesecake with shortcrust Springform cake tin, 170-190 55-80...
- Page 32 en How it works Recommended settings for yoghurt Food Accessories/cookware Shelf position Type of Temperature in Cooking heating °C time in mins Yoghurt Individual moulds Cooking compartment 40–45 8–9 hrs floor Preheat the cooking compartment and cookware for 23.6 Slow cooking approx. 15 minutes. Slow cooking is a technique for cooking food over a Sear the meat on all sides on the cooking zone at a long period at low temperatures.
- Page 33 Installation instructions en Position baking tins/dishes either next to one another or offset on different shelves so that they are not dir- ectly one above the other in the cooking compartment. Recommended settings for baking Food Accessories/cook- Shelf pos- Type of Temperature in Cooking time in ware...
-
Page 34: 24.1 General Installation Instructions
en Installation instructions WARNING ‒ Risk of fire! 24.1 General installation instructions It is dangerous to use an extended power Follow these instructions before you start with cord and non-approved adapters. the installation of the appliance. ▶ Do not use multiple socket strips. ¡ The safe operation of this appliance can ▶... - Page 35 Installation instructions en ¡ Observe any available installation instructions for the ¡ Ensure that air exchange is guaranteed in accord- hob. ance with the diagram. 24.4 Installation in a tall unit Observe the installation dimensions and the installation instructions when installing in a tall unit. ¡...
- Page 36 en Installation instructions ¡ Contact protection must be guaranteed by the in- Screw the appliance into place. stallation. Electrically connect the appliance with the protective contact plug Note: The appliance must only be connected to a pro- tective contact socket that has been correctly installed. Insert the plug into the protective contact socket.
- Page 40 Expert advice for your Bosch home appliances, help with problems or a repair from Bosch experts. Find out everything about the many ways Bosch can support you: www.bosch-home.com/service Contact data of all countries are listed in the attached service directory.