Table of Contents
Advertisement
OWNER'S MANUAL
DRYER
Before beginning installation, read these instructions carefully. This will
simplify installation and ensure that the product is installed correctly and
safely. Leave these instructions near the product after installation for
future reference.
FDV708W FDV909W FDV909S
EN ENGLISH
MFL71424338
Rev.01_101119
Copyright © 2019 LG Electronics Inc. All Rights Reserved
www.lg.com
Advertisement
Table of Contents

Related Manuals for LG FDV708W


Summary of Contents for LG FDV708W
- Page 1 Leave these instructions near the product after installation for future reference. FDV708W FDV909W FDV909S EN ENGLISH www.lg.com MFL71424338 Rev.01_101119 Copyright © 2019 LG Electronics Inc. All Rights Reserved...
-
Page 2: Table Of Contents
Sorting Laundry ....................17 Control Panel ....................18 Programme Table ....................20 Option Programmes and Extra Functions ............24 SMART FUNCTIONS ..............26 Using LG SmartThinQ Application ..............26 Using Smart Diagnosis™ ................29 MAINTENANCE ................30 Cleaning after Every Dry .................30 Cleaning the Appliance Periodically ..............31 TROUBLESHOOTING ..............32 Before Calling for Service ................32... -
Page 3: Safety Instructions
SAFETY INSTRUCTIONS READ ALL INSTRUCTIONS BEFORE USE The following safety guidelines are intended to prevent unforeseen risks or damage from unsafe or incorrect operation of the appliance. The guidelines are separated into ‘WARNING’ and ‘CAUTION’ as described below. Safety Messages This symbol is displayed to indicate matters and operations that can cause risk. - Page 4 For use in Europe: This appliance can be used by children aged from 8 years and above and persons with reduced physical, sensory or mental capabilities or lack of experience and knowledge if they have been given supervision or instruction concerning use of the appliance in a safe way and understand the hazards involved.
- Page 5 • This appliance must not be installed behind a lockable door, a sliding door or a door with a hinge on the opposite side to that of the appliance, in such a way that a full opening of the appliance door is restricted.
- Page 6 Improper use can cause fire or explosion. • In case of flood, disconnect the power plug and contact the LG Electronics customer information centre. • Do not push down the door excessively, when the appliance door is open.
- Page 7 • Never unplug the appliance by pulling on the power cable. Always grip the power plug firmly and pull straight out from the socket outlet. Technical Safety for Using the Dryer WARNING - To avoid a fire Risk of Fire and Flammable Materials •...
- Page 8 • Do not spray dry cleaning detergent directly onto the appliance or use the appliance to dry clothes left with dry cleaning detergent. • Do not dry clothes stained with oil substances. Oil substances (including edible oils) stained on clothes cannot be completely removed even after washing with water.
-
Page 9: Caring For The Environment
WEEE collection point. For the most up to date information for your country please see www.lg.com/global/recycling. This dryer contains refrigerant gases R290 (GWP: 3): 0.145 kg Hermetically sealed. -
Page 10: Installation
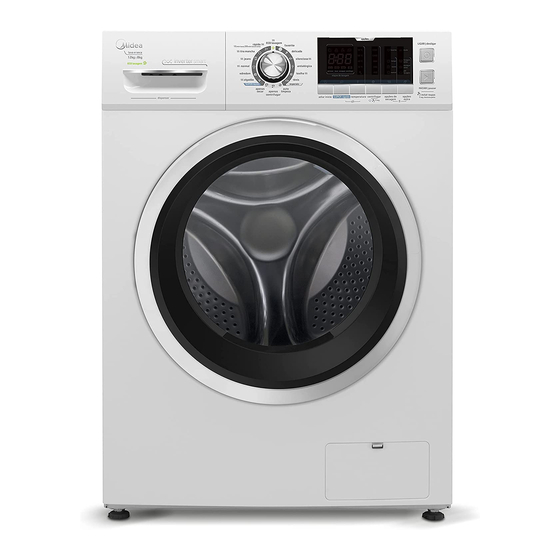
• Appearance and specifications may vary without notice to improve the quality of the appliance. Front View Water container Control panel Door Accessories Please contact LG Electronics Customer Information Centre or visit the LG Website at http://www.lg.com for purchase. Condensing Drain Hose and Hose Holder Dry Rack Stacking Kit... -
Page 11: Installation Place Requirements
Specifications Model FDV708W FDV909W / FDV909S Power supply 220 - 240 V~, 50 Hz Size 600 mm (W) X 690 mm (D) X 850 mm (H) Product weight 56 kg Allowable temperature 5 - 35 °C Max. capacity 8 kg... -
Page 12: Leveling The Appliance
Leveling the appliance • Please ensure that when the appliance is installed, it is easily accessible for an engineer in the event of a breakdown. Checking the Level • With the appliance installed, adjust all four feet using a spanner to ensure the appliance Leveling the appliance prevents unnecessary is stable, and a clearance of approximately 20 noise and vibration. - Page 13 Open the door and remove 2 screws on the door hinge(a). After removing the screws, put the door down carefully from the cabinet(b) with the front side facing down to the floor. Switch the position between the hinge assembly(c) and door latch assembly(d) and then tighten the screws in reverse order.
-
Page 14: Stacking Instructions
Dryer LG Washing Machine This dryer may only be stacked on top of an LG washing machine. Do not attempt to stack this dryer on any other washing machine, as it could result in damage, injury or property damage. - Page 15 Remove the two screws from the bottom of the Separate the anti-backflow lid(a) and the rear cover on each side as illustrated below. water container hose(b) from the connecting kit. Align the stacking kit holes and the rear cover holes. •...
-
Page 16: Operation
OPERATION Operation Overview CAUTION • Be careful not to trap laundry between the door Using the Appliance and rubber seal. Before the first cycle, set the appliance to dry for Turn the power on. five minutes to warm up the drum. Open the door •... -
Page 17: Sorting Laundry
Rubber and Plastics CAUTION • Do not dry any items made from or containing • Be careful! The drum inside may still be hot. rubber or plastics such as: • The appliance must not be used for purposes − Aprons, Bibs and Chair Covers other than those for which it was designed. -
Page 18: Control Panel
Control Panel Control Panel Features Power Button • Press the Power button to turn power on and off. • Press the Power button to cancel the Delay End function. Programme Selector • Programmes are available according to the laundry type. •... - Page 19 Display This icon indicates that the lint filter should be cleaned or is inserted. • Cleaning notice: When you press the Power button, the icon will become displayed. • Missing notice: When the lint filter is not inserted, the icon will become displayed and the appliance will not operate.
-
Page 20: Programme Table
Programme Table Sensor Drying Programme Guide Programme Cotton Max. Load Capacity 8 kg / 9 kg Dry Level Extra • Laundry Type • Towels, dressing gowns and bed linen • Detail • For thick and quilted fabrics Cupboard • Bath towels, tea towels, underwear and cotton socks •... - Page 21 Programme Easy Care Max. Load Capacity 3.5 kg Dry Level Cupboard • Laundry Type • Shirts, T-shirts, trousers, under-wear and socks • Detail • For polyamide, acrylic, and polyester that do not need to be ironed Iron • Shirts, T-shirts, under-wear, anoraks and socks •...
- Page 22 Timed Drying Programme Guide Programme Rack Dry Max. Load Capacity – Laundry Type Silk, wool, delicate lingerie Detail Refreshes clothes without tumble drying Programme Cool Air Max. Load Capacity – Laundry Type All fabrics that need refreshing Detail Tumbles without heat Programme Warm Air Max.
- Page 23 Selectable Drying Options Programme EcoHybrid Programme Dry Level Energy Time Extra Cotton Cupboard Iron Extra Mixed Fabric Cupboard Iron Cupboard Easy Care Iron Duvet – Towels – Speed 30 – Allergy Care – Delicates – Wool – Sportswear – Rack Dry –...
-
Page 24: Option Programmes And Extra Functions
Option Programmes and Dry Level Extra Functions It allows you to select a dryness level for the drying programme. Delay End Turn the appliance on. It allows you to delay the finishing time of drying Select a programme. cycle from 3 hours to 19 hours. Turn the appliance on. - Page 25 More Time / Less Time Open the door. It allows you to increase or decrease a drying Insert the hook to the drum centre. time when you use the Rack Dry, Cool Air and Warm Air drying programme. • Press the More Time button to increase a drying time by 5 minutes.
-
Page 26: Smart Functions
SmartThinQ provider or refer to your wireless router manual. • For appliances with the a or b logo • LG SmartThinQ is not responsible for any network connection problems or any faults, Check the distance between the appliance malfunctions, or errors caused by network and the wireless router (Wi-Fi network). - Page 27 Put the laundry in drum. • If you enable the Smart Pairing function in the LG SmartThinQ app and turn on the dryer after Press and hold the Anti Crease button for 3 using the washer, a recommended dryer cycle seconds to enable the Remote Start function.
- Page 28 20 cm between the device and the body. LG Electronics will also provide open source code to you on CD-ROM for a charge covering the cost of performing such distribution (such as the cost of...
-
Page 29: Using Smart Diagnosis
Use this function if you need an accurate diagnosis • If the Smart Diagnosis™ data transfer is poor by an LG Electronics customer information centre due to poor call quality, you may not receive the when the appliance malfunctions or fails. Use this best Smart Diagnosis™... -
Page 30: Maintenance
MAINTENANCE WARNING • Remove the power plug when you clean the appliance. Not removing the plug may result in electric shock. Cleaning after Every Dry • Open the second lint filter. Cleaning the Lint Filter Clean the lint filter after each drying cycle. Cleaning the lint filter will reduce drying time and energy consumption. -
Page 31: Cleaning The Appliance Periodically
Emptying the Water Container CAUTION Condensed water is collected in the water • Do not wipe the moisture sensor with abrasive container. materials. Always clean the sensor with a Empty the water container after every use. Not rough sponge. doing so will affect the drying performance. If the water container is full, the E icon glows and a chime sounds while the appliance is operating. -
Page 32: Troubleshooting
Operation of your appliance can lead to errors and malfunctions. The following tables contain possible causes and notes for resolving an error message or malfunction. It is recommended to read the tables carefully below in order to save your time and money that may cost for calling to LG Electronics service centre. - Page 33 The door is closed while laundry or foreign substance is caught in the door. • Check if laundry or foreign substance is caught in the door before using the appliance. If water leaks continuously, contact the LG Electronics Customer Information Centre. Appliance runs and This is how the anti crease option works.
- Page 34 Symptoms Possible Cause & Solution Clothes take too long Load is not properly sorted. to dry. • Separate heavy items from lightweight items. Larger and heavier items take longer to dry. Light items in a load with heavy items can fool the sensor because the light items dry faster.
- Page 35 Symptoms Possible Cause & Solution Clothes are shrinking. Garment care instructions are not being followed. • To avoid shrinking your clothes, always consult and follow fabric care instructions. Some fabrics will naturally shrink when washed. Other fabrics can be washed but will shrink when dried in the appliance. Use a low or no heat setting.
- Page 36 • Find the Wi-Fi network connected to your smartphone and remove it, then connected to the Wi-Fi register your appliance on LG SmartThinQ. network. Mobile data for your smartphone is turned on. • Turn off the Mobile data of your smartphone and register the appliance using the Wi-Fi network.
-
Page 37: Operating Data
OPERATING DATA Product Fiche Commission Delegated Regulation (EU) No 392/2012 Supplier’s name or trade mark LG Electronics FDV909W / Supplier’s model identifier FDV708W FDV909S Rated capacity in kg of cotton laundry for the standard cotton 8 kg 9 kg programme at full load... - Page 38 The weighted condensation efficiency (C ) for the ‘standard 91 % 91 % cotton programme at full and partial load' The sound power level 62 dB(A) 62 dB(A) Free Standing...
- Page 39 Memo...