Sign In
Upload
Manuals
Brands
Sharp Manuals
All in One Printer
AR-M317 AR-5625
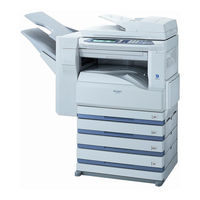
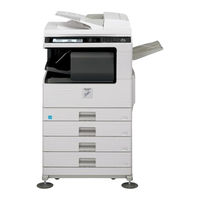
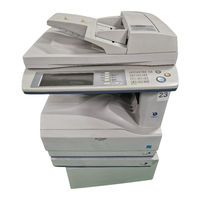
Sharp AR-M317 AR-5625 Manuals
Manuals and User Guides for Sharp AR-M317 AR-5625. We have
10
Sharp AR-M317 AR-5625 manuals available for free PDF download: Key Operator's Manual, Service Manual, Operation Manual, Online Manual, Setup Manual, Brochure & Specs, Specification Sheet
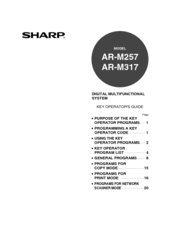
Sharp AR-M317 AR-5625 Key Operator's Manual (302 pages)
Digital Multifunctional System
Brand:
Sharp
| Category:
All in One Printer
| Size: 12.55 MB
Table of Contents
Table of Contents
27
Programming Key Operator Code
3
Using the Key Operator Programs
4
Keys Used in Key Operator Programs
5
Key Operator Program List
6
Key Operator Program Menu
8
Account Control
10
Auditing Mode
10
General Programs
10
Resetting Account
10
Total Pages Per Account
10
Account Limit Setting
11
Account Number Control
11
Account Number Security
11
Cancel Jobs of Invalid Accounts
11
Energy Save
12
Preheat Mode Setting
12
Toner Save Mode
12
Auto Clear Setting
13
Keys Touch Sound
13
Message Time Setting
13
Operation Settings
13
Device Control
14
Disabling of Clock Adjustment
14
Disabling of Document Feeder
14
Disabling of Duplex
14
Disabling of Stapler
14
Display Language Setting
14
Stream Feeding Mode
14
Output Trays
15
Security Settings
15
Key Operator Code Change
16
Network Scanner Expansion Kit
16
Product Key
16
Ps3 Expansion Kit
16
Serial Number
16
Copy Settings
17
Exposure Adjustment
17
Auto Paper Selection Setting
17
Initial Status Settings
17
Setting a Maximum Number of Copies
17
Sort Auto Select
17
Disabling Deletion of Job Programs
17
Card Shot Settings
17
Rotation Copy Setting
17
Print Settings
18
Default Settings
18
Interface Settings
19
Hexadecimal Dump Mode
19
Parallel Port Emulation Switching
19
I/O Timeout
19
Network Settings
20
Ip Address Setting
20
Enable Netware
20
Port Switching Method
20
Enable Ethertalk
21
Enable Netbeui
21
Reset the Nic
21
Restore Factory Defaults
21
Initialize And/Or Store Settings
21
Scanner Settings
22
Initial Resolution Setting
22
Table of Contents
27
Programs for Copy Mode
17
Cautions
29
Cautions on Using the Machine
29
Important Points When Selecting an Installation Site
29
Cautions on Handling the Machine
30
Environmental Information
31
Using the Manual
31
About the Operation Manuals
31
The Meaning of "R" in Original and Paper Size Indications
32
Conventions Used in this Manual
32
Main Features
33
Part Names and Functions
34
Operation Panel
36
Touch Panel
37
Using the Touch Panel
37
Power on and off
39
Power off
39
Initial Settings
40
Power Save Modes
40
Auto Power Shut-Off Mode
40
Preheat Mode
40
Loading Paper
41
Special Papers
42
Loading Paper
43
Loading the Paper in the Paper Tray
43
Loading Paper in the Bypass Tray
44
Changing a Tray's Paper Type and Paper Size Settings
45
Setting the Paper Type in the Bypass Tray
46
Main Screen of Copy Mode
47
Normal Copying
48
Copying from the Document Glass
48
Copying from the Rspf
49
Points to Note When Making Copies
50
Originals that Can be Used in the Rspf
50
Original Size] Key
51
BYPASS FEED (Special Paper)
52
Automatic Two-Sided Copying
53
Using the Document Glass
53
Copy] Key
53
Using the Rspf
54
Exposure Adjustment
55
Selecting the Original Image Type and Manually Adjusting the Exposure
55
Reduction/Enlargement/Zoom
56
Automatic Ratio Selection
56
Manual Ratio Selection
57
Interrupting a Copy Run
60
Copy Finishing Functions
61
Sort Copy
61
Group Copy
61
Offset Function
61
Orientation of the Original and Stapling Positions
63
STAPLE SORT (When the Finisher AR-FN5A) Is Installed)
63
Special Modes
65
General Procedure for Using the Special Functions
66
Margin Shift Copy
67
Center Erase
68
Edge Erase
68
Erase Copy
68
Dual Page Copy
69
Pamphlet Copy
70
Job Build Mode
71
Multi Shot Copy
72
Original Size
73
Cover Copy
74
B/W Reverse Copy
76
Card Shot
77
Custom Settings
79
General Procedure for Custom Settings
80
Settings
81
Total Count
81
Display Contrast
81
List Print
81
Tray Settings
81
Job Program Memory
82
Storing a Job Program
82
Executing a Job Program
83
Deleting a Stored Job Program
83
Auditing Mode
84
Copying When Auditing Mode Is Enabled
84
Troubleshooting and Maintenance
85
Display Messages
86
Troubleshooting
88
Paper Feeding Problems
90
Image Quality Problems
91
Misfeed Removal
92
Misfeed Removal Guidance
92
Misfeed in the Rspf
93
Misfeed in the Bypass Tray
94
Misfeed in the Machine
94
Misfeed in the Center Tray
96
Misfeed in the Upper Paper Tray
96
Misfeed in the Lower Paper Tray
97
MISFEED in an OUTPUT TRAY When a Finisher (AR-FN5A) Is Installed)
98
Misfeed in the Upper Exit Area
98
Replacing the Toner Cartridge
100
Staple Cartridge Replacement
101
Staple Jam Removal
102
Checking the Toner Quantity and Total Count
102
Cleaning the Machine
103
Document Glass and Rspf
103
The Bypass Tray Paper Feed Roller
103
Peripheral Devices
104
Finisher (Ar-Fn5A)
105
SHEET PAPER FEED UNIT 2 X 500-SHEET PAPER FEED UNIT
106
Storage of Supplies
107
Proper Storage
107
Specifications
108
Material Safety Data Sheet
110
7 Appendix
118
Table of Contents
119
Table of Contents
132
7 Web Page in the Machine
135
(Part 1)
180
4 Printing from Macintosh
208
8 Specifications
265
Index
118
Index by Purpose
121
Trademark Acknowledgments
122
Introduction
131
About the Network Scanner Function
133
Before Using the Network Scanner Function
133
Accessing Web Pages
134
Settings Required for the Network Scanner Function
134
About the Web Page
135
Basic Settings for Network Scanning
136
Configuring Smtp Server Settings
137
Smtp Server and Dns Server Settings
137
Programming Custom Index Names
139
Setting up Destination Information
140
Storing Destinations for Scan to Ftp
141
Editing and Deleting Programmed Transmission Destinations
144
Initial Screen of Scanner Mode
148
Address Book Screen
149
Basic Transmission Method
150
How to Use the Network Scanner Function
150
Sending an Image
150
Transmission Methods for Scan to E-Mail
152
Manually Setting the Scanning Size
156
Manual] Key
157
Selecting the Quality
157
Selecting the Resolution
158
Selecting the File Format
159
Changing the Send Settings
160
Settings Screen
160
Canceling an E-Mail/Ftp Transmission
161
Error Codes
164
If Your E-Mail Is Returned
164
Checking the Ip Address
166
Metadata Transmission for Scan to Desktop
168
Preparations for Metadata Transmission
168
Settings Required in the Web Pages
168
Transmitting Metadata
169
Metadata Fields
171
How to Use the Online Manual
179
Basic Printing
183
About the "No Offset" Function Setting
186
Printer Driver Settings
188
Pamphlet Style
190
Printing Multiple Pages on One Page
191
Fitting the Printed Image to the Paper
192
Rotating the Print Image 180 Degrees
193
How to Print a Watermark
194
Printing a Watermark
194
When a Finisher Is Installed
195
Print Hold Function
197
Selecting Print Hold Settings in the Printer Driver at the Time of Printing
198
How to Print a Print Hold Job
199
Printing Using the Print Hold Function
199
Points to Note about the Print Hold Function
200
Carbon Copy Print
201
Printing Using Carbon Copy Print
202
Printing Lines in Black
203
Printing Text and Lines in Black
203
Printing Text in Black
203
Printer Utilities
204
Starting up the Printer Utilities
205
Using the Printer Utilities
205
Changing the Printer Status Monitor Settings
206
Checking the Printer Status
207
Selecting Paper Settings
208
When "Paper Feed" Is Set to "Auto Select
212
When "Paper Feed" Is Set to Paper Tray or Paper Type
213
Mac os X
216
Stapling Printed Pages (When a Finisher Is Installed)
228
Job Control Function (Mac os 9.0 to 9.2.2 and Mac os X V10.2 To)
229
Printing When Auditing Mode Is Enabled
229
Using the Print Hold Function
229
Giving Priority to a Print Job
230
Canceling a Print Job
231
Configuring the Printer Condition Settings
232
How to Configure the Settings
232
Printer Condition Setting Menu
234
Printer Condition Settings
235
Printing the Printer Setting and Font Lists
240
Check the Connections
242
Printing Does Not Take Place
242
Check Your Computer
243
Check the Machine
244
Checking the Printer Driver
245
Improper Printing Operation
246
Printing Is Slow
246
Part of the Printed Image Is Missing
249
Print Quality Is Not Satisfactory
249
The Printed Image Is Coarse
249
The Printed Image Is Distorted
249
If a Notice Page Is Printed
250
Disabling Notice Page Printing
251
Removing the Software
252
Accessing the Web Page
254
About the Web Page (for Users)
255
Directly Printing a File in a Computer
256
About the Web Page (for the Administrator)
257
Setting up the E-Mail Print Function
258
Using the E-Mail Print Function
259
Information Setup
260
Smtp Setup
260
Status Message Setup
261
Alerts Message Setup
262
Printer Specifications
264
Printer Driver Specifications
265
Online Manual
268
3 Troubleshooting
271
1 Print
273
Basic Printing
273
Opening the Printer Driver from the "Start" Button
275
Printer Driver Settings
276
Two-Sided Printing
277
Printing Multiple Pages on One Page
278
Fitting the Printed Image to the Paper
279
Rotating the Print Image 180 Degrees
280
Printing a Watermark
281
Stapling Printed Pages (When a Finisher Is Installed)
282
Giving Priority to a Print Job
284
Canceling a Print Job
285
2 Printer Sharing
286
Sharing the Printer Using Windows Networking
286
Shared Printer Settings
287
Client Settings
288
5 Operation at the Machine
300
Troubleshooting
291
Printing Does Not Take Place
292
Improper Printing Operation
296
Print Quality Is Not Satisfactory
298
Disabling Notice Page Printing
300
If a Notice Page Is Printed
300
Uninstalling the Printer Driver
301
Printer Specifications
302
Specifications
302
Advertisement
Sharp AR-M317 AR-5625 Service Manual (159 pages)
Digital Multifunctional System
Brand:
Sharp
| Category:
All in One Printer
| Size: 14.04 MB
Table of Contents
Table of Contents
1
Service Manual
1
Note for Installing Site
4
Configuration
5
Note for Servicing
4
Precautions for Servicing
4
Warning for Servicing
4
Line of Machines and Options
5
Combination of Options List
6
Specifications
7
A. Common Operation
7
B. Copy Mode
7
Engine Specifications
8
A. Operation and Display Section
8
B. Paper Feed, Transport, Paper Exit Section
8
C. Optical (Image Scanning) Section
9
D. Scanner (Exposure) Section
9
E. Image Process Section
9
F. Fusing
10
G. Drive
10
And Expanded Functions
10
Safety and Environmental Protection Standards
10
Environment Conditions
11
IMC Board Functions
11
Printer Function
12
B. Printer Driver Specification
12
C. Interface
14
D. System Outline
14
Printer Function (AR-M258/ M318)
14
A. Basic Function
14
Consumable Parts
15
Supply System Table
15
A. Sec/ Secl/ Lag
15
Australia/ New Zealand
15
Maintenance Parts List
16
A. Sdsca/ Secl/ Lag (Ar-M257/ M317)
16
C. STCL/ SRH/ SRS/ SRSSC/ SBI/ Agent (All Model)
17
Drum>
18
Environment Conditions
18
A. Ambient Conditions for Transporting
18
B. Ambient Storage Conditions (Sealed)
18
C. Operating Ambient Conditions
18
Life (Packed Conditions)
18
Unpacking and Installation
19
A. Environment
19
B. Power Source
19
C. Transport
19
D. Other Precautions
20
Production Number Identification
18
TD Cartridge>
18
Removal and Storage of Fixing Pin
20
Removal of Protective Material and Fixing Screw
20
Developer Cartridge Installation
21
Toner Cartridge Installation
21
Toner Density Sensor Level Adjustment
22
Tray Paper Size Setting
22
B. Manual Feed Tray
22
Installation of Options
23
A. Ar-P27
23
B. Ar-Pk1N
24
C. Ar-Pf1/Pf2
25
D. MX-Nsx1
25
F. Ar-Sm5/Sm6
26
A. External View
27
External View and Internal Structure
27
B. Internal Structure
28
C. Operation Panel
29
E. Motor, Solenoid, Clutch
31
F. Sensor
31
H. Section
32
Adjustments, Setting
33
Name and Function of each Section
27
Copier Adjustment
33
A. Process Section
33
B. Mechanism Section
35
C. Image Density (Exposure) Adjustment
41
Simulation
43
List of Adjustment Items
33
Outline and Purpose
43
A. Operating Procedures and Operations
43
Process
43
Simulation Code List
45
Details
48
Trouble Code List
100
Error Code List
100
Self Diagnostics
101
Disassembly, Assembly and Maintenance
113
Maintenance Table
113
Counter Clear
115
List of Disassembly and Assembly
115
A. Process Unit
115
Details of Disassembly and Assembly
116
Process Unit
116
B. Developing Section
117
C. Fusing Section
118
D. Optical Section
120
E. Paper Feed Section
122
F. Side Door Unit
127
G. 1St Paper Exit Unit
128
H. 2Nd Paper Exit Unit
130
I. Laser Unit
130
J. Power Unit
131
L. Ozone Filter
133
M. Drive Section
134
N. Transport Section
136
O. Operation Section
136
P. Switch
137
Flash ROM Version-Up Procedure
139
Others
139
B. Printer Control Board Firmware Download Method
140
C. Others (Troubleshooting)
141
Key Operator Program List
141
A. Common Program of Digital Copier
141
B. Copy Function Setting Program
142
C. Printer Function Setting Program
142
D. Network Scanner Function Setting Program
143
E-Mail Status/ E-Mail Alerts
144
A. Basic Functions
144
B. Main Body Specifications
144
C. Printer Controller Specifications
144
D. Handling of Transmission Data
144
Electrical Section
145
Block Diagram
145
Actual Wiring Diagram
146
Trademark Acknowledgements
159
Sharp AR-M317 AR-5625 Operation Manual (104 pages)
Brand:
Sharp
| Category:
All in One Printer
| Size: 6.28 MB
Table of Contents
Table of Contents
3
Cautions
5
Cautions on Using the Machine
5
Important Points When Selecting an Installation Site
5
Cautions on Handling the Machine
6
Laser Information
6
Environmental Information
7
1 Before Using the Machine
5
Using the Manual
7
About the Operation Manuals
7
The Meaning of "R" in Original and Paper Size Indications
8
Conventions Used in this Manual
8
Main Features
9
Part Names and Functions
10
Operation Panel
12
Touch Panel
13
Using the Touch Panel
13
The Machine
10
Power on and off
15
Power on
15
Power off
15
Initial Settings
16
Power Save Modes
16
Loading Paper
17
Paper
17
Special Papers
18
Letterhead Paper
18
Loading Paper
19
Loading the Paper in the Paper Tray
19
Loading Paper in the Bypass Tray
20
Changing a Tray's Paper Type and Paper Size Settings
21
Setting the Paper Type in the Bypass Tray
22
Main Screen of Copy Mode
23
Normal Copying
24
Copying from the Document Glass
24
Copying from the Rspf
25
Points to Note When Making Copies
26
Originals that Can be Used in the Rspf
26
Original Size] Key
27
BYPASS FEED (Special Paper)
28
Automatic Two-Sided Copying
29
Using the Document Glass
29
Copy] Key
29
Using the Rspf
30
Exposure Adjustment
31
Manually Adjusting the Exposure
31
Reduction/Enlargement/Zoom
32
Automatic Ratio Selection
32
Manual Ratio Selection
33
(XY ZOOM Copying)
34
Interrupting a Copy Run
36
Copy Finishing Functions
37
Sort Copy
37
Group Copy
37
Offset Function
37
When Using the Document Glass
38
(AR-FN5A) Is Installed)
39
Stapling Positions
39
Staple Sort
39
Special Modes
41
General Procedure for Using the
42
Special Functions
42
Margin Shift Copy
43
Erase Copy
44
Edge Erase
44
Center Erase
44
Dual Page Copy
45
Pamphlet Copy
46
Job Build Mode
47
2 Copy Functions
48
Multi Shot Copy
48
Original Size
49
Cover Copy
50
B/W Reverse Copy
52
Card Shot
53
Custom Settings
55
General Procedure for Custom
56
Settings
56
Total Count
57
Settings
57
Job Program Memory
58
Storing a Job Program
58
Executing a Job Program
59
Deleting a Stored Job Program
59
Auditing Mode
60
Copying When Auditing Mode Is Enabled
60
5 Troubleshooting and Maintenance
61
Display Messages
62
Troubleshooting
64
Paper Feeding Problems
66
Image Quality Problems
67
Misfeed Removal
68
Misfeed Removal Guidance
68
Misfeed in the Rspf
69
Misfeed in the Bypass Tray
70
Misfeed in the Machine
70
Misfeed in the Center Tray
72
Misfeed in the Upper Paper Tray
72
Misfeed in the Lower Paper Tray
73
MISFEED in the UPPER EXIT AREA (When a Job Separator Tray Kit or Finisher (AR-FN5A) Is Installed)
74
MISFEED in an OUTPUT TRAY (When a Finisher (AR-FN5A) Is Installed)
74
Replacing the Toner Cartridge
76
Staple Cartridge Replacement
77
Staple Jam Removal
78
Checking the Toner Quantity and Total Count
78
Cleaning the Machine
79
Document Glass and Rspf
79
The Bypass Tray Paper Feed Roller
79
6 Peripheral Devices and Supplies
80
Peripheral Devices
80
Finisher (Ar-Fn5A)
81
500-SHEET PAPER FEED UNIT/ 2 X 500-SHEET PAPER FEED UNIT
82
Storage of Supplies
83
Proper Storage
83
7 Appendix
84
Specifications
84
Material Safety Data Sheet
86
Index
94
Index by Purpose
97
Trademark Acknowledgments
98
Advertisement
Sharp AR-M317 AR-5625 Online Manual (92 pages)
AR-M250, AR-M310 series
Brand:
Sharp
| Category:
Copier
| Size: 2.91 MB
Table of Contents
Contents
2
Introduction
2
Part
2
How to Use the Online Manual
3
Table of Contents
4
Basic Printing
7
1 Printing from Windows
8
When "Paper Selection" Is Set to "Auto Select
8
When the "Paper Selection" Setting Is "Paper Source" or "Paper Type
9
About the "No Offset" Function Setting
10
Auditing Mode
10
Opening the Printer Driver from the "Start" Button
11
Printer Driver Settings
12
Two-Sided Printing
13
Pamphlet Style
14
Contents
14
Printing Multiple Pages on One
15
Contents
15
Fitting the Printed Image to the Paper
16
Rotating the Print Image 180 Degrees
17
Printing a Watermark
18
How to Print a Watermark
18
Stapling Printed Pages (When a Finisher Is Installed)
19
When a Finisher Is Installed
19
Part
19
When a Saddle Stitch Finisher Is Installed
20
Part
20
2 Advanced Printing (Windows)
21
Print Hold Function
21
Printing Using the Print Hold Function
22
Selecting Print Hold Settings in the Printer Driver at the Time of Printing
22
How to Print a Print Hold Job
23
Points to Note about the Print Hold Function
24
Carbon Copy Print
25
Printing Using Carbon Copy Print
26
Printing Text and Lines in Black
27
Printing Text in Black
27
Printing Lines in Black
27
3 Printer Utilities
28
Before Using the Printer Status Monitor
28
Using the Printer Utilities
29
Starting up the Printer Utilities
29
Changing the Printer Status Monitor Settings
30
Checking the Printer Status
31
Selecting Paper Settings
32
Basic Printing
32
Before Printing, Make Sure that the Correct Size of Paper for Your Document Has Been Loaded in the Machine
32
Part
32
4 Printing
34
When "Paper Feed" Is Set to "Auto Select
36
When "Paper Feed" Is Set to Paper Tray or Paper Type
37
Two-Sided Printing
38
Pamphlet Style
40
Printing Multiple Pages on One
42
Printing Multiple Pages on One Page
43
Fitting the Printed Image to the Paper
45
Rotating the Print Image 180 Degrees
46
Printing a Watermark
48
When a Finisher Is Installed
50
Stapling Printed Pages (When a Finisher Is Installed)
50
When a Saddle Stitch Finisher Is Installed
51
Mac os X
52
Printing When Auditing Mode Is Enabled
53
Using the Print Hold Function
53
5 Operation at the Machine
54
Giving Priority to a Print Job / Canceling a Print Job
54
Canceling a Print Job
55
Configuring the Printer Condition Settings
56
How to Configure the Settings
56
Printer Condition Setting Menu
58
Printer Condition Settings
59
Printing the Printer Setting and Font Lists
64
6 Troubleshooting
65
Printing Does Not Take Place
66
Check the Connections
66
Check Your Computer
67
Check the Machine
68
Checking the Printer Driver
69
Improper Printing Operation
70
Printing Is Slow
70
Two-Sided Printing Is Not Possible
70
Stapling Is Not Possible (When a Finisher or a Saddle Stitch Finisher Is Installed)
70
Punching Is Not Possible (When a Saddle Stitch Finisher Is Installed)
71
Print Quality Is Not Satisfactory
72
Check the Paper Being Used
72
The Printed Image Is Coarse
73
The Printed Image Is Distorted
73
Part of the Printed Image Is Missing
73
If a Notice Page Is Printed
74
Disabling Notice Page Printing
75
Removing the Software
76
Windows
76
Macintosh (Mac os X)
77
7 Web Page in the Machine
78
About the Web
78
Accessing the Web
78
Directly Printing a File in a Computer
81
E-Mail Print Function
82
Setting up the E-Mail Print Function
82
Using the E-Mail Print Function
83
E-Mail Status and E-Mail Alert Settings
84
Information Setup
84
SMTP Setup
84
Status Message Setup
85
Alerts Message Setup
86
Protecting Information Programmed in the Web Page ("Passwords")
87
8 Specifications
88
Printer Specifications
88
Printer Driver Specifications
89
Contents (Part
91
Sharp AR-M317 AR-5625 Operation Manual (48 pages)
OPERATION MANUAL for network scanner
Brand:
Sharp
| Category:
All in One Printer
| Size: 2.46 MB
Table of Contents
Table of Contents
1
Introduction
3
Before Using the Network Scanner Function
5
About the Network Scanner Function
5
Accessing Web Pages
6
Settings and Programming Required for the Network Scanner Feature
6
Settings Required for the Network Scanner Function
6
About the Web Page
7
Basic Settings for Network Scanning
8
Smtp Server and Dns Server Settings
9
Configuring Ldap Server Settings (When Using an Ldap Server)
10
Programming Custom Index Names
11
Setting up Destination Information
12
Storing Destinations for Scan to Ftp
13
Editing and Deleting Programmed Transmission Destinations
16
STORING the SENDER INFORMATION (Scan to E-Mail)
17
PROTECTING INFORMATION PROGRAMMED in the WEB PAGE ("Passwords")
18
Restricting Use of the Network Scanner Function (User Authentication)
19
Initial Screen of Scanner Mode
20
Address Book Screen
21
How to Use the Network Scanner Function
22
Basic Transmission Method
22
Sending an Image
22
Using the Document Glass
23
Using the Rspf
23
Transmission Methods for Scan to E-Mail
24
SCANNING and TRANSMITTING ATWO-SIDED ORIGINAL (When an RSPF Is Installed)
26
SCANNING a LARGE NUMBER of ORIGINALS (When an RSPF Is Installed)
27
Manually Setting the Scanning Size
28
Scanning Settings (Original Size, Quality, Resolution, File Format, and Send Setting)
28
Selecting the Quality
29
Selecting the Resolution
30
Selecting the File Format
31
Changing the Send Settings
32
Canceling an E-Mail/Ftp Transmission
33
Troubleshooting
34
Display Messages
35
If Your E-Mail Is Returned
36
Important Points When Using Scan to E-Mail
37
Checking the Ip Address
38
Metadata Delivery
39
Metadata Delivery (Data Entry)
39
Preparations for Metadata Transmission
40
Settings Required in the Web Pages
40
Metadata Transmission for Scan to Desktop
40
Transmitting Metadata
41
Metadata Fields
43
Specifications
44
Sharp AR-M317 AR-5625 Online Manual (36 pages)
AR-M250/M310/5600 Series
Brand:
Sharp
| Category:
Copier
| Size: 0.84 MB
Table of Contents
Introduction
2
How to Use the Online Manual
3
Table of Contents
4
1 Print
5
Basic Printing
5
Opening the Printer Driver from the "Start" Button
8
Printer Driver Settings
9
Two-Sided Printing
10
Printing Multiple Pages on One Page
11
Fitting the Printed Image to the Paper
12
Rotating the Print Image 180 Degrees
13
Printing a Watermark
14
Stapling Printed Pages (When a Finisher Is Installed)
15
When a Saddle Stitch Finisher Is Installed
16
Giving Priority to a Print Job
17
Canceling a Print Job
18
2 Printer Sharing
19
Sharing the Printer Using Windows Networking
19
Shared Printer Settings
20
Client Settings
21
C O N T E N T S
21
3 Troubleshooting
24
Printing Does Not Take Place
25
Check Your Computer
26
Check the Machine
27
Checking the Printer Driver
28
Improper Printing Operation
29
Print Quality Is Not Satisfactory
31
The Printed Image Is Coarse
32
Part of the Printed Image Is Missing
32
The Printed Image Is Distorted
32
If a Notice Page Is Printed
33
Uninstalling the Printer Driver
34
4 Specifications
35
Printer Specifications
35
Sharp AR-M317 AR-5625 Setup Manual (20 pages)
DIGITAL MULTIFUNCTIONAL SYSTEM
Brand:
Sharp
| Category:
All in One Printer
| Size: 1.2 MB
Table of Contents
Table of Contents
1
Software License
2
About the Software
4
Before Installation
4
Hardware and Software Requirements
4
Installation Environment and Installation Procedure
4
Installing the Software
5
STANDARD INSTALLATION (USB Only)
5
Custom Installation
7
Installing the Pc-Fax Driver
13
Connecting to a Computer
15
Connecting a Usb Cable
15
Connecting a Parallel Cable
15
Configuring the Printer Driver
16
How to Use the Online Manual
17
Troubleshooting
18
Sharp AR-M317 AR-5625 Brochure & Specs (8 pages)
AR-M257 | AR-M317 Brochure
Brand:
Sharp
| Category:
All in One Printer
| Size: 1.6 MB
Sharp AR-M317 AR-5625 Operation Manual (4 pages)
Brand:
Sharp
| Category:
All in One Printer
| Size: 0.18 MB
Sharp AR-M317 AR-5625 Specification Sheet (2 pages)
AR-M257 | AR-M317 Specification Sheet
Brand:
Sharp
| Category:
All in One Printer
| Size: 1.69 MB
Advertisement
Related Products
Sharp AR-M335N
Sharp AR-M620U
Sharp AR-M700U
Sharp AR-M700N
Sharp AR-M160
Sharp AR-M205
Sharp AR-M276
Sharp AR-M280U Imager
Sharp AR-M230 Series
SHARP AR-M237 - B/W Laser - Copier
Sharp Categories
Microwave Oven
LCD TV
TV
Stereo System
All in One Printer
More Sharp Manuals
Login
Sign In
OR
Sign in with Facebook
Sign in with Google
Upload manual
Upload from disk
Upload from URL