Pioneer X910BT - AVIC - Navigation System Manuals
Manuals and User Guides for Pioneer X910BT - AVIC - Navigation System. We have 2 Pioneer X910BT - AVIC - Navigation System manuals available for free PDF download: Operation Manual, Installation Manual

Pioneer X910BT - AVIC - Navigation System Operation Manual (214 pages)
FLASH MEMORY MULTIMEDIA AV NAVIGATION RECEIVER
Brand: Pioneer
|
Category: Car Video System
|
Size: 5.6 MB
Table of Contents
-
Map Coverage26
-
Route54
-
Save as55
-
-
Using AV Input140
-
Using AV1140
-
Using AV2140
-
-
Time Settings144
-
POI Settings145
-
3D Settings145
-
Map Settings145
-
Displayed Info146
-
Smart Zoom146
-
Overview Mode147
-
Route147
-
Warnings148
-
Set Home149
-
Demo Mode149
-
Sound Settings149
-
About150
-
Other Functions173
-
Appendix177
-
Troubleshooting177
-
Playable Discs192
-
DVD-Video and CD192
-
Playing Dualdisc192
-
Dolby Digital192
-
DTS Sound192
-
-
-
Compatibility193
-
-
Bluetooth200
-
SD and SDHC Logo201
-
Wma201
-
DIVX201
-
Aac201
-
-
Destination Menu204
-
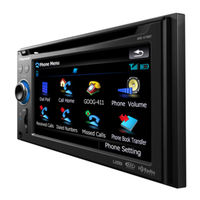
Phone Menu204
-
Settings Menu205
-
Shortcut Menu207
-
DVD Setup208
-
-
Glossary209
-
Specifications212
Advertisement
Pioneer X910BT - AVIC - Navigation System Installation Manual (58 pages)
FLASH MEMORY MULTIMEDIA AV NAVIGATION RECEIVER
Brand: Pioneer
|
Category: Car Video System
|
Size: 1.75 MB
Table of Contents
-
English
2-
Installation20
-
Français
29-
Installation48
Advertisement