
Related Manuals for JVC UX-G500V


Summary of Contents for JVC UX-G500V
-
Page 1: Micro Component System
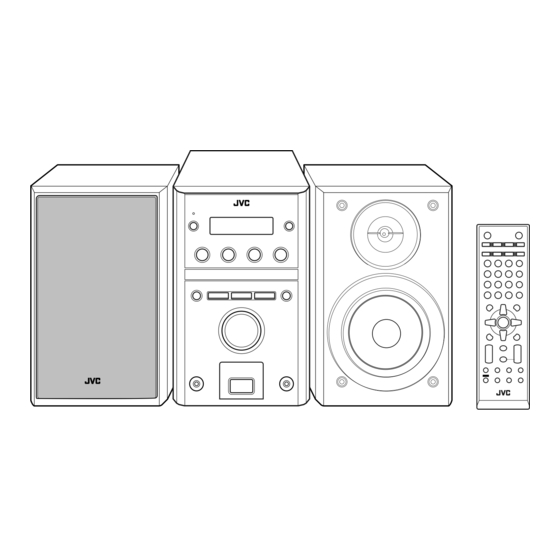
MICRO COMPONENT SYSTEM UX-G500V —Consists of CA-UXG500V and SP-UXG500V SUPER VIDEO INSTRUCTIONS GVT0249-006A [US/UB/UN/UG/UX/A/UH/UW]... - Page 2 Warnings, Cautions and Others CAUTION line. Disconnect the mains plug to shut the power off completely (the STANDBY lamp goes off). The MAINS plug or an appliance coupler is used as the disconnect device, the disconnect device shall remain readily operable.
- Page 3 Caution: Proper Ventilation To avoid risk of electric shock and fire, and to prevent damage, locate the apparatus as follows: 1. Front: No obstructions and open spacing. 2. Sides/Top/ Back: No obstructions should be placed in the areas shown by the dimensions below. 3.
- Page 4 Thank you for purchasing a JVC product. Please read all instructions carefully before operation, to ensure your complete understanding and to obtain the best possible performance from the System. Precautions Installation • Install the System in a location with adequate ventilation to prevent internal heat build-up in the System.
-
Page 5: Table Of Contents
Maintenance ... 40 Troubleshooting ... 41 Display Messages for Recording or Editing Operations ... 42 Language Code List ... 43 Optical Digital Out Signals ... 44 Operating JVC’s TVs Using the Remote Control ... 44 Specifications ... 45 Parts Index ... 46... - Page 6 Playable Disc/File Types DIGITAL VIDEO SUPER VIDEO • CD-R/-RW: Recorded in the Audio CD, Video CD, and SVCD formats. MP3, WMA, WAV, JPEG, MPEG-1, MPEG-2 and DivX files written in accordance with the “ISO 9660” format can also be played. •...
-
Page 7: Connections
Do not connect the power cord until all other connections have been made. • Connect VIDEO OUT directly to the video input of your TV. Connecting VIDEO OUT to a TV via a VCR may interfere with your viewing when playing back copy- protected discs/files. - Page 8 AM/FM antenna To assemble the AM loop antenna To connect AM/FM antenna AM loop antenna (supplied) Turn it until the best reception is obtained. If the cords are covered with vinyl, remove the vinyl to expose the tip of the cord by twisting the vinyl.
-
Page 9: Preparing The Remote Control
System. • You cannot connect a computer to the USB memory terminal ( • You cannot connect JVC Everio camcorder to the USB memory terminal ( • Noise and static electricity may stop the USB mass storage class device sound. -
Page 10: Display Indicators
The indications on the display tell you a lot of things while you are operating the System. Before operating the System, be familiar with when and how the indicators illuminate on the display. 1 USB indicator • Lights when “USB MEM” is selected as the source. 2 REC (recording) indicator •... -
Page 11: Daily Operations-Playback
Daily Operations— In this manual, operations using the remote control are mainly explained; however, you can use the buttons and controls on the main unit if they have the same (or similar) name and marks. Remote control Number buttons Playback Turn on the power. -
Page 12: Listening To The Radio
How to select a number Examples: To select number 5, press 5. To select number 10, press 10. To select number 15, press 10, 1, then 5. To select number 30, press 10, 3, then 0. To select number 125, press 10, 10, 1, 2, then 5. -
Page 13: Playing Back A Disc/Usb Mass Storage Class Device
Select a preset number for the station you store. • To select a number, see “How to select a number” on page 9. • You can also use the ¡ or 1 button. Store the station. To tune in to a preset station Select the band (FM or AM). - Page 14 If different types of playable files (audio/still picture/moving picture) are recorded • Select a file type to play (see the following and “FILE TYPE” in “PICTURE” menu on page 37). • You can use the control screen appears on the TV. (For still/moving picture files, it appears while playback is stopped.) For details, see page 32.
-
Page 15: Playing Back A Digital Audio Player
Remote To locate an item directly ONLY You can select a title/chapter/track/file directly and start playback. • For DVD Video, you can select a title before starting playback, while you can select a chapter after starting playback. • To select a number, see “How to select a number”... -
Page 16: Daily Operations-Sound & Other Adjustments
Daily Operations— Remote control Main unit Adjusting the Volume You can adjust the volume level from “VOL MIN” (level 0) to “VOL MAX” (level 40). Remote control: Main unit: Sound & Other Adjustments Remote ONLY To drop the volume in a moment To restore the volume, press again, or adjust the volume level. -
Page 17: Creating A Soothing Tone For Your Ear -My Sound
Remote To adjust the tone ONLY You can adjust the bass and treble level from –3 to +3. To adjust the bass Canceled To adjust the treble Canceled Creating a Soothing Tone for your Ear —MY SOUND Each individual response to audio frequency differently. MY SOUND is to store the response to audio frequency. -
Page 18: Creating 3-Dimensional Sound Field-3D Phonic
To exit MY SOUND setup To select the preset MY SOUND • This does not function for DivX files. (Canceled) Creating 3-Dimensional Sound Field —3D Phonic • This only functions while listening to disc/USB mass storage class device. • This does not function for MPEG-1/MPEG-2/DivX files. While playing... -
Page 19: Setting The Eco (Ecology) Mode
Setting the ECO (ecology) Mode Setting the ECO mode allows you to reduce power consumption by turning the display off while on standby. While the System is on standby... Changing the Color System and Scanning Mode INFO You can select the video output to match it to the color system of your TV (NTSC or PAL). -
Page 20: Setting The Clock
To adjust the picture tone Select “USER1” or “USER2.” • Follow steps 1 and 2 explained in “To select a preset picture tone.” Select a parameter you want to adjust. Adjust if the neutral color is bright or GAMMA dark (–3 to +3). BRIGHTNESS Adjust if the entire picture is bright or dark (–8 to +8). -
Page 21: Turning Off The Power Automatically
Turning Off the Power Automatically Auto Standby • This only functions while playing a disc or USB mass storage class device. A.STBY indicator lights on the display. When the playback stops, the A.STBY indicator starts flashing. If no operation is done for about 3 minutes while the indicator is flashing, the System turns off (standby) automatically. -
Page 22: Unique Video Disc/File Operations
Unique Video Disc/File Operations Remote control USB 6 DVD/CD 6 SLOW ZOOM Selecting the Audio Track For DivX files/DVD Video: While playing back a chapter/ file containing several audio languages, you can select the language to listen to. For DVD-VR/SVCD/VCD: While playing back a track, you can select the audio channel to listen to. -
Page 23: Selecting The Subtitle Language
Selecting the Subtitle Language For DivX files/DVD Video: While playing back a chapter/ file containing subtitles in different languages, you can select the subtitle language to display on the TV. For DVD-VR: While playing, you can turn the subtitles on or off. -
Page 24: Special Effect Playback
Special Effect Playback INFO Still picture playback To display the still picture: While playing... Disc USB mass storage class device To resume normal playback, press either button again. Frame-by-frame playback • This function is used only while playing DVD Video/ DVD-VR/SVCD/VCD. -
Page 25: Advanced Playback Operations
Advanced Playback Operations Remote control Number buttons Main unit Programming the Playing Order —Program Play INFO You can arrange the playing order of the chapters/tracks/ files (up to 99) before you start playback. • Program play cannot be used for the USB mass storage class device, DVD-VR and JPEG/MPEG-1/MPEG-2/ DivX files on a disc. -
Page 26: Playing At Random-Random Play
To check the programmed contents Before or after playback... In the reverse order. In the programmed order. • You can also use 4 or ¢ to check the programmed contents. To modify the program Before or after playback... To erase the last step: (while holding...) To erase the entire program: To add another step... -
Page 27: Playing Repeatedly
Playing Repeatedly INFO • For DVD Video/DVD-VR/SVCD/VCD/CD: You can also select the repeat mode using the on-screen bar (see pages 30 and 31). For DVD Video: While playing... (Canceled) For CD/SVCD/VCD: While playing (without PBC for SVCD/VCD) or before playback... (Canceled) For DVD-VR: While playing an Original Program... -
Page 28: Recording And Editing Operations
Recording and Editing Operations Remote control Number buttons Main unit INFO Before You Start Recording • It may be unlawful to record or play back copyrighted material without the consent of the copyright owner. • The recording level is not affected by the volume. •... -
Page 29: Recording From A Disc
Recording from a Disc You can record tracks in digital recording from a CD onto the USB device. • Do not vibrate the System while recording/editing tracks. Take care especially while “WAIT” is shown on the display. It may damage the recorded tracks on the System. -
Page 30: Entering Titles
Select the track/group title editing mode. (while holding...) Confirm the selection. GROUP TITLE EDIT ABCDE 01234 GROUP01 [0 – 9] KEY ENTER LETTERS CHANGE CHARACTER TABLE MOVE CURSOR [CANCEL] DELETE A LETTER [ENTER] REGISTER NEW NAME Ex.: When “GRP EDIT” is selected in step Enter a title. -
Page 31: Erasing The Tracks Or Groups
To move the character entry position Move the entry position to the right. Move the entry position to the left. To erase a character When the character entry position is on the character you want to erase... (while holding...) To enter a space Select the space from “Symbols.”... -
Page 32: On-Screen Operations
Remote control USB 6 DVD/CD 6 Number buttons On-screen Bar Operations INFO You can check the source information (disc/USB mass storage class device) and playback status by using the on-screen bar (not applicable for MP3/WMA/WAV/JPEG files). You can also use some functions when playing back DVD Video/DVD-VR/SVCD/VCD/CD. - Page 33 To operate using the On-screen Bar Ex.: Selecting a subtitle (French) for DVD Video While “DVD/CD” is selected as the source... Display the entire on-screen bar. disappears * This does not appear for MPEG-1/MPEG-2/DivX files. Select (highlight) the item you want. Dolby D TITLE TITLE 2...
- Page 34 Select the repeat mode you want. Repeats a desired portion (see below). Repeats the current title. TITLE* Repeats the disc (not applicable for DVD) or programmed track. CHAPTER** Repeats the current chapter. TRACK** Repeats the current track. Cancels Repeat Play. * While playing a DVD-VR, “PG”...
-
Page 35: Control Screen Operations
Chapter Search For DVD Video/DVD-VR: You can search for the chapter number to play. • This function is not available during Program Play and Random Play. While playing, display the entire on-screen bar. Select CHAP. Display the pop-up window. Dolby D TITLE TITLE 2 CHAP... - Page 36 Control screen for MP3/WMA/WAV/JPEG/MPEG-1/ MPEG-2/DivX files The control screen appears on the TV when the System detects MP3/WMA/WAV/JPEG/MPEG-1/MPEG-2/DivX files on the loaded disc or connected USB mass storage class device. • For JPEG/MPEG-1/MPEG-2/DivX, it appears when playback is stopped. Ex.: While playing an MP3 file on a disc. RANDOM REPEAT STEP Group : 2 / 3...
-
Page 37: Daily Timer Operations
Daily Timer Operations Remote control Setting the Daily Timer Using Daily Timer, you can wake up with your favorite music. AUDIO You can store three Daily Timer settings; however, you can activate only one of the timers at any one time. •... - Page 38 1 Set the hour then the minute for on-time. 2 Set the hour then the minute for off-time. 3 Select the playback source—“TUNER-FM,” “TUNER-AM,” “DISC,” “AUDIO IN,” or “USB.” 4 For “TUNER-FM” or “TUNER-AM”: Select a preset channel. For “DISC”: Select the title/group number, then the chapter/track/file number.
-
Page 39: Setup Menu Operations
Setup Menu Operations Remote control SET UP Menu Item MENU LANGUAGE AUDIO LANGUAGE SUBTITLE ON SCREEN LANGUAGE MONITOR TYPE 16:9 4:3 LB 4:3 PS Initial Settings You can change the settings of the System. • The Setup Menu can be used only when “DVD/CD” or “USB MEM’... - Page 40 Menu Item PICTURE SOURCE SCREEN SAVER FILE TYPE DIGITAL AUDIO OUTPUT DOWN MIX D. RANGE COMPRESSION You can enjoy powerful audio even at a low volume level while playing Dolby RESUME ON SCREEN GUIDE DivX REGISTRATION You can obtain optimal picture quality by selecting the source type of the video source.
-
Page 41: Additional Information
Playing Back a Disc/USB Mass Storage Class Device: JVC bears no responsibility for any loss of data in the USB mass storage class device while using this System. • When you change the source to “DVD/CD” or “USB MEM,”... - Page 42 <.mpg>, <.mpeg>, or <.mod>*. * <.mod> is an extension code used for the MPEG-2 files recorded by JVC Everio camcorders. The MPEG-2 files with the <.mod> extension code cannot be played back if HD format is used or its maximum bit rate is more than 2 Mbps.
-
Page 43: Maintenance
Recording and Editing Operations (see pages 25 to 28) • Do not vibrate the System while recording/editing tracks. Take care especially while “WAIT” is shown on the display. It may damage the recorded tracks in the System. Giving (Editing) Titles to Tracks or Groups: •... -
Page 44: Troubleshooting
Troubleshooting General Adjustments or settings are suddenly canceled before you finish. ] There is a time limit. Repeat procedure again. Operations are disabled. ] The built-in microprocessor may malfunction due to external electrical interference. Unplug the power cord and then plug it back in. Unable to operate the System from the remote control. -
Page 45: Display Messages For Recording Or Editing Operations
Recording and Editing Operations Unable to record into the USB device. ] The capacity of the USB device is full. Erase some tracks. ] There have been 999 tracks or groups on the USB device you want to record into. Erase unwanted tracks. ] The USB device is write-protected. -
Page 46: Language Code List
Language Code List Afar Abkhazian Afrikaans Ameharic Arabic Assamese Aymara Azerbaijani Bashkir Byelorussian Bulgarian Bihari Bislama Bengali, Bangla Tibetan Breton Catalan Corsican Welsh Danish Bhutani Greek Esperanto Estonian Basque Persian Finnish Fiji Faroese Frisian Irish Scots Gaelic Maori Galician Macedonian Guarani Malayalam Gujarati... -
Page 47: Optical Digital Out Signals
44.1 kHz, 16 bit Linear PCM 32/44.1/48 kHz, 16 bit Linear PCM 32/44.1/48 kHz, 16 bit Linear PCM Dolby Digital bitstream You can use the remote control to operate JVC’s TVs. TV/VIDEO Change the input mode. TV CH UP, DOWN Change the channel. -
Page 48: Specifications
Specifications Amplifier section—CA-UXG500V 60 W (30 W + 30 W) at 4 Ω (10% THD) Output power: Audio input: AUDIO IN: Stereo min. (∅ 3.5 mm) 500 mV/50 kΩ (at “IN_LVL1”) 250 mV/50 kΩ (at “IN_LVL2”) 125 mV/50 kΩ (at “IN_LVL3”) Audio output: SUBWOOFER OUT: 500 mV/10 kΩ... -
Page 49: Parts Index
4, 6, 12 8, 12, 44 10, 24 8, 10, 21, 26, 33 8, 9 4, 8 1, 13 8, 10, 21, 33 4, 6 8, 13 Remote control This remote control can also operate JVC’s TVs (see page 44). Main unit... - Page 50 © 2008 Victor Company of Japan, Limited 0508WMKMDWJMM...