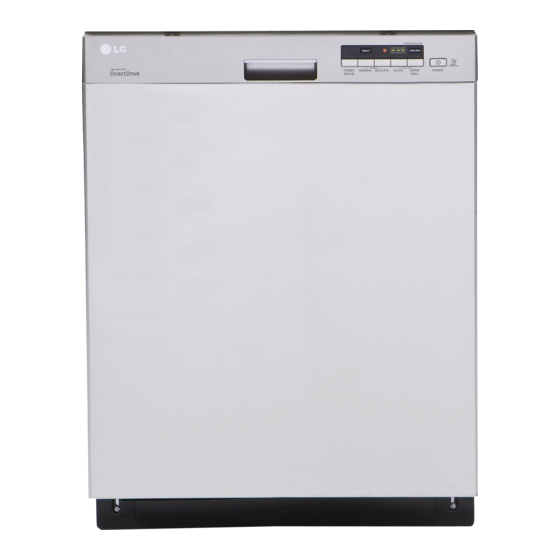
LG LDS5040ST Owner's Manual
Lds5040st; lds5040ww; lds5040bb
Hide thumbs
Also See for LDS5040ST:
- Owner's manual (80 pages) ,
- Specification (2 pages) ,
- Service manual (53 pages)

Related Manuals for LG LDS5040ST


Summary of Contents for LG LDS5040ST
- Page 1 OWNER’S MANUAL DISHWASHER Please read this owner's manual thoroughly before operating and keep it handy for reference at all times. www.lg.com P/No. : MFL6628142...
-
Page 2: Table Of Contents
TABLE OF CONTENTS TABLE OF CONTENTS IMPORTANT SAFETY INFORMATION CARE AND CLEANING 3 Basic Safety Precautions Keeping the dishwasher 4 Electrical Safety Cleaning the Metallic Parts 4 Before Using the Dishwasher Cleaning the Upper Spray Arm Cleaning the Top Spray Arm Seasonal Maintenance and Storage PARTS AND FEATURES 5 Features... -
Page 3: Important Safety Information
IMPORTANT SAFETY INFORMATION IMPORTANT SAFETY INFORMATION READ ALL INSTRUCTIONS BEFORE USE Your safety and the safety of others is very important. This owner's manual contains many important safety messages; as well as on your appliance. Always read and follow all safety messages. This is the safety alert symbol. -
Page 4: Basic Safety Precautions
IMPORTANT SAFETY INFORMATION BASIC SAFETY PRECAUTIONS To reduce the risk of re, electric shock, or injury to persons when using this appliance, follow basic precautions, WARNING including the following: For a permanently connected dishwasher: Tip Hazard This appliance must be connected to a grounded metal, perma- Do not put excessive downward force on the open dishwasher nent wiring system, or an equipment grounding conductor must door prior to installation, as this could cause damage to the unit... -
Page 5: Parts And Features
SOFT FOOD GRINDER AND SELF- CLEANING FILTER For best wash results, your LG dishwasher has a built-in soft food grinder and a selfclean- SLIM DIRECT MOTOR™ ing lter. The grinder grinds... -
Page 6: Parts
PARTS AND FEATURES PARTS 1. CONTROL PANEL 10. UPPER SPRAY ARM 2. DOOR HANDLE 11. LOWER SPRAY ARM 3. FRONT COVER 12. DETERGENT AND RINSE AID DISPENSER 4. LOWER COVER 13. DRYING VENT COVER 5. LEVELING FEET 14. UPPER RACK 6. -
Page 7: Control Panel
PARTS AND FEATURES CONTROL PANEL UPPER ONLY Cycles This cycle is only for washing items placed on the upper rack. Select your desired cycle. CHIME ON/OFF POWER SCRUB To enable or disable the chime, rst, turn on the dishwasher. This cycle is for heavily and hard soiled dishes. Power Scrub Press and hold the buttons simu- can also help reduce hard water spotting on dishes. - Page 8 Should you experience any problems with your dishwasher, it has the capability of transmitting data to your Smart Phone To activate the Child Lock: using the LG Smart Laundry & DW Application or via you tele- 1. Press the Power button. phone to the LG call center.
-
Page 9: Cycle Option Chart
PARTS AND FEATURES CYCLE OPTION CHART The cycle guide below shows the available options for each cycle. Extra Dry Sanitary Sanitary Sanitary Delay Cycle Sanitary Extra Dry Extra Rinse Extra Extra Dry Extra Dry Extra Rinse Start Rinse Extra Rinse Power Scrub Normal Delicate... -
Page 10: Operating Instructions
OPERATING INSTRUCTIONS OPERATING INSTRUCTIONS QUICK START CAUTION 1. LOAD THE DISHES Scrape the dishes free of excess food, bones, and any other Empty the lower rack rst and then the upper rack. This will avoid hard, non-soluble residue. Pull each rack out and load the water from dripping from the upper rack onto dishes in the lower dishes as described in this manual. -
Page 11: 1 Loading The Lower Rack
The combination of high water temperature and dishwasher de- LOADING 12 PLACE SETTINGS tergents may damage certain items. LG does not recommend washing the following items in the dishwasher: y Hand painted silver or gold leaf dishes y Wood or bone handled utensils... -
Page 12: 2 Folding Down The Lower Tines
OPERATING INSTRUCTIONS FOLDING DOWN THE LOWER TINES The tines are adjustable to t dishes of various sizes. Rear Front LOADING DISHES & POTS LOADING POTS & BOWLS... -
Page 13: 3 Loading The Silverware Basket
OPERATING INSTRUCTIONS LOADING THE SILVERWARE BASKET The silverware basket has separators to avoid scratching and tar- nishing of delicate silverware. The basket can be separated into three separate baskets that can be used individually in both the upper and lower racks. Unlock the tabs above the left and right side to separate. -
Page 14: 4 Loading The Upper Rack
OPERATING INSTRUCTIONS LOADING THE UPPER RACK Use the upper rack for small or delicate items such as small plates, cups, saucers, glasses, and dishwasher-safe plastic items. Cups, glasses, and bowls must be positioned upside down. Extra cups or cooking utensils can be laid on the fold down cup racks, which may also provide support for long stemmed glasses. -
Page 15: 5 Adding Detergent To The Dispenser
OPERATING INSTRUCTIONS ADDING DETERGENT TO THE DISPENSER y Only use detergent intended for automatic dishwashers. Pre wash y Detergent must be put into the detergent compartment be- Compartment fore starting any cycle. y Use less detergent if the dishes are only lightly soiled. Using ex- cess detergent can leave a lm on dishes and in the dishwasher resulting in poor wash performance. -
Page 16: 6 Adding Rinse Aid To The Dispenser
OPERATING INSTRUCTIONS ADDING RINSE AID TO THE DISPENSER The Low Rinse Aid indicator will appear in the display when more rinse aid is needed. The use of rinse aid is recommended to prevent water droplet spots on dishes and to enhance the drying performance. NOTE Only use liquid rinse aid in the dishwasher. -
Page 17: Care And Cleaning
CARE & CLEANING CARE & CLEANING For best results, it is important to periodically check and care for the spray arms. WARNING To prevent injury during care and maintenance/cleaning, wear gloves and/or protective clothing. KEEPING THE DISHWASHER CLEANING THE UPPER SPRAY If you will not be using the dishwasher for a long period time, run the Quick cycle without detergent. -
Page 18: 8 Cleaning The Top Spray Arm
CARE & CLEANING CLEANING THE TOP SPRAY ARM After cleaning the top spray arm, replace it. Slide it back into place and make sure the retainer clip engages. Make sure that the water jet holes are not blocked by food particles. When cleaning is necessary, use a screwdriver to release the retainer clip from the bracket that holds the top spray arm assembly to the tub. -
Page 19: Faqs
45 seconds. Then, turn the unit o and let it reset. Repeat LG dishwashers are designed to be used in conjunction with a as necessary. rinse aid. Using a rinse aid will maximize the amount of water that has already been sheeted away from the dishes before the dry cycle begins. - Page 20 FAQs PRODUCT FEATURES AND OPERATION What is Child Lock and how is it activated? Child Lock is a feature that will prevent the controls from being changed during the cycle. It does not prevent the door from be- ing opened or the unit from being powered o . To activate or de- activate, press the buttons simultane for 3 seconds.
-
Page 21: Troubleshooting
TROUBLESHOOTING BEFORE CALLING FOR SERVICE Problem Possible Causes Solutions Dishwasher will not Door is not completely closed. Make sure that the door is completely closed and operate latched. Power supply or power cord is not connected. Connect the power supply or cord properly. Fuse is blown or circuit breaker tripped. - Page 22 TROUBLESHOOTING BEFORE CALLING FOR SERVICE Food soil remains on dishes. Improper cycle selection. Select correct cycle based on soil level and type of dishware being washed. Water temperature too low. Check water supply connection or water heater setting. Dish washing detergent was not used. Use recommended detergent.
-
Page 23: Smart Diagnosis™ System
Smart Phone using the turned on by touching the POWER button. If your dishwasher is LG Smart Laundry & DW Application or via your telephone to the unable to turn on, then troubleshooting must be done without LG call center. -
Page 24: Warranty
DISHWASHER LIMITED WARRANTY (USA) Should your LG Dishwasher prove to be defective in material or workmanship under normal use during the warranty period listed below, e ective from the date of original consumer purchase of the product, LG Electronics will replace the defective part(s). Replacement parts will meet intended t and function of the original part. -
Page 25: Product Registration Information
: Should your LG Dishwasher (“Product”) fail due to a defect in material or workmanship under normal home use during the warranty period set forth below, LG Canada will at its option repair or replace the Product upon receipt of proof of original retail purchase. This warranty is valid only to the original retail purchaser of the product and applies only to a Product distributed in Canada by LG Canada or an authorized Canadian distributor thereof. - Page 26 MEMO...
- Page 27 LG Customer Information Center For inquires or comments, visit www.lg.com or call; 1-800-243-0000 USA, Consumer User 1-888-542-2623 CANADA Register your product Online! www.lg.com...