Epson AcuLaser C4000 Service Manual
Color laser page printer
Hide thumbs
Also See for AcuLaser C4000:
- Owner's manual (420 pages) ,
- Reference manual (406 pages) ,
- Setup manual (48 pages)

Related Manuals for Epson AcuLaser C4000


Summary of Contents for Epson AcuLaser C4000
-
Page 1: Service Manual
SERVICE MANUAL Color Laser Page Printer EPSON AcuLaser C4000 AcuLaser C4100 AcuLaser C3000 SEPG01012... - Page 2 The contents of this manual are subject to change without notice. All effort have been made to ensure the accuracy of the contents of this manual. However, should any errors be detected, SEIKO EPSON would greatly appreciate being informed of them.
- Page 3 MAKE CERTAIN THAT THE SOURCE VOLTAGES IS THE SAME AS THE RATED VOLTAGE, LISTED ON THE SERIAL NUMBER/RATING PLATE. IF THE EPSON PRODUCT HAS A PRIMARY AC RATING DIFFERENT FROM AVAILABLE POWER SOURCE, DO NOT CONNECT IT TO THE POWER SOURCE.
-
Page 4: About This Manual
About This Manual This manual describes basic functions, theory of electrical and mechanical operations, maintenance and repair procedures of the EPSON AcuLaser C4000, AcuLaser C4100 and AcuLaser C3000. The instructions and procedures included herein are intended for the experienced repair technicians,... -
Page 5: Manual Configuration
Provides preventive maintenance procedures and the achieved through a previous action. lists of Epson-approved lubricants and adhesives Indicates an operating or maintenance procedure, practice required for servicing the product. W A R N I N G or condition that, if not strictly observed, could result in APPENDIX. - Page 6 Abbreviation This manual uses unique abbreviations and acronyms which may differ from those in common use. Please note that they are used in the manual descriptions without explanation. The main abbreviations and acronyms are listed below. Because the following list was formed as a general reference, some items on the list may not appear in this manual.
- Page 7 Left Overhead Projector Short Edge Feed Organic Photo Conductor Signal Ground Left Hand Option Sensor Low Paper Sensor Laser Diode Solenoid Long Edge Feed Plug yy Start Of Scan LVPS Low Voltage Power Plug and Jack Scan Per Inch Supply Paper Handling Stamdard Pressure Roll...
-
Page 8: Safety Information
Safety Information Power Supply To prevent accidents during a maintenance procedure, strictly observe the Warnings and Cautions. Do not do anything that is dangerous or not within the scope of this document. Before starting any service procedure, switch off the printer power and Do not do anything that is dangerous even if not specifically described unplug the power cord from the wall outlet. -
Page 9: Mechanical Components
Mechanical Components High Temperature Assembly If you service a driving assembly (e.g., gears), first turn off the power To prevent you from becoming injured or burned, do the following: and unplug the power cord. Then manually rotate the assembly. Before working with a high temperature Assembly (e.g., Fuser Assembly), turn off the power, unplug the power cord and wait until it cools down. -
Page 10: Laser Beam
Laser Beam Do not expose yourself to the laser beam to prevent W A R N I N G injury (blindness). Do not open the cover that has the laser beam warning label. If you disassemble or assemble the printer, turn off the power. -
Page 11: Warning And Caution Labels
Warning and Caution Labels Warning labels and Caution labels are placed on the printer to help prevent accidents. When maintaining the printer, confirm that these labels are not dirty or peeling off. Caution label for high temperature components Figure 0-3. Warning and Caution Labels... - Page 12 Safety System Schematic The schematic below outlines the features of the printer's safety system. For details about signal wires, see "Appendix - Wiring Diagram".
-
Page 13: Manual Contents
Manual Contents Chapter 1 PRODUCT DESCRIPTIONS Chapter 2 OPERATING PRINCIPLES Chapter 3 TROUBLESHOOTING Chapter 4 DISASSEMBLY AND ASSEMBLY Chapter 5 ADJUSTMENT Chapter 6 MAINTENANCE Chapter 7 AcuLaser C4100 Chapter 8 AcuLaser C3000 Appendix... - Page 14 Revision Status Revision Issued Date Description March 18, 2002 First Release April 19, 2002 Chapter 1 1.14.5 Panel Setting Item List “PRINTER ADJUST MENU” • “Cleaning Cycle” and comment is added. Chapter 3 • “Reference page number in FIP” is added. 3.3 Level 2 FIP •...
- Page 15 Revision Issued Date Description November 15, 2002 Preface • A misdescription deleted. Chapter3 • “3-1-4 Test print by engine itself” added. August 4, 2003 Chapter 1 1.5.1 “Reliability” • The value of MPBF is fixed 1.10 “Consumable Components” • The value of Transfer Unit Lifetime is revised 1.14.5 “Panel Setting Item List”...
-
Page 16: Table Of Contents
CONTENTS Product Descriptions Button Functions Description ..............35 Special Operations .................. 36 Features......................5 Panel Setting Item List ................37 Explanation of Each Setting Menu and Setting Items ......47 Specifications ....................7 Basic Specifications .................. 7 About RAM Expansion................54 Various Sensors .................. - Page 17 Xerographics (PL11.1) ................77 Precautions When Using FIP ..............106 TCRU Assy (PL12.1 ~ 3)................. 78 Level 1 FIP....................107 Frame (PL13.1) & Drive (PL14.1)............79 Level 1 FIP Flowchart ................107 Electrical (PL15.1 ~ 2) & CONTROLLER BOARD (ESS) (PL16.1)..79 Level 2 FIP....................
- Page 18 Appendix Transfer Unit replacement..............474 Components that require regular replacement ........474 Parts List and Explodede Diagram for Main Unit of The AcuLaser C4000 Color Registration Adjustment ............... 475 Attention on handling the parts list ............570 Parts List Tables ................... 571 AcuLaser C4100 Exploded Diagrams ................
- Page 19 Notation on the Diagrams for the Wiring and Signal Descriptions between Components ..................613 Parts List and Exploded Diagram for Large Capacity Paper Unit of The AcuLaser C4000..................637 Attention on handling the part list ............637 Parts List Tables..................638 Exploded Diagrams ................
-
Page 20: Product Descriptions
C H A P T E R PRODUCT DESCRIPTIONS... -
Page 21: Features
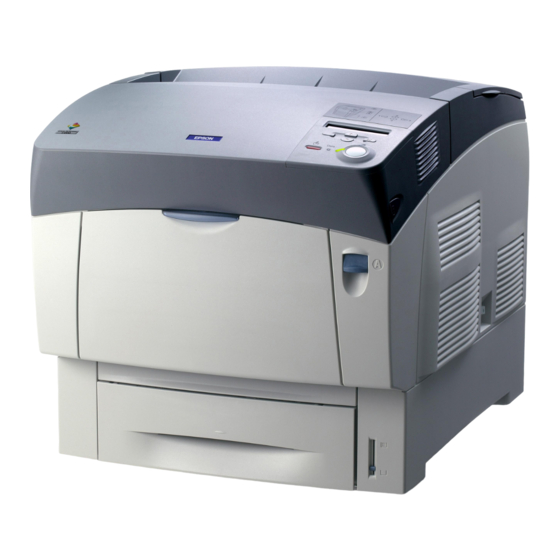
EPSON AcuLaser C4000/C4100/C3000 Revision F 1.1 Features CONTROLLER FEATURES 1. High-speed controller with a new CPU adopted This printer is a non-impact color page printer that takes advantage of a laser and electrophotographic technologies. It provides 1200/600/300 dpi of 64-bit RISC CPU... - Page 22 Font registration in the PostScript3 mode Registration of Reserve Job and Confidential Job Registering Form Overlay (only available for Windows environment) 6. Changing the Manual Feed specification. Same as EPL–5900 Figure 1-1. Exterior View of the EPSON AcuLaser C4000 Product Descriptions Features...
-
Page 23: Specifications
EPSON AcuLaser C4000/C4100/C3000 Revision F 1.2 Specifications 1.2.1.2 Printer Basic Specification METHOD This section describes specifications for EPSON AcuLaser C4000. 1.2.1 Basic Specifications Electrophotographic method using scanning semiconductor laser beam and dry two-component toner. 1.2.1.1 Process Specifications RESOLUTION Printer Type... - Page 24 EPSON AcuLaser C4000/C4100/C3000 Revision F Table 1-1. Printing mode by paper type PAPER FEED REFERENCE Mode <video I/F name> Paper type, thickness Centerline reference for each paper size and each paper feeder. Thick1 <Heavier paper-L mode> Thick paper: 100~159g/m2 Thick2 <Heavier paper-H mode>...
- Page 25 EPSON AcuLaser C4000/C4100/C3000 Revision F PAPER FEED Table 1-5. Optional Paper Source Combination Combination MP Tray Table 1-4. Paper Feed − (100 sheets* Standard Sheets Paper Applicable Containing Paper Size First Cassette Cassette 1 (500 Sheets) Source Paper Type *...
- Page 26 EPSON AcuLaser C4000/C4100/C3000 Revision F APPLICABLE PAPER SIZES, PAPER TYPES, AND PAPER ORIENTATION Table 1-6. Applicable Paper Sizes, Paper Types, and Paper Orientation 1 Standard Optional Dimensions in mm Duplex Printing Paper Paper Size cassette 500 Sheets (inches) Orientation MP Tray...
- Page 27 EPSON AcuLaser C4000/C4100/C3000 Revision F Special Applications : See Table 1-7 Table 1-7. Applicable Paper Sizes, Paper Types, and Paper Orientation 2 Standard Optional Dimensions in mm Duplex Printing Paper Paper Size Paper cassette 500 Sheets (inches) Orientation Tray (500 Sheets)
- Page 28 EPSON AcuLaser C4000/C4100/C3000 Revision F Duplex Unit ENVELOPE ORIENTATION Paper size: The regular size and unspecified size described in the Table 1-6 and 1-7 can be fed. Paper thikneess: 64 ~ 105g/m 500 sheets x 2 unit (Large capacity paper unit)
- Page 29 EPSON AcuLaser C4000/C4100/C3000 Revision F CONSUMABLE COMPONENTS PRODUCT LIFETIME Toner Cartridge: Black (K), Cyan (C), Magenta (M), Yellow (Y) Main unit Photoconductor Unit 300K printed pages or 5 years, whichever comes first. Transfer Unit (with periodic part replacement. See Components that require regular...
-
Page 30: Various Sensors
EPSON AcuLaser C4000/C4100/C3000 Revision F 1.3 Various Sensors Table 1-11. Various Sensors Unit Detectable Matter Detectable Device Remarks Cartridge mounted/unmounted Automatic detection (switch method) New cartridge Automatic detection* Toner Cartridge Cartridge type Refer to *9 (Cyan, Magenta, Yellow, Black) Near life end... - Page 31 EPSON AcuLaser C4000/C4100/C3000 Revision F *1: A used cartridge (with toner remaining) will be detected as a new cartridge if installed after Near End has been detected. Replacement of a toner cartridge before Near End has been detected will result in erroneous detection of Near End and End.
-
Page 32: Paper Specifications
EPSON AcuLaser C4000/C4100/C3000 Revision F 1.4 Paper Specifications Paper with punch holes or perforations. Creased, curled or torn paper. 1.4.1 Paper Types Irregularly shaped paper or paper with non-perpendicular corners. Labels that peel off easily. Standard Paper Paper with glue, staples or paper clips attached to it. -
Page 33: Paper Source Classification
EPSON AcuLaser C4000/C4100/C3000 Revision F 1.4.3 Paper Source Classification 1.4.4 Printing Area Table 1-12. Paper Usability for Each Paper Source PRINTABLE AREA Special Applications 210.9 x 351.6 210.9 x 896.0 (at the time of setting uncut paper) Standard Normal Paper... -
Page 34: Reliability And Durability
EPSON AcuLaser C4000/C4100/C3000 Revision F 1.5 Reliability and Durability Multiple-Sheet Feed Rate Table 1-14. Multiple-Sheet Feed Rate 1.5.1 Reliability Standard Cassette and Paper Type Standard MP Tray Optional 500 Sheets Unit MPBF Standard Paper 1/1,500 1/2,500 Normal Paper 1/1,000 1/1,500... -
Page 35: Durability
EPSON AcuLaser C4000/C4100/C3000 Revision F 1.5.2 Durability SKEW (With standard paper fed from MP tray or Paper cassette) PRINTING VOLUME Maximum 30K pages Table 1-15. Paper Skew Printing Page Scanning Direction Average 5K pages / month Main Scanning Direction |a - b| 1.23... -
Page 36: Operating Conditions (Including Comsumables)
EPSON AcuLaser C4000/C4100/C3000 Revision F 1.6 Operating Conditions SPACE REQUIREMENTS (Including Comsumables) In order to ensure that the printer operates properly, provide at least as much space as shown in the diagram below. AIR TEMPERATURE AND HUMIDITY To open the cover and be able to replace the consumables easily, provide at least 350 mm of space above the top of the printer. -
Page 37: Storage And Transport Of The Printer Main Unit (Consumables Packaged), And Optional Products
EPSON AcuLaser C4000/C4100/C3000 Revision F 1.7 Storage and Transport of the Printer Main Unit TRANSPORT BAROMETRIC PRESSURE (Consumables Packaged), and Optional 70.9275 kPa Minimum (15,000m) * Products *: In pressurized luggage compartment TEMPERATURE AND HUMIDITY CONDITIONS DROPPING Main unit (Consumables packaged) Table 1-20. -
Page 38: Electrical Feature
EPSON AcuLaser C4000/C4100/C3000 Revision F 1.8 Electrical Feature DIELECTRIC STRENGTH Specifications here are not applicable to any optional units. No break down during application of the voltages shown below for a one minute period. FAST TRANSIENT / BURST (AC LINE NOISE) Table 1-21. -
Page 39: Compliance With Standards And Regulations
EPSON AcuLaser C4000/C4100/C3000 Revision F 1.9 Compliance with Standards and Regulations 1.10 Consumable Components SAFETY STANDARDS SPECIFICATIONS For 200V system models: Table 1-23. Specifications IEC 60950 2 Edition / EN60950 / A1 - A4 / CE Mark Name Lifetime Dimensions (mm) -
Page 40: Maintenance
EPSON AcuLaser C4000/C4100/C3000 Revision F 1.11 Maintenance PACKING STORAGE AND TRANSPORT ENVIRONMENTS Temperature and Humidity Conditions Table 1-26. Maintenance Maintenance Item Period Maintenance Method Table 1-24. Temperature/Humidity Pickup roller At the time of paper feed Conditions Temperature Humidity Warranty Period Wipe with a dry cloth. -
Page 41: Exterior View And Unit Names
EPSON AcuLaser C4000/C4100/C3000 Revision F 1.12 Exterior View and Unit Names The table below lists the major exterior parts names. For the corresponding location, see the following figures. Note if any part names differ from the descriptions in the User’s Guide, they are shown in the brackets. - Page 42 EPSON AcuLaser C4000/C4100/C3000 Revision F Figure 1-6. Exterior view and Unit parts 2 Figure 1-7. Exterior view and Unit parts 3 Product Descriptions Exterior View and Unit Names 1-26...
-
Page 43: Controller Unit Specifications
EPSON AcuLaser C4000/C4100/C3000 Revision F 1.13 Controller Unit Specifications HOST INTERFACE Standard Parallel 1ch Bi-directional compatible with IEEE 1284 1.13.1 Controller Basic Specifications standard, B-type connector Compatibility, Nibble, ECP Ethernet 100 Base-TX/10 Base-T : 64-bit RISC PowerPC 750CX 400 MHz USB 1.1... -
Page 44: Controller Configuration
EPSON AcuLaser C4000/C4100/C3000 Revision F 1.13.2 Controller Configuration 1.13.3 External Interface Specifications This printer can set the following configurations for each destination. Since This printer is equipped with the following host interfaces. jumper resistors are used for the settings, these settings are determined when 1. -
Page 45: Parallel Interface Specifications
EPSON AcuLaser C4000/C4100/C3000 Revision F 1.13.3.1 Parallel Interface Specifications DEVICE ID INTERFACE TYPE The initial value of this printer’s Device ID is as shown below. In the following description, carriage returns have been added considering legibility, however IEEE 1284 bi-directional high-speed parallel interface in practice, the character string is continuous without carriage return codes being included. -
Page 46: Ethernet Interface Specifications
– 2. Microsoft Network – – Auto-IP, SSDP – CHASSIS GND – 3. NetBEUI P.L.High (+5V) SELINX SNMP, ENPC 4. NetWare SNMP, ENPC 5. AppleTalk SNMP, ENPC ENPC : EPSON Network Peripheral Control Protocol Product Descriptions Controller Unit Specifications 1-30... - Page 47 EPSON AcuLaser C4000/C4100/C3000 Revision F 1.13.3.3 USB Interface Specifications CONNECTOR NAME STANDARD RJ45 The USB interface specifications are compatible with the Universal Serial Bus COMPATIBLE CABLE Specification Rev. 1.1. 2-pair STP (10 Base-T, 100 Base-TX) DEVICE ID In order to conform to FCC Class B, EN55022 Class B and VCCI Class B, a shielded type cable must be used This printer has an 18-digit of serial ID for USB1.1.
-
Page 48: Optional Interface Specifications
EPSON AcuLaser C4000/C4100/C3000 Revision F 1.13.3.4 Optional Interface Specifications EMULATION TYPE/ENTITY TYPE This printer includes one slot of Type-B optional interface slot as standard equipment. Table 1-31. Emulation Type/Entity Type Emulation Emulation Type Entity Type MAIN SYSTEM TYPE POSTSCRIPT-00 LaserWriter... -
Page 49: Control Panel
EPSON AcuLaser C4000/C4100/C3000 Revision F 1.14 Control Panel Table 1-32. LEDs and switches on the Control Panel Location Name Remarks This section describes the control panel of this printer and its functions. LCD Panel 1 line x 20-digit (5 x 7 dot matrix) -
Page 50: Display Elements Description
EPSON AcuLaser C4000/C4100/C3000 Revision F 1.14.2 Display Elements Description FLASH 2 An error where an operator must release the error and press the Start/Stop button has occured. LCD (LIQUID CRYSTAL DISPLAY) (1) A liquid crystal display that indicates up to 1-line x 20-digit (5x7 dot matrix). It An error that cannot recover unless an operator clears the printer error has displays printer statuses in normal operation. -
Page 51: Button Functions Description
EPSON AcuLaser C4000/C4100/C3000 Revision F 1.14.3 Button Functions Description JOB CANCEL BUTTON (6) Normal pressing BACK BUTTON (2) Deletes currently printed data. In normal operations Every time pressing this button deletes the job. Shifts to the panel setting mode. Long pressing (two seconds or longer) -
Page 52: Special Operations
EPSON AcuLaser C4000/C4100/C3000 Revision F 1.14.4 Special Operations 1.14.4.2 Functions Description 1.14.4.1 List of Operating Functions HEX DUMP A list of the special operating functions supported by this printer is shown This function converts receiced data into hexadecimal ASCII, then outputs it. -
Page 53: Panel Setting Item List
EPSON AcuLaser C4000/C4100/C3000 Revision F 1.14.5 Panel Setting Item List PROGRAM MODULE COPY This printer’s setting item list is shown below. This function copies the contents of the ROM module in socket P, to the flash Furthermore, the factory defaults values are shown in Bold style. - Page 54 EPSON AcuLaser C4000/C4100/C3000 Revision F *5: This is displayed and can be executed only when the PostScript 3 module is EMULATION MENU installed. *6: This is not displayed on the panel. It can be executed in EJL. It is not open...
- Page 55 EPSON AcuLaser C4000/C4100/C3000 Revision F *3: This is valid only for the ESC/Page, ESC/Page-Color and PS3 mode. Other LCD Contrast modes print in 600 dpi. Cyan_Regist Transparencies cannot be printed at 1200 dpi. (Print quality cannot be guaranteed, so 1200 dpi is not offered as an option in the driver.) Magenta_Regist ∼...
- Page 56 EPSON AcuLaser C4000/C4100/C3000 Revision F CONFIDENTIAL JOB MENU * PARALLEL MENU * Item Value Item Value user xxxxxxxxxxxxxx Parallel I/F On , Off Enter Password * XXXX Speed Fast , Normal Job * xxxxxxxxxxxxxxx Bi-D Nibble , ECP , Off ∼...
- Page 57 EPSON AcuLaser C4000/C4100/C3000 Revision F NETWORK MENU * AUX MENU * Item Value Item Value Network I/F On , Off AUX I/F On , Off Network Config No , Yes AUX Config * No , Yes Get IPAddress * Panel, Auto , PING...
- Page 58 EPSON AcuLaser C4000/C4100/C3000 Revision F *4: This is displayed and can be selected/executed only when "AUX Config = Yes" is selected. The setting value switches to the Online status, and becomes valid when the network card restarts. Therefore, when changing the setting value, executing ”AUX Status Sheet”...
- Page 59 EPSON AcuLaser C4000/C4100/C3000 Revision F LJ4 MENU Source SymSet * 3199 Dest SymSet 3199 Item Value CR Function CR , CR+LF Font Source Resident , Download * , ROM A * LF Function LF , CR+LF Font Number available (Max 65535)
- Page 60 EPSON AcuLaser C4000/C4100/C3000 Revision F GL2 MENU ESCP2 MENU Item Value Item Value GLMode LJ4GL2, GLlike Font Courier, Prestige, Roman, Sans serif, Roman T, Orator S, Sans H, Script, OCR A, OCR B Scale Off, A0, A1, A2, A3 Pitch 10 cpi , 12 cpi ,15 cpi , Prop.
- Page 61 EPSON AcuLaser C4000/C4100/C3000 Revision F FX MENU 1239X MENU Item Value Item Value Font Courier, Font Courier, Prestige, Gothic, Orator, Script, Presentor, Prestige, Sans serif Roman, Sans Pitch 10cpi, 12cpi,15cpi, 17cpi, 20cpi, 24cpi, Prop. serif, Script, Code Page 437, 850, 858, 860, 863, 865...
- Page 62 EPSON AcuLaser C4000/C4100/C3000 Revision F *1: This setting menu is displayed only when the Support Mode has been SUPPORT MENU * activated by hidden operation when the power is turned on. *2: The current changes 5% for each step. Item Value *3: Warm boot occurs after Enter key is pressed.
-
Page 63: Explanation Of Each Setting Menu And Setting Items
EPSON AcuLaser C4000/C4100/C3000 Revision F 1.14.6 Explanation of Each Setting Menu and Reference: (This cannot be included in the manual) The remaining toner is displayed according to the Dispense Time Setting Items (3,050 Sec = 0 %) that is administrated by the engine. However, this value is not always accurate. - Page 64 EPSON AcuLaser C4000/C4100/C3000 Revision F 1.14.6.2 Tray Menu PHOTOCONDUCTOR MP TYPE, LC1 TYPE, LC2 TYPE, LC3 TYPE This displays the remaining life of the Photoconductor Unit in % (display only, exclusive readout). This menu specifies the type of paper set in the MP Tray, LC1/2/3 Cassette.
- Page 65 EPSON AcuLaser C4000/C4100/C3000 Revision F When Page Size = A4, LT, A5, B5, LGL, GLG, EXE, 1.14.6.4 Setup Menu Paper Type = Normal and PAPER SOURCE Paper Source = Auto : Selects the Paper Source that matches the Selects the paper source when Paper Type = Normal.
- Page 66 EPSON AcuLaser C4000/C4100/C3000 Revision F PAPER TYPE Set the Paper Type to match the change in the kind of paper to be used. Printing speed and CM (Color Matching) will be decided based on the setting. Table 1-35. Engine Control, CM (Color Matching)
- Page 67 EPSON AcuLaser C4000/C4100/C3000 Revision F 1.14.6.5 Reset Menu PAGE SIDE SELECTYPE INIT Front : Select this when printing on the front side of Paper Type = Thick or ExtraThk This function returns the panel setting values to the factory default. However Back : Select this when printing on the back side of Paper Type = Thick or following panel setting values are not returned to factory default.
- Page 68 EPSON AcuLaser C4000/C4100/C3000 Revision F 1.14.6.7 Printer Adjust Menu COATED This setting menu is displayed only when the Support Mode has been activated Sets the Transfer Current for printing with the Paper Type = Coated setting. by a special operation when the power is turned on, and can be selected. Then The rest of processing is same as Normal.
- Page 69 EPSON AcuLaser C4000/C4100/C3000 Revision F 1.14.6.8 Maintenance Menu (This cannot be included in the manual) This setting menu is displayed and can be selected only when the Maintenance Mode has been activated by hidden operation when the power is turned on.
-
Page 70: About Ram Expansion
Mann: Approx. 36.5kg (Printer body only) the errors. The dimension of EPSON AcuLaser C4000 is shown below. Set the resolution to 300 dpi in the case of B/W printing. In color printing, change the compression format to the non-reversible compression. -
Page 71: Operating Principles
C H A P T E R OPERATING PRINCIPLES... -
Page 72: Print Process
EPSON AcuLaser C4000/C4100/C3000 Revision F 2.1 Print Process 2.1.1 Print Process Overview This printer is a “full color laser printer” that uses the principle of electrophotographic recording. Each YMCK color (yellow, magenta, cyan, black) has its own special drum and developer that are used in tandem, three... -
Page 73: Print Process Diagram
EPSON AcuLaser C4000/C4100/C3000 Revision F 2.1.2 Print Process Diagram All major components of the printing process are consolidated in the PHD ASSY (PL11.1.3), as shown in the diagram below. The diagram below illustrates the entire print process. ” Figure 2-3. PHD ASSY Diagram Figure 2-2. -
Page 74: Print Process Technical Explanation
EPSON AcuLaser C4000/C4100/C3000 Revision F 2.1.3 Print Process Technical Explanation 2.1.3.9 Electrical Carge Removal This process neutralizes / removes any positive electrical charge that remains 2.1.3.1 Charging Process on the back of the paper due to the “tertiary transfer”, through the provision of a negative bias (negative voltage) by Detack Daw. - Page 75 Belt opposite the Heat Roll applies pressure to the paper and the toner is fixed in place. The fusing method of the AcuLaser C4000 differs from previous heat-roll and pressure-roll fusing methods. By using a pressure method with the belt: •...
- Page 76 EPSON AcuLaser C4000/C4100/C3000 Revision F 2.1.3.12 Cleaning (Full) The “Cleaning (Full)” process removes residual toner from the HTC, Refresher, IDT 1 Cleaner, and IDT 2 Cleaner after the complete toner image has been transferred to the paper. Toner that is not transferred during the “Secondary Transfer” and “3rd Stage Transfer”...
- Page 77 EPSON AcuLaser C4000/C4100/C3000 Revision F 2) Refresher, HTC High voltage opposite that used during the print transfer process (negative) is applied to IDT 1, IDT 2 and BTR. The drum surfaces are negatively charged by contact with IDT 1 rollers. By applying zero volts to the Refresher and HTC, residual toner (positive polarity) on the Refresher and HTC is transferred by electric charge to the drums.
-
Page 78: Flow Of Print Data
EPSON AcuLaser C4000/C4100/C3000 Revision F 2.2 Flow of Print Data 2.2.1 Data Flow Print data (electric signal) from the Printer Controller follows the flow shown below to become a print image. Operating Principles Flow of Print Data 2-62... -
Page 79: Drive Transmission Path
EPSON AcuLaser C4000/C4100/C3000 Revision F 2.3 Drive Transmission Path 2.3.1 DRIVE ASSY MAIN (PL14.1.2) Rotational force of the DRIVE ASSY MAIN is transferred through the flow shown below. Figure 2-8. DRIVE ASSY MAIN 2 Figure 2-7. DRIVE ASSY MAIN 2... -
Page 80: Drive Assy Deve (Pl14.1.1)
EPSON AcuLaser C4000/C4100/C3000 Revision F 2.3.2 DRIVE ASSY DEVE (PL14.1.1) 2.3.3 HOLDER ASSY (PL12.2.5 ~ 8) (Y, M, C, K) Rotational force of the DRIVE ASSY DEVE drives each of the color developers Rotational force of the Toner Motor inside the HOLDER ASSY drives the inside the PHD ASSY (PL11.1.3). -
Page 81: Drive Assy Fuser (Pl6.1.18)
EPSON AcuLaser C4000/C4100/C3000 Revision F 2.3.4 DRIVE ASSY FUSER (PL6.1.18) Rotational force of the DRIVE ASSY FUSER drives the FUSER ASSY (PL9.1.1). Figure 2-12. HOLDER ASSY 2 Figure 2-13. DRIVE ASSY FUSER Operating Principles Drive Transmission Path 2-65... -
Page 82: Motor Assy Dup (Pl8.1.8)
EPSON AcuLaser C4000/C4100/C3000 Revision F 2.3.5 MOTOR ASSY DUP (PL8.1.8) Rotational force of the MOTOR ASSY DUP is transferred through the flow shown below. Figure 2-15. MOTOR ASSY DUP 2 Figure 2-14. MOTOR ASSY DUP 1 Operating Principles Drive Transmission Path... -
Page 83: Paper Feed
EPSON AcuLaser C4000/C4100/C3000 Revision F 2.4 Paper Feed 2.4.2 Paper Feed Path Diagram 2.4.1 Paper Feed Path (without options in use) Figure 2-16. Paper Feed Path Diagram 1 Operating Principles Paper Feed 2-67... - Page 84 EPSON AcuLaser C4000/C4100/C3000 Revision F Figure 2-17. Paper Feed Path Diagram 2 Operating Principles Paper Feed 2-68...
-
Page 85: Functions Of Main Components
EPSON AcuLaser C4000/C4100/C3000 Revision F 2.5 Functions of Main Components The main components that make up this device will be explained with corresponding illustrations. Components are divided into blocks according to the structure of the printer. Paper Cassette (PL3.1 ~ 2) Paper Feeder (PL4.1 ~ 3) -
Page 86: Paper Feeder (Pl4.1 ~ 3)
EPSON AcuLaser C4000/C4100/C3000 Revision F 2.5.2 Paper Feeder (PL4.1 ~ 3) SENSOR HUM TEMP (PL4.2.4) Detects temperature and humidity inside the printer. The printer adjusts the charge voltage, the supply voltage to each transfer 2.5.2.1 Main Functions roller, and the developer bias according to the detected temperature and SWITCH SIZE TRAY1 (PL4.2.8) -
Page 87: Housing Assy Retard (Pl5.1)
EPSON AcuLaser C4000/C4100/C3000 Revision F 2.5.3 Housing Assy Retard (PL5.1) 2.5.4 Chute Assy In (PL6.1) 2.5.3.1 Main Functions 2.5.4.1 Main Functions SENSOR ASSY ADC (PL6.1.11) CLUTCH TURN MSI (MSI Turn Clutch) (PL5.1.9) Determines the density of the toner image on the surface of the BTR inside Driving force from the DRIVE ASSY MAIN (PL14.1.2) is transferred to the... -
Page 88: Chute Assy Out (Pl7.1)
EPSON AcuLaser C4000/C4100/C3000 Revision F 2.5.5 Chute Assy Out (PL7.1) 2.5.5.1 Main Functions SENSOR PAPER (Full Stack Sensor) (PL7.1.4) Change in the actuator position detects exceeded quantities of discharged or collected paper on the top cover. (Full stack: sensor receiving) SENSOR PAPER (Dup Jam Sensor) (PL7.1.4) -
Page 89: Chute Assy Exit (Pl8.1)
EPSON AcuLaser C4000/C4100/C3000 Revision F 2.5.6 Chute Assy Exit (PL8.1) 2.5.6.1 Main Functions MOTOR ASSY DUP (PL8.1.8) Supplies driving force to the ROLL EXIT (PL8.1.4), ROLL MID (PL8.1.5), ROLL DUP (PL7.1.12). ROLL EXIT (PL8.1.4) ROLL EXIT begins rotating by receiving driving force from MOTOR ASSY DUP and then conveys the fused print onto the top cover. -
Page 90: Fuser Assy & Btr Assy (Pl9.1)
EPSON AcuLaser C4000/C4100/C3000 Revision F 2.5.7 Fuser Assy & BTR Assy (PL9.1) 2.5.7.1 Main Functions FUSER ASSY (PL9.1.1) The FUSER ASSY fixes the toner to the paper with heat and pressure, and it also conveys the paper toward and away from the fusing location. - Page 91 EPSON AcuLaser C4000/C4100/C3000 Revision F Figure 2-25. Fuser Assy & BTR Assy 2 Figure 2-26. Fuser Assy & BTR Assy 3 Operating Principles Functions of Main Components 2-75...
- Page 92 EPSON AcuLaser C4000/C4100/C3000 Revision F Figure 2-27. Fuser Assy & BTR Assy 4 Operating Principles Functions of Main Components 2-76...
-
Page 93: Xerographics (Pl11.1)
EPSON AcuLaser C4000/C4100/C3000 Revision F 2.5.8 Xerographics (PL11.1) CHUTE ASSY REGI (CLUTCH REGI) (PL10.1.1) The CHUTE ASSY REGI is constructed of the CLUTCH REGI (PL10.1.12), the ROLL REGI RUBBER (PL10.1.10) and the ROLL REGI METAL. 2.5.8.1 Main Functions Driving force is transferred from the DRIVE ASSY MAIN (PL14.1.2) to the ROS ASSY (PL11.1.1) -
Page 94: Tcru Assy (Pl12.1 ~ 3)
EPSON AcuLaser C4000/C4100/C3000 Revision F 2.5.9 TCRU Assy (PL12.1 ~ 3) HVPS SUB (PL12.1.9) Provides high voltage to the following components during “3rd Stage Transfer” and “De-electrification” of the print process. 2.5.9.1 Main Functions • The BTR inside the BTR ASSY (PL9.1.2) SWITCH TCRU ASSY (Y) (PL12.2.10) -
Page 95: Frame (Pl13.1) & Drive (Pl14.1)
EPSON AcuLaser C4000/C4100/C3000 Revision F 2.5.10 Frame (PL13.1) & Drive (PL14.1) 2.5.11 Electrical (PL15.1 ~ 2) & CONTROLLER BOARD (ESS) (PL16.1) 2.5.10.1 Main Functions 2.5.11.1 Main Functions DRIVE ASSY MAIN (PL14.1.2) FAN REAR (PL15.1.3) Supplies driving force to the following components: Vents heat from inside the printer and prevents internal overheating. - Page 96 EPSON AcuLaser C4000/C4100/C3000 Revision F PWB DRIVE (PL15.1.15) Controls the motor and other components according to PWBA MCU & HVPS signals and sends data from sensors/switches to PWBA MCU & HVPS. Power from the LVPS passes through this PWB and is supplied to PWBA MCU &...
-
Page 97: Switches And Sensors
EPSON AcuLaser C4000/C4100/C3000 Revision F 2.6 Switches and Sensors Switches and sensors installed on this printer are shown in the diagrams below. For the function of each component, see “2.5 "Functions of Main Components". Figure 2-32. Switches and Sensors 1 Figure 2-33. -
Page 98: Mode
EPSON AcuLaser C4000/C4100/C3000 Revision F Operation Mode 2.7 Mode 2.7.2 The following five modes are available in the printer’s Operation Mode. 2.7.1 Print Mode DIAG TEST Mode Printer is ready to receive diagnostic commands or is executing There are three print modes: Normal Mode, High Resolution Mode, and High diagnostics. -
Page 99: Control
EPSON AcuLaser C4000/C4100/C3000 Revision F 2.8 Control 2.8.2 Paper Supply Selection Control When not actively controlled by the Printer Controller, TRAY 1 is selected as 2.8.1 Paper Size Control the paper supply when the power is turned ON. NOTE: “TRAY 1” is used as the name for the printer’s internal paper The table below shows “Paper Size Switch ON/OFF conditions for SWITCH... -
Page 100: Process Control
EPSON AcuLaser C4000/C4100/C3000 Revision F 2.8.4 PROCESS CONTROL An overview of POTENTIAL CONTROL is shown below. 1) Temperature and humidity is measured by the SENSOR HUM TEMP In order to render a stable print, timely correction of image formation (PL4.2.4) and target values are set for drum charge voltage and parameters is needed. - Page 101 EPSON AcuLaser C4000/C4100/C3000 Revision F 2.8.4.2 Toner Density Control method determines the number of dispense rotations. ADC dispense rotation calculations are cancelled after 8 pages are It is necessary to maintain fixed toner densities in order to obtain stable print printed.
- Page 102 EPSON AcuLaser C4000/C4100/C3000 Revision F 2.8.4.3 High Area Coverage Mode 2.8.4.5 SENSOR ASSY ADC (PL6.1.11) LED Light Quantity Control When printing a series of pages with an image coverage area requiring toner dispensing, the toner density inside the developer can become low.
-
Page 103: Color Registration Control
EPSON AcuLaser C4000/C4100/C3000 Revision F 2.8.5 Color Registration Control An overview of Color Registration Controls shown below. 1) SENSOR ASSY ADC (PL6.1.11) output is measured when there is no This printer uses a dedicated drum and developer for each of the colors yellow, toner on the BTR, and the threshold is established. -
Page 104: Btr Assy (Pl9.1.2) Control
EPSON AcuLaser C4000/C4100/C3000 Revision F 2.8.6 BTR ASSY (PL9.1.2) Control 4) Cancellation of “BTR Worklife Warning” and “BTR Worklife Error” The SENSOR TNR FULL does not detect that the collection space is full when the power is turned on or the front door is closed, the “BTR 2.8.6.1 Detection of BTR ASSY (PL9.1.2) Position... -
Page 105: Toner Control
EPSON AcuLaser C4000/C4100/C3000 Revision F 2.8.7 Toner Control This condition is established to prevent erroneous detection that can occur due to position of the film as explained at “2.8.7.1 About SENSOR Installation of the toner bottle is detected by the SWITCH TCRU ASSY TONER LOW”. -
Page 106: Fuser Control
EPSON AcuLaser C4000/C4100/C3000 Revision F 2.8.8 Fuser Control intervals are opened after a set number of pages, and because the number of pages output in one minute is reduced, this method is called PPM DOWN. PPM DOWN is activated on the basis of paper size or paper class. -
Page 107: Operating Principles For The Large Capacity Paper Unit (Option Feeder)
EPSON AcuLaser C4000/C4100/C3000 Revision F 2.9 Operating Principles for the Large Capacity Paper Unit (Option Feeder) The following sections describes Operating Principles for the Large Capacity Paper Unit. 2.10 Drive Transmission Path 2.10.1 DRIVE ASSY FEEDER Rotational force of the DRIVE ASSY FEEDER is transferred through the flow shown below. -
Page 108: Gear Layout
EPSON AcuLaser C4000/C4100/C3000 Revision F 2.10.2 Gear Layout Figure 2-38. Gear Layout Operating Principles Drive Transmission Path 2-92... -
Page 109: Paper Feed
EPSON AcuLaser C4000/C4100/C3000 Revision F 2.11 Paper Feed 2.11.2 Paper Feed Path Diagram 2.11.1 Paper Feed Path When the OPTION FEEDER is attached, paper is supplied in the following order. Figure 2-39. Paper Feed Path Diagram Operating Principles Paper Feed... -
Page 110: Functions Of Main Components
EPSON AcuLaser C4000/C4100/C3000 Revision F 2.12 Functions of Main Components ROLL ASSY FEED (Tray 2) (PL17.3.3) ROLL ASSY FEED (Tray 3) (PL17.3.3) When the SOLENOID FEED moves, force from the SPRING FEED The main components that make up this device will be explained with (PL17.3.9, PL17.3.10) causes the GEAR FEED and GEAR IDLER FEED... - Page 111 EPSON AcuLaser C4000/C4100/C3000 Revision F Figure 2-40. Two Tray Module II/III Operating Principles Functions of Main Components 2-95...
-
Page 112: Two Tray Module Iv (Pl17.4)
EPSON AcuLaser C4000/C4100/C3000 Revision F 2.12.2 Two Tray Module IV (PL17.4) 2.12.2.1 Main Functions SENSOR LOW PAPER (Tray 2) (Low Paper Sensor) (PL17.4.7) SENSOR LOW PAPER (Tray 3) (Low Paper Sensor) (PL17.4.7) The actuator lowers according to the level of paper in the tray. When the actuator descends to a certain level, the sensor becomes shaded, thereby allowing detection of the low quantity of paper. -
Page 113: Switches And Sensors
EPSON AcuLaser C4000/C4100/C3000 Revision F 2.13 Switches and Sensors Switches and sensors installed on the AcuLaser C4000 Base Engine are shown in the diagrams below. For the function of each component, see “Section 2.5 Functions of Main Components”. Figure 2-42. Switches and Sensors... -
Page 114: Controller Operating Principles
The following figure shows C470 MAIN circuit board components. This section describes C470MAIN board which is the main controller of AcuLaser C4000. The following describes controller features of the AcuLaser C4000. High-speed controller with a new CPU adopted 64-bit RISC CPU Power PC 750CX 400MHz 64-bit high-speed memory PC100 SDRAM DIMM 64MB of standard RAM. - Page 115 EPSON AcuLaser C4000/C4100/C3000 Revision F The following figure shows C470 Main Circuit Board Diagrams. Figure 2-44. C470 Main Circuit Board Diagrams Operating Principles Controller Operating Principles 2-99...
- Page 116 EPSON AcuLaser C4000/C4100/C3000 Revision F The following table shows C470 Main Circuit Board Major Components. Table 2-3. C470 Main Circuit Board Major Components Name Model Number / Function Location Table 2-3. C470 Main Circuit Board Major Components E05B93BA / Name Model Number / Function •...
- Page 117 EPSON AcuLaser C4000/C4100/C3000 Revision F Table 2-3. C470 Main Circuit Board Major Components Name Model Number / Function Location M51953BFP / • 8SOP Reset IC IC502 • 340mS • 4.25V SCGPWM4B / 1. IC for pulse width modulation for connection...
-
Page 118: Troubleshooting
C H A P T E R TROUBLESHOOTING... -
Page 119: Overview
EPSON AcuLaser C4000/C4100/C3000 Revision F 3.1 Overview 3.1.2 Preliminary Checks Check the following before troubleshooting: After confirming the problem and carrying out preliminary checks, you should take advantage of FIP (Fault Isolation Procedure), and the information in “Chapter 2: 1. Make sure that the power source voltage is within the specifications. (Measure OPERATING PRINCIPLE”... -
Page 120: Precautions When Performing Work
EPSON AcuLaser C4000/C4100/C3000 Revision F 3.1.3 Precautions When Performing Work 5. When carrying out work, you should use a wrist band to ground your body in order to eliminate static electricity from your body. 1. Be sure to unplug the POWER CORD (PL15.1.9) except when necessary when performing work. -
Page 121: Test Print By Engine Itself
EPSON AcuLaser C4000/C4100/C3000 Revision F 3.1.4 Test print by engine itself Overview This printer can perform test print as a operation check by engine itself. The printer prints a test print pattern with built-in engine function. Test Print Method 1. Remove the PWB Controller. (Refer to Chapter 4.2.19 "CONTROLLER BOARD".) -
Page 122: Precautions When Using Fip
EPSON AcuLaser C4000/C4100/C3000 Revision F 3.1.5 Precautions When Using FIP 10. When measuring voltages inside the FIP, the minus-side P/J3-4 at the rear is always set to SG (signal ground) or RTN (return). Because of this, after 1. When carrying out troubleshooting for the FIP, it is assumed that the PWB... -
Page 123: Level 1 Fip
EPSON AcuLaser C4000/C4100/C3000 Revision F 3.2 Level 1 FIP The Level 1 FIP is the first step to take in diagnosing problems. The Level 1 FIP involves identifying error codes and other trouble symptoms, and is intended as a guide for proceeding to the troubleshooting procedures in Level 2. -
Page 124: Level 2 Fip
EPSON AcuLaser C4000/C4100/C3000 Revision F 3.3 Level 2 FIP Face-down Tray 3.3.1 Level 2 FIP The Level 2 FIP includes the procedures for diagnosing problems by classifying them according to error codes and other trouble symptoms. The method of problem diagnosis allow the causes of problems to be located quickly by following the procedures indicated in the FIP or the checking procedures. - Page 125 LED Message Category Status code Refer to: The table below shows the list of printer message of AcuLaser C4000. Each uuuu Toner Out Error message is the one when “Lang = English” is set. (uuuu = CMYK, only the relevant item is displayed)
- Page 126 EPSON AcuLaser C4000/C4100/C3000 Revision F Table 3-1. Printer Messages Note *1: See Section 3.3.3 "Service Call Error Messages". The relevant values among the Values of Paper Source in the panel setting LED Message Category Status code Refer to: except for Auto are displayed.
- Page 127 3.3.2.2 Details of Status Message and Treatment 3.3.2.3 Details of Error Message and Treatment This section describes the status messages specific to AcuLaser C4000. This section describes the error messages specific to AcuLaser C4000. NOTE: “READY” message means that the printer performs printing as Optional RAM Error soon as the “READY”...
- Page 128 EPSON AcuLaser C4000/C4100/C3000 Revision F Jam xxxx uuuu Toner Cart Out Description Description A paper jam has occurred at the location indicated in X. One of the C, M, Y, K toner cartridges is not installed. The uuuu display corresponds to the C, M, Y, K toner cartridges, and indicates the cartridge that is not installed.
- Page 129 EPSON AcuLaser C4000/C4100/C3000 Revision F Install Photocondctr Install TransferUnit Description Description The Photoconductor Unit is not installed or is not set correctly. The Transfer Unit is not installed. The Ready LED is off and the Error LED is on. The Ready LED is off and the Error LED is on.
- Page 130 EPSON AcuLaser C4000/C4100/C3000 Revision F Wrong Photoconductor Replace Photocondctr Description Description The appropriate Photoconductor Unit is not installed. Printing stops since this error cause damages to the engine. NOTE: Do not open to an user this. The Ready LED is off and the Error LED is on.
- Page 131 EPSON AcuLaser C4000/C4100/C3000 Revision F Printer Open Paper Out ttt sss Description Description One of the Cover A, Cover B, and Cover D is open. 1: There is no paper loaded in the selected paper source “sss”. 2: Paper is set in none of the paper sources.
- Page 132 Revision F 3.3.2.4 Details of Warning Message and Treatment Worn Photoconductor This section describes the warning messages specific to AcuLaser C4000. Description NOTE: Warning displays do not change any LED lighting. This warning informs the user that the Photoconductor Unit has reached the end of its life cycle.
- Page 133 EPSON AcuLaser C4000/C4100/C3000 Revision F Execute Reset of the Reset Menu. Worn Fuser Replace the Transfer Unit with a new one. Description Reference FIP This warning message informs the user that the Fuser Unit has reached the FIP-36 end of its life cycle. The printing quality after that this message appears is not guaranteed.
-
Page 134: Service Call Error Messages
EPSON AcuLaser C4000/C4100/C3000 Revision F 3.3.3 Service Call Error Messages Controller Related Service-Call Error See the following tables for the detailed information on the Service-Call Error Table 3-3. List of Service-Call Errors (Controller Related) messages. Error Error Reference Explanation Category... - Page 135 EPSON AcuLaser C4000/C4100/C3000 Revision F Table 3-3. List of Service-Call Errors (Controller Related) Error Error Reference Explanation Category Code ffff C or D 1020 RAM error (Slot 0) FIP-50 C or D 1021 RAM error (Slot 1) FIP-50 C or D...
- Page 136 EPSON AcuLaser C4000/C4100/C3000 Revision F FIP-1 Yellow Toner Cartridge Detached Treatment Step Check Initial setting Do the following checks show a problem? • Cartridge installation • With the tool: Go to step 2. Reinstall applicable parts. • Switch TCRU Assy (PL12.2.10) (Y) installation •...
- Page 137 EPSON AcuLaser C4000/C4100/C3000 Revision F Treatment Step Check PWB drive (PL15.1.15) continuity 1. Disconnect the connector (P/J42) and (P/J51) on the PWB Drive REGI. Replace the PWB Drive. Go to step 7. (Refer to Ch4-4.2.18.5) 2. Check the continuity between P42-4 <=> J51-11.
- Page 138 EPSON AcuLaser C4000/C4100/C3000 Revision F FIP-2 Magenta Toner Cartridge Detached Treatment Step Check Initial setting Do the following checks show a problem? • Cartridge installation • With the tool: Go to step 2. Reinstall applicable parts. • Switch TCRU Assy (PL12.2.10) (M) installation •...
- Page 139 EPSON AcuLaser C4000/C4100/C3000 Revision F FIP-3 Cyan Toner Cartridge Detached Treatment Step Check Initial setting Do the following checks show a problem? • Cartridge installation • With the tool: Go to step 2. Reinstall applicable parts. • Switch TCRU Assy (PL12.2.10) (C) installation •...
- Page 140 EPSON AcuLaser C4000/C4100/C3000 Revision F FIP-4 Black Toner Cartridge Detached Treatment Step Check Initial setting Do the following checks show a problem? • Cartridge installation • With the tool: Go to step 2. Reinstall applicable parts. • Switch TCRU Assy (PL12.2.10) (K) installation •...
- Page 141 EPSON AcuLaser C4000/C4100/C3000 Revision F FIP-5 PHD Detached Treatment Step Check Initial setting Do the following checks show a problem? Reinstall applicable parts. Go to step 2. • PHD Assy (PL11.1.3) installation PHD Assy (PL11.1.3) 1. Replace the PHD Assy.
- Page 142 EPSON AcuLaser C4000/C4100/C3000 Revision F Treatment Step Check PWB Drive (PL15.1.15) power supply circuit continuity 1. Disconnect the P/J41 connector from the PWB drive. 2. Check the continuity for the following circuits. Replace the PWB Drive. Go to step 9.
- Page 143 EPSON AcuLaser C4000/C4100/C3000 Revision F Treatment Step Check Harness Assy EEPROM (PL15.2.10) continuity check 1. Disconnect the P/J140 connector from the PWBA MCU & HVPS. (Refer to Ch4-4.2.18.1) 2. Check the continuity for the following lines. Replace the PWBA MCU &...
- Page 144 EPSON AcuLaser C4000/C4100/C3000 Revision F FIP-6 BTR Detached Treatment Step Check Initial setting Do the following checks show a problem? Reinstall applicable parts. Go to step 2. • BTR Assy (PL9.1.2) installation • Sensor Assy ADC (PL6.1.11) installation BTR Assy (PL9.1.2) 1.
- Page 145 EPSON AcuLaser C4000/C4100/C3000 Revision F Treatment Step Check PWB Drive (PL15.1.15) power supply circuit continuity 1. Disconnect the P/J41 connector from the PWB Drive. Replace the PWB Drive. Go to step 9. (Refer to Ch4-4.2.18.5) 2. Check the continuity between P61-8 <=> P41-24.
- Page 146 EPSON AcuLaser C4000/C4100/C3000 Revision F Treatment Step Check Harness Assy Front 1 (PL15.2.7) signal check Replace the Sensor Assy ADC. Go to step 12. Is there 0V DC between P/J136-5 <=> P/J136-3? (Refer to Ch4-4.2.9.2) Harness Assy CTD (PL6.1.10) continuity check 1.
- Page 147 EPSON AcuLaser C4000/C4100/C3000 Revision F FIP-7 Fuser Detached Treatment Step Check Initial setting Do the following checks show a problem? Reinstall applicable parts. Go to step 2. • Fuser Assy (PL9.1.1) installation Fuser Assy (PL9.1.1) check 1. Remove the Fuser Assy (Refer to Ch4-4.2.12.1).
- Page 148 EPSON AcuLaser C4000/C4100/C3000 Revision F FIP-8 CRUM ID Error Treatment Step Check Initial setting Do the following checks show a problem? Reinstall applicable parts. Go to step 2. • PHD Assy (PL11.1.3) installation • PWBA CRUM installation inside PHD Assy PHD Assy (PL11.1.3)
- Page 149 EPSON AcuLaser C4000/C4100/C3000 Revision F Treatment Step Check 3.3V DC power supply to PWB Drive (PL15.1.15) 1. Disconnect the P/J61 connector from the PWB Drive. Go to FIP-DC (Page 5-280). Go to FIP-DC (Page 5-280). 2. Measure the voltage between J61-6 <=> J61-5.
- Page 150 EPSON AcuLaser C4000/C4100/C3000 Revision F Treatment Step Check Harness Assy EEPROM (PL15.2.10) continuity check 1. Disconnect the P/J140 connector from the PWBA MCU & HVPS. (Refer to Ch4-4.2.18.1) 2. Check the continuity for the following lines. Replace the Harness Assy Go to step 13.
- Page 151 EPSON AcuLaser C4000/C4100/C3000 Revision F FIP-9 Media Type Mismatch Treatment Step Check Initial setting Do the following checks show a problem? • With the tool: Go to step 2. Reinstall applicable parts. • Sensor OHP (PL10.1.16) installation • Without the tool: Go to step 3.
- Page 152 EPSON AcuLaser C4000/C4100/C3000 Revision F Treatment Step Check PWBA MCU & HVPS (PL15.1.2) power supply circuit continuity 1. Disconnect P/J11 from the PWBA MCU & HVPS. Replace the PWBA MCU & 2. Check the continuity for the following circuits. Go to step 9.
- Page 153 EPSON AcuLaser C4000/C4100/C3000 Revision F FIP-10 Feed Jam Treatment Step Check Initial setting Do the following checks show a problem? • Paper cassette installation • Condition of paper inside cassette Reinstall applicable parts. Go to step 2. • Worn or damaged roll or gear inside feeder •...
- Page 154 EPSON AcuLaser C4000/C4100/C3000 Revision F Treatment Step Check 3.3V DC power supply to PWB Drive (PL15.1.15) 1. Disconnect the P/J61 connector from the PWB Drive. Go to step 10. Go to FIP-DC (Page 5-280). 2. Measure the voltage between J61-6 <=> J61-5.
- Page 155 EPSON AcuLaser C4000/C4100/C3000 Revision F Treatment Step Check Drive Assy Main (PL14.1.10) check 1. Remove the PHD Assy (PL11.1.3). 2. Close the I/L switch of the PWB Drive (PL15.1.15). Replace the PWBA MCU & Go to step 16. HVPS. (Refer to Ch4-4.2.18.1) 3.
- Page 156 EPSON AcuLaser C4000/C4100/C3000 Revision F Treatment Step Check Harness Assy 24V (PL15.2.6) continuity 1. Disconnect the P/J60 connector of the PWB Drive (PL15.1.15) and P/J63 connector of the LVPS (PL15.1.10). Replace the Harness Assy 24V 2. Check the continuity for the following lines.
- Page 157 EPSON AcuLaser C4000/C4100/C3000 Revision F Treatment Step Check PWB Drive (PL15.1.15) 1. Replace the PWB Drive. (Refer to Ch4-4.2.18.5) Go to step 26. Problem solved. 2. Carry out a test print. Does the problem still occur? Drive Assy Main (PL14.1.2) 1.
- Page 158 EPSON AcuLaser C4000/C4100/C3000 Revision F Treatment Step Check Harness Assy 24V (PL15.2.6) continuity 1. Disconnect P/J60 connector of the PWB Drive (PL15.1.15) and P/J163 connector of the LVPS (PL15.1.10). Replace the Harness Assy 24V 2. Check the continuity for the following lines.
- Page 159 EPSON AcuLaser C4000/C4100/C3000 Revision F Treatment Step Check I/L Switch check 1. Remove the Cover Side R. (Refer to Ch4-4.2.4.9) 2. Open and close the Cover Assy Front Head (PL1.1.2). Go to step 40. Reinstall applicable parts. 3. Check the operation of the I/L Switch of the PWB Drive (PL15.1.15).
- Page 160 EPSON AcuLaser C4000/C4100/C3000 Revision F Treatment Step Check Clutch Turn MSI (PL5.1.9) operation check • With the tool: 1. Print while feeding paper from the MSI. Go to step 47. Go to step 52. 2. Check if the leading edge of the paper passes the Roll Turn (PL5.1.2).
- Page 161 EPSON AcuLaser C4000/C4100/C3000 Revision F Treatment Step Check Solenoid Feed MSI (PL7.1.40) check 1. Close the I/L Switch of the PWB Drive (PL15.1.15). Replace the PWBA MCU & Go to step 54. 2. Use the diagnosis tool to carry out a Digital Output Test to check if the Solenoid Feed MSI HVPS.
- Page 162 EPSON AcuLaser C4000/C4100/C3000 Revision F Treatment Step Check PWB Drive (PL15.1.15) power supply circuit 1. Remove the PHD Assy (PL11.1.3). PWB Drive. 2. Close the I/L Switch of the PWB Drive (PL15.1.15). Go to step 60. (Refer to Ch4-4.2.18.5) 3. Measure the voltage between P/J60-1 <=> P/J60-2.
- Page 163 EPSON AcuLaser C4000/C4100/C3000 Revision F FIP-11 Regi Jam Treatment Step Check Initial setting Do the following checks show a problem? • Actuator Regi (PL10.1.21) installation Reinstall applicable parts. Go to step 2. • Sensor Regi (PL10.1.20) installation • Chute Assy Regi (PL10.1.1) installation Is the paper in tray 1/2/3 and the tray Assy MSI (PL1.2.12) normal with no curl, wrinkles...
- Page 164 EPSON AcuLaser C4000/C4100/C3000 Revision F Treatment Step Check PWBA MCU & HVPS (PL15.1.2) power supply circuit continuity 1. Disconnect the P/J11 connector from the PWBA MCU & HVPS. Replace the PWBA MCU & Go to step 10. HVPS. (Refer to Ch4-4.2.18.1) 2.
- Page 165 EPSON AcuLaser C4000/C4100/C3000 Revision F Treatment Step Check Harness Assy DRV 1 (PL15.2.2) continuity 1. Disconnect the P/J41 connector from the PWB Drive (PL15.1.15). 2. Disconnect the P/J11 connector from the PWBA MCU & HVPS (PL15.1.2). Replace the Harness Assy 3.
- Page 166 EPSON AcuLaser C4000/C4100/C3000 Revision F FIP-12 Fuser Jam Treatment Step Check Initial setting Do the following checks show a problem? • Sensor Exit actuator installation • Fuser Assy (PL9.1.1) installation Reinstall applicable parts. Go to step 2. • Chute Assy In (PL2.1.5) installation •...
- Page 167 EPSON AcuLaser C4000/C4100/C3000 Revision F Treatment Step Check Power supply to Sensor Exit 1. Remove the PHD Assy (PL11.1.3). 2. Remove the Sensor Exit from the Fuser Assy. (Refer to Ch4-4.2.12.1) Go to step 14. Go to step 9. 3. Connect the P/J232 of the Sensor Exit connector.
- Page 168 EPSON AcuLaser C4000/C4100/C3000 Revision F Treatment Step Check Sensor Exit signal check 1. Move a piece of paper into and away from the sensor element of the exit sensor. Go to step 15. Go to step 17. 2. Measure the voltage between P/J327-3 <=> P/J327-2.
- Page 169 EPSON AcuLaser C4000/C4100/C3000 Revision F Treatment Step Check PWB Drive (PL15.1.15) power supply circuit continuity 1. Remove the PHD Assy (PL11.1.3). Replace the PWB Drive. 2. Turn On the I/L switch. Go to step 21. (Refer to Ch4-4.2.18.5) 3. Measure the voltage between P60-1 <=> P/J60-2 of the PWB Drive.
- Page 170 EPSON AcuLaser C4000/C4100/C3000 Revision F FIP-13 Duplex Jam Treatment Step Check Initial setting Do the following checks show a problem? • Chute Assy Exit (PL8.1.1) installation Reinstall applicable parts. Go to step 2. • Motor Assy Dup (PL8.1.8) installation • Actuator Dup (PL7.1.13) installation •...
- Page 171 EPSON AcuLaser C4000/C4100/C3000 Revision F Treatment Step Check PWBA MCU & HVPS (PL15.1.2) power supply circuit continuity 1. Disconnect the P/J11 connector from the PWBA MCU & HVPS. Replace the PWBA MCU & Go to step 9. HVPS. (Refer to Ch4-4.2.18.1) 2.
- Page 172 EPSON AcuLaser C4000/C4100/C3000 Revision F Treatment Step Check Harness Assy Front 1 (PL15.2.7) continuity check 1. Disconnect the P/J13 connector from the PWBA MCU & HVPS (PL15.1.2). 2. Check the continuity for the following lines. Replace the Harness Assy Front 1 J13-1 <=>...
- Page 173 EPSON AcuLaser C4000/C4100/C3000 Revision F Treatment Step Check Harness Assy 24V (PL15.2.6) continuity 1. Disconnect the P/J163 connector from the LVPS (PL15.1.10). 2. Disconnect the P/J60 connector from the PWB Drive (PL15.1.15). Replace the Harness Assy 24V 3. Check the continuity for the following.
- Page 174 EPSON AcuLaser C4000/C4100/C3000 Revision F FIP-14 ROS Failure Treatment Step Check Harness Assy ROS (PL15.2.5) continuity check 1. Disconnect the P/J151 connector from the ROS Assy. (Refer to Ch4-4.2.14.1) Replace the Harness Assy SOS 2. Disconnect the P/J15 connector from the PWBA MCU & HVPS. (Refer to Ch4-4.2.18.1) Go to step 2.
- Page 175 EPSON AcuLaser C4000/C4100/C3000 Revision F Treatment Step Check Harness Assy DRV1 (PL15.2.2) continuity 1. Disconnect the P/J41 connector from the PWB Drive (PL15.1.15). 2. Disconnect the P/J11 connector from the PWBA MCU & HVPS (PL15.1.2). 3. Check the continuity for the following lines.
- Page 176 EPSON AcuLaser C4000/C4100/C3000 Revision F Treatment Step Check ROS Assy (PL11.1.1) 1. Replace the ROS Assy with a new part. (Refer to Ch4-4.2.14.1) Go to step 11. Problem solved. 2. Turn On the power. Does the problem still occur? PWBA MCU & HVPS (PL15.1.2) 1.
- Page 177 EPSON AcuLaser C4000/C4100/C3000 Revision F FIP-15 Fuser Failure Treatment Step Check Initial setting Do the following checks show a problem? Reinstall applicable parts. Go to step 2. • Fuser Assy (PL9.1.1) installation Fuser Assy (PL9.1.1) and Harness Assy FSR2 (PL6.1.9) connector check 1.
- Page 178 EPSON AcuLaser C4000/C4100/C3000 Revision F Treatment Step Check Harness Assy LVNC (PL15.2.1) continuity 1. Disconnect the P/J61 connector from the PWB Drive (PL15.1.15). Replace the Harness Assy 2. Disconnect the P/J165 connector from the LVPS (PL15.1.10). Go to step 7.
- Page 179 EPSON AcuLaser C4000/C4100/C3000 Revision F FIP-16 NV-RAM Error Treatment Step Check Turn off the power and turn on the power. Problem solved, or if an error Go to step 2. Does the problem occur? occurs again, go to step 2.
- Page 180 EPSON AcuLaser C4000/C4100/C3000 Revision F FIP-17 CTD Sensor Error Treatment Step Check Initial setting Do the following checks show a problem? Reinstall applicable parts. Go to step 2. • Sensor Assy ADC (PL6.1.11) installation BTR Assy (PL9.1.2) check 1. Replace the BTR Assy. (Refer to Ch4-4.2.12.2) Go to step 3.
- Page 181 EPSON AcuLaser C4000/C4100/C3000 Revision F Treatment Step Check Replace the Sensor Assy ADC (Refer to Ch4-4.2.9.2) 1. Replace the Sensor Assy ADC. (Refer to Ch4-4.2.9.2) Go to step 7. End of procedure 2. Turn On the power. Does the error still occur? 5V DC power supply 1.
- Page 182 EPSON AcuLaser C4000/C4100/C3000 Revision F FIP-18 Fan Motor Failure Treatment Step Check Initial setting Do the following checks show a problem? Reinstall applicable parts. Go to step 2. • Fan Fuser (PL1.1.9) installation • Fan Rear (PL15.1.3) installation Fan Rear (PL15.1.3) Fail signal Measure the following voltages at the PWB Drive (PL15.1.15) connector.
- Page 183 EPSON AcuLaser C4000/C4100/C3000 Revision F FIP-19 Low Density Error Treatment Step Check Initial setting Do the following checks show a problem? • BTR Assy (PL9.1.2) installation Reinstall applicable parts. Go to step 2. • Sensor Assy ADC (PL6.1.11) installation • PHD Assy (PL11.1.3) installation •...
- Page 184 EPSON AcuLaser C4000/C4100/C3000 Revision F Treatment Step Check Harness Assy Front 1 (PL15.2.7) continuity check 1. Disconnect the P/J13 connector from the PWBA MCU & HVPS. (Refer to Ch4-4.2.18.1) 2. Check the continuity for the following lines. P1361-1 <=> J13-16 Replace the Harness Assy Front 1 P1361-2 <=>...
- Page 185 EPSON AcuLaser C4000/C4100/C3000 Revision F FIP-20 Firmware Error Treatment Step Check See if the problem recurs; if it Does the error occur even when the power is turned Off and back On? Go to step 2. does, go to step 2.
- Page 186 EPSON AcuLaser C4000/C4100/C3000 Revision F Treatment Step Check Harness Assy EEPROM (PL15.2.10) connection 1. Remove the PWBA MCU & HVPS. (Refer to Ch4-4.2.18.1) Go to step 9. Connect P/J140 correctly. 2. Check the connection of the P/J140 connector of the PWBA MCU & HVPS (PL15.1.2).
- Page 187 EPSON AcuLaser C4000/C4100/C3000 Revision F FIP-21 Environment Sensor Error Treatment Step Check Initial setting Do the following checks show a problem? Reinstall applicable parts. Go to step 2. • Sensor Hum Temp (PL4.2.4) installation Connector connections 1. Remove the Housing Assy Elec. (Refer to Ch4-4.2.13.1) 2.
- Page 188 EPSON AcuLaser C4000/C4100/C3000 Revision F Treatment Step Check Harness Assy TMPA (PL4.2.3), Harness Assy TMPB (PL15.2.12) continuity Check the continuity for the following lines. J24-1 <=> P2361-4/J2361-1 <=> J231-4 Replace the harness with no J24-2 <=> P2361-3/J2361-2 <=> J231-3 Go to step 7.
- Page 189 EPSON AcuLaser C4000/C4100/C3000 Revision F FIP-22 Yellow Toner Empty Treatment Step Check Initial setting Do the following checks show a problem? • Sensor Toner Low (PL12.2.9) installation Reinstall applicable parts. Go to step 2. • Toner Cartridge installation • Toner Motor installation Toner Cartridge (Y) (PL12.1.1) check...
- Page 190 EPSON AcuLaser C4000/C4100/C3000 Revision F Treatment Step Check Toner Motor check Use the Toner Motor diagnosis tool to carry out a Digital Output Test. Check the toner mixing Auger Go to step 8. and the Gears for damage. The Interlock SW should be closed.
- Page 191 EPSON AcuLaser C4000/C4100/C3000 Revision F Treatment Step Check Harness Assy Drive 1 (PL15.2.2) continuity check Check the following. Are the continuities normal? Replace the PWB Drive (Refer J11-25 <=> J41-16 to Ch4-4.2.18.5). If this does not Replace the Harness Assy Drive 1 J11-26 <=>...
- Page 192 EPSON AcuLaser C4000/C4100/C3000 Revision F FIP-23 Magenta Toner Empty Treatment Step Check Initial setting Do the following checks show a problem? • Sensor Toner Low (PL12.2.9) installation Reinstall applicable parts. Go to step 2. • Toner Cartridge installation • Toner Motor installation Toner Cartridge (M) (PL12.1.2) check...
- Page 193 EPSON AcuLaser C4000/C4100/C3000 Revision F Treatment Step Check Toner Motor check Use the Toner Motor diagnosis tool to carry out a Digital Output Test. Check the toner mixing Auger Go to step 8. and the Gears for damage. The Interlock SW should be closed.
- Page 194 EPSON AcuLaser C4000/C4100/C3000 Revision F Treatment Step Check PWB Drive (PL15.1.15) continuity 1. Disconnect the P/J60 connector from the PWB Drive. Replace the PWB Drive. Go to step 13. (Refer to Ch4-4.2.18.5) 2. Measure the voltage between J60-1 <=> J60-2.
- Page 195 EPSON AcuLaser C4000/C4100/C3000 Revision F FIP-24 Cyan Toner Empty Treatment Step Check Initial setting Do the following checks show a problem? • Sensor Toner Low (PL12.2.9) installation Reinstall applicable parts. Go to step 2. • Toner Cartridge installation • Toner Motor installation Toner Cartridge (C) (PL12.1.3) check...
- Page 196 EPSON AcuLaser C4000/C4100/C3000 Revision F Treatment Step Check Power supply to Toner Motor (C) of Holder Assy (M) (PL12.2.7) 1. Remove the PHD Assy (PL11.1.3). 2. Turn on the Interlock Switch of the PWB Drive (PL15.1.15). Go to step 9.
- Page 197 EPSON AcuLaser C4000/C4100/C3000 Revision F FIP-25 Black Toner Empty Treatment Step Check Initial setting Do the following checks show a problem? • Sensor Toner Low (PL12.2.9) installation Reinstall applicable parts. Go to step 2. • Toner Cartridge installation • Toner Motor installation Toner Cartridge (K) (PL12.1.4) check...
- Page 198 EPSON AcuLaser C4000/C4100/C3000 Revision F Treatment Step Check Power supply to Toner Motor (K) of Holder Assy (K) (PL12.2.8) 1. Remove the PHD Assy (PL11.1.3). 2. Turn on the Interlock Switch of the PWB Drive (PL15.1.15). Go to step 9.
- Page 199 EPSON AcuLaser C4000/C4100/C3000 Revision F FIP-26 PHD Life Over Treatment Step Check Initial setting Do the following checks show a problem? Reinstall applicable parts. Go to step 2. • PHD Assy (PL11.1.3) installation • PWBA CRUM installation inside PHD Assy PHD Assy (PL11.1.3) check...
- Page 200 EPSON AcuLaser C4000/C4100/C3000 Revision F Treatment Step Check Harness Assy EEPROM (PL15.2.10) continuity check 1. Disconnect the P/J140 connector from the PWBA MCU & HVPS. 2. Check the continuity for the following lines. P71-2 <=> J140-5 Replace the Harness Assy Go to step 7.
- Page 201 EPSON AcuLaser C4000/C4100/C3000 Revision F FIP-27 BTR Life Over Treatment Step Check Initial setting Do the following checks show a problem? Reinstall applicable parts. Go to step 2. • BTR Assy (PL9.1.2) installation • Sensor TNR Full (PL6.1.13) installation BTR Assy (PL9.1.2) 1.
- Page 202 EPSON AcuLaser C4000/C4100/C3000 Revision F Treatment Step Check Power supply to Sensor TNR Full (PL6.1.13) Measure the following voltage at the relay connector between the Harness Assy TFLSNS Replace the Harness Assy and the Harness Assy EEPROM (PL15.2.10). Go to step 8.
- Page 203 EPSON AcuLaser C4000/C4100/C3000 Revision F FIP-28 Fuser Life Over Treatment Step Check PWBA MCU & HVPS (PL15.1.2) 1. Replace the PWBA MCU & HVPS with a new part. (Refer to Ch4-4.2.18.1) Go to FIP-Noise (Page 5-281). Problem solved. 2. Turn On the power.
- Page 204 EPSON AcuLaser C4000/C4100/C3000 Revision F FIP-29 CTD Sensor Dustiness Treatment Step Check Initial setting Do the following checks show a problem? Reinstall applicable parts. Go to step 2. • BTR Assy (PL9.1.2) installation • Sensor Assy ADC (PL6.1.11) installation Sensor Assy (PL6.1.11) cleaning 1.
- Page 205 EPSON AcuLaser C4000/C4100/C3000 Revision F Treatment Step Check Sensor Assy ADC (PL6.1.11) signal check Measure the following voltage at the relay connector between the Harness Assy Front 1 Replace the Sensor Assy ADC. Replace the PWBA MCU & (PL15.2.7) and the Harness Assy CTD (PL6.1.10).
- Page 206 EPSON AcuLaser C4000/C4100/C3000 Revision F FIP-30 Front Cover Treatment Step Check Initial setting Do the following checks show a problem? • With the tool: Go to step 2. • PWB Drive (PL15.1.15) installation Reinstall applicable parts. • Without the tool: Go to step 3.
- Page 207 EPSON AcuLaser C4000/C4100/C3000 Revision F FIP-31 Yellow Toner Near Empty Treatment Step Check Initial setting Do the following checks show a problem? • Sensor Toner Low (PL12.2.9) installation Reinstall applicable parts Go to step 2. • Toner Cartridge installation • Toner Motor installation Toner Cartridge (Y) (PL12.1.1) check...
- Page 208 EPSON AcuLaser C4000/C4100/C3000 Revision F Treatment Step Check Toner Motor check Use the Toner Motor diagnosis tool to carry out a Digital Output Test. Check the toner mixing Auger Go to step 8. and the Gears for damage. The Interlock SW should be closed.
- Page 209 EPSON AcuLaser C4000/C4100/C3000 Revision F Treatment Step Check Harness Assy Drive 1 (PL15.2.2) continuity check 1. Disconnect the P/J11 connector from the PWBA MCU & HVPS. 2. Disconnect the P/J41 connector from the PWB Drive (PL15.1.15). 3. Check the continuity for the following.
- Page 210 EPSON AcuLaser C4000/C4100/C3000 Revision F FIP-32 Magenta Toner Near Empty Treatment Step Check Initial setting Do the following checks show a problem? • Sensor Toner Low (PL12.2.9) installation Reinstall applicable parts. Go to step 2. • Toner Cartridge installation • Toner Motor installation Toner Cartridge (M) (PL12.1.2) check...
- Page 211 EPSON AcuLaser C4000/C4100/C3000 Revision F Treatment Step Check Check the toner mixing Auger Toner Motor check and the Gears for damage. If Use the Toner Motor diagnosis tool to carry out a Digital Output Test. there is damaged part, replace Go to step 8.
- Page 212 EPSON AcuLaser C4000/C4100/C3000 Revision F Treatment Step Check Harness Assy Drive 1 (PL15.2.2) continuity check 1. Disconnect the P/J11 connector from the PWBA MCU & HVPS. 2. Disconnect the P/J41 connector from the PWB Drive (PL15.1.15). 3. Check the continuity for the following.
- Page 213 EPSON AcuLaser C4000/C4100/C3000 Revision F FIP-33 Cyan Toner Near Empty Treatment Step Check Initial setting Do the following checks show a problem? • Sensor Toner Low (PL12.2.9) installation Reinstall applicable parts. Go to step 2. • Toner Cartridge installation • Toner Motor installation Toner Cartridge (C) (PL12.1.3) check...
- Page 214 EPSON AcuLaser C4000/C4100/C3000 Revision F Treatment Step Check Check the toner mixing Auger Toner Motor check and the Gears for damage. If Use the Toner Motor diagnosis tool to carry out a Digital Output Test. there is damaged part, replace Go to step 8.
- Page 215 EPSON AcuLaser C4000/C4100/C3000 Revision F Treatment Step Check Harness Assy Drive 1 (PL15.2.2) continuity check 1. Disconnect the P/J11 connector from the PWBA MCU & HVPS. 2. Disconnect the P/J41 connector from the PWB Drive (PL15.1.15). 3. Check the continuity for the following.
- Page 216 EPSON AcuLaser C4000/C4100/C3000 Revision F FIP-34 Black Toner Near Empty Treatment Step Check Initial setting Do the following checks show a problem? • Sensor Toner Low (PL12.2.9) installation Reinstall applicable parts. Go to step 2. • Toner Cartridge installation • Toner Motor installation Toner Cartridge (K) (PL12.1.4) check...
- Page 217 EPSON AcuLaser C4000/C4100/C3000 Revision F Treatment Step Check Check the toner mixing Auger Toner Motor check and the Gears for damage. If Use the Toner Motor diagnosis tool to carry out a Digital Output Test. there is damaged part, replace Go to step 8.
- Page 218 EPSON AcuLaser C4000/C4100/C3000 Revision F Treatment Step Check Harness Assy Drive 1 (PL15.2.2) continuity check 1. Disconnect the P/J11 connector from the PWBA MCU & HVPS. 2. Disconnect the P/J41 connector from the PWB Drive (PL15.1.15). 3. Check the continuity for the following.
- Page 219 EPSON AcuLaser C4000/C4100/C3000 Revision F FIP-35 PHD Life Warning Treatment Step Check Initial setting Do the following checks show a problem? Reinstall applicable parts. Go to step 2. • PHD Assy (PL11.1.3) installation • PWBA CRUM installation inside PHD Assy PHD Assy (PL11.1.3) check...
- Page 220 EPSON AcuLaser C4000/C4100/C3000 Revision F Treatment Step Check Harness Assy EEPROM (PL15.2.10) continuity check 1. Disconnect the P/J140 connector from the PWBA MCU & HVPS. 2. Check the continuity for the following lines. P71-2 <=> J140-5 Replace the Harness Assy Go to step 7.
- Page 221 EPSON AcuLaser C4000/C4100/C3000 Revision F FIP-36 BTR Life Warning Treatment Step Check Initial setting Do the following checks show a problem? Reinstall applicable parts. Go to step 2. • BTR Assy (PL9.1.2) installation • Sensor TNR Full (PL6.1.13) installation BTR Assy (PL9.1.2) 1.
- Page 222 EPSON AcuLaser C4000/C4100/C3000 Revision F Treatment Step Check 5V DC power supply to PWB Drive (PL15.1.15) 1. Disconnect the P/J61 connector from the PWB Drive. Go to step 8. Go to FIP-DC (Page 5-280). 2. Measure the voltage between P61-8 <=> J61-7.
- Page 223 EPSON AcuLaser C4000/C4100/C3000 Revision F FIP-37 CTD Sensor Dustiness Treatment Step Check Initial setting Do the following checks show a problem? Reinstall applicable parts. Go to step 2. • BTR Assy (PL9.1.2) installation • Sensor Assy ADC (PL6.1.11) installation Sensor Assy (PL6.1.11) cleaning 1.
- Page 224 EPSON AcuLaser C4000/C4100/C3000 Revision F Treatment Step Check Sensor Assy ADC (PL6.1.11) signal check Measure the following voltage at the relay connector between the Harness Assy Front 1 Replace the Sensor Assy ADC. Replace the PWBA MCU & (PL15.2.7) and the Harness Assy CTD (PL6.1.10).
- Page 225 EPSON AcuLaser C4000/C4100/C3000 Revision F FIP-38 Tray 1 Paper Near Empty Treatment Step Check Initial setting Do the following checks show a problem? Reinstall applicable parts. Go to step 2. • Sensor No/Low Paper (PL4.3.4) (L/P) installation • Sensor actuator installation •...
- Page 226 EPSON AcuLaser C4000/C4100/C3000 Revision F Treatment Step Check PWB Drive (PL15.1.15) continuity 1. Disconnect the P/J42 and P/J47 connector from the PWB Drive. Replace the PWB Drive. (Refer Go to step 9. to Ch4-4.2.18.5) 2. Measure the voltage between P47-10 <=> P42-20.
- Page 227 EPSON AcuLaser C4000/C4100/C3000 Revision F FIP-39 Paper Empty Treatment Step Check Initial setting Do the following checks show a problem? • Sensor No/Low Paper (PL4.3.4) (L/P) installation Reinstall applicable parts. Go to step 2. • Link Actuator (PL4.3.6) installation • Actuator No Paper (PL4.3.4) installation Does the error occur even when paper is added? Go to step 3.
- Page 228 EPSON AcuLaser C4000/C4100/C3000 Revision F Treatment Step Check PWB Drive (PL15.1.15) continuity 1. Disconnect the P/J42 connector from the PWB Drive. Replace the PWB Drive. (Refer Go to step 9. to Ch4-4.2.18.5) 2. Measure the voltage between P47-7 <=> P42-19.
- Page 229 EPSON AcuLaser C4000/C4100/C3000 Revision F FIP-40 Upper Cassette Detached Treatment Step Check Initial setting Do the following checks show a problem? Reinstall applicable parts. Go to step 2. • Switch Size Tray 1 (PL4.2.8) installation • Paper Cassette installation Switch Size Tray 1 (PL4.2.8) 1.
- Page 230 EPSON AcuLaser C4000/C4100/C3000 Revision F Treatment Step Check Harness Assy DRV 2 (PL15.2.3) continuity Check the continuity for the following lines. J42-16 <=> J12-15 Replace the Harness Assy DRV 2 Go to step 7. (PL15.2.3). J42-17 <=> J12-14 J42-18 <=> J12-13 Is there continuity in all lines? Actuator Size (PL3.2.21)
- Page 231 EPSON AcuLaser C4000/C4100/C3000 Revision F FIP-41 Full Stack Treatment Step Check Initial setting Do the following checks show a problem? Reinstall applicable parts. Go to step 2. • Sensor Paper (PL7.1.4) (Full Stack) installation • Actuator Full Stack (PL7.1.5) installation Actuator Full Stack (PL7.1.5)
- Page 232 EPSON AcuLaser C4000/C4100/C3000 Revision F Treatment Step Check PWBA MCU & HVPS (PL15.1.2) continuity 1. Disconnect the P/J11 and P/J13 connectors of the PWBA MCU & HVPS. Replace the PWBA MCU & Go to step 9. HVPS. (Refer to Ch4-4.2.18.1) 2.
- Page 233 EPSON AcuLaser C4000/C4100/C3000 Revision F FIP-42 Yellow Toner Empty 2 Treatment Step Check Initial setting Do the following checks show a problem? • Sensor Toner Low (PL12.2.9) installation Reinstall applicable parts. Go to step 2. • Toner Cartridge installation • Toner Motor installation Toner Cartridge (Y) (PL12.1.1) check...
- Page 234 EPSON AcuLaser C4000/C4100/C3000 Revision F Treatment Step Check Check the toner mixing Auger Toner Motor check and the Gears for damage. If Use the Toner Motor diagnosis tool to carry out a Digital Input Test. there is damaged part, replace Go to step 8.
- Page 235 EPSON AcuLaser C4000/C4100/C3000 Revision F Treatment Step Check PWB Drive (PL15.1.15) continuity 1. Disconnect the P/J60 connector from the PWB Drive. Replace the PWB Drive. Go to step 13. (Refer to Ch4-4.2.18.5) 2. Measure the voltage between J60-1 <=> J60-2.
- Page 236 EPSON AcuLaser C4000/C4100/C3000 Revision F FIP-43 Magenta Toner Empty 2 Treatment Step Check Initial setting Do the following checks show a problem? • Sensor Toner Low (PL12.2.9) installation Reinstall applicable parts. Go to step 2. • Toner Cartridge installation • Toner Motor installation Toner Cartridge (M) (PL12.1.2) check...
- Page 237 EPSON AcuLaser C4000/C4100/C3000 Revision F Treatment Step Check Check the toner mixing Auger Toner Motor check and the Gears for damage. If Use the Toner Motor diagnosis tool to carry out a Digital Output Test. there is damaged part, replace Go to step 8.
- Page 238 EPSON AcuLaser C4000/C4100/C3000 Revision F Treatment Step Check PWB Drive (PL15.1.15) continuity 1. Disconnect the P/J60 connector from the PWB Drive. Replace the PWB Drive. Go to step 13. (Refer to Ch4-4.2.18.5) 2. Measure the voltage between J60-1 <=> J60-2.
- Page 239 EPSON AcuLaser C4000/C4100/C3000 Revision F FIP-44 Cyan Toner Empty 2 Treatment Step Check Initial setting Do the following checks show a problem? • Sensor Toner Low (PL12.2.9) installation Reinstall applicable parts. Go to step 2. • Toner Cartridge installation • Toner Motor installation Toner Cartridge (C) (PL12.1.3) check...
- Page 240 EPSON AcuLaser C4000/C4100/C3000 Revision F Treatment Step Check Check the toner mixing Auger Toner Motor check and the Gears for damage. If Use the Toner Motor diagnosis tool to carry out a Digital Input Test. there is damaged part, replace Go to step 8.
- Page 241 EPSON AcuLaser C4000/C4100/C3000 Revision F Treatment Step Check PWB Drive (PL15.1.15) continuity 1. Disconnect the P/J60 connector from the PWB Drive. Replace the PWB Drive. Go to step 13. (Refer to Ch4-4.2.18.5) 2. Measure the voltage between J60-1 <=> J60-2.
- Page 242 EPSON AcuLaser C4000/C4100/C3000 Revision F FIP-45 Black Toner Empty 2 Treatment Step Check Initial setting Do the following checks show a problem? • Sensor Toner Low (PL12.2.9) installation Reinstall applicable parts. Go to step 2. • Toner Cartridge installation • Toner Motor installation Toner Cartridge (K) (PL12.1.4) check...
- Page 243 EPSON AcuLaser C4000/C4100/C3000 Revision F Treatment Step Check Check the toner mixing Auger Toner Motor check and the Gears for damage. If Use the Toner Motor diagnosis tool to carry out a Digital Output Test. there is damaged part, replace Go to step 8.
- Page 244 EPSON AcuLaser C4000/C4100/C3000 Revision F Treatment Step Check PWB Drive (PL15.1.15) continuity 1. Disconnect the P/J60 connector from the PWB Drive. Replace the PWB Drive. Go to step 13. (Refer to Ch4-4.2.18.5) 2. Measure the voltage between J60-1 <=> J60-2.
- Page 245 EPSON AcuLaser C4000/C4100/C3000 Revision F FIP-46 PHD Life Over 2 Treatment Step Check Initial setting Do the following checks show a problem? Reinstall applicable parts. Go to step 2. • PHD Assy (PL11.1.3) installation • PWBA CRUM installation inside PHD Assy PHD Assy (PL11.1.3) check...
- Page 246 EPSON AcuLaser C4000/C4100/C3000 Revision F Treatment Step Check Harness Assy EEPROM (PL15.2.10) continuity check 1. Disconnect the P/J140 connector from the PWBA MCU & HVPS. 2. Check the continuity for the following lines. P71-2 <=> J140-5 Replace the Harness Assy Go to step 7.
- Page 247 EPSON AcuLaser C4000/C4100/C3000 Revision F FIP-47 BTR Life Over 2 Treatment Step Check Initial setting Do the following checks show a problem? Reinstall applicable parts. Go to step 2. • BTR Assy (PL9.1.2) installation • Sensor TNR Full (PL6.1.13) installation BTR Assy (PL9.1.2)
- Page 248 EPSON AcuLaser C4000/C4100/C3000 Revision F Treatment Step Check PWBA MCU & HVPS (PL15.1.2) 1. Replace the PWBA MCU & HVPS with a new part. (Refer to Ch4-4.2.18.1) Go to FIP-Noise (Page 5-281). Problem solved. 2. Turn On the power. Does the problem still occur?
- Page 249 EPSON AcuLaser C4000/C4100/C3000 Revision F FIP-48 Engine Communication Error Treatment Step Check Initial setting: • Remove all the optional units and modules related to the electrical system and bring the Replace or reinstall the relevant printer back to the standard status.
- Page 250 EPSON AcuLaser C4000/C4100/C3000 Revision F FIP-49 Verify (DIMM Slot Related) Error Treatment Step Check Initial setting: • Remove all the optional units and modules related to the electrical system and bring the Replace or reinstall the relevant printer back to the standard status.
- Page 251 EPSON AcuLaser C4000/C4100/C3000 Revision F FIP-50 Error in Standard RAM (Slot 0, 1) Treatment Step Check Initial setting: • Remove all the optional units and modules related to the electrical system and bring the Replace or reinstall the relevant Go to step 2.
- Page 252 EPSON AcuLaser C4000/C4100/C3000 Revision F FIP-51 ROM Checksum Error (MASK ROM for Font) Treatment Step Check Initial setting: • Remove all the optional units and modules related to the electrical system and bring the Replace or reinstall the relevant Go to step 2.
- Page 253 EPSON AcuLaser C4000/C4100/C3000 Revision F FIP-52 ROM Checksum Error (CODE, IPL) Treatment Step Check Initial setting: • Remove all the optional units and modules related to the electrical system and bring the Replace or reinstall the relevant Go to step 2.
- Page 254 Replace or reinstall the relevant Problem solved. it in the correct direction and location. part. • Check if the DIMM is available for this printer, AcuLaser C4000. In cases other than above, replace the CONTROLLER PWB. Troubleshooting Level 2 FIP...
- Page 255 EPSON AcuLaser C4000/C4100/C3000 Revision F FIP-54 EEPROM Writing Error Treatment Step Check Initial setting: • Remove all the optional units and modules related to the electrical system and bring the Replace or reinstall the relevant Go to step 2. printer back to the standard status.
- Page 256 EPSON AcuLaser C4000/C4100/C3000 Revision F FIP-55 CCNV Hardware Error Treatment Step Check Initial setting: • Remove all the optional units and modules related to the electrical system and bring the Replace or reinstall the relevant Go to step 2. printer back to the standard status.
- Page 257 EPSON AcuLaser C4000/C4100/C3000 Revision F FIP-56 Engine Initialization Error Treatment Step Check Initial setting: • With the tool: Go to step 2. • Remove all the optional units and modules related to the electrical system and bring the Replace or reinstall the relevant printer back to the standard status.
- Page 258 EPSON AcuLaser C4000/C4100/C3000 Revision F FIP-57 SRAM (for Compression) Initialization Hardware Error Treatment Step Check Initial setting: • Remove all the optional units and modules related to the electrical system and bring the Replace or reinstall the relevant Go to step 2.
- Page 259 EPSON AcuLaser C4000/C4100/C3000 Revision F FIP-58 Video System Hardware Error (including PWM Calibration Error IC) Treatment Step Check Initial setting: • Remove all the optional units and modules related to the electrical system and bring the Replace or reinstall the relevant Go to step 2 printer back to the standard status.
- Page 260 EPSON AcuLaser C4000/C4100/C3000 Revision F FIP-59 Built - in Network Hardware Error Treatment Step Check Initial setting: • Remove all the optional units and modules related to the electrical system and bring the Replace or reinstall the relevant Go to step 2.
- Page 261 EPSON AcuLaser C4000/C4100/C3000 Revision F FIP-60 DIMM SPD Error Treatment Step Check Initial setting: • Remove all the optional units and modules related to the electrical system and bring the Replace or reinstall the relevant Go to step 2. printer back to the standard status.
-
Page 262: Image Quality Troubleshooting Fip
EPSON AcuLaser C4000/C4100/C3000 Revision F 3.3.4 Image Quality Troubleshooting FIP FIP-P5 "Dropout, thin areas, stripes or bands in the direction perpendicular to the paper feed direction" NOTE: This section contains instructions for troubleshooting when the FIP-P6 "Black Dots" printer controller is operating normally. However, it is possible to tell basically if there is a problem with the printer controller or with FIP-P7 "Fogging"... - Page 263 EPSON AcuLaser C4000/C4100/C3000 Revision F FIP-P1 "Light image" Description / initial check Dropout in print image • This means that there are patches in the printed image where the ink is missing or is coated very lightly. initial check Are any parts being used that have incorrect specifications, or that are installed incorrectly, damaged, bent, dirty or that have foreign particles adhering to them? Related parts The following parts are related to this problem.
- Page 264 EPSON AcuLaser C4000/C4100/C3000 Revision F Item Check Laser beam path 1. Check that thee are no obstructions to the laser beam path between the ROS Assy Remove the obstruction or clean (PL11.1.1) and the Drum. Go to step 5. the window of the ROS Assy 2.
- Page 265 EPSON AcuLaser C4000/C4100/C3000 Revision F FIP-P2 "All White" Description / initial check Printout is completely white (on white paper) • This means that no printing image is appearing at all, so that the whole page remains white. initial check Are any parts being used that have incorrect specifications, or that are installed incorrectly, damaged, bent, dirty or that have foreign particles adhering to them? Related parts The following parts are related to this problem.
- Page 266 EPSON AcuLaser C4000/C4100/C3000 Revision F Item Check Laser path 1. Check the laser path from the ROS Assy (PL11.1.1) to the drum inside the PHD Assy Remove the foreign particles (PL11.1.3). Go to step 5. or dirt. 2. Check that the window of the ROS Assy is not dirty.
- Page 267 EPSON AcuLaser C4000/C4100/C3000 Revision F FIP-P3 "All Black" Description / initial check Printout is completely black • This means that the whole image appears solid black. initial check Are any parts being used that have incorrect specifications, or that are installed incorrectly, damaged, bent, dirty or that have foreign particles adhering to them? Related parts The following parts are related to this problem.
- Page 268 EPSON AcuLaser C4000/C4100/C3000 Revision F Item Check ROS Assy (PL11.1.1) 1. Cover half of the laser beam output window of the ROS Assy (PL11.1.1) with a piece of Replace the ROS Assy. Replace the PWBA MCU & paper. (Refer to Ch4-4.2.14.1) HVPS.
- Page 269 EPSON AcuLaser C4000/C4100/C3000 Revision F FIP-P4 "Dropout, thin areas, ripples or bands in paper feed direction" Description / initial check Printout contains white dropout or black stripes. • This means that there are white or thin stripes or dark stripes in the printout in the paper feed direction.
- Page 270 EPSON AcuLaser C4000/C4100/C3000 Revision F Item Check Laser path 1. Check the laser path from the ROS Assy (PL11.1.1) to the drum inside the PHD Assy Remove the foreign particles or (PL11.1.3). Go to step 4. dirt. 2. Check that the window of the ROS Assy is not dirty.
- Page 271 EPSON AcuLaser C4000/C4100/C3000 Revision F FIP-P5 "Dropout, thin areas, stripes or bands in the direction perpendicular to the paper feed direction" Description / initial check Printout contains white dropout or black stripes. • This means that there are white or thin stripes or dark stripes in the printout in the direction that is perpendicular to the paper feed direction.
- Page 272 EPSON AcuLaser C4000/C4100/C3000 Revision F Item Check BTR Assy (PL9.1.2) Replace the BTR Assy. Check the BTR Assy roller. Go to step 4. (Refer to Ch4-4.2.12.2) Is the BTR Assy roller dirty or worn? Periodicity check Replace the applicable parts.
- Page 273 EPSON AcuLaser C4000/C4100/C3000 Revision F FIP-P6 "Black Dots" Description / initial check Black dots appear on print. • This means that there are round black (colored) spots in the printout. initial check Are any parts being used that have incorrect specifications, or that are installed incorrectly, damaged, bent, dirty or that have foreign particles adhering to them? Related parts The following parts are related to this problem.
- Page 274 EPSON AcuLaser C4000/C4100/C3000 Revision F Item Check Fuser Assy (PL9.1.1) 1. Remove the Fuser Assy. (Refer to Ch4-4.2.12.1) Wait for the Fuser Assy to cool down before starting. W A R N I N G Replace the Fuser Assy. Go to step 3.
- Page 275 EPSON AcuLaser C4000/C4100/C3000 Revision F FIP-P7 "Fogging" Description / initial check Printout is blurry. • This means that toner is adhering to the white areas of the printout. initial check Are any parts being used that have incorrect specifications, or that are installed incorrectly, damaged, bent, dirty or that have foreign particles adhering to them? Related parts The following parts are related to this problem.
- Page 276 EPSON AcuLaser C4000/C4100/C3000 Revision F Item Check Chute Assy Exit (PL8.1.1) grounding Repair the location of the Check the Chute Assy Exit grounding circuit. Go to step 5. grounding fault. Is the in Chute Assy Exit grounded? Fuser Assy (PL9.1.1) grounding Replace the PWBA MCU &...
- Page 277 EPSON AcuLaser C4000/C4100/C3000 Revision F FIP-P8 "Paper Skew" Description / initial check Printing skewed • This means that the image is printed at an angle. initial check Are any parts being used that have incorrect specifications, or that are installed incorrectly, damaged, bent, dirty or that have foreign particles adhering to them? Related parts The following parts are related to this problem.
- Page 278 EPSON AcuLaser C4000/C4100/C3000 Revision F Item Check Paper supply rollers Clean or replace the applicable Check the paper supply rollers. Go to step 4. part. Are the paper supply rollers worn or damaged? Paper feed rollers Check all rollers in the paper feed path.
- Page 279 EPSON AcuLaser C4000/C4100/C3000 Revision F FIP-P9 "Wrinkles" Description / initial check Wrinkles in printout • This means that there are wrinkles in the paper after printing. initial check Are any parts being used that have incorrect specifications, or that are installed incorrectly, damaged, bent, dirty or that have foreign particles adhering to them? Related parts The following parts are related to this problem.
- Page 280 EPSON AcuLaser C4000/C4100/C3000 Revision F Item Check Fuser Assy (PL9.1.1) 1. Remove the Fuser Assy. (Refer to Ch4-4.2.12.1) Wait for the Fuser Assy to cool down before starting. W A R N I N G Replace the Fuser Assy. Go to step 3.
- Page 281 EPSON AcuLaser C4000/C4100/C3000 Revision F FIP-P10 "Unsatisfactory Fixing" Description / initial check Poor toner fixing • This means that when the image is rubbed it a finger, the printed image can be removed easily. initial check Are any parts being used that have incorrect specifications, or that are installed incorrectly, damaged, bent, dirty or that have foreign particles adhering to them? Related parts The following parts are related to this problem.
- Page 282 EPSON AcuLaser C4000/C4100/C3000 Revision F Item Check Fuser Assy (PL9.1.1) Turn the Gear Idler by hand and check that the Heat Roll and the Belt Assy contact each Replace the related parts one Replace the Fuser Assy. other evenly. by one.
-
Page 283: Printer Operation Troubleshooting Fip
EPSON AcuLaser C4000/C4100/C3000 Revision F 3.3.5 Printer Operation Troubleshooting FIP This section describes the FIP for troubleshooting printer operation. FIP-OP1 Printer does not work Main power supply does not turn on. Treatment Step Check Initial setting Do the following checks show a problem? •... - Page 284 EPSON AcuLaser C4000/C4100/C3000 Revision F Treatment Step Check • Harness Assy Front 2 (PL7.1.2) • Harness Assy TNR (PL12.1.6) • Harness Assy DRV 1 (PL15.2.2) • Harness Assy SOS (PL15.2.5) Repair or replace the applicable Go to step 2. part.
- Page 285 EPSON AcuLaser C4000/C4100/C3000 Revision F Treatment Step Check PWB Drive (PL15.1.15) 1. With the P/J60 connector of the PWB Drive connected, turn on the power. Replace the PWBA Drive. Go to step 9. (Refer to Ch4-4.2.18.5) 2. Check if the Fan Rear (PL15.1.3) operates.
- Page 286 EPSON AcuLaser C4000/C4100/C3000 Revision F Treatment Step Check ROS Assy (PL11.1.1) 1. Remove the ROS Assy. (Refer to Ch4-4.2.14.1) Replace the ROS Assy. (Refer Go to step 15. to Ch4-4.2.14.1) 2. Turn on the power and check that the Fan Rear (PL15.1.3) operates.
- Page 287 EPSON AcuLaser C4000/C4100/C3000 Revision F Treatment Step Check Harness Assy Front 2 (PL7.1.2) 1. Connect P/J15 of the PWBA MCU & HVPS (PL15.1.2). 2. Disconnect the P/J139 relay connector between the Harness Assy Front 1 (PL15.2.7) and Replace the Harness Assy Front Replace the Harness Assy Front the Harness Assy Front 2.
- Page 288 EPSON AcuLaser C4000/C4100/C3000 Revision F Treatment Step Check Motor Assy Dup (PL8.1.8) 1. Remove the Motor Assy Dup. (Refer to Ch4-4.2.11.4) Replace the Motor Assy Dup. Go to step 29. (Refer to Ch4-4.2.11.4) 2. Turn on the power and check that the Fan Rear (PL15.1.3) operates.
- Page 289 EPSON AcuLaser C4000/C4100/C3000 Revision F FIP-OP2 LCD/LED display error LCD/LED display is incorrect. Treatment Step Check Initial setting Do the following checks show a problem? • Control Panel (PL TBD) • PWBA MCU & HVPS (PL15.1.2) Repair or replace the applicable •...
- Page 290 EPSON AcuLaser C4000/C4100/C3000 Revision F Treatment Step Check Harness Assy Opepane (PL15.2.9) and Harness Assy Opepane BS (PL7.1.3) 1. Disconnect P/J22 controller from the PWBA MCU & HVPS (PL15.1.2). 2. Disconnect P/J220 controller from the Control Panel (PL TBD). 3. Check the continuity for the following lines.
- Page 291 EPSON AcuLaser C4000/C4100/C3000 Revision F FIP-OP3 Keypad operation not possible Keypad buttons do not operate. Treatment Step Check Initial setting Do the following checks show a problem? • Control Panel (PL TBD) • PWBA MCU & HVPS (PL15.1.2) Repair and replace the •...
- Page 292 EPSON AcuLaser C4000/C4100/C3000 Revision F Treatment Step Check Harness Assy Opepane (PL15.2.9) and Harness Assy Opepane BS (PL7.1.3) 1. Disconnect P/J22 connector from the PWBA MCU & HVPS (PL15.1.2). (Refer to Ch4- 4.2.18.1) 2. Disconnect P/J220 connector from the Control Panel (PL TBD).
- Page 293 EPSON AcuLaser C4000/C4100/C3000 Revision F FIP-OP4 Incorrect printer operation Printer operation is unstable. Treatment Step Check Initial setting Do the following checks show a problem? • PWBA MCU & HVPS (PL15.1.2) Repair or replace the applicable Go to step 2.
- Page 294 EPSON AcuLaser C4000/C4100/C3000 Revision F Treatment Step Check Interface Cable 1. Replace the Interface Cable connecting the host computer and the printer. Go to step 8. Problem solved. 2. Send a print command from the host computer. Is the printer operation still unstable? PWB Controller (PL16.1.5)
-
Page 295: Other Fip
EPSON AcuLaser C4000/C4100/C3000 Revision F 3.3.6 Other FIP This section contains power supply FIP and noise FIP that are not included in the error code FIP, image quality FIP and printer operation FIP. It should be used as a result of first referring to the error code FIP, image quality FIP and printer operation FIP. - Page 296 EPSON AcuLaser C4000/C4100/C3000 Revision F FIP-DC Treatment Step Check Initial setting Do the following checks show a problem? Repair. Go to step 2. • Blown fuse inside LVPS (PL15.1.10) • AC power supply problem LVPS (PL15.1.10) check 1. Disconnect the LVPS connectors J163, J165 and J164.
- Page 297 EPSON AcuLaser C4000/C4100/C3000 Revision F FIP-Noise Treatment Step Check Initial setting Do the following checks show a problem? • PWBA MCU & HVPS (PL15.1.2) • HSG Assy Bias (PL11.1.4) • PHD Assy (PL11.1.3) • Harness Assy AC SW (PL15.1.11) • Fuser Assy (PL9.1.1) •...
- Page 298 EPSON AcuLaser C4000/C4100/C3000 Revision F Treatment Step Check Harness Assy AC SW (PL15.1.11) Check the grounding screw for the grounding cable of the Harness Assy AC SW. (Refer to Install the grounding screw Go to step 6. Ch4-4.2.18.4) correctly. Is the cable grounded correctly? HSG Assy Bias (PL11.1.4)
- Page 299 EPSON AcuLaser C4000/C4100/C3000 Revision F Treatment Step Check Chute Assy Exit (PL8.1.1) Repair or replace any blades 1. Remove the Chute Assy Exit. (Refer to Ch4-4.2.11.1) that are bent or contaminated, Go to step 13. or replace the Chute Assy Exit.
-
Page 300: Level 2 Fip -Large Capacity Paper Unit
EPSON AcuLaser C4000/C4100/C3000 Revision F 3.4 Level 2 FIP –Large Capacity Paper Unit– 3.4.1 Level 2 FIP The following is described about troubleshooting of the Large Capacity Paper Unit. The Level 2 FIP includes the procedures for diagnosing problems by classifying them according to error codes and other trouble symptoms. The method of problem diagnosis allow the causes of problems to be located quickly by following the procedures indicated in the FIP or the checking procedures. - Page 301 EPSON AcuLaser C4000/C4100/C3000 Revision F Treatment Step Check Replace the paper and go to Is the paper in TRAY 2 normal with no curl, wrinkles or moisture? Go to step 7. step 7. Paper feed path Remove the foreign particles Check the paper feed path.
- Page 302 EPSON AcuLaser C4000/C4100/C3000 Revision F Treatment Step Check Clutch Assy Turn TRAY 2 (PL17.3.18) resistance check 1. Disconnect the J825 connector from the Clutch Assy Turn. Replace the PWBA MCU & Replace the Clutch Assy Turn HVPS. (Refer to Ch4-4.2.18.1) TRAY 2.
- Page 303 EPSON AcuLaser C4000/C4100/C3000 Revision F Treatment Step Check Replace the paper and go to Is the paper in TRAY 3 normal with no curl, wrinkles or moisture? Go to step 21. step 21. Paper feed path Remove the foreign particles Check the paper feed path.
- Page 304 EPSON AcuLaser C4000/C4100/C3000 Revision F Treatment Step Check Clutch Assy Turn TRAY 3 (PL17.3.18) resistance check 1. Disconnect the P/J835 connector from the Clutch Assy Turn TRAY 3 (PL17.3.18). (Refer Replace the Clutch Assy Turn Replace the PWBA MCU &...
- Page 305 EPSON AcuLaser C4000/C4100/C3000 Revision F Treatment Step Check PWBA Feeder (PL17.4.1) continuity 1. Disconnect the P/J81 and P/J82 connectors of the PWBA Feeder. 2. Check the continuity for the following circuits. P81-2/25 <=> P82-11 <=> P82-13 <=> P83-11 <=> P83-13 <=> P84-3/4 Replace the PWBA Feeder.
- Page 306 EPSON AcuLaser C4000/C4100/C3000 Revision F Treatment Step Check Harness Assy OPF Main (PL15.2.8) continuity 1. Disconnect the J210/P810 relay connector between the Harness Assy OPT Main and the Harness Assy OPFREC (PL4.2.9). 2. Check the continuity for the following lines.
- Page 307 EPSON AcuLaser C4000/C4100/C3000 Revision F Treatment Step Check Harness Assy OPFREC (PL4.2.9) continuity 1. Remove the Option Feeder (Refer to Ch2), and then disconnect the P/J810 relay connector between the Harness Assy OPF REC and the Harness Assy OPF PLG (PL17.4.2).
- Page 308 EPSON AcuLaser C4000/C4100/C3000 Revision F FIP-2 Tray 2 Paper Near Empty Treatment Step Check Initial setting Do the following checks show a problem? Reinstall applicable parts. Go to step 2. • Sensor Low Paper (PL17.4.7) installation • Lever Low Paper (PL17.4.9) installation •...
- Page 309 EPSON AcuLaser C4000/C4100/C3000 Revision F Treatment Step Check PWBA Feeder (PL17.4.1) continuity 1. Disconnect the P/J81 and P/J82 connectors of the PWBA Feeder. Replace the PWBA Feeder. Go to step 9. (Refer to Ch4-4.2.20.10) 2. Check the continuity between P81-18 <=> P82-10.
- Page 310 EPSON AcuLaser C4000/C4100/C3000 Revision F FIP-3 Tray 3 Paper Near Empty Treatment Step Check Initial setting Do the following checks show a problem? Reinstall applicable parts. Go to step 2. • Sensor Low Paper (PL17.4.7) installation • Lever Low Paper (PL17.4.9) installation •...
- Page 311 EPSON AcuLaser C4000/C4100/C3000 Revision F Treatment Step Check PWBA Feeder (PL17.4.1) continuity 1. Disconnect the P/J81 and P/J83 connectors of the PWBA Feeder. Replace the PWBA Feeder. Go to step 9. (Refer to Ch4-4.2.20.10) 2. Check the continuity between P81-19 <=> P83-10.
- Page 312 EPSON AcuLaser C4000/C4100/C3000 Revision F FIP-4 Tray 2 Paper Empty Treatment Step Check Initial setting Do the following checks show a problem? • Sensor No Paper (PL17.3.4) installation Reinstall applicable parts Go to step 2. • Actuator No Paper (PL17.3.5) installation •...
- Page 313 EPSON AcuLaser C4000/C4100/C3000 Revision F Treatment Step Check PWBA Feeder (PL17.4.1) continuity 1. Disconnect the P/J81 and P/J82 connectors of the PWBA Feeder. Replace the PWBA Feeder. Go to step 9. (Refer to Ch4-4.2.20.10) 2. Check the continuity between P81-16 <=> P82-7.
- Page 314 EPSON AcuLaser C4000/C4100/C3000 Revision F FIP-5 Tray 3 Paper Empty Treatment Step Check Initial setting Do the following checks show a problem? • Sensor No Paper (PL17.3.4) installation Reinstall applicable parts. Go to step 2. • Actuator No Paper (PL17.3.5) installation •...
- Page 315 EPSON AcuLaser C4000/C4100/C3000 Revision F Treatment Step Check PWBA Feeder (PL17.4.1) continuity 1. Disconnect the P/J81 and P/J83 connectors of the PWBA Feeder. Replace the PWBA Feeder. Go to step 9. (Refer to Ch4-4.2.20.10) 2. Check the continuity between P81-15 <=> P83-7.
- Page 316 EPSON AcuLaser C4000/C4100/C3000 Revision F FIP-6 Upper Cassette Detached Treatment Step Check Initial setting Do the following checks show a problem? Reinstall applicable parts. Go to step 2. • Switch Assy Size TRAY 2 (PL17.2.7) installation • PAPER CASSETTE installation Replace the Switch Assy Size Switch Assy Size TRAY 2 (PL17.2.7)
- Page 317 EPSON AcuLaser C4000/C4100/C3000 Revision F Treatment Step Check Harness Assy OPF PLG (PL17.4.2), Harness Assy OPFREC (PL4.2.9) and Harness Assy OPF Main (PL15.2.8) continuity check 1. Disconnect the P/J21 connector from the PWBA MCU & HVPS. (Refer to Ch4-4.2.18.1) 2. Disconnect the P/J81 connector from the PWBA Feeder (PL17.4.1).
-
Page 318: Disassembly And Assembly
C H A P T E R DISASSEMBLY AND ASSEMBLY... -
Page 319: Overview
EPSON AcuLaser C4000/C4100/C3000 Revision F 4.1 Overview 4.1.2 Tools The table below shows the tools used for servicing. This chapter describes procedures for disassembly and assembly of the EPL- C8200. Note the procedures are applicable only when the printer has no options installed. -
Page 320: Disassembly Assembly Procedures
EPSON AcuLaser C4000/C4100/C3000 Revision F 4.2 Disassembly Assembly Procedures Refer to the followings which explain descriptions used in this chapter. Regarding “(PL X, Y, Z)” at the end of each heading of removal This section describes procedures for disassembling/assembling the printer. -
Page 321: Large Capacity Paper Unit Removal
EPSON AcuLaser C4000/C4100/C3000 Revision F 4.2.1 Large capacity paper unit removal In this procedure, "Press latch A" and "Press latch B" releases the latch that is shown in the below figures. 1. Turn the printer off and unplug the power cord. -
Page 322: Removing/Replacing The Consumables
EPSON AcuLaser C4000/C4100/C3000 Revision F 4.2.2 Removing/Replacing the Consumables 6. Insert the standard lower cassette into the printer. 7. Carefully lift up the printer with two or more people until the holes on the The consumables available (can be replaced by users) for this printer are as bottom of the printer are free from the five pins on the top of the unit, and shown below. - Page 323 EPSON AcuLaser C4000/C4100/C3000 Revision F 4.2.3.2 Updating by copying from the FLASH ROM module PROCEDURE Follow the steps below. 1. Print a status sheet, and make sure of current program version. 1. Set the ROM module in which the program is to be written in the socket A 2.
- Page 324 EPSON AcuLaser C4000/C4100/C3000 Revision F 4.2.3.3 Formatting the FLASH ROM Module Flash ROM module can be formatted as instructed below. 1. Install the ROM module to be formatted to the socket A of the CONTROLLER PWB. NOTE: Leave the ROM module in the socket P of the CONTROLLER PWB as it is.
-
Page 325: Cover
EPSON AcuLaser C4000/C4100/C3000 Revision F 4.2.4 COVER 4.2.4.1 CONTROL PANEL (PL1.1.1) Removal 1. Remove the COVER ASSY FRONT HEAD (PL1.1.2). (See Section 4.2.4.2.) 2. Remove the HOLDER LEVER OUT. (See Section 4.2.4.3.) 3. Release the 2 hooks securing the CONTROL PANEL (PL.1.1.1) to the COVER ASSY FRONT HEAD. - Page 326 EPSON AcuLaser C4000/C4100/C3000 Revision F 4.2.4.2 COVER ASSY FRONT HEAD (PL1.1.2) Removal Attach the COVER ASSY FRONT HEAD in condition without 1. Press the latch B on the printer body and open the CHUTE ASSY OUT C A U T I O N the B latch button being pushed in.
- Page 327 EPSON AcuLaser C4000/C4100/C3000 Revision F 4.2.4.3 FAN FUSER (PL1.1.9) Removal 1. Remove the COVER ASSY FRONT HEAD. (See Section 4.2.4.2.) 2. Remove the 2 screws (gold, tapped, 8mm) securing the HOLDER LEVER OUT (PL1.1.5) to the rear of the COVER ASSY FRONT HEAD.
- Page 328 EPSON AcuLaser C4000/C4100/C3000 Revision F 4.2.4.4 COVER ASSY TOP MAIN (PL1.1.12) Removal 1. Remove the COVER TOP (PL1.1.11) from the printer body. 2. Remove the 4 TONER CARTRIDGES (Y/M/C/K) (PL12.1.1, 2,3,4). 3. Release the latch A of the printer body and open the CHUTE ASSY IN (PL7.1.1).
- Page 329 EPSON AcuLaser C4000/C4100/C3000 Revision F 4.2.4.5 COVER ASSY TOP PHD (PL1.1.15) Removal 4.2.4.6 COVER REAR (PL1.1.28) Removal 1. Remove the COVER ASSY TOP MAIN. (See Section 4.2.4.4.) 1. Remove the COVER ASSY TOP MAIN. (See Section 4.2.4.4.) 2. Remove the COVER SIDE L. (See Section 4.2.4.14.) 2.
- Page 330 EPSON AcuLaser C4000/C4100/C3000 Revision F 4.2.4.7 LINK: L (PL1.2.5) Removal 4.2.4.8 LINK: R (PL1.2.5) Removal 1. Remove the COVER ASSY TOP MAIN. (See Section 4.2.4.4.) 1. Remove the COVER ASSY TOP MAIN. (See Section 4.2.4.4.) 2. Remove the COVER SIDE L. (See Section 4.2.4.14.) 2.
- Page 331 EPSON AcuLaser C4000/C4100/C3000 Revision F 4.2.4.9 COVER SIDE R (PL1.2.2) Removal 4.2.4.10 COVER ASSY FRONT (PL1.2.6) Removal 1. Remove the COVER ASSY TOP MAIN. (See Section 4.2.4.4.) 1. Release the latch A and open CHUTE ASSY OUT (PL7.1) and CHUTE ASSY IN (PL6.1.1).
- Page 332 EPSON AcuLaser C4000/C4100/C3000 Revision F 4.2.4.11 COVER MSI (PL1.2.21) Removal 4.2.4.12 TRAY ASSY MSI (PL1.2.12) Removal 1. Open the COVER MSI (PL1.2.21) from the front side of printer body. 1. Open the COVER MSI (PL1.2.21) from the printer body. 2. While allowing the left side of the COVER MSI left side elongated hole 2.
- Page 333 EPSON AcuLaser C4000/C4100/C3000 Revision F 4.2.4.13 COVER ASSY FRONT IN (PL1.2.10) Removal 1. Remove the FUSER ASSY. (See Section 4.2.12.1.) 2. Remove the COVER MSI. (See Section 4.2.4.11.) 3. Remove the TRAY ASSY MSI. (See Section 4.2.4.12.) 4. Remove the COVER ASSY FRONT HEAD. (See Section 4.2.4.2.) 5.
- Page 334 EPSON AcuLaser C4000/C4100/C3000 Revision F 4.2.4.14 COVER SIDE L (PL1.2.1) Removal 1. Remove the COVER ASSY TOP MAIN. (See Section 4.2.4.4.) 2. Remove the 1 screw (silver, with a brim, 8mm) securing the COVER SIDE L to the rear side of the printer body.
-
Page 335: Chasis & Feeder/Cassette
EPSON AcuLaser C4000/C4100/C3000 Revision F 4.2.5 CHASIS & FEEDER/CASSETTE 4.2.5.1 FEEDER ASSY (PL2.1.3) Removal 1. Pull out the CASSETTE from the printer body. 2. Remove the COVER ASSY TOP MAIN. (See Section 4.2.4.4.) 3. Remove the COVER SIDE L. (See Section 4.2.4.14.) 4. - Page 336 EPSON AcuLaser C4000/C4100/C3000 Revision F Lifting the upper unit of the printer body should be done by W A R N I N G 2 people. When removing the FEEDER ASSY from the printer body C A U T I O N upper unit, be careful not to drop the upper unit or damage the components.
-
Page 337: Paper Cassette
EPSON AcuLaser C4000/C4100/C3000 Revision F 4.2.6 PAPER CASSETTE 4.2.5.2 STRAP (PL2.1.8) Removal 1. Release the latch B of the printer body and open the CHUTE ASSY OUT 4.2.6.1 ROLL ASSY (PL3.1.6) Removal (PL7.1.1). 1. Pull out the CASSETTE from the printer body. - Page 338 EPSON AcuLaser C4000/C4100/C3000 Revision F 4.2.6.2 HOLDER RETARD (PL3.1.9) Removal 4.2.6.3 CASSETTE ASSY FRONT (REFERENCE ONLY) Removal 1. Pull out the CASSETTE from the printer body. 1. Pull out the CASSETTE from the printer body. 2. Remove the CASSETTE ASSY FRONT. (See Section 4.2.6.3.) 2.
-
Page 339: Paper Feeder
EPSON AcuLaser C4000/C4100/C3000 Revision F 4.2.7 PAPER FEEDER 4.2.7.2 COVER CASSETTE REAR (PL4.1.3) Removal 1. Remove the CASSETTE ASSY REAR from the back of the printer body by 4.2.7.1 CHUTE ASSY TURN (PL4.1.6) Removal letting it revolve upward as it is pulled in this direction. - Page 340 EPSON AcuLaser C4000/C4100/C3000 Revision F 4.2.7.3 HOUSING FDR L (PL4.2.1) Removal 1. Pull out the CASSETTE from the printer body. 2. Remove the COVER ASSY TOP MAIN. (See Section 4.2.4.4.) 3. Remove the COVER SIDE L. (See Section 4.2.4.14.) 4. Remove the COVER SIDE R. (See Section 4.2.4.9.) 5.
- Page 341 EPSON AcuLaser C4000/C4100/C3000 Revision F Lifting the upper unit of the printer body should be done by W A R N I N G 2 people. When removing the FEEDER ASSY from the printer body C A U T I O N upper unit, be careful not to drop the upper unit or damage the components.
- Page 342 EPSON AcuLaser C4000/C4100/C3000 Revision F 4.2.7.4 HOUSING FDR R (PL4.2.2) Removal 1. Pull out the CASSETTE from the printer body. 2. Remove the COVER ASSY TOP MAIN. (See Section 4.2.4.4.) 3. Remove the COVER SIDE L. (See Section 4.2.4.14.) 4. Remove the COVER SIDE R. (See Section 4.2.4.9.) 5.
- Page 343 EPSON AcuLaser C4000/C4100/C3000 Revision F Lifting the upper unit of the printer body should be done by W A R N I N G 2 people. When removing the FEEDER ASSY from the printer body C A U T I O N upper unit, be careful not to drop the upper unit or damage the components.
- Page 344 EPSON AcuLaser C4000/C4100/C3000 Revision F 4.2.7.5 SENSOR HUM TEMP (PL4.2.4) Removal Lifting the upper unit of the printer body should be done by W A R N I N G 1. Pull out the CASSETTE from the printer body. 2 people.
- Page 345 EPSON AcuLaser C4000/C4100/C3000 Revision F 4.2.7.6 HARNESS ASSY OPFREC (PL4.2.9) Removal 1. Pull out the CASSETTE from the printer body. 2. Remove the COVER ASSY TOP MAIN. (See Section 4.2.4.4.) 3. Remove the COVER SIDE L. (See Section 4.2.4.14.) 4. Remove the COVER SIDE R. (See Section 4.2.4.9.) 5.
- Page 346 EPSON AcuLaser C4000/C4100/C3000 Revision F Lifting the upper unit of the printer body should be done by W A R N I N G 2 people. When removing the FEEDER ASSY from the printer body C A U T I O N upper unit, be careful not to drop the upper unit or damage the components.
- Page 347 EPSON AcuLaser C4000/C4100/C3000 Revision F 4.2.7.7 SWITCH SIZE TRAY1 (PL4.2.8) Removal 1. Pull out the CASSETTE from the printer body. 2. Remove the COVER ASSY TOP MAIN. (See Section 4.2.4.4.) 3. Remove the COVER SIDE L. (See Section 4.2.4.14.) 4. Remove the COVER SIDE R. (See Section 4.2.4.9.) 5.
- Page 348 EPSON AcuLaser C4000/C4100/C3000 Revision F Lifting the upper unit of the printer body should be done by W A R N I N G 2 people. When removing the FEEDER ASSY from the printer body C A U T I O N upper unit, be careful not to drop the upper unit or damage the components.
- Page 349 EPSON AcuLaser C4000/C4100/C3000 Revision F 4.2.7.8 LEVER LOW PAPER (PL4.2.10) 1. Pull out the CASSETTE from the printer body. 2. Remove the COVER ASSY TOP MAIN. (See Section 4.2.4.4.) 3. Remove the COVER SIDE L. (See Section 4.2.4.14.) 4. Remove the COVER SIDE R. (See Section 4.2.4.9.) 5.
- Page 350 EPSON AcuLaser C4000/C4100/C3000 Revision F Lifting the upper unit of the printer body should be done by W A R N I N G 2 people. When removing the FEEDER ASSY from the printer body C A U T I O N upper unit, be careful not to drop the upper unit or damage the components.
- Page 351 EPSON AcuLaser C4000/C4100/C3000 Revision F 4.2.7.9 INDICATOR (PL4.2.11) Removal 1. Pull out the CASSETTE from the printer body. 2. Remove the COVER ASSY TOP MAIN. (See Section 4.2.4.4.) 3. Remove the COVER SIDE L. (See Section 4.2.4.14.) 4. Remove the COVER SIDE R. (See Section 4.2.4.9.) 5.
- Page 352 EPSON AcuLaser C4000/C4100/C3000 Revision F Lifting the upper unit of the printer body should be done by W A R N I N G 2 people. When removing the FEEDER ASSY from the printer body C A U T I O N upper unit, be careful not to drop the upper unit or damage the components.
- Page 353 EPSON AcuLaser C4000/C4100/C3000 Revision F 4.2.7.10 GUIDE INDICATOR (PL4.2.13) Removal 1. Pull out the CASSETTE from the printer body. 2. Remove the COVER ASSY TOP MAIN. (See Section 4.2.4.4.) 3. Remove the COVER SIDE L. (See Section 4.2.4.14.) 4. Remove the COVER SIDE R. (See Section 4.2.4.9.) 5.
- Page 354 EPSON AcuLaser C4000/C4100/C3000 Revision F Lifting the upper unit of the printer body should be done by W A R N I N G 2 people. When removing the FEEDER ASSY from the printer body C A U T I O N upper unit, be careful not to drop the upper unit or damage the components.
- Page 355 EPSON AcuLaser C4000/C4100/C3000 Revision F 4.2.7.11 PICKUP ASSY (PL4.3.1) Removal 1. Pull out the CASSETTE from the printer body. 2. Remove the COVER ASSY TOP MAIN. (See Section 4.2.4.4.) 3. Remove the COVER SIDE L. (See Section 4.2.4.14.) 4. Remove the COVER SIDE R. (See Section 4.2.4.9.) 5.
- Page 356 EPSON AcuLaser C4000/C4100/C3000 Revision F Lifting the upper unit of the printer body should be done by W A R N I N G 2 people. When removing the FEEDER ASSY from the printer body C A U T I O N upper unit, be careful not to drop the upper unit or damage the components.
- Page 357 EPSON AcuLaser C4000/C4100/C3000 Revision F 4.2.7.12 ROLL ASSY FEED (PL4.3.3) Removal 1. Pull out the CASSETTE from the printer body. 2. From the FEEDER, let the SHAFT FEED 1 (PL4.3.2) rotate so that the rubber part of the ROLL ASSY FEED faces downward.
- Page 358 EPSON AcuLaser C4000/C4100/C3000 Revision F 4.2.7.13 SENSOR NO/LOW PAPER (Tray1 N/P) (PL4.3.4) RIGHT Removal 1. Pull out the CASSETTE from the printer body. 2. Remove the COVER ASSY TOP MAIN. (See Section 4.2.4.4.) 3. Remove the COVER SIDE L. (See Section 4.2.4.14.) 4.
- Page 359 EPSON AcuLaser C4000/C4100/C3000 Revision F Lifting the upper unit of the printer body should be done by W A R N I N G 2 people. When removing the FEEDER ASSY from the printer body C A U T I O N upper unit, be careful not to drop the upper unit or damage the components.
- Page 360 EPSON AcuLaser C4000/C4100/C3000 Revision F 4.2.7.14 SENSOR NO/LOW PAPER (Tray1 L/P) (PL4.3.4) Removal 1. Pull out the CASSETTE from the printer body. 2. Remove the COVER ASSY TOP MAIN. (See Section 4.2.4.4.) 3. Remove the COVER SIDE L. (See Section 4.2.4.14.) 4.
- Page 361 EPSON AcuLaser C4000/C4100/C3000 Revision F Lifting the upper unit of the printer body should be done by W A R N I N G 2 people. When removing the FEEDER ASSY from the printer body C A U T I O N upper unit, be careful not to drop the upper unit or damage the components.
- Page 362 EPSON AcuLaser C4000/C4100/C3000 Revision F 4.2.7.15 ACTUATOR NO PAPER (PL4.3.5) Removal RIGHT 1. Pull out the CASSETTE from the printer body. 2. Remove the COVER ASSY TOP MAIN. (See Section 4.2.4.4.) 3. Remove the COVER SIDE L. (See Section 4.2.4.14.) 4.
- Page 363 EPSON AcuLaser C4000/C4100/C3000 Revision F Lifting the upper unit of the printer body should be done by W A R N I N G 2 people. When removing the FEEDER ASSY from the printer body C A U T I O N upper unit, be careful not to drop the upper unit or damage the components.
- Page 364 EPSON AcuLaser C4000/C4100/C3000 Revision F 4.2.7.16 LINK ACTUATOR (PL4.3.6) Removal 1. Pull out the CASSETTE from the printer body. 2. Open the front section of the LINK ACTUATOR to the left and right, and release the LINK ACTUATOR bracket from shaft of the ACTUATOR NO PAPER (PL4.3.5).
- Page 365 EPSON AcuLaser C4000/C4100/C3000 Revision F 4.2.7.17 SOLENOID FEED TRAY1 (PL4.3.17) Removal 1. Pull out the CASSETTE from the printer body. 2. Remove the COVER ASSY TOP MAIN. (See Section 4.2.4.4.) 3. Remove the COVER SIDE L. (See Section 4.2.4.14.) 4. Remove the COVER SIDE R. (See Section 4.2.4.9.) 5.
- Page 366 EPSON AcuLaser C4000/C4100/C3000 Revision F Lifting the upper unit of the printer body should be done by W A R N I N G 2 people. When removing the FEEDER ASSY from the printer body C A U T I O N upper unit, be careful not to drop the upper unit or damage the components.
- Page 367 EPSON AcuLaser C4000/C4100/C3000 Revision F 4.2.7.18 CLUTCH ASSY TURN TRAY1 (PL4.3.18) Removal 1. Pull out the CASSETTE from the printer body. 2. Remove the COVER ASSY TOP MAIN. (See Section 4.2.4.4.) 3. Remove the COVER SIDE L. (See Section 4.2.4.14.) 4.
- Page 368 EPSON AcuLaser C4000/C4100/C3000 Revision F Lifting the upper unit of the printer body should be done by W A R N I N G 2 people. When removing the FEEDER ASSY from the printer body C A U T I O N upper unit, be careful not to drop the upper unit or damage the components.
- Page 369 EPSON AcuLaser C4000/C4100/C3000 Revision F 4.2.7.19 ROLL ASSY TURN (PL4.3.21) Removal 1. Pull out the CASSETTE from the printer body. 2. Remove the COVER ASSY TOP MAIN. (See Section 4.2.4.4.) 3. Remove the COVER SIDE L. (See Section 4.2.4.14.) 4. Remove the COVER SIDE R. (See Section 4.2.4.9.) 5.
- Page 370 EPSON AcuLaser C4000/C4100/C3000 Revision F Lifting the upper unit of the printer body should be done by W A R N I N G 2 people. When removing the FEEDER ASSY from the printer body C A U T I O N upper unit, be careful not to drop the upper unit or damage the components.
- Page 371 EPSON AcuLaser C4000/C4100/C3000 Revision F 4.2.7.20 ROLL ASSY (PL4.3.25) Removal 1. Pull out the CASSETTE from the printer body. 2. Release the 1 hook securing the ROLL ASSY to SHAFT FEED 2 (PL4.3.23) from the FEEDER. 3. Remove the ROLL ASSY to the left side, away from SHAFT FEED 2.
-
Page 372: Housing Assy Retard
EPSON AcuLaser C4000/C4100/C3000 Revision F 4.2.8 HOUSING ASSY RETARD 4.2.8.1 HOUSING ASSY RETARD (PL5.1.1) Removal 1. Pull out the CHUTE ASSY REGI. (See Section 4.2.13.1.) 2. Disconnect the connector (P/J19 ) of CLUTCH TURN MSI (PL5.1.9) from the upper part of PWBA MCU & HVPS (PL15.1.2), then free the harness from clamp of CHASSIS MAIN (PL2.1.9). - Page 373 EPSON AcuLaser C4000/C4100/C3000 Revision F 4.2.8.2 ROLL TURN (PL5.1.2) Removal 1. Pull out the CHUTE ASSY REGI. (See Section 4.2.13.1.) 2. Remove the HOUSING ASSY RETARD. (See Section 4.2.8.1.) 3. Remove the CLUTCH TURN MSI. (See Section 4.2.8.4.) 4. Remove the E-ring securing the left side of the ROLL TURN to the HOUSING ASSY RETARD (PL5.1.1).
- Page 374 EPSON AcuLaser C4000/C4100/C3000 Revision F 4.2.8.3 ROLL ASSY RETARD (PL5.1.5) Removal 1. Release the latch A of the printer body and open the CHUTE ASSY OUT (PL5.1.1). 2. Hold the front end of the HOLDER RETARD (PL5.1.6) of the upper part of the HOUSING ASSY RETARD (PL5.1.1), and let the HOLDER RETARD...
-
Page 375: Chute Assy In
EPSON AcuLaser C4000/C4100/C3000 Revision F 4.2.9 CHUTE ASSY IN 4.2.9.1 CHUTE ASSY IN (PL6.1.1) Removal J5030 1. Remove the FUSER ASSY. (See Section 4.2.12.1.) 2. Remove the BTR ASSY. (See Section 4.2.12.2.) 3. Remove the COVER ASSY TOP MAIN. (See Section 4.2.4.4.) 4. -
Page 376: Chute Assy In
EPSON AcuLaser C4000/C4100/C3000 Revision F 17. Remove the 1 screw securing the WIRE ASSY FSR EARTH to the printer body right side. 18. Free the harness (J52) of the DRIVE ASSY FUSER (PL6.1.18) from the upper clamp of the DRIVE ASSY MAIN (PL14.1.2). - Page 377 EPSON AcuLaser C4000/C4100/C3000 Revision F 4.2.9.2 SENSOR ASSY ADC (PL6.1.11) Removal 4.2.9.3 SENSOR TONER FULL (PL6.1.13) Removal 1. Release the latch A of the printer body and open the CHUTE ASSY IN 1. Release the latch A of the printer body and open the CHUTE ASSY IN (PL6.1.1).
- Page 378 EPSON AcuLaser C4000/C4100/C3000 Revision F 4.2.9.4 DRIVE ASSY FUSER (PL6.1.18) Removal 1. Remove the FUSER ASSY. (See Section 4.2.12.1.) 2. Remove the BTR ASSY. (See Section 4.2.12.2.) 3. Remove the COVER ASSY FRONT. (See Section 4.2.4.10.) 4. Remove the COVER ASSY TOP MAIN. (See Section 4.2.4.4.) 5.
- Page 379 EPSON AcuLaser C4000/C4100/C3000 Revision F 4.2.9.5 LATCH R (PL6.1.21) Removal 4.2.9.6 LATCH L (PL6.1.30) Removal 1. Remove the FUSER ASSY. (See Section 4.2.12.1.) 1. Remove the FUSER ASSY. (See Section 4.2.12.1.) 2. Remove the COVER ASSY FRONT. (See Section 4.2.4.10.) 2.
-
Page 380: Chute Assy Out
EPSON AcuLaser C4000/C4100/C3000 Revision F 4.2.10 CHUTE ASSY OUT 4.2.10.1 CHUTE ASSY OUT (PL7.1) Removal 1. Remove the FUSER ASSY. (See Section 4.2.12.1.) 2. Remove the COVER ASSY TOP MAIN. (See Section 4.2.4.4.) 3. Remove the COVER ASSY FRONT HEAD. (See Section 4.2.4.2.) 4. - Page 381 EPSON AcuLaser C4000/C4100/C3000 Revision F 17. Remove the upper E-rings at the left and right of the SHAFT PIVOT (PL6.1.1) securing the lower portion of the CHUTE ASSY OUT to the printer body. When performing the following step, be careful not to cut...
- Page 382 EPSON AcuLaser C4000/C4100/C3000 Revision F 4.2.10.2 SENSOR PAPER (Full Stack) (PL7.1.4) Removal 4.2.10.3 ACTUATOR FULL STACK (PL7.1.5) Removal 1. Remove the ACTUATOR FULL STACK. (See Section 4.2.10.3.) 1. Remove the COVER ASSY FRONT HEAD. (See Section 4.2.4.2.) 2. Remove the COVER ASSY FRONT HEAD. (See Section 4.2.4.2.) 2.
- Page 383 EPSON AcuLaser C4000/C4100/C3000 Revision F 4.2.10.4 SENSOR PAPER (Dup Jam) (PL7.1.4) Removal 4.2.10.5 SENSOR PAPER (MSI N/P) (PL7.1.4) Removal 1. Remove the FUSER ASSY. (See Section 4.2.12.1.) 1. Remove the FUSER ASSY. (See Section 4.2.12.1.) 2. Remove the COVER ASSY FRONT HEAD. (See Section 4.2.4.2.) 2.
- Page 384 EPSON AcuLaser C4000/C4100/C3000 Revision F 4.2.10.6 ELIMINATOR ASSY (PL7.1.9) Removal 4.2.10.7 ROLL DUP (PL7.1.12) Removal 1. Remove the COVER ASSY FRONT HEAD. (See Section 4.2.4.2.) 1. Remove the FUSER ASSY. (See Section 4.2.12.1.) 2. Remove the 1 screw securing the ELIMINATOR ASSY to the CHUTE 2.
- Page 385 EPSON AcuLaser C4000/C4100/C3000 Revision F 4.2.10.8 ACTUATOR DUP (PL7.1.13) Removal 1. Remove the FUSER ASSY. (See Section 4.2.12.1.) 2. Remove the COVER ASSY FRONT HEAD. (See Section 4.2.4.2.) 3. Remove the COVER MSI. (See Section 4.2.4.11.) 4. Remove the TRAY ASSY MSI. (See Section 4.2.4.12.) 5.
- Page 386 EPSON AcuLaser C4000/C4100/C3000 Revision F 4.2.10.9 LATCH OUT (PL7.1.18) Removal 1. Remove the FUSER ASSY. (See Section 4.2.12.1.) 2. Remove the COVER ASSY FRONT HEAD. (See Section 4.2.4.2.) 3. Remove the COVER MSI. (See Section 4.2.4.11.) 4. Remove the TRAY ASSY MSI. (See Section 4.2.4.12.) 5.
- Page 387 EPSON AcuLaser C4000/C4100/C3000 Revision F 4.2.10.10 ROLL ASSY FEED (PL7.1.27) Removal Be careful of the installation direction of the ROLL ASSY 1. Release the latch B and open the CHUTE ASSY OUT (PL7.1.1). C A U T I O N FEED during assembly.
- Page 388 EPSON AcuLaser C4000/C4100/C3000 Revision F 4.2.10.11 ACTUATOR MSI (PL7.1.37) Removal 1. Remove the FUSER ASSY. (See Section 4.2.12.1.) 2. Remove the COVER ASSY FRONT HEAD. (See Section 4.2.4.2.) 3. Remove the COVER MSI. (See Section 4.2.4.11.) 4. Remove the TRAY ASSY MSI. (See Section 4.2.4.12.) 5.
- Page 389 EPSON AcuLaser C4000/C4100/C3000 Revision F 4.2.10.12 SOLENID FEED MSI (PL7.1.40) Removal 1. Remove the FUSER ASSY. (See Section 4.2.12.1.) 2. Remove the COVER ASSY TOP MAIN. (See Section 4.2.4.4.) 3. Remove the COVER ASSY FRONT HEAD. (See Section 4.2.4.2.) 4. Remove the COVER MSI. (See Section 4.2.4.11.) 5.
- Page 390 EPSON AcuLaser C4000/C4100/C3000 Revision F 4.2.10.13 SHAFT ASSY ROLL FEED (REFERENCE ONLY) Removal 1. Remove the FUSER ASSY. (See Section 4.2.12.1.) 2. Remove the COVER ASSY TOP MAIN. (See Section 4.2.4.4.) 3. Remove the COVER ASSY FRONT HEAD. (See Section 4.2.4.2.) 4.
- Page 391 EPSON AcuLaser C4000/C4100/C3000 Revision F 4.2.10.14 PLATE ASSY BOTTOM MSI (PL7.1.42) Removal 1. Remove the FUSER ASSY. (See Section 4.2.12.1.) 2. Remove the COVER ASSY TOP MAIN. (See Section 4.2.4.4.) 3. Remove the COVER ASSY FRONT HEAD. (See Section 4.2.4.2.) 4.
-
Page 392: Chute Assy Exit
EPSON AcuLaser C4000/C4100/C3000 Revision F 4.2.11 CHUTE ASSY EXIT 4.2.11.1 CHUTE ASSY EXIT (PL8.1.1) Removal 1. Remove the FUSER ASSY. (See Section 4.2.12.1.) 2. Remove the COVER ASSY FRONT HEAD. (See Section 4.2.4.2.) 3. Remove the COVER MSI. (See Section 4.2.4.11.) 4. - Page 393 EPSON AcuLaser C4000/C4100/C3000 Revision F 4.2.11.2 ROLL EXIT (PL8.1.4) Removal 1. Remove the FUSER ASSY. (See Section 4.2.12.1.) 2. Remove the COVER ASSY FRONT HEAD. (See Section 4.2.4.2.) 3. Remove the COVER MSI. (See Section 4.2.4.11.) 4. Remove the TRAY ASSY MSI. (See Section 4.2.4.12.) 5.
- Page 394 EPSON AcuLaser C4000/C4100/C3000 Revision F 4.2.11.3 ROLL MID (PL8.1.5) Removal 1. Remove the FUSER ASSY. (See Section 4.2.12.1.) 2. Remove the COVER ASSY FRONT HEAD. (See Section 4.2.4.2.) 3. Remove the COVER MSI. (See Section 4.2.4.11.) 4. Remove the TRAY ASSY MSI. (See Section 4.2.4.12.) 5.
- Page 395 EPSON AcuLaser C4000/C4100/C3000 Revision F 4.2.11.4 MOTOR ASSY DUP (PL8.1.8) Removal 1. Remove the FUSER ASSY. (See Section 4.2.12.1.) 2. Remove the COVER ASSY FRONT HEAD. (See Section 4.2.4.2.) 3. Remove the COVER MSI. (See Section 4.2.4.11.) 4. Remove the TRAY ASSY MSI. (See Section 4.2.4.12.) 5.
-
Page 396: Fuser Assy & Btr Assy
EPSON AcuLaser C4000/C4100/C3000 Revision F 4.2.12 FUSER ASSY & BTR ASSY 4.2.12.1 FUSER ASSY (PL9.1.1) Removal The FUSER is very hot, so to avoid burns use great caution W A R N I N G when it is operating. 1. Release the latch A and open the CHUTE ASSY IN (PL7.1.1). - Page 397 EPSON AcuLaser C4000/C4100/C3000 Revision F 4.2.12.2 BTR ASSY (PL9.1.2) Removal 1. Release the latch A of the printer body and open the CHUTE ASSY IN (PL6.1.1). 2. Release the lock by pinching the left and right side latches that secure the BTR ASSY (PL9.1.2) to the CHUTE ASSY IN of the printer body, then let...
-
Page 398: Registration
EPSON AcuLaser C4000/C4100/C3000 Revision F 4.2.13 REGISTRATION 4.2.13.1 CHUTE ASSY REGI (PL10.1.1) Removal 1. Release the latch A of the printer body and open the CHUTE ASSY IN (PL6.1.1). 2. Release the 2 hooks securing the HOUSING ASSY ELEC (PL10.1.23), then remove the HOUSING ASSY ELEC upward. - Page 399 EPSON AcuLaser C4000/C4100/C3000 Revision F 4.2.13.2 SENSOR REGI (PL10.1.20) Removal 4.2.13.3 ACTUATOR REGI (PL10.1.21) Removal 1. Remove the CHUTE ASSY REGI. (See Section 4.2.13.1.) 1. Remove the CHUTE ASSY REGI. (See Section 4.2.13.1.) 2. Remove the ACTUATOR REGI. (See Section 4.2.13.3.) 2.
- Page 400 EPSON AcuLaser C4000/C4100/C3000 Revision F 4.2.13.4 SENSOR OHP (PL10.1.16) Removal 1. Remove the CHUTE ASSY REGI. (See Section 4.2.13.1.) 2. Remove the E-ring securing the GEAR REGI METAL (PL10.1.3), then pull out the GEAR REGI METAL from the left side shaft of the ROLL REGI METAL (PL10.1.9).
- Page 401 EPSON AcuLaser C4000/C4100/C3000 Revision F 9. Lift up the left side shaft of the ROLL REGI METAL from the CHUTE ASSY REGI, and pull out the ROLL REGI METAL along with the right side shaft of the BEARING METAL R (PL10.1.11) (white).
-
Page 402: Xerographics
EPSON AcuLaser C4000/C4100/C3000 Revision F 4.2.14 XEROGRAPHICS 4.2.14.1 ROS ASSY (PL11.1.1) Removal 1. Remove the COVER ASSY TOP MAIN. (See Section 4.2.4.4.) 2. Remove the COVER SIDE L. (See Section 4.2.4.14.) 3. Remove the COVER SIDE R. (See Section 4.2.4.9.) 4. - Page 403 EPSON AcuLaser C4000/C4100/C3000 Revision F 4.2.14.2 HSG ASSY BIAS (PL11.1.4) Removal 1. Remove the COVER ASSY TOP MAIN. (See Section 4.2.4.4.) 2. Remove the COVER SIDE L. (See Section 4.2.4.14.) 3. Remove the LINK: L. (See Section 4.2.4.7.) P/J5030 4. Disconnect the connector (P/J5020, P/J5030) on the HVPS SUB (PL12.1.9), and remove the WIRE ASSY BTR2 (PL6.1.2) and WIRE ASSY...
-
Page 404: Tcru Asssy
EPSON AcuLaser C4000/C4100/C3000 Revision F 4.2.15 TCRU ASSSY 4.2.15.1 HOLDER TCRU ASSY UNIT Removal (REFERENCE ONLY) When disassembling the HOLDER TCRU ASSY UNIT, use C A U T I O N as vacuum or other cleaning device to remove the residual... - Page 405 EPSON AcuLaser C4000/C4100/C3000 Revision F 7. Disconnect the connector (P/J51) on the PWB DRIVE (PL15.1.15) from the right side surface of the printer body. 8. Disconnect the connector (P/J144) on the PWB EEPROM (PL12.1.8) from the left side surface of the printer body.
- Page 406 EPSON AcuLaser C4000/C4100/C3000 Revision F 4.2.15.2 HOLDER TONER ASSY (Y) (PL12.2.1) Removal 1. Remove the COVER ASSY TOP MAIN. (See Section 4.2.4.4.) 2. Remove the COVER SIDE L. (See Section 4.2.4.14.) 3. Remove the COVER SIDE R. (See Section 4.2.4.9.) 4.
- Page 407 EPSON AcuLaser C4000/C4100/C3000 Revision F 4.2.15.3 HOLDER TONER ASSY (M) (PL12.2.2) Removal Be sure to attach the hook of motor side. 1. Remove the COVER ASSY TOP MAIN. (See Section 4.2.4.4.) 2. Remove the COVER SIDE L. (See Section 4.2.4.14.) 3.
- Page 408 EPSON AcuLaser C4000/C4100/C3000 Revision F 4.2.15.4 HOLDER TONER ASSY (C) (PL12.2.3) Removal 1. Remove the COVER ASSY TOP MAIN. (See Section 4.2.4.4.) 2. Remove the COVER SIDE L. (See Section 4.2.4.14.) 3. Remove the COVER SIDE R. (See Section 4.2.4.9.) 4.
- Page 409 EPSON AcuLaser C4000/C4100/C3000 Revision F 4.2.15.5 HOLDER TONER ASSY (K) (PL12.2.4) Removal 1. Remove the COVER ASSY TOP MAIN. (See Section 4.2.4.4.) 2. Remove the COVER SIDE L. (See Section 4.2.4.14.) 3. Remove the COVER SIDE R. (See Section 4.2.4.9.) 4.
- Page 410 EPSON AcuLaser C4000/C4100/C3000 Revision F 4.2.15.6 SWITCH TCRU ASSY (PL12.2.10) Removal 4.2.15.7 SENSOR TONER LOW (PL12.2.9) Removal 1. Remove the COVER ASSY TOP MAIN. (See Section 4.2.4.4.) 1. Remove the COVER ASSY TOP MAIN. (See Section 4.2.4.4.) 2. Remove the COVER SIDE L. (See Section 4.2.4.14.) 2.
- Page 411 EPSON AcuLaser C4000/C4100/C3000 Revision F 4.2.15.8 PWB EEPROM (PL12.1.8) Removal 4.2.15.9 HVPS SUB (PL12.1.9) Removal 1. Remove the COVER ASSY TOP MAIN. (See Section 4.2.4.4.) 1. Remove the COVER ASSY TOP MAIN. (See Section 4.2.4.4.) 2. Remove the COVER SIDE L. (See Section 4.2.4.14.) 2.
-
Page 412: Frame
EPSON AcuLaser C4000/C4100/C3000 Revision F 4.2.16 FRAME 4.2.16.1 LEVER DRUM: L (PL13.1.4) Removal 1. Remove the COVER ASSY TOP MAIN. (See Section 4.2.4.4.) 2. Remove the COVER SIDE L. (See Section 4.2.4.14.) 3. Remove the LINK: L. (See Section 4.2.4.7.) 4. - Page 413 EPSON AcuLaser C4000/C4100/C3000 Revision F When installing the LINK LEVER L, do so after aligning the GEAR IDL PRL (PL13.1.18) and lower part of the LINK LEVER L to the positions shown in the drawing. HANABI_BE_CHAP03_069FB Figure 4-98. LEVER DRUM:L (PL13.1.4) Removal (2)
- Page 414 EPSON AcuLaser C4000/C4100/C3000 Revision F 4.2.16.2 LEVER DRUM:R (PL13.1.4) Removal 1. Remove the COVER ASSY TOP MAIN. (See Section 4.2.4.4.) 2. Remove the COVER SIDE R. (See Section 4.2.4.9.) 3. Remove the PWB DRIVE. (See Section 4.2.18.5.) 4. Remove the LINK: R. (See Section 4.2.4.8.) 5.
- Page 415 EPSON AcuLaser C4000/C4100/C3000 Revision F When installing the LINK LEVER R (PL13.1.6), do so after aligning the GEAR IDL PRR (PL13.1.11) and lower part of the LINK LEVER R to the positions shown in the drawing. HANABI_BE_CHAP03_071FB Figure 4-100. LEVER DRUM:L (PL13.1.4) Removal (2)
- Page 416 EPSON AcuLaser C4000/C4100/C3000 Revision F 4.2.16.3 ACTUATOR I/L (PL13.1.8) Removal 1. Remove the COVER ASSY TOP MAIN. (See Section 4.2.4.4.) 2. Remove the COVER SIDE R. (See Section 4.2.4.9.) 3. Remove the PWB DRIVE. (See Section 4.2.18.5.) 4. From the right side surface of the printer body, release the hooks of the SPRING I/L (PL13.1.9) hanging from the convex part of the PLATE ASSY...
- Page 417 EPSON AcuLaser C4000/C4100/C3000 Revision F 4.2.16.4 PWB ASSY EARTH (PL13.1.17) Removal 1. Remove the CHUTE ASSY REGI. (See Section 4.2.13.1.) 2. Remove the HOUSING ASSY RETARD. (See Section 4.2.8.1.) 3. Remove the 2 screws (gold, 10mm and gold, tapped, 10mm) and remove the PLATE EARTH FRONT (PL13.
-
Page 418: Drive
EPSON AcuLaser C4000/C4100/C3000 Revision F 4.2.17 DRIVE 4.2.17.2 DRIVE ASSY MAIN (PL14.1.2) Removal 1. Remove the COVER ASSY TOP MAIN. (See Section 4.2.4.4.) 4.2.17.1 DRIVE ASSY DEVE (PL14.1.1) Removal 2. Remove the COVER SIDE R. (See Section 4.2.4.9.) 1. Remove the COVER ASSY TOP MAIN. (See Section 4.2.4.4.) 3. -
Page 419: Electrical
EPSON AcuLaser C4000/C4100/C3000 Revision F 4.2.18 ELECTRICAL 4.2.18.1 PWBA MCU & HVPS (PL15.1.2) Removal 1. Remove the PWB Controller (PWB ESS). (See Section 4.2.19.1.) 2. Remove the CHUTE ASSY REGI. (See Section 4.2.13.1.) Be sure that the CHUTE ASSY REGI is removed when C A U T I O N performing the following step. - Page 420 EPSON AcuLaser C4000/C4100/C3000 Revision F 13. Disconnect all the connectors on the PWBA MCU & HVPS from the BOX ASSY ELEC. 14. Remove the 6 screws (gold, 6mm) securing the PWBA MCU & HVPS to the BOX ASSY ELEC. 15. Remove the PWBA MCU & HVPS from the BOX ASSY ELEC.
- Page 421 EPSON AcuLaser C4000/C4100/C3000 Revision F 4.2.18.2 FAN REAR (PL15.1.3) Removal 1. Remove the COVER ASSY TOP MAIN. (See Section 4.2.4.4.) 2. Remove the COVER SIDE L. (See Section 4.2.4.14.) 3. Remove the COVER SIDE R. (See Section 4.2.4.9.) 4. Remove the COVER REAR. (See Section 4.2.4.6.) 5.
- Page 422 EPSON AcuLaser C4000/C4100/C3000 Revision F 4.2.18.3 LVPS (PL15.1.10) Removal P/J166 P/J163 1. Remove the COVER ASSY TOP MAIN. (See Section 4.2.4.4.) 2. Remove the COVER SIDE R. (See Section 4.2.4.9.) P/J167 P/J165 3. Remove the 2 CLAMP GUIDE HARNESS (PL15. 1. 5) on the GUIDE P/J164 HARNESS SW (PL15.
- Page 423 EPSON AcuLaser C4000/C4100/C3000 Revision F 4.2.18.4 HARNESS ASSY AC SW (PL15.1.11) Removal 1. Remove the COVER ASSY TOP MAIN. (See Section 4.2.4.4.) 2. Remove the COVER SIDE R. (See Section 4.2.4.9.) 3. Remove the 1screw (gold, with outside toothed lock washer, 10mm) securing the grounding wire of the HARNESS ASSY AC SW to the printer body.
- Page 424 EPSON AcuLaser C4000/C4100/C3000 Revision F 4.2.18.5 PWB DRIVE (PL15.1.15) Removal 1. Remove the COVER ASSY TOP MAIN. (See Section 4.2.4.4.) 2. Remove the COVER SIDE R. (See Section 4.2.4.9.) 3. Disconnect all the connectors on the PWB DRIVE from the right side surface of the printer body.
- Page 425 EPSON AcuLaser C4000/C4100/C3000 Revision F 4.2.18.6 BOX ASSY ELEC (PL15.1.6) Removal 1. Remove the PWB Controller (PWB ESS). (See Section 4.2.19.1.) 2. Remove the CHUTE ASSY REGI. (See Section 4.2.13.1.) Be sure that the CHUTE ASSY REGI is removed when C A U T I O N performing the following step.
- Page 426 EPSON AcuLaser C4000/C4100/C3000 Revision F 15. Remove the COVER CASSETTE REAR. (See Section 4.2.7.2.) 16. Remove the 5 screws (gold, 6mm, 2 positions from upper front, 1 position from LVPS side, 2 positions from rear side) securing the BOX ASSY ELEC to the printer body.
- Page 427 EPSON AcuLaser C4000/C4100/C3000 Revision F 4.2.18.7 HOUSING ASSY CONTACT (PL15.1.8) Removal 1. Remove the PWB Controller (PWB ESS). (See Section 4.2.19.1.) 2. Remove the CHUTE ASSY REGI. (See Section 4.2.13.1.) Be sure that the CHUTE ASSY REGI is removed when C A U T I O N performing the following step.
-
Page 428: Controller Board
EPSON AcuLaser C4000/C4100/C3000 Revision F 4.2.19 CONTROLLER BOARD 4.2.19.1 PWB CONTROLLER (PL16.1.5) Removal 1. Loosen the 2 SCREW KNURLING (PL16.1.6) securing the PLATE REAR ESS (PL16.1.7) at the back of the printer body. 2. Hold the knobs of the GUIDE L ESS (PL16.2.12) and the GUIDE R ESS (PL16.1.13), and remove the PWB CONTROLLER from the printer body. - Page 429 EPSON AcuLaser C4000/C4100/C3000 Revision F Step 7 When removing the PWB Controller, perform USB ID input C A U T I O N without fail. (Refer to Section 5.1) When installing the PWB CONTROLLER into the printer body, be sure the PWB CONTROLLER front edge connectors are properly connected to the connectors of the PWBA MCU &...
-
Page 430: Large Capacity Paper Unit (Option Feeder Unit)
EPSON AcuLaser C4000/C4100/C3000 Revision F 4.2.20 Large Capacity Paper Unit (Option FEEDER UNIT) 4.2.20.1 COVER FRONT (PL17.1.5) Removal 1. Remove CASSETTE TRAY 2 and 3, and any others of the type that can be withdrawn, by pulling them straight out then tilting them up to take them all the way out. - Page 431 EPSON AcuLaser C4000/C4100/C3000 Revision F 4.2.20.2 COVER R (PL17.1.4) Removal 1. Remove the COVER FRONT. (See Section 4.2.20.1.) 2. Remove the 5 screws (silver, with the brim, 8mm) securing the COVER R to the TWO TRAY MODULE. 3. Use two hands to grasp both sides of COVER R, and while pulling front part wider to the left and right, release the 3 bosses of front part COVER R from the holes of FRAME ASSY OPF (PL17.1.3).
- Page 432 EPSON AcuLaser C4000/C4100/C3000 Revision F 4.2.20.3 COVER L (PL17.1.1) Removal REAR 1. Remove the COVER FRONT. (See Section 4.2.20.1.) 2. Remove the 5 screws (silver, with the brim, 8mm) securing the COVER L to the TWO TRAY MODULE. 3. Use two hands to grasp both sides of COVER L, and while pulling front part wider to the left and right, release the 3 bosses of front part COVER L from the holes of FRAME ASSY OPF (PL17.1.3).
- Page 433 EPSON AcuLaser C4000/C4100/C3000 Revision F 4.2.20.4 CHUTE ASSY TURN (PL17.2.8) Removal The following steps is a common to the TRAY 2 and the C H E C K P O I N T TRAY 3. 1. Remove the CASSETTE ASSY (PL2.1.3). (See Section 4.2.20.1.) 2.
- Page 434 EPSON AcuLaser C4000/C4100/C3000 Revision F 4.2.20.5 HARNESS ASSY FDR 2T (PL17.4.3) Removal 1. Remove the COVER FRONT. (See Section 4.2.20.1.) 2. Remove the COVER R (PL17.1.4). (See Section 4.2.20.2.) 3. Disconnect the connector (P/J821) of the SWITCH ASSY SIZE (PL17.2.7) (TRAY 2).
- Page 435 EPSON AcuLaser C4000/C4100/C3000 Revision F 4.2.20.6 HARNESS ASSY FDR 3T (PL17.4.4) Removal 1. Remove the COVER FRONT. (See Section 4.2.20.1.) 2. Remove the COVER R (PL17.1.4). (See Section 4.2.20.2.) 3. Disconnect the connector (P/J821) of the SWITCH ASSY SIZE (PL17.2.7) (TRAY 3).
- Page 436 EPSON AcuLaser C4000/C4100/C3000 Revision F 4.2.20.7 DRIVE ASSY FEEDER (PL17.4.5) Removal 4.2.20.8 INDICATOR ASSY (PL17.4.10) Removal 1. Remove the COVER FRONT. (See Section 4.2.20.1.) 1. Remove the COVER FRONT. (See Section 4.2.20.1.) 2. Remove the COVER R. (See Section 4.2.20.2.) 2.
- Page 437 EPSON AcuLaser C4000/C4100/C3000 Revision F 4.2.20.9 HARNESS ASSY OPF PLG (PL17.4.2) Removal 1. Separate the TWO TRAY MODULE from the printer body. 2. Remove the COVER FRONT. (See Section 4.2.20.1.) 3. Remove the COVER R. (See Section 4.2.20.2.) 4. Remove the HARNESS ASSY OPF PLG from the connector (P81) on the PWBA FEEDER (PL17.4.1).
- Page 438 EPSON AcuLaser C4000/C4100/C3000 Revision F 4.2.20.10 PWBA FEEDER (PL17.4.1) Removal 1. Remove the COVER FRONT. (See Section 4.2.20.1.) 2. Remove the COVER R. (See Section 4.2.20.2.) 3. Disconnect the harness (P/J81, 82, 83, 84) on the PWBA FEEDER. 4. Remove the 4 screws (silver, 6mm) securing the PWBA FEEDER to the FRAME ASSY OPF (PL17.1.3), and remove the PWBA FEEDER.
- Page 439 EPSON AcuLaser C4000/C4100/C3000 Revision F 4.2.20.11 GUIDE ASSY CASSETTE R (PL17.2.2) Removal TRAY 2 Disassembly 1. Remove the COVER FRONT. (See Section 4.2.20.1.) 2. Remove the COVER R. (See Section 4.2.20.2.) 3. Remove the CHUTE ASSY TURN. (See Section 4.2.20.4.) 4.
- Page 440 EPSON AcuLaser C4000/C4100/C3000 Revision F 6. Insert the LEVER LOW PAPER axle into the GUIDE ASSY CASSETTE R recess and the BRACKET LOW PAPER hole, then align the position alignment hole of the BRACKET ASSY LOW PAPER with the position alignment punch of the FRAME ASSY OPF and keep it in place.
- Page 441 EPSON AcuLaser C4000/C4100/C3000 Revision F Reassembly 1. Keep the GUIDE CASSETTE ASSY R near the installation position, with the upper part leaning to the left. 2. Pass the back end of the LEVER LOW PAPER to the slit of the GUIDE ASSY CASSETTE R while twisting it.
- Page 442 EPSON AcuLaser C4000/C4100/C3000 Revision F 4.2.20.12 GUIDE ASSY CASSETTE L (PL17.1.5) Removal 1. Remove the COVER FRONT. (See Section 4.2.20.1.) 2. Remove the COVER L. (See Section 4.2.20.3.) 3. Remove the CHUTE ASSY TURN. (See Section 4.2.20.4.) 4. Remove the 5 screws (gold, tapped, 8mm) securing the GUIDE ASSY CASSETTE L to the FRAME ASSY OPF (PL17.1.3).
- Page 443 EPSON AcuLaser C4000/C4100/C3000 Revision F 4.2.20.13 LINK ACTUATOR (PL17.3.6) Removal 1. Remove the CASSETTE of the TRAY 2,3. (See Section 4.2.20.1.) 2. Remove the LINK ACTUATOR from the protrusions of the ACTUATOR NO PAPER (PL17.3.5) by making it wider, then pull it from the holes in the opening of the FRAME ASSY OPF (PL17.1.3).
- Page 444 EPSON AcuLaser C4000/C4100/C3000 Revision F 4.2.20.14 PICK UP ASSY TR2 (PL17.3.1) Removal When assembling the screws, be careful not to damage the 1. Remove the COVER FRONT. (See Section 4.2.20.1.) GEAR or SPRING with the screwdriver. Also, be careful not 2.
- Page 445 EPSON AcuLaser C4000/C4100/C3000 Revision F 4.2.20.15 PICK UP ASSY TR3 (PL17.3.1) Removal When assembling the screws, be careful not to damage the 1. Remove the COVER FRONT. (See Section 4.2.20.1.) GEAR or SPRING with the screwdriver. Also, be careful not 2.
- Page 446 EPSON AcuLaser C4000/C4100/C3000 Revision F 4.2.20.16 GEAR IDLER (PL17.4.6) Removal 1. Remove the COVER FRONT. (See Section 4.2.20.1.) 2. Remove the COVER R. (See Section 4.2.20.2.) 3. Remove the COVER L. (See Section 4.2.20.3.) 4. Remove the CHUTE ASSY TURN of the TRAY 3. (See Section 4.2.20.4.) 5.
- Page 447 EPSON AcuLaser C4000/C4100/C3000 Revision F 4.2.20.17 SENSOR LOW PAPER (PL17.4.7) Removal TRAY 2 1. Remove the COVER FRONT. (See Section 4.2.20.1.) 2. Remove the COVER R. (See Section 4.2.20.2.) 3. Remove the CHUTE ASSY TURN. (See Section 4.2.20.4.) 4. Remove the DRIVE ASSY FEEDER. (See Section 4.2.20.7.) 5.
- Page 448 EPSON AcuLaser C4000/C4100/C3000 Revision F 4.2.20.18 CASTER ASSY S (PL17.1.6) Removal 4.2.20.19 CASTER ASSY (PL17.1.7) Removal 1. Separate the TWO TRAY MODULE from the printer body. 1. Separate the TWO TRAY MODULE from the printer body. When performing the next step, be careful not to damage...
- Page 449 EPSON AcuLaser C4000/C4100/C3000 Revision F 4.2.20.20 SWITCH ASSY SIZE (PL17.2.7) Removal 4.2.20.21 STOPPER CST (PL17.2.4) Removal TRAY 2 The following steps is a common to the TRAY 2 and the C H E C K 1. Remove the COVER FRONT. (See Section 4.2.20.1.) P O I N T TRAY 3.
- Page 450 EPSON AcuLaser C4000/C4100/C3000 Revision F 4.2.20.22 SOLENOID FEED (PL17.3.17) Removal TRAY 2 1. Remove the COVER FRONT. (See Section 4.2.20.1.) 2. Remove the COVER R. (See Section 4.2.20.2.) 3. Disconnect the connector (P/J 824) of the SOLENOID FEED. 4. Remove the 1 screw (silver, 6mm) securing the SOLENOID FEED to the PICK UP ASSY (PL17.3.1).
- Page 451 EPSON AcuLaser C4000/C4100/C3000 Revision F 4.2.20.23 SPRING FEED H (PL17.3.10) Removal 4.2.20.24 SPRING FEED 1 (PL17.3.9) Removal The following steps is a common to the TRAY 2 and the The following steps is a common to the TRAY 2 and the...
- Page 452 EPSON AcuLaser C4000/C4100/C3000 Revision F 4.2.20.25 GEAR FEED H2 (PL17.3.11) Removal TRAY 2 1. Remove the COVER FRONT. (See Section 4.2.20.1.) 2. Remove the COVER R. (See Section 4.2.20.2.) 3. Remove the DRIVE ASSY FEEDER. (See Section 4.2.20.7.) 4. Remove the SPRING FEED H. (See Section 4.2.20.23.) 5.
- Page 453 EPSON AcuLaser C4000/C4100/C3000 Revision F 4.2.20.26 GEAR FEED 1 (PL17.3.8) Removal The following steps is a common to the TRAY 2 and the C H E C K P O I N T TRAY 3. 1. Remove the COVER FRONT. (See Section 4.2.20.1.) 2.
- Page 454 EPSON AcuLaser C4000/C4100/C3000 Revision F 4.2.20.27 GEAR FEED H1 (PL17.3.12) Removal TRAY 2 1. Remove the COVER FRONT. (See Section 4.2.20.1.) 2. Remove the COVER R. (See Section 4.2.20.2.) 3. Remove the DRIVE ASSY FEEDER. (See Section 4.2.20.7.) 4. Remove the SPRING FEED H. (See Section 4.2.20.23.) 5.
- Page 455 EPSON AcuLaser C4000/C4100/C3000 Revision F 4.2.20.28 GEAR FEED 2 (PL17.3.13) Removal 4.2.20.29 STOPPER CLUTCH (PL17.3.16) Removal The following steps is a common to the TRAY 2 and the The following steps is a common to the TRAY 2 and the...
- Page 456 EPSON AcuLaser C4000/C4100/C3000 Revision F 4.2.20.30 CLUTCH ASSY TURN (PL17.3.18) Removal TRAY 2 1. Remove the COVER FRONT. (See Section 4.2.20.1.) 2. Remove the COVER R. (See Section 4.2.20.2.) 3. Remove the COVER L. (See Section 4.2.20.3.) 4. Remove the CHUTE ASSY TURN of the TRAY 2. (See Section 4.2.20.4.) 5.
- Page 457 EPSON AcuLaser C4000/C4100/C3000 Revision F 4.2.20.31 GEAR IDLER (PL17.3.15) Removal TRAY 2 1. Remove the COVER FRONT. (See Section 4.2.20.1.) 2. Remove the COVER R. (See Section 4.2.20.2.) 3. Remove the COVER L. (See Section 4.2.20.3.) 4. Remove the CHUTE ASSY TURN of the TRAY 2. (See Section 4.2.20.4.) 5.
- Page 458 EPSON AcuLaser C4000/C4100/C3000 Revision F 4.2.20.32 GEAR IDLER FEED (PL17.3.14) Removal TRAY 2 1. Remove the COVER FRONT. (See Section 4.2.20.1.) 2. Remove the COVER R. (See Section 4.2.20.2.) 3. Remove the COVER L. (See Section 4.2.20.3.) 4. Remove the CHUTE ASSY TURN of the TRAY 2. (See Section 4.2.20.4.) 5.
- Page 459 EPSON AcuLaser C4000/C4100/C3000 Revision F 4.2.20.33 GEAR IDLER IN (PL17.3.19) Removal TRAY 2 1. Remove the COVER FRONT. (See Section 4.2.20.1.) 2. Remove the COVER R. (See Section 4.2.20.2.) 3. Remove the COVER L. (See Section 4.2.20.3.) 4. Remove the CHUTE ASSY TURN of the TRAY 2. (See Section 4.2.20.4.) 5.
- Page 460 EPSON AcuLaser C4000/C4100/C3000 Revision F 4.2.20.34 ROLL ASSY FEED (PL17.3.3) Removal TRAY 2 1. Pull out the CASSETTE of the TRAY 2. 2. Rotate SHAFT FEED 1 (PL17.3.2) away from the FEEDER of TRAY 2 so that the rubber part of ROLL ASSY FEED is facing downward.
- Page 461 EPSON AcuLaser C4000/C4100/C3000 Revision F 4.2.20.35 ACTUATOR NO PAPER (PL17.3.5) Removal TRAY 2 1. Remove the COVER FRONT. (See Section 4.2.20.1.) 2. Remove the COVER R. (See Section 4.2.20.2.) 3. Remove the COVER L. (See Section 4.2.20.3.) 4. Remove the CHUTE ASSY TURN. (See Section 4.2.20.4.) 5.
- Page 462 EPSON AcuLaser C4000/C4100/C3000 Revision F 4.2.20.36 SENSOR NO PAPER (PL17.3.4) Removal 9. Remove the PICK UP ASSY TR 3. (See Section 4.2.20.14.) 10. Put the PICK UP ASSY TR 3 bottom faced up on the work table. TRAY 2 11. Remove the ACTUATOR NO PAPER (PL17.3.5). (See Section 4.2.20.35.) 1.
- Page 463 EPSON AcuLaser C4000/C4100/C3000 Revision F 4.2.20.37 ROLL ASSY (PL17.3.24) Removal 1. Remove the CASSETTE ASSY (PL2.1.4). 2. Pull out the ROLL ASSY to left side while releasing the hook, and remove the ROLL ASSY. When installing the ROLL ASSY, secure the gap of the lower ROLL ASSY to the shaft of the SHAFT FEED 2 (PL17.3.22).
- Page 464 EPSON AcuLaser C4000/C4100/C3000 Revision F 4.2.20.38 BEARING (PL17.3.7) Removal TRAY 2 1. Remove the COVER FRONT. (See Section 4.2.20.1.) 2. Remove the COVER R. (See Section 4.2.20.2.) 3. Remove the COVER L. (See Section 4.2.20.3.) 4. Remove the CHUTE ASSY TURN of the TRAY 2. (See Section 4.2.20.4.) 5.
- Page 465 EPSON AcuLaser C4000/C4100/C3000 Revision F TRAY 3 1. Remove the COVER FRONT. (See Section 4.2.20.1.) 2. Remove the COVER R. (See Section 4.2.20.2.) 3. Remove the SPRING FEED H. (See Section 4.2.20.23.) 4. Remove the SOLENOID FEED. (See Section 4.2.20.22.) 5.
- Page 466 EPSON AcuLaser C4000/C4100/C3000 Revision F 4.2.20.39 BEARING SLEEVE (PL17.3.21) Removal See Section 4.2.20.42 about the procedure to remove the C H E C K P O I N T BEARING SLEEVE securing the SHAFT FEED 2. TRAY 2 1. Remove the COVER FRONT. (See Section 4.2.20.1.) 2.
- Page 467 EPSON AcuLaser C4000/C4100/C3000 Revision F 4.2.20.40 ROLL ASSY TURN (PL17.3.20) Removal TRAY 2 1. Remove the COVER FRONT. (See Section 4.2.20.1.) 2. Remove the COVER R. (See Section 4.2.20.2.) 3. Remove the COVER L. (See Section 4.2.20.3.) 4. Remove the CHUTE ASSY TURN. (See Section 4.2.20.4.) 5.
- Page 468 EPSON AcuLaser C4000/C4100/C3000 Revision F 26. SENSOR NO PAPER (PL17.3.4) Removal 27. Shift the ROLL ASSY TURN to the right and left side, remove the ROLL ASSY TURN from the shaft hole of the FRAME ASSY DRIVE (PL17.3.25). TRAY 3 1.
- Page 469 EPSON AcuLaser C4000/C4100/C3000 Revision F 4.2.20.41 SHAFT FEED 1 (PL17.3.2) Removal 6. Remove the GUIDE ASSY CASSETTE R. (See Section 4.2.20.11.) 7. Remove the GUIDE ASSY CASSETTE L. (See Section 4.2.20.12.) TRAY 2 8. Remove the LINK ACTUATOR. (See Section 4.2.20.13.) 1.
- Page 470 EPSON AcuLaser C4000/C4100/C3000 Revision F 4.2.20.42 SHAFT FEED 2 (PL17.3.22) Removal TRAY 2 1. Remove the COVER FRONT. (See Section 4.2.20.1.) 2. Remove the COVER R. (See Section 4.2.20.2.) 3. Remove the COVER L. (See Section 4.2.20.3.) 4. Remove the CHUTE ASSY TURN. (See Section 4.2.20.4.) 5.
- Page 471 EPSON AcuLaser C4000/C4100/C3000 Revision F TRAY 3 1. Remove the COVER FRONT. (See Section 4.2.20.1.) 2. Remove the COVER R. (See Section 4.2.20.2.) 3. Remove the COVER L. (See Section 4.2.20.3.) 4. Remove the CHUTE ASSY TURN. (See Section 4.2.20.4.) 5.
-
Page 472: Adjustment
C H A P T E R ADJUSTMENT... -
Page 473: Usb Id Input
This program can not be executed together with EPW Since this USB ID information is stored on EEPROM on the MAIN (EPSON Printer Window) on Windows 95/98. Be sure Board of the printer, you have to re-define the ID information by the... -
Page 474: Usb Id Input
EPSON AcuLaser C4000/C4100/C3000 Revision F 3. When the window as shown in Figure 5-2 is displayed, check “USB 4. When the window as shown Figure 5-3 appears, input the serial ID Input” and click “OK” button. nember (10 digits) of the printer and click “OK” button to store the USB ID information (18 digits in total) in EEPOM on the Main Board of the printer. -
Page 475: Usb Id Confirmation
EPSON AcuLaser C4000/C4100/C3000 Revision F 5.1.3 USB ID Confirmation 3. The window as shown Figure 5-5 appears and a status sheet will be printed automatically. Once you have input a new USB ID, never forget to C A U T I O N confirm it on the status sheet. -
Page 476: Usb Id Confirmation
EPSON AcuLaser C4000/C4100/C3000 Revision F 4. Check that the USB ID printed on the status sheet is identical with that shown on the window. After completion of confirmation, press “ “button. USB ID IC0 0 0 011P210202072024460MC010303 Figure 5-6. USB ID Confirmation... - Page 477 C H A P T E R MAINTENANCE...
- Page 478 6.1.2 Consumable components and components that require regular replacement This chapter explains the maintenance of the EPSON AcuLaser C4000. The The following table shows the list and lifetime of the consumable components maintenance of this product is designed for users to do maintenance.
- Page 479 EPSON AcuLaser C4000/C4100/C3000 Revision F Figure 6-3. Fuser Unit Figure 6-1. Toner Cartridge Figure 6-4. Transfer Unit Figure 6-2. Photoconductor Unit Figure 6-5. Roll Assy Maintenance Maintenance 6-464...
-
Page 480: Maintenance Maintenance
EPSON AcuLaser C4000/C4100/C3000 Revision F 6.1.3 Cleaning 1. Clean the outer dirt using a dry and soft clean cloth. If the dirt is not easy to remove, use the neutral detergent. 2. Remove the paper dust, the spilt toner and so on inside the printer, and clean the dirt using a brush or dry soft cloth. -
Page 481: Maintenance Menu
6.2 Maintenance Menu 6.2.2 Engine Status Sheet The following explains each item of a status sheet. The AcuLaser C4000 is equipped with the maintenance menu for 1. Total Counts maintenance. The maintenance menu is added to panel menu by special operation. -
Page 482: Maintenance Menu
EPSON AcuLaser C4000/C4100/C3000 Revision F 10. MCU : This is the printer units mechanical control and is the value read from the engine. 11. Error Log : This is a history of the latest 20 errors which have occurred in the panel messages, EJL status codes and Total Pages. - Page 483 EPSON AcuLaser C4000/C4100/C3000 Revision F The following List explains the control information and control methods. Table 6-2. List of control information and control methods Count Processing and Information Name Range Units Counting Conditions Clear Conditions Storage Location Total Pages Controller...
-
Page 484: Consumable Components Replacement
1. Confirm the color of the toner cartridge that needs to be replaced by checking the LCD panel or EPSON Status Monitor 3. This section describes consumable components of the AcuLaser C4000. Refer 2. Remove the top cover. to 6.1.2 about consumable parts. -
Page 485: Consumable Components Replacement
EPSON AcuLaser C4000/C4100/C3000 Revision F 5. Take the new toner cartridge out of its package, and gently shake it from 7. Turn the toner cartridge knobs to the locked position. side to side and front to back to distribute the toner evenly. -
Page 486: Photoconductor Unit Replacement
EPSON AcuLaser C4000/C4100/C3000 Revision F 6.3.2 Photoconductor Unit replacement 3. Raise cover D. The photoconductor unit weighs 4.5 kg (9.9 lb). Be sure to C A U T I O N hold it firmly by the handle when carrying it. - Page 487 EPSON AcuLaser C4000/C4100/C3000 Revision F 5. Take the new photoconductor unit and tear away the top portion of the bag Be careful not to touch or scratch the surface of the drum. along the dotted line to expose the handle. Then, grab the handle and...
-
Page 488: Fuser Unit Replacement
EPSON AcuLaser C4000/C4100/C3000 Revision F 6.3.3 Fuser Unit replacement 9. Close covers D and A. Do not touch the surface of the fuser unit. Doing so may C A U T I O N impair print quality. The fuser unit can be very hot if the printer has been in W A R N I N G use. -
Page 489: Transfer Unit Replacement
EPSON AcuLaser C4000/C4100/C3000 Revision F 6.4 Components that require regular 6.3.4 Transfer Unit replacement replacement Do not touch the surface of the transfer unit. Doing so may The components of this printer that require regular replacement are only ROLL C A U T I O N impair the print quality. -
Page 490: Color Registration Adjustment
EPSON AcuLaser C4000/C4100/C3000 Revision F 6.5 Color Registration Adjustment Straightest lines This printer can adjust the color registration position of each color by control panel operation. To confirm the amount of differences between Black and Yellow / Magenta / Cyan in the laser scanning direction, the color registration sheet is printed. -
Page 491: Aculaser C4100
C H A P T E R AcuLaser C4100... - Page 492 EPSON AcuLaser C4000/C4100/C3000 Revision F This chapter describes information that is unique to the EPSON AcuLaser C4100. The chapter structures information by following section. Product Descriptions Panel Message For Troubleshooting Maintenance AcuLaser C4100 7-477...
-
Page 493: Product Descriptions
EPSON AcuLaser C4000/C4100/C3000 Revision F 7.1 Product Descriptions Font Unification to AGFA font 7.1.1 Features Symbol set additional ESC/Page Color Mode: 84 Scalable Fonts + 7 Bitmap Fonts ENGINE FEATURES PCL5e Mode: 93 Scalable Fonts + 7 Bitmap Fonts Printing Speed:... -
Page 494: Printer Basic Specification
EPSON AcuLaser C4000/C4100/C3000 Revision F 7.1.2 Printer Basic Specification NOTE 2:Cleaning cycle occurs during printing. RESOLUTION PAPER SPECIFICATION Standard Paper Type 600dpi RX-80 (80 g/ XEROX 4024 DP 20lb (75g/ ): LT PRINT MODE 600dpi Mode (Standard paper): Full speed... - Page 495 EPSON AcuLaser C4000/C4100/C3000 Revision F Table 7-3. Printing mode by paper type PRINTING MODE BY PAPER TYPE Paper Type Speed Table 7-3. Printing mode by paper type Mode Video I/F Mode name Mode Thickness Paper Type Speed Thick paper 1...
- Page 496 EPSON AcuLaser C4000/C4100/C3000 Revision F PAPER FEED COMPONENTS THAT REQUIRE REGULAR REPLACEMENT Table 7-4. Paper Feed Table 7-5. List of Regular Replacement Components Sheets Name Life Applicable Paper Source Containing Paper Size paper Type 100K pages Pickup Roll Capacity 300K pages...
- Page 497 EPSON AcuLaser C4000/C4100/C3000 Revision F 7.1.2.1 Product reliability NOISE Table 7-7. Main Unit PRODUCT LIFE Sound Sound Print Mode 600K printed pages or 5 years, whichever comes first. pressure power level 55.0dB (A) 6.7 (B) Full Speed Mode (Requires periodical replacement of specific components. Refer to 52.0dB (A)
- Page 498 EPSON AcuLaser C4000/C4100/C3000 Revision F 7.1.2.2 Various Sensors 7.1.2.3 Consumable Components Table 7-9. Various Sensors Table 7-10. Specifications Detectable Weight Unit Detectable Device Remarks Unit Lifetime Dimensions (mm) Matter (kg) Cartridge Average of 10,000 355 (W) x 51 (D) x 55 (H)
-
Page 499: Control Panel
EPSON AcuLaser C4000/C4100/C3000 Revision F 7.1.3 Control Panel ROM MODULE COPY 1. Make sure that the printer is turned off. Insert a blank ROM module 7.1.3.1 Special Operations into the slot A on the main controller and this is a destination Table 7-11. - Page 500 EPSON AcuLaser C4000/C4100/C3000 Revision F 7.1.3.2 Panel Setting Item *3: This is displayed and can be executed only when the Network I/F = On. *4: This is displayed and can be executed only when the printer is equipped with Level 3 NOTE: The factory defaults values are shown in Bold style.
- Page 501 EPSON AcuLaser C4000/C4100/C3000 Revision F STATUS MENU PRINTING MENU When a warning message occurs, all warnings occurred at the List entering SelecType is displayed. Item Value Page Size A4 * , A5, B5, LT * , HLT, LGL, GLT, GLG, EXE,...
- Page 502 EPSON AcuLaser C4000/C4100/C3000 Revision F Item Value SETUP MENU Magenta_Regist ∼ ∼ List Yellow_Regist ∼ ∼ Panel Lock* Off, On Item Value Lang English *1: This is displayed and can be selected only when the optional 500-sheets lower (Lang, Sprache, LINGUA, LENG, Français...
- Page 503 EPSON AcuLaser C4000/C4100/C3000 Revision F RESET MENU NETWORK MENU List List Item Value Item Value Clear Warning Network I/F On, off Clear All Warning Network Config No, Yes Reset Get IPAddress Panel, Auto, PING Reset All *2*3 0.0.0.0 ~ 192.168.192.168 ~ 255.255.255.255 SelecType Init 0.0.0.0 ~ 255.255.255.0 ~ 255.255.255.255...
- Page 504 EPSON AcuLaser C4000/C4100/C3000 Revision F *1: When this setting is changed, the setting value becomes valid after warm boot or AUX MENU *1*2 restarting the printer. The setting value is reflected immediately to the Status Sheet and EJL read-back, List however it is changed in practice after warm boot or restarting the printer.
- Page 505 EPSON AcuLaser C4000/C4100/C3000 Revision F ESC/PAGE MENU List Item Value Auto CR On, Off Auto FF On, Off CR Function CR, CR+LF LF Function CR+LF, LF FF Function CR+FF, FF Error Code Ignore, Space Avoid Error Off, On On, Off...
- Page 506 EPSON AcuLaser C4000/C4100/C3000 Revision F Item Value LJ4 MENU Form 60 * 64 * 128 Lines List Source SymSet * 3199 Dest SymSet 3199 Item Value CR Function CR, CR+LF Font Source Resident, Download * , ROM A * LF Function...
- Page 507 EPSON AcuLaser C4000/C4100/C3000 Revision F ESCP2 MENU SUPPORT MENU List List Item Value Item Value Font Courier, Prestige, Roman, Sans serif, Roman T, Orator S, HDD Format Sans H, Script, OCR A, OCR B PS3 HDD Init Pitch 10 cpi, 12 cpi,15 cpi, Prop.
- Page 508 EPSON AcuLaser C4000/C4100/C3000 Revision F Explanation PRINTER ADJUST MENU Feed Offset List Fine adjust printing misalignment of paper feeding direction in simplex printing of front side of duplex printing. Item Value Normal -15 ~ 0 ~ 15 A step is one level...
- Page 509 EPSON AcuLaser C4000/C4100/C3000 Revision F Explanation MAINTENANCE MODE E Mode This setting menu is displayed and can be selected only when the For customization purpose only. (Yellow, Magenta and Cyan Maintenance Mode has been activated by hidden operation when the toner consumption (except Black) is economized to less than power is turned on.
-
Page 510: Toner Cartridge Replacement
EPSON AcuLaser C4000/C4100/C3000 Revision F 7.1.4 Status Sheet THE LOWEST DESCRIPTION SECTION OF THE STATUS SHEET ICxxx xxx xxx yyy yyy yyy: “xxx xxx xxx” indicates that number of NETWORK MENU Toner Cartridge replacements for each color. The current setting of NetWare, AppleTalk, Rendzvous and Link Speed “yyy yyy yyy”... -
Page 511: Panel Message For Troubleshooting
EPSON AcuLaser C4000/C4100/C3000 Revision F 7.2 Panel Message For Troubleshooting Table 8-1. List of Printer Messages LED Message Category Error Light Status code Error Replace Photocondctr 4236 7.2.1 List of Printer Messages Error Replace TransferUnit 4236 Error Printer Open 4002 The table below shows the list of printer message of AcuLaser C4100. -
Page 512: Details Of Error Message And Treatment
EPSON AcuLaser C4000/C4100/C3000 Revision F 7.2.2 Details of Error Message and Treatment Table 8-1. List of Printer Messages LED Message Category Error Light Status code 1010 Install uuuu TnrCart (Display in test printing) Status 1014 Calibrating Printer Description Status 1001... -
Page 513: Details Of Warning Message And Treatment
EPSON AcuLaser C4000/C4100/C3000 Revision F Replace Toner uuuu TonerCart Error uuuu Description Description The printer detects that a toner is empty according to the Toner End One of the toner cartridges is broken. sensor and the toner's Dispense Time of each color of the engine, Treatment and printing stops. -
Page 514: Maintenance
EPSON AcuLaser C4000/C4100/C3000 Revision F 7.3 Maintenance 7.3.1 Consumable components and regularly replaced parts LIST OF COMPONENTS FUSER UNIT ROLL ASSY FEED ROLL ASSY FEED ROLL ASSY ROLL ASSY FEED ROLL ASSY FEED TONER CARTRIDGE (Y, M, C, K) CHUTE ASSY REGI... - Page 515 EPSON AcuLaser C4000/C4100/C3000 Revision F Table 8-2. List of components Category Name Code Life (page) Replacement Time Note “Replace Toner uuuu” Consumable components Cyan Toner Cartridge S050146 8,000 Magenta Toner Cartridge S050147 8,000 Yellow Toner Cartridge S050148 8,000 Black Toner Cartridge...
-
Page 516: Fuser Unit Replacement
EPSON AcuLaser C4000/C4100/C3000 Revision F COMPATIBILITY FUSER ASSY Components ALC4100 => ALC4000 ALC4100 <= ALC4000 Toner Cartridge Not compatible. It can not install due to the shape difference. Photoconductor Unit Compatible Not compatible. “Wrong Photoconductor” error occurs. Transfer Unit Compatible... -
Page 517: Engine Status Sheet
EPSON AcuLaser C4000/C4100/C3000 Revision F 7.3.2 Engine Status Sheet Paper Type (Type) Transfer Unit Paper type is shown by decimal number. Number of printed copies of the Transfer Unit. Table 8-4. Paper Type Installing a new Transfer Unit will reset it when a waste toner box is... -
Page 518: List Of Control Information And Control Methods
EPSON AcuLaser C4000/C4100/C3000 Revision F 7.3.3 List of control information and control methods Table 7-12. List of control information and control methods Count Processing and Information Name Range Units Counting Conditions Clear Conditions Storage Location C Toner Counter Dispense time... -
Page 519: Parts List For Al-C4100
EPSON AcuLaser C4000/C4100/C3000 Revision F 7.4 Parts List for AL-C4100 Table 7-13. Parts List for AL-C4100 RefNo. Part Name 16-1-200 RAM DIMM 16-1-202 GUIDE RAIL Table 7-13. Parts List for AL-C4100 16-1-203 "GROUNDING SPRING,TYPE-B" RefNo. Part Name 16-1-50 "BOARD ASSY., MAIN"... - Page 520 EPSON AcuLaser C4000/C4100/C3000 Revision F Table 7-13. Parts List for AL-C4100 Table 7-13. Parts List for AL-C4100 RefNo. Part Name RefNo. Part Name 04-2-02 06-1-13 HOUSING FDR R WASTE TONER SENSOR 04-2-03 06-1-14 HARNESS ASSY TMPA HARNESS ASSY TFLSNS 04-2-04...
- Page 521 EPSON AcuLaser C4000/C4100/C3000 Revision F Table 7-13. Parts List for AL-C4100 Table 7-13. Parts List for AL-C4100 RefNo. Part Name RefNo. Part Name 10-1-12 13-1-14 CLUTCH REGI FILM REGI 10-1-20 13-1-17 E.R.M. SENSOR PWBA ASSY EARTH 10-1-21 13-1-18 ACTUATOR REGI...
- Page 522 EPSON AcuLaser C4000/C4100/C3000 Revision F Table 7-13. Parts List for AL-C4100 RefNo. Part Name NONFIG REPACK KIT PAD NONFIG REPACK KIT BAG NONFIG "INDIVIDUAL CARTON BOX,220V" AcuLaser C4100 Parts List for AL-C4100 7-507...
-
Page 523: Exploded Diagram
EPSON AcuLaser C4000/C4100/C3000 Revision F 7.5 Exploded Diagram The following pages shows the exploded diagram for the AcuLaser C4100. ( Total : 23 pages ) AcuLaser C4100 Exploded Diagram 7-508... - Page 524 C538-CASE-001 The parts to which no reference number is assigned will not be available as after-sale service parts. (P137) HIBANA_BE_CHAP05_001Fa FOR EPSON AcuLaserC4100(1.1) Rev.01 C538...
- Page 525 C538-CASE-002 The parts to which no reference number is assigned will not be available as after-sale service parts. FOR EPSON AcuLaserC4100(1.2) HIBANA_BE_CHAP05_002Fa Rev.01 C538...
- Page 526 C538-ELEC-001 The parts to which no reference number is assigned will not be available as after-sale service parts. FOR EPSON AcuLaserC4100(16.1) Rev.01 C538...
- Page 527 C538-MECH-001 The parts to which no reference number is assigned will not be available as after-sale service parts. HIBANA_BE_CHAP05_003Fb FOR EPSON AcuLaserC4100(2.1) Rev.01 C538...
- Page 528 C538-MECH-002 The parts to which no reference number is assigned will not be available as after-sale service parts. PL3.2 HIBANA_BE_CHAP05_004Fa FOR EPSON AcuLaserC4100(3.1) Rev.01 C538...
- Page 529 C538-MECH-003 The parts to which no reference number is assigned will not be available as after-sale service parts. HIBANA_BE_CHAP05_005Fb FOR EPSON AcuLaserC4100(3.2) Rev.01 C538...
- Page 530 C538-MECH-004 The parts to which no reference number is assigned will not be available as after-sale service parts. PL4. 3 PL4. 2 PL4. 2 HIBANA_BE_CHAP05_006Fa FOR EPSON AcuLaserC4100(4.1) Rev.01 C538...
- Page 531 C538-MECH-005 The parts to which no reference number is assigned will not be available as after-sale service parts. (J231) (P2361) (J471) (J210) (P810) HIBANA_BE_CHAP05_007Fa FOR EPSON AcuLaserC4100(4.2) Rev.01 C538...
- Page 532 C538-MECH-006 The parts to which no reference number is assigned will not be available as after-sale service parts. (P472) (P473) (J474) (J475) (J471) (J472) (J473) (P474) (P475) (J47) HIBANA_BE_CHAP05_008Fa FOR EPSON AcuLaserC4100(4.3) Rev.01 C538...
- Page 533 C538-MECH-007 The parts to which no reference number is assigned will not be available as after-sale service parts. 1(All this page) (J19) HIBANA_BE_CHAP05_009Fa FOR EPSON AcuLaserC4100(5.1) Rev.01 C538...
- Page 534 The parts to which no reference number is assigned will not be available as (J5030) after-sale service parts. 1 (All except a) (J5020) (J162) (J232) (J141) (J145) (J1361) (J136) (J233) (J138) (J2362) (J142) (J52) (J235) HIBANA_BE_CHAP05_010Fa FOR EPSON AcuLaserC4100(6.1) Rev.01 C538...
- Page 535 The parts to which no reference number C538-MECH-009 is assigned will not be available as after-sale service parts. 1 (all this page,PL8.1) (J134) (J2211) PL8.1.a (P134) (J135) (J133) (J221) (J139) (J1322) (J1321) (P133) (P132) (J132) (J131) (P135) (J137) (J50) HIBANA_BE_CHAP05_011Fc FOR EPSON AcuLaserC4100(7.1) Rev.01 C538...
- Page 536 C538-MECH-010 The parts to which no reference number is assigned will not be available as after-sale service parts. 1 (All this page) PL7.1.b (P131) HIBANA_BE_CHAP05_012Fb FOR EPSON AcuLaserC4100(8.1) Rev.01 C538...
- Page 537 C538-MECH-011 The parts to which no reference number is assigned will not be available as after-sale service parts. PL7. 1. 1 HIBANA_BE_CHAP05_013Fa FOR EPSON AcuLaserC4100(9.1) Rev.01 C538...
- Page 538 C538-MECH-012 The parts to which no reference number is assigned will not be available as after-sale service parts. 1 (All except 23) (J32) (J321) (J18) (J181) HIBANA_BE_CHAP05_014Fa FOR EPSON AcuLaserC4100(10.1) Rev.01 C538...
- Page 539 The parts to which no reference number C538-MECH-013 is assigned will not be available as after-sale service parts. HIBANA_BE_CHAP05_015Fa FOR EPSON AcuLaserC4100(11.1) Rev.01 C538...
- Page 540 The parts to which no reference number is assigned will not be available as after-sale service parts. PL12. 2 (P5011) PL12. 3 (P144) (J342) (J704) (J703) (J702) (J514) (P145) (J701) (J513) (J512) (J511) (J51) HIBANA_BE_CHAP05_016Fb FOR EPSON AcuLaserC4100(12.1) Rev.01 C538...
- Page 541 C538-MECH-015 The parts to which no reference number is assigned will not be available as after-sale service parts. (P514) (K) (P704) (K) (P513) (C) (P703) (C) (P512) (M) (P702) (M) (P511) (Y) (P701) (Y) HIBANAI_BE_CHAP05_017Fa FOR EPSON AcuLaserC4100(12.2) Rev.01 C538...
- Page 542 C538-MECH-016 The parts to which no reference number is assigned will not be available as after-sale service parts. (P341) (P342) (J341) (J3411) (J710) (J71) HIBANA_BE_CHAP05_018Fd FOR EPSON AcuLaserC4100(12.3) Rev.01 C538...
- Page 543 C538-MECH-017 The parts to which no reference number is assigned will not be available as after-sale service parts. HIBANA_BE_CHAP05_019Fa FOR EPSON AcuLaserC4100(13.1) Rev.01 C538...
- Page 544 C538-MECH-018 The parts to which no reference number is assigned will not be available as after-sale service parts. (J49) (J48) HIBANA_BE_CHAP05_020Fb FOR EPSON AcuLaserC4100(14.1) Rev.01 C538...
- Page 545 C538-MECH-019 The parts to which no reference number is assigned will not be available as after-sale service parts. (J166) (J161) HIBANA_BE_CHAP05_021Fb FOR EPSON AcuLaserC4100(15.1) Rev.01 C538...
- Page 546 (P139) (P50) (P1361) (J5011) (P138) (P52) (J61) (J41) (P210) (J165) (J13) (J42) (P221) (J11) (J21) (J144) (J164) (P71) (J12) (J22) (J141) (J311) (P151) (J140) (J167) (J15) (J23) (P2361) (J60) (P2362) (J163) (P3411) (J24) (J34) HIBANA_BE_CHAP05_022Fb FOR EPSON AcuLaserC4100(15.2) Rev.01 C538...
-
Page 547: Circuit Schematic
EPSON AcuLaser C4000/C4100/C3000 Revision F 7.6 Circuit Schematic The following pages shows the circuit schematic of the C538MAIN board for the AcuLaser C4100. ( Total : 7 pages ) AcuLaser C4100 Circuit Schematic 7-532... -
Page 555: Aculaser C3000
C H A P T E R AcuLaser C3000... -
Page 556: Product Descriptions
Comes with the following host interface as a standard: AcuLaser C4100. USB 2.0 HS I/F (D4 supported *) Options and Consumables * D4 mode becomes valid only when EPSON external LAN option unit is Table 8-1. Compatibility connected. Note Network I/F (10BASE-T/100BASE-TX) - Page 557 EPSON AcuLaser C4000/C4100/C3000 Revision F SOFTWARE ESC/PageS03 Printing system Function of update the engine controller ROM (only with flash memory version). Display remaining amount of C, M, Y, K toner on the panel (when “Ready”, “Offline” and “Sleep” display) Job Monitoring MIB...
-
Page 558: Printer Basic Specification
EPSON AcuLaser C4000/C4100/C3000 Revision F 8.1.2 Printer Basic Specification CONSUMABLES For the common basic specification about the engine mechanism of the The life specificaiton of the toner cartridges for the AL-C3000 are AL-C4100 and C3000, Refer to 7.1. "Product Descriptions". -
Page 559: Control Panel
EPSON AcuLaser C4000/C4100/C3000 Revision F 8.1.3 Control Panel INFORMATION MENU Since this printer is equipped with the host-based controller system, the Status Item Note Sheet functions that can be controlled from the control panel is limited Status Sheet compared with the C4100. This section describes the control panel function that unique to the C3000. - Page 560 EPSON AcuLaser C4000/C4100/C3000 Revision F TRAY MENU COLOR REGIST MENU Status Status Item Note Item Note Sheet Sheet MP Tray Size Cyan Regist LC1 Size Magenta Regist LC2 Size *1, *2 Yellow Regist LC3 Size *1, *2, *3 *1: The applicable parameter range is from -7 to 7 and the factory default is 0. The...
- Page 561 EPSON AcuLaser C4000/C4100/C3000 Revision F USB MENU NETWORK MENU Status Status Item Note Item Note Sheet Sheet USB IF Network IF USB SPEED Network Confg USB ExtI/FConfg Get IPAddress Get IPAddress *3, *4, *3, *4, *5 *3, *4 *3, *4...
- Page 562 EPSON AcuLaser C4000/C4100/C3000 Revision F MAINTENANCE MENU *1 Status Item Note Sheet Engine Status Sheet Clear Error Log *1: This menu item only displays when the printer is powered up with hidden panel sequence. Regardless of “Lang” setting, this menu is always displayed in English.
- Page 563 EPSON AcuLaser C4000/C4100/C3000 Revision F Every 33 pages PRINTER ADJUST MENU *1 Every 28 pages Every 24 pages Status Item Note Sheet The setting “Cleaning Cycle” is only applicable to Normal C H E C K P O I N T...
-
Page 564: Panel Message
EPSON AcuLaser C4000/C4100/C3000 Revision F 8.1.4 Panel Message Table 9-5. List of Printer Messages LED Message Category Error Light Status code The table below shows the list of printer message of AcuLaser C4100. Error Install LC1 4007 Each message is the one when “Lang = English” is set. - Page 565 EPSON AcuLaser C4000/C4100/C3000 Revision F Table 9-5. List of Printer Messages Treatment LED Message Category Error Light Status code Press [Start/Stop] button to restart printing from the next page. Status (Printing) 1009 To cancel this print job, delete the spool data file of printer driver...
- Page 566 EPSON AcuLaser C4000/C4100/C3000 Revision F 8.1.4.2 Details of Warning Message and Treatment The warning message described below is unique for C3000. Color Unmatched Description The version of printer driver’s LUT and printer’s screen version is not the same. Treatment Make the version of printer driver and printer firmware matched.
-
Page 567: Printer Status Information
EPSON AcuLaser C4000/C4100/C3000 Revision F 8.1.5 Printer Status Information [Full Version] The current status of the printer such as the SelecType setting and the consumables life can be verified by printing the status sheet. In addition to this, the operational history of printer engine can be checked by performing a service report function that specifically provided for the service personnel. - Page 568 EPSON AcuLaser C4000/C4100/C3000 Revision F Text String Description TEXT STRING JCxxxxxx Indicates the number of Paper Jam problem. The text string printed at the bottom of status sheet indicates various ICxxx-xxx-xxx-xxx Indicates the number of toner cartridges used on the printer.
- Page 569 EPSON AcuLaser C4000/C4100/C3000 Revision F 8.1.5.2 Service Report Function Print [pages] Indicates the total print page information for each paper size. In the MAINTENANCE MENU, the engine status sheet and the print log Total report can be output to obtain further details about the operational Total printed page history of the pritner.
- Page 570 EPSON AcuLaser C4000/C4100/C3000 Revision F Error Log Paper Type Lists the history log of detected errors; upto 20 error incidents, with Indicates the media type code that specifies to the engine the corresponding panel message and EJL status code, total printed controller, in Decimal format.
- Page 571 EPSON AcuLaser C4000/C4100/C3000 Revision F PRINT LOG REPORT Serial number of the unit. Date The date and the time of when the report is printed, is indicated in “yyyy/mm/dd hh:mm” format. If the system clock is not synchronized with the server, this information is not indicated.
-
Page 572: Main Controller
(video image data). Therefore, the functions of main controller on the printer is very limited compared with the AcuLaser C4000 and C4100. 8.2.1 Major Components The main controller;... -
Page 573: Parts List For Al-C3000
EPSON AcuLaser C4000/C4100/C3000 Revision F 8.3 Parts List for AL-C3000 Table 8-7. Parts List for AL-C3000 RefNo. Part Name ‘16.1.13’ To identify each component location, refer to the exploded diagram of GUIDE R ESS the AL-C4100 ("7.5 Exploded Diagram"). ‘16.1.52’... - Page 574 EPSON AcuLaser C4000/C4100/C3000 Revision F Table 8-7. Parts List for AL-C3000 Table 8-7. Parts List for AL-C3000 RefNo. Part Name RefNo. Part Name ‘04.3.04’ ‘07.1.04’ EXIT SENSOR E.R.M. SENSOR ‘04.3.06’ ‘07.1.05’ ACTUATOR LINK ACTUATOR FULL STACK ‘04.3.17’ ‘07.1.12’ SOLENOID FEED TRAY 1 ROLL DUP ‘04.3.18’...
- Page 575 EPSON AcuLaser C4000/C4100/C3000 Revision F Table 8-7. Parts List for AL-C3000 Table 8-7. Parts List for AL-C3000 RefNo. Part Name RefNo. Part Name ‘12.1.09’ ‘15.1.11’ HVPS SUB HARNESS ASSY AC SW ‘12.2.01’ ‘15.1.15’ KIT HOLDER ASSY TONER(Y) PWBA DRV HBN ‘12.2.02’...
-
Page 576: Exploded Diagram
EPSON AcuLaser C4000/C4100/C3000 Revision F 8.4 Exploded Diagram The following page shows the exploded diagram of the AcuLaser C3000. All the other part of exploded diagrams, other than the C A U T I O N one shown on next page, are common with the AcuLaser C4100. - Page 577 C569-ELEC-001 The parts to which no reference number is assigned will not be available as after-sale service parts. HIBANA_BE_CHAP05_023Fb FOR EPSON AcuLaserC3000(16.1) Rev.01 C569...
-
Page 578: Circuit Schematic
EPSON AcuLaser C4000/C4100/C3000 Revision F 8.5 Circuit Schematic The following pages shows the circuit schematic of the C569MAIN board for the AcuLaser C3000. ( Total : 5 pages ) AcuLaser C3000 Circuit Schematic 8-563... - Page 579 Model: AcuLaser C3000 Board: C569MAIN BOARD Sheet: 1 of 5 Rev. : B...
- Page 580 Model: AcuLaser C3000 Board: C569MAIN BOARD Sheet: 2 of 5 Rev. : B...
- Page 581 Model: AcuLaser C3000 Board: C569MAIN BOARD Sheet: 3 of 5 Rev. : B...
- Page 582 Model: AcuLaser C3000 Board: C569MAIN BOARD Sheet: 4 of 5 Rev. : B...
- Page 583 Model: AcuLaser C3000 Board: C569MAIN BOARD Sheet: 5 of 5 Rev. : B...
-
Page 584: Appendix
C H A P T E R APPENDIX... -
Page 585: Parts List And Explodede Diagram For Main Unit Of The Aculaser C4000
E: E ring KL: KL clip C: C ring N: nut • The arrowheads in the illustrations indicate assemblies made up of lower parts with their numbers. Appendix Parts List and Explodede Diagram for Main Unit of The AcuLaser C4000 9-570... -
Page 586: Parts List Tables
ACTUATOR NO PAPER 01-2-19 TRAY ASSY LOW 04-3-06 ACTUATOR LINK 02-1-08 STRAP 04-3-17 SOLENOID FEED TRAY 1 03-1-05 CHUTE RETADE 04-3-18 CLUTCH ASSY TURN TRAY 1 Appendix Parts List and Explodede Diagram for Main Unit of The AcuLaser C4000 9-571... - Page 587 ROS ASSY 07-1-02 HARNESS ASSY FRONT 2 11-1-04 HSG ASSY BIAS 07-1-03 HARNESS ASSY OPEPANE BS 11-1-05 STUD PLUNGER 07-1-04 E.R.M. SENSOR 11-1-50 KIT HSG ASSY BIAS Appendix Parts List and Explodede Diagram for Main Unit of The AcuLaser C4000 9-572...
- Page 588 PANEL REAR ESS 13-1-17 PWBA ASSY EARTH 16-1-12 GUIDE L ESS 13-1-18 GEAR ASSY PR L 16-1-13 GUIDE R ESS 13-1-20 CHASSIS MAIN 14-1-01 DRIVE ASSY DEVE Appendix Parts List and Explodede Diagram for Main Unit of The AcuLaser C4000 9-573...
- Page 589 EPSON AcuLaser C4000/C4100/C3000 Revision F Table 9-1. Parts list of the AcuLaser C4000 (Main Unit) Part Name 16-1-200 RAM DIMM 16-1-202 GUIDE RAIL 16-1-203 "GROUNDING SPRING,TYPE-B" Appendix Parts List and Explodede Diagram for Main Unit of The AcuLaser C4000 9-574...
-
Page 590: Exploded Diagrams
EPSON AcuLaser C4000/C4100/C3000 Revision F 9.1.3 Exploded Diagrams The following pages show exploded diagrams of the AcuLaser C4000. Appendix Parts List and Explodede Diagram for Main Unit of The AcuLaser C4000 9-575... - Page 591 01-1-50 01-1-10 C470-CASE-001 The parts to which no reference number is assigned will not be available as after-sale service parts. 01-1-11 01-1-02 01-1-01 01-1-03 01-1-09 01-1-12 (J137) 01-1-23 01-1-28 01-1-52 01-1-19 HANABI_BE_CHAP05_001Fb FOR EPSON AcuLaserC4000 (1.1) Rev.01 C470...
- Page 592 C470-CASE-002 The parts to which no reference numb is assigned will not be available as after-sale service parts. 01-2-01 01-2-02 01-2-04 01-2-05 01-2-10 01-2-04 01-2-05 01-2-06 01-2-12 01-2-19 HANABI_BE_CHAP05_002Fb FOR EPSON AcuLaser C4000 (1.2) Rev.01 C470...
- Page 593 C470-MECH-001 The parts to which no reference numbe is assigned will not be available as after-sale service parts. 02-1-08 HANABI_BE_CHAP05_003Fb FOR EPSON AcuLaserC4000 (2.1) Rev.01 C470...
- Page 594 The parts to which no reference number is assigned will not be available as C470-MECH-002 after-sale service parts. 03-1-05 03-1-06 PL3. 2 HANABI_BE_CHAP05_004Fa FOR EPSON AcuLaserC4000 (3.1) Rev.01 C470...
- Page 595 The parts to which no reference number C470-MECH-003 03-2-01 is assigned will not be available as after-sale service parts. 03-2-07 03-2-07 03-2-21 03-2-21 03-2-21 HANABI_BE_CHAP05_005Fa FOR EPSON AcuLaserC4000 (3.2) Rev.01 C470...
- Page 596 C470-MECH-004 The parts to which no reference number is assigned will not be available as after-sale service parts. 04-1-01 PL4. 3 04-1-03 04-1-06 PL4. 2 PL4. 2 04-1-04 04-1-04 04-1-04 HANABI_BE_CHAP05_006Fa FOR EPSON AcuLaserC4000 (4.1) Rev.01 C470...
- Page 597 The parts to which no reference number is assigned will not be available as after-sale service parts. 04-2-04 (J237) 04-2-03 04-2-08 (P2361) (J471) 04-2-01 04-2-02 04-2-05 04-2-06 04-2-05 (J210) 04-2-11 04-2-09 04-2-05 04-2-05 (P810) 04-2-10 HANABI_BE_CHAP05_007Fb FOR EPSON AcuLaserC4000 (4.2) Rev.01 C470...
- Page 598 The parts to which no reference number is assigned will not be available as after-sale service parts. 04-3-03 04-3-01 04-3-03 04-3-05 04-3-06 04-3-04 (P472) 04-3-21 (P473) (J474) 04-3-18 04-3-17 04-3-04 (J475) 04-3-25 (J471) (J472) (J473) (P474) 04-3-28 (P475) (J47) HANABI_BE_CHAP05_008Fb FOR EPSON AcuLaserC4000 (4.3) Rev.01 C470...
- Page 599 C470-MECH-007 The parts to which no reference number is assigned will not be available as after-sale service parts. 05-1-01 05-1-02 05-1-05 (J19) 05-1-09 HANABI_BE_CHAP05_009Fb FOR EPSON AcuLaserC4000 (5.1) Rev.01 C470...
- Page 600 06-1-01 after-sale service parts. (J5030) 06-1-02 (J5020) 06-1-05 (J162) (J232) 06-1-09 (J141) (J1361) (J136) 06-1-11 (J233) 06-1-10 (J138) 06-1-14 (J145) 06-1-13 (J142) 06-1-30 (J52) 06-1-18 06-1-51 06-1-51 (J235) (J234) 06-1-50 06-1-50 06-1-20 06-1-21 HANABI_BE_CHAP05_010FC FOR EPSON AcuLaserC4000 (6.1) Rev.01 C470...
- Page 601 (J134) 07-1-02 (J220) 07-1-03 07-1-05 07-1-04 (P134) (J133) (J135) 07-1-50 07-1-50 (J221) (J139) 07-1-51 07-1-51 07-1-13 (P133) (P132) 07-1-12 07-1-43 07-1-04 (J132) 07-1-40 (J131) 07-1-45 (P135) 07-1-04 (J137) (J50) 07-1-23 07-1-37 07-1-27 HANABI_BE_CHAP05_011Fe FOR EPSON AcuLaserC4000 (7.1) Rev.01 C470...
- Page 602 C470-MECH-010 The parts to which no reference number is assigned will not be available as after-sale service parts. 08-1-01 08-1-04 08-1-05 08-1-08 (P131) HANABI_BE_CHAP05_012Fa FOR EPSON AcuLaserC4000 (8.1) Rev.01 C470...
- Page 603 C470-MECH-011 The parts to which no reference number is assigned will not be available as after-sale service parts. 09-1-01 PL7. 1. 1 HANABI_BE_CHAP05_013Fb FOR EPSON AcuLaserC4000 (9.1) Rev.01 C470...
- Page 604 The parts to which no reference number C470-MECH-012 is assigned will not be available as after-sale service parts. 10-1-01 10-1-12 10-1-20 10-1-21 10-1-23 HANABI_BE_CHAP05_014Fa FOR EPSON AcuLaserC4000 (10.1) Rev.01 C470...
- Page 605 C470-MECH-013 The parts to which no reference number is assigned will not be available as after-sale service parts. 11-1-01 11-1-50 11-1-05 11-1-04 11-1-05 11-1-05 11-1-05 11-1-05 11-1-05 11-1-05 11-1-05 HANABI_BE_CHAP05_015Fa FOR EPSON AcuLaserC4000 (11.1) Rev.01 C470...
- Page 606 12-1-09 (P5011) PL12. 3 PL12. 2 (P144) (P145) 12-1-08 (J434) (J433) (J442) (J432) (J443) (J431) (J444) (J514) (J441) (J513) (J512) 12-1-06 (J511) (J51) HANABI_BE_CHAP05_016FC FOR EPSON AcuLaserC4000 (12.1) Rev.01 C470...
- Page 607 (P514) (K) (P434) (K) 12-2-09 (P444) (K) 12-2-10 (P433) (C) 12-2-09 (P513) (C) (P443) (C) 12-2-10 12-2-03 (P432) (M) 12-2-09 (P512) (M) (P442) (M) 12-2-10 12-2-02 (P431) (Y) 12-2-09 (P511) (Y) (P441) (Y) 12-2-01 HANABI_BE_CHAP05_017Fa FOR EPSON AcuLaserC4000 (12.2) Rev.01 C470...
- Page 608 C470-MECH-016 The parts to which no reference number is assigned will not be available as after-sale service parts. 12-3-01 12-3-15 12-3-14 12-3-13 (J710) 12-3-08 (J71) HANABI_BE_CHAP05_018Fb FOR EPSON AcuLaserC4000 (12.3) Rev.01 C470...
- Page 609 13-1-02 13-1-02 13-1-05 13-1-04 13-1-05 13-1-04 13-1-04 13-1-08 13-1-04 13-1-05 13-1-05 13-1-04 13-1-04 13-1-05 13-1-04 13-1-04 13-1-19 13-1-05 13-1-05 13-1-20 13-1-05 13-1-10 13-1-18 13-1-10 13-1-11 13-1-17 13-1-14 HANABI_BE_CHAP05_019Fb FOR EPSON AcuLaserC4000 (13.1) Rev.01 C470...
- Page 610 C470-MECH-018 The parts to which no reference number is assigned will not be available as after-sale service parts. 14-1-01 (J49) (J48) 14-1-02 HANABI_BE_CHAP05_020Fb FOR EPSON AcuLaserC4000 (14.1) Rev.01 C470...
- Page 611 The parts to which no reference number is assigned will not be available as after-sale service parts. (J166) 15-1-05 15-1-02 15-1-05 15-1-05 15-1-03 15-1-16 15-1-05 15-1-05 15-1-05 15-1-10 15-1-09 (J161) 15-1-11 15-1-05 15-1-05 15-1-15 HANABI_BE_CHAP05_021Fc FOR EPSON AcuLaserC4000 (15.1) Rev.01 C470...
- Page 612 15-2-01 15-2-07 (J41) (P210) (J165) (J13) 15-2-02 15-2-08 (J42) (P221) (J11) (J21) 15-2-03 15-2-09 (J144) (J164) (P71) (J12) (J22) (J141) 15-2-04 15-2-10 (J311) (J151) (J140) (J2361) 15-2-05 (J15) 15-2-12 (J60) (J24) 15-2-06 (J163) HANABI_BE_CHAP05_022Fb FOR EPSON AcuLaserC4000 (15.2) Rev.01 C470...
- Page 613 The parts to which no reference number is assigned will not be available as C470-ELEC-001 after-sale service parts. 16-1-10 16-1-12 16-1-203 16-1-200 16-1-202 16-1-201 16-1-13 16-1-05 FOR EPSON AcuLaserC4000 (16.1) Rev.01 C470...
-
Page 614: Wiring Diagrams
EPSON AcuLaser C4000/C4100/C3000 Revision F 9.2 Wiring Diagrams This section describes the connector locations. “P” and “J” stand for “Plug” and “Jack”, respectively. 9.2.1 P/J Locations See the following figures for the P/J locations. Figure 9-1. P/J Location 1 Appendix... - Page 615 EPSON AcuLaser C4000/C4100/C3000 Revision F Figure 9-2. P/J Location 2 Figure 9-3. P/J Location 3 Appendix Wiring Diagrams 9-600...
- Page 616 EPSON AcuLaser C4000/C4100/C3000 Revision F Figure 9-4. P/J Location 4 Figure 9-5. P/J Location 5 Appendix Wiring Diagrams 9-601...
- Page 617 EPSON AcuLaser C4000/C4100/C3000 Revision F Figure 9-6. P/J Location 6 Appendix Wiring Diagrams 9-602...
-
Page 618: Plug And Jack (P/J) Location Tables
EPSON AcuLaser C4000/C4100/C3000 Revision F 9.2.2 Plug and Jack (P/J) Location Tables Coordinates Description Connector for PL16.1.5 PWB Controller (PWB ESS) to See the following table for the plug and jack (P/J) location. I-33 PL15.1.2 PWBA MCU & HVPS H-43... - Page 619 EPSON AcuLaser C4000/C4100/C3000 Revision F Coordinates Description Coordinates Description Connects PL15.1.15 PWB Drive and PL15.2.6 Harness Assy Relay Connector for PL15.2.10 Harness Assy EEPROM to I-17 B-32 PL6.1.14 Harness Assy TFLSNS Connects PL15.1.15 PWB Drive and PL15.2.1 Harness Assy Connects PL6.1.13 Sensor Toner Full and PL15.2.10...
- Page 620 EPSON AcuLaser C4000/C4100/C3000 Revision F Coordinates Description Coordinates Description Connects PL15.1.2 PWBA MCU & HVPS and PL15.2.4 Connects PL12.2.6 Holder Assy (M) (TNR Motor) and I-42 Harness Assy LVRPG PL12.1.6 Harness Assy TNR Connects PL10.1.17 Harness Assy OHP and PL10.1.16 Connects PL12.2.7 Holder Assy (C) (TNR Motor) and...
- Page 621 EPSON AcuLaser C4000/C4100/C3000 Revision F Coordinates Description Relay Connector for PL15.2.7 Harness Assy Front 1 to 1361 B-32 PL6.1.10 Harness Assy CTD Relay Connector for PL15.2.12 Harness Assy TMPB to 2361 E-36 PL4.2.3 Harness Assy TMPA Connects PL12.1.9 HVPS Sub and PL15.2.7 Harness Assy...
-
Page 622: High-Pressure Electrode Location Tables
EPSON AcuLaser C4000/C4100/C3000 Revision F 9.2.3 High-pressure electrode Location Tables high- pressure Coordinates Description See the following table for the High-pressure electrode location. electrode Connects PL11.1.4 HSG ASSY BIAS and PL15.1.8 DEVE Y B-73 HOUSING ASSY CONTACT high- pressure Coordinates... - Page 623 EPSON AcuLaser C4000/C4100/C3000 Revision F high- pressure Coordinates Description electrode Connects PL11.1.4 HSG ASSY BIAS and PL15.1.8 IDT 2 D-73 HOUSING ASSY CONTACT IDT 2 Connects PL11.1.3 PHD ASSY and PL11.1.5 STUD E-65 CLEANER PLUNGER IDT 2 Connects PL11.1.3 PHD ASSY and PL11.1.5 STUD...
-
Page 624: Wiring Diagrams And Signal Information
EPSON AcuLaser C4000/C4100/C3000 Revision F 9.3 Wiring Diagrams and Signal Information 9.3.1 Overall Wiring Connection Diagram The symbols used in the overall wiring connection diagrams on the following pages are as follows: Symbols Description Indicates connection of parts by HARNESS, wire, etc. - Page 625 EPSON AcuLaser C4000/C4100/C3000 Revision F Figure 9-7. Overall Wiring Connection Diagram Appendix Wiring Diagrams and Signal Information 9-610...
-
Page 626: Wiring And Signal Descriptions Between Components
EPSON AcuLaser C4000/C4100/C3000 Revision F 9.3.2 Wiring and Signal Descriptions between §4. DEVELOPER COMPONENTS 1 Components Connects PWB DRIVE (PL15.1.15) and SWITCH TCRU ASSY(Y) (PL12.2.10). 9.3.2.1 Configuration Connects PWB DRIVE (PL15.1.15) and SWITCH TCRU ASSY(M) (PL12.2.10). Wiring connection diagrams are divided into 11 sections and provide details Connects PWB DRIVE (PL15.1.15) and SWITCH TCRU ASSY(C) - Page 627 EPSON AcuLaser C4000/C4100/C3000 Revision F §6. FUSER COMPONENTS §10. PAPER FEEDER COMPONENTS Connects LVPS (PL15.1.10) and FUSER ASSY (PL9.1.1). Connects PWBA MCU & HVPS (PL15.1.2) and SENSOR PAPER Connects PWBA MCU & HVPS (PL15.1.2) and FUSER ASSY (PL9.1.1). (Dup Jam) (PL7.1.4).
-
Page 628: Notation On The Diagrams For The Wiring And Signal Descriptions Between Components
EPSON AcuLaser C4000/C4100/C3000 Revision F 9.3.3 Notation on the Diagrams for the Wiring and Symbol Description Signal Descriptions between Components Shows a signal's logic value (Low: L or High: H) when a function's motion has been The symbols used in the wiring connection diagrams for parts on the following REGI CLUTCH ON(L)+24VDC activated. - Page 629 EPSON AcuLaser C4000/C4100/C3000 Revision F § Connection Diagram POWER SUPPLY COMPONENTS Appendix Wiring Diagrams and Signal Information 9-614...
- Page 630 EPSON AcuLaser C4000/C4100/C3000 Revision F LVPS (PL15.1.10) excess voltage protection circuit All output is shut off when an overvoltage condition occurs for 24VDC/ 5VDC/3.3VDC supply voltage. The operation point at this time is 32VDC or less for 24VDC, 7VDC or less for 5VDC, and 6VDC or less for 3.3VDC.
- Page 631 EPSON AcuLaser C4000/C4100/C3000 Revision F § Connection Diagram CASSETTE COMPONENTS Appendix Wiring Diagrams and Signal Information 9-616...
- Page 632 EPSON AcuLaser C4000/C4100/C3000 Revision F Winding resistance for Solenoid and Clutch P/L No. Parts Name Winding resistance 96 Ω ± 10% (20 °C) PL 4.3.17 SOLENOID FEED TRAY 1 175 Ω ± 10% (20 °C) PL 4.3.18 CLUTCH ASSY TURN TRAY 1 P/J No.
- Page 633 EPSON AcuLaser C4000/C4100/C3000 Revision F § Connection Diagram - 3 DRIVE COMPONENTS Appendix Wiring Diagrams and Signal Information 9-618...
- Page 634 EPSON AcuLaser C4000/C4100/C3000 Revision F P/J No. Signal line Description P12-1 P42-30 FAN FSR STOP Drive Control Signal for FAN FUSER. P12-30 P42-1 FAN FSR LOW P50-7 P137-1 FAN FSR ON(H)+24VDC ON/OFF Control Signal for FAN FUSER. FAN FSR Fail detection signal for FAN FUSER.
- Page 635 EPSON AcuLaser C4000/C4100/C3000 Revision F Description of DRIVE ASSY MAIN (PL14.1.2). Description of MOTOR ASSY DUP (PL8.1.8). Motor type: Hybrid type stepping motor Motor type: Hybrid type stepping motor Step angle: 1.8° ± 0.09° Step angle: 1.8° ± 0.09° Winding resistance: 2.1Ω ± 10% / Phase (25°C) Winding resistance: 5.5Ω...
- Page 636 EPSON AcuLaser C4000/C4100/C3000 Revision F § Connection Diagram - 4 DEVELOPER1 COMPONENTS Appendix Wiring Diagrams and Signal Information 9-621...
- Page 637 EPSON AcuLaser C4000/C4100/C3000 Revision F P/J No. Signal line Description Toner quantity sensing signal sent by SENSOR P51-34 P443-2 NOTNR_C TONER LOW (C) (PL12.2.9) Toner quantity sensing signal sent by SENSOR P51-36 P444-2 NOTNR_K TONER LOW (K) (PL12.2.9) NOTNR_CHK_ SENSOR TONER LOW (Y) (PL12.2.9) Selected P12-23 P42-8 Signal at time of Toner Quantity Check.
- Page 638 EPSON AcuLaser C4000/C4100/C3000 Revision F § Connection Diagram DEVELOPER2 COMPONENTS Appendix Wiring Diagrams and Signal Information 9-623...
- Page 639 EPSON AcuLaser C4000/C4100/C3000 Revision F Description of TONER MOTOR ASSY. Motor type: PM type stepping motor Step angle: 7.5° ± 0.5° Winding resistance: 80Ω ± 10% / Phase (20°C) Excitation sequence : See the following the table. (*: excitation) Step (2-phase excitation)
- Page 640 EPSON AcuLaser C4000/C4100/C3000 Revision F § Connection Diagram - FUSER COMPONENTS Appendix Wiring Diagrams and Signal Information 9-625...
- Page 641 EPSON AcuLaser C4000/C4100/C3000 Revision F P/J No. Signal line Description EXIT PAPER Fuser's Paper Sensing Signal by Exit P13-19 P138-3 SENSED(L)+3.3VDC Sensor inside FUSER ASSY (PL9.1.1). Heat Roll surface temperature data P13-20 P138-4 FUSER_STS measured by Temp Sensor, for judging Fuser Control Temperature.
- Page 642 EPSON AcuLaser C4000/C4100/C3000 Revision F § Connection Diagram ROS COMPONENTS Appendix Wiring Diagrams and Signal Information 9-627...
- Page 643 EPSON AcuLaser C4000/C4100/C3000 Revision F P/J No. Signal line Description P15-20 P151-1 XPDATA_A_Y Pixel data signal for ROS ASSY P15-19 P151-2 XPDATA_B_M (PL11.1.1) internal Quad Beam Laser Diode emission. (4 color separation P15-18 P151-3 XPDATA_C_C Laser Diode) P15-17 P151-4 XPDATA_C_K...
- Page 644 EPSON AcuLaser C4000/C4100/C3000 Revision F Appendix Wiring Diagrams and Signal Information 9-629...
- Page 645 EPSON AcuLaser C4000/C4100/C3000 Revision F P/J No. Signal line Description Waste Toner Bottle full sensing signal TONER FULL P140-12 P141-2 sent by SENSOR TNR FULL SENSED(H) +3.3VDC (PL6.1.13). Measurement Data sent by ADC P13-12 P1361-5 ADC VOUT Sensor inside SENSOR ASSY ADC (PL6.1.11).(Analog data)
- Page 646 EPSON AcuLaser C4000/C4100/C3000 Revision F § Connection Diagram - 9 XEROGRAPHICS COMPONENTS2 Appendix Wiring Diagrams and Signal Information 9-631...
- Page 647 EPSON AcuLaser C4000/C4100/C3000 Revision F P/J No. Signal line Description Output to IDT2 Cleaner from HVPS P802 ICT2 CLEANER inside PWBA MCU & HVPS (PL15.1.2). Output for Primary Transfer to IDT1 from P701 IDT1 HVPS inside PWBA MCU & HVPS (PL15.1.2).
- Page 648 EPSON AcuLaser C4000/C4100/C3000 Revision F § Connection Diagram - 10 PAPER FEEDER COMPONENTS Appendix Wiring Diagrams and Signal Information 9-633...
- Page 649 EPSON AcuLaser C4000/C4100/C3000 Revision F P/J No. Signal line Description DUP JAM SENSED(L) Paper Sensing Signal for Duplex sent by P13-3 P139-9 +3.3VDC SENSOR PAPER (Dup Jam) (PL7.1.4). Full Stack Sensing Signal for Paper Exit FULL STACK P13-6 P139-6 Discharge sent by SENSOR PAPER (Full SENSED(L) +3.3VDC...
- Page 650 EPSON AcuLaser C4000/C4100/C3000 Revision F § Connection Diagram - 11 CONTROLLER COMPONENTS Appendix Wiring Diagrams and Signal Information 9-635...
- Page 651 EPSON AcuLaser C4000/C4100/C3000 Revision F P/L No. Signal line Description TEST PRINT Printer's internal Test Print can be made by P31-1 ON(L) +3.3VDC setting to LOW level (connection to SG). NOTE *1: Direct attachment to circuit board. Appendix Wiring Diagrams and Signal Information...
-
Page 652: Parts List And Exploded Diagram For Large Capacity Paper Unit Of The Aculaser C4000
KL: KL clip C: C ring N: nut • The arrowheads in the illustrations indicate assemblies made up of lower parts with their numbers. Appendix Parts List and Exploded Diagram for Large Capacity Paper Unit of The AcuLaser C4000 9-637... -
Page 653: Parts List Tables
CLUTCH ASSY TURN TRAY 1 01-3-20 ROLL ASSY TURN 01-3-24 ROLL ASSY 01-4-1 PWBA FEEDER 01-4-2 HARNESS ASSY PFLG 01-4-3 HARNESS ASSY FDR 2T Appendix Parts List and Exploded Diagram for Large Capacity Paper Unit of The AcuLaser C4000 9-638... -
Page 654: Exploded Diagrams
EPSON AcuLaser C4000/C4100/C3000 Revision F 9.4.3 Exploded Diagrams The following pages show exploded diagrams of the Large capacity paper unit. Appendix Parts List and Exploded Diagram for Large Capacity Paper Unit of The AcuLaser C4000 9-639... - Page 655 C813-OPTI-024 The parts to which no reference number is assigned will not be available as after-sale service parts. 01-1-01 01-1-07 01-1-06 01-1-07 01-1-06 01-1-05 01-1-08 01-1-05 01-1-05 01-1-08 01-1-04 HANABI_FDR_CHAP05_001Fa Large Capacity Paper Unit (1.1) Rev.01...
- Page 656 C813-OPTI-025 The parts to which no reference number is assigned will not be available as after-sale service parts. PL17. 3 PL17. 3 01-2-01 01-2-02 01-2-08 (P821) 01-2-07 01-2-08 (P831) HANABI_FDR_CHAP05_002Fa Large Capacity Paper Unit (1.2) Rev.01...
- Page 657 C813-OPTI-026 The parts to which no reference number is assigned will not be available as after-sale service parts. 01-3-03 01-3-03 01-3-01 01-3-05 01-3-06 01-3-04 01-3-20 01-3-18 01-3-17 01-3-24 HANABI_FDR_CHAP05_003Fb Large Capacity Paper Unit (1.3) Rev.01...
- Page 658 The parts to which no reference number C813-OPTI-027 is assigned will not be available as after-sale service parts. (J810) 01-4-01 01-4-02 (P81) (J81) (P83) (P82) (P84) 01-4-03 (J82) 01-4-04 (J821) (J8220) (J83) (P8220) 01-4-11 (J831) (J8220) (P824) (P8220) (P825) (J822) 01-4-11 (J823) (P834)
-
Page 659: Wiring Diagrams
EPSON AcuLaser C4000/C4100/C3000 Revision F 9.5 Wiring Diagrams This section describes the connector locations. “P” and “J” stand for “Plug” and “Jack”, respectively. 9.5.1 P/J Locations See the following figures for the P/J locations. Figure 9-8. P/J Location Appendix Wiring Diagrams... -
Page 660: Plug And Jack (P/J) Location Tables
EPSON AcuLaser C4000/C4100/C3000 Revision F 9.5.2 Plug and Jack (P/J) Location Tables See the following table for the plug and jack (P/J) location. Coordinates Description Connects PWBA Feeder and Harness Assy OPF PLG Connects PWBA Feeder and Harness Assy FDR2T... -
Page 661: Wiring Diagrams And Signal Information
EPSON AcuLaser C4000/C4100/C3000 Revision F 9.6 Wiring Diagrams and Signal Information 9.6.1 Overall Wiring Connection Diagram The symbols used in the overall wiring connection diagrams on the following pages are as follows: Symbols Description Indicates connection of parts by HARNESS, wire, etc. - Page 662 EPSON AcuLaser C4000/C4100/C3000 Revision F Figure 9-9. Overall Wiring Connection Diagram Appendix Wiring Diagrams and Signal Information 9-647...
-
Page 663: Wiring And Signal Descriptions Between Components
EPSON AcuLaser C4000/C4100/C3000 Revision F 9.6.2 Wiring and Signal Descriptions between §3. CASSETTE3 COMPONENTS Components Connects PWBA FEEDER (PL17.4.1) and SWITCH ASSY SIZE (Tray 3) (PL17.2.7). 9.6.2.1 Configuration Connects PWBA FEEDER (PL17.4.1) and SENSOR NO PAPER (Tray 3) (PL17.3.4). Wiring connection diagrams are divided into 3 sections and provide details Connects PWBA FEEDER (PL17.4.1) and SENSOR LOW PAPER (Tray... -
Page 664: Notation On The Diagrams For The Wiring And Signal Descriptions Between Components
EPSON AcuLaser C4000/C4100/C3000 Revision F 9.6.3 Notation on the Diagrams for the Wiring and Symbol Description Signal Descriptions between Components Shows a signal's logic value (Low: L or High: H) when a function's motion has been The symbols used in the wiring connection diagrams for parts on the following REGI CLUTCH ON(L)+24VDC activated. - Page 665 EPSON AcuLaser C4000/C4100/C3000 Revision F § Connection Diagram DRIVE COMPONENTS Appendix Wiring Diagrams and Signal Information 9-650...
- Page 666 EPSON AcuLaser C4000/C4100/C3000 Revision F Signal line Description FDR A, FDR B, FDR XA, Drive Control Signal for DRIVE ASSY FEEDER FDR XB, DA_FDRMOT (PL17.4.5). FDR_A, FDR_B, Excitation signal for DRIVE ASSY FEEDER (PL17.4.5). FDR_XA, FDR_XB P/J No. Signal line...
- Page 667 EPSON AcuLaser C4000/C4100/C3000 Revision F § Connection Diagram CASSETTE2 COMPONENTS Appendix Wiring Diagrams and Signal Information 9-652...
- Page 668 EPSON AcuLaser C4000/C4100/C3000 Revision F P/L No. Signal line Description TRAY2 SIZE0 ON/OFF detect signal for upper switch of P82-1 P821-4 SWITCH SWITCH ASSY SIZE (PL17.2.7). ON(L)+3.3VDC TRAY2 SIZE1 ON/OFF detect signal for middle switch of P82-2 P821-3 SWITCH SWITCH ASSY SIZE (PL17.2.7).
- Page 669 EPSON AcuLaser C4000/C4100/C3000 Revision F § Connection Diagram - 3 CASSETTE3 COMPONENTS Appendix Wiring Diagrams and Signal Information 9-654...
- Page 670 EPSON AcuLaser C4000/C4100/C3000 Revision F P/J No. Signal line Description TRAY3 SIZE0 SWITCH ON/OFF detect signal for upper switch of P83-1 P831-4 ON(L)+3.3VDC SWITCH ASSY SIZE (PL17.2.7). TRAY3 SIZE1 SWITCH ON/OFF detect signal for middle switch of P83-2 P831-3 ON(L)+3.3VDC SWITCH ASSY SIZE (PL17.2.7).
-
Page 671: Component Layout
EPSON AcuLaser C4000/C4100/C3000 Revision F 9.7 Component Layout Figure 9-10. C470MAIN Component Layout - Component Side Appendix Component Layout 9-656... -
Page 672: Component Layout
EPSON AcuLaser C4000/C4100/C3000 Revision F Figure 9-11. C470MAIN Component Layout - Soldered Side Appendix Component Layout 9-657... -
Page 673: Circuit Diagrams
EPSON AcuLaser C4000/C4100/C3000 Revision F 9.8 Circuit Diagrams The following pages show the circuit diagrams of the C470MAIN Circuit Board. Appendix Circuit Diagrams 9-658...