HP Compaq 6000 Pro Maintenance & Service Manual
Hp compaq 6000 pro all-in-one pc
Hide thumbs
Also See for Compaq 6000 Pro:
- Maintenance and service manual (257 pages) ,
- Maintenance & service manual (125 pages) ,
- Troubleshooting manual (67 pages)
Table of Contents
Advertisement
Advertisement
Table of Contents

Related Manuals for HP Compaq 6000 Pro


Summary of Contents for HP Compaq 6000 Pro
- Page 1 Maintenance & Service Guide HP Compaq 6000 Pro All-in-One PC...
- Page 2 No part of this document may be photocopied, reproduced, or translated to another language without the prior written consent of Hewlett-Packard Company. Maintenance & Service Guide HP Compaq 6000 Pro All-in-One PC First Edition (June 2010) Document Part Number: 628499-001...
-
Page 3: About This Book
About This Book WARNING! Text set off in this manner indicates that failure to follow directions could result in bodily harm or loss of life. CAUTION: Text set off in this manner indicates that failure to follow directions could result in damage to equipment or loss of information. - Page 4 About This Book...
-
Page 5: Table Of Contents
Table of contents 1 Product Features ............................1 Front Components ..........................3 Rear and Side Components ......................... 4 2 Installing and Customizing the Software ...................... 5 Installing the Operating System ......................5 Downloading Microsoft Windows Updates ................... 6 Installing or Upgrading Device Drivers (Windows systems) ..............6 Accessing Disk Image (ISO) Files ...................... - Page 6 Preventing Electrostatic Damage to Equipment ..............25 Personal Grounding Methods and Equipment ..............26 Grounding the Work Area ....................26 Recommended Materials and Equipment ................27 Operating Guidelines .......................... 27 Routine Care ............................28 General Cleaning Safety Precautions ................28 Cleaning the Computer Case ....................
- Page 7 Display Control Board ........................71 Power Button Board ........................... 73 Inverter Board ............................. 75 Optical Drive Connector Board ......................77 Hood Sensor ............................79 Hard Drive Connector ......................... 81 Fan ..............................83 Speakers ............................85 System Board Shield .......................... 86 System Board .............................
- Page 8 viii...
-
Page 9: Product Features
Product Features The HP Compaq 6000 Pro All-In One Business PC offers the following features: ● Intel® Core™ 2 Duo processors ● Windows® 7 Professional 32- or 64-bit operating system ● Up to 8 gigabytes (GB) of DDR3 memory ●... - Page 10 ● Face Recognition for HP ProtectTools software with auto-login capabilities ● TPM 1.2-compliant embedded security chip ● VESA-compliant mounting solutions ● HD webcam ● Dual-array microphone ● Premium stereo speakers ● HP SkyRoom full version for professional quality visual collaboration built on HP Video and Image processing engines for hi-fi audio, hi-def video, and hi-performance 3D application sharing NOTE:...
-
Page 11: Front Components
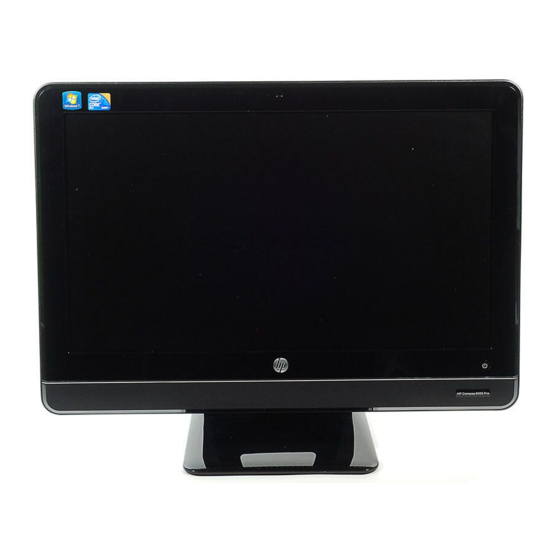
Front Components Component Component Dual microphone array Drive activity LED Webcam (optional) Power button and LED 21.5-inch diagonal 16:9 widescreen LED- (10) High-performance stereo speakers backlit full HD LCD display Tray-load optical drive (optional) (11) IR Receiver and LED (select models only) Optical drive eject button (12) Adjustable tilt and swivel stand... -
Page 12: Rear And Side Components
Rear and Side Components Component Component HP 6-in-1 Media Card Reader (13) Stereo audio line out IEEE 1394 port (14) (4) USB 2.0 ports (2) USB 2.0 ports (15) PS/2 mouse port Headphone jack (16) PS/2 keyboard port Microphone/line in jack (17) USB 2.0 port (used for optional wireless keyboard/mouse transmitter/receiver) -
Page 13: Installing And Customizing The Software
Installing and Customizing the Software If your computer was not shipped with a Microsoft operating system, some portions of this documentation do not apply. Additional information is available in online help after you install the operating system. NOTE: If the computer was shipped with Windows Vista or Windows 7 loaded, you will be prompted to register the computer with HP Total Care before installing the operating system. -
Page 14: Downloading Microsoft Windows Updates
Downloading Microsoft Windows Updates To set up your Internet connection, click Start > Internet Explorer and follow the instructions on the screen. Once an Internet connection has been established, click the Start button. Select the All Programs menu. Click on the Windows Update link. In Windows Vista and Windows 7, the Windows Update screen appears. -
Page 15: Protecting The Software
Protecting the Software To protect the software from loss or damage, keep a backup copy of all system software, applications, and related files stored on the hard drive. Refer to the operating system or backup utility documentation for instructions on making backup copies of your data files. Protecting the Software... -
Page 16: Computer Setup (F10) Utility
Computer Setup (F10) Utility Computer Setup (F10) Utilities Use Computer Setup (F10) Utility to do the following: ● Change factory default settings. ● Set the system date and time. ● Set, view, change, or verify the system configuration, including settings for processor, graphics, memory, audio, storage, communications, and input devices. -
Page 17: Using Computer Setup (F10) Utilities
● Solve system configuration errors detected but not automatically fixed during the Power-On Self- Test (POST). ● Replicate the system setup by saving system configuration information on a USB flash drive and restoring it on one or more computers. ● Execute self-tests on a specified ATA hard drive (when supported by drive). -
Page 18: Computer Setup-File
Computer Setup—File NOTE: Support for specific Computer Setup options may vary depending on the hardware configuration. Table 3-2 Computer Setup—File Option Description System Information Lists: ● Product name ● SKU number (some models) ● Processor type/speed/stepping ● Installed memory size/speed, number of channels (single or dual) (if applicable) ●... -
Page 19: Computer Setup-Storage
Computer Setup—Storage NOTE: Support for specific Computer Setup options may vary depending on the hardware configuration. Table 3-3 Computer Setup—Storage Option Description Device Configuration Lists all installed BIOS-controlled storage devices. When a device is selected, detailed information and options are displayed. The following options may be presented: Hard Disk: Size, model, firmware, serial number, connector color, SMART, emulation type. - Page 20 Table 3-3 Computer Setup—Storage (continued) Storage Options Removable Media Boot Enables/disables ability to boot the system from removable media. SATA Emulation Allows you to choose how the SATA controller and devices are accessed by the operating system. There are two supported options: AHCI and IDE. AHCI (default option) - Allows operating systems with AHCI device drivers loaded to take advantage of more advanced features of the SATA controller.
-
Page 21: Computer Setup-Security
Computer Setup—Security NOTE: Support for specific Computer Setup options may vary depending on the hardware configuration. Table 3-4 Computer Setup—Security Option Description Setup Password Allows you to set and enable a setup (administrator) password. NOTE: If the setup password is set, it is required to change Computer Setup options, flash the ROM, and make changes to certain plug and play settings under Windows. - Page 22 Table 3-4 Computer Setup—Security (continued) USB Security Allows you to enable or disable groups of USB ports or individual USB ports: ● Front USB Ports ◦ USB Port 11 ◦ USB Port 12 ● Rear USB Ports ◦ USB Port 1 ◦...
- Page 23 Table 3-4 Computer Setup—Security (continued) System Security Data Execution Prevention (some models) (enable/disable) - Helps prevent operating system (some models: these security breaches. options are hardware PAVP (Models with Blu-ray drives) (disabled/min/max) - PAVP enables the Protected Audio Video dependent) Path in the Chipset.
- Page 24 Table 3-4 Computer Setup—Security (continued) Master Boot Record (Enable/Disable) Protects the master boot record from viruses or other corruption. Saves a copy Security of the current master boot record and allows you to restore the saved copy. Setup Security Level Provides a method to allow end-users limited access to change specified setup options, without having to know the Setup Password.
-
Page 25: Computer Setup-Power
Computer Setup—Power NOTE: Support for specific Computer Setup options may vary depending on the hardware configuration. Table 3-5 Computer Setup—Power Option Description ● OS Power Runtime Power Management— Enable/Disable. Allows certain operating systems to reduce Management processor voltage and frequency when the current software load does not require the full capabilities of the processor. -
Page 26: Computer Setup-Advanced
Computer Setup—Advanced NOTE: Support for specific Computer Setup options may vary depending on the hardware configuration. Table 3-6 Computer Setup—Advanced Option Heading Power-On Options Allows you to set: ● POST mode (QuickBoot, Clear Memory, FullBoot, or FullBoot Every x Days). ◦... - Page 27 Table 3-6 Computer Setup—Advanced (continued) ◦ Clear Memory = No memory count on cold boot. Clears memory on all boots. ◦ FullBoot Every x Days = Memory count on 1st cold boot on or after the xth day. No more memory counts until 1st cold boot on or after x days. Clears memory on all boots. ●...
- Page 28 Table 3-6 Computer Setup—Advanced (continued) Execute Memory Test Restarts the computer and executes the POST memory test/logging. (some models) BIOS Power-On Allows you to set the computer to turn on automatically at a time you specify. PCI Devices ● Lists currently installed PCI devices and their IRQ settings. ●...
-
Page 29: Recovering The Configuration Settings
Table 3-6 Computer Setup—Advanced (continued) Management Devices The Management Devices menu will only be displayed in the Advanced menu when the BIOS detects multiple management options. This option is for installed NIC cards that support ASF or DASH. Use the Management Devices menu to select if the BIOS management operations will be through the embedded solution or one of the installed NIC cards. -
Page 30: Serial Ata (Sata) Drive Guidelines And Features
Serial ATA (SATA) Drive Guidelines and Features NOTE: HP only supports the use of SATA hard drives on these models of computer. No Parallel ATA (PATA) drives are supported. SATA Hard Drives Serial ATA Hard Drive Characteristics Number of pins/conductors in data cable Number of pins in power cable Maximum data cable length 39.37 in (100 cm) -
Page 31: Smart Ata Drives
SMART ATA Drives The Self Monitoring Analysis and Recording Technology (SMART) ATA drives for the HP Personal Computers have built-in drive failure prediction that warns the user or network administrator of an impending failure or crash of the hard drive. The SMART drive tracks fault prediction and failure indication parameters such as reallocated sector count, spin retry count, and calibration retry count. -
Page 32: Identifying The Chassis, Routine Care, And Disassembly Preparation
Identifying the Chassis, Routine Care, and Disassembly Preparation This chapter provides general service information for the computer. Adherence to the procedures and precautions described in this chapter is essential for proper service. CAUTION: When the computer is plugged into an AC power source, voltage is always applied to the system board. -
Page 33: Electrostatic Discharge Information
Electrostatic Discharge Information A sudden discharge of static electricity from your finger or other conductor can destroy static-sensitive devices or microcircuitry. Often the spark is neither felt nor heard, but damage occurs. An electronic device exposed to electrostatic discharge (ESD) may not appear to be affected at all and can work perfectly throughout a normal cycle. -
Page 34: Personal Grounding Methods And Equipment
● Keep electrostatic sensitive parts in their containers until they arrive at static-free stations. ● Place items on a grounded surface before removing them from their container. ● Always be properly grounded when touching a sensitive component or assembly. ● Avoid contact with pins, leads, or circuitry. -
Page 35: Recommended Materials And Equipment
Recommended Materials and Equipment Materials and equipment that are recommended for use in preventing static electricity include: ● Antistatic tape ● Antistatic smocks, aprons, or sleeve protectors ● Conductive bins and other assembly or soldering aids ● Conductive foam ● Conductive tabletop workstations with ground cord of one-megohm +/- 10% resistance ●... -
Page 36: Routine Care
● Do not place computers so near each other that they are subject to each other’s re-circulated or preheated air. ● Keep liquids away from the computer and keyboard. ● Never cover the ventilation slots on the monitor with any type of material. ●... -
Page 37: Cleaning The Monitor
When cleaning debris from under the keys, review all rules in General Cleaning Safety Precautions on page 28 before following these procedures: CAUTION: Use safety glasses equipped with side shields before attempting to clean debris from under the keys. ● Visible debris underneath or between the keys may be removed by vacuuming or shaking. -
Page 38: Screws
● Diagnostics software ● HP tamper-resistant T-15 wrench (Smart Cover FailSafe Key, PN 166527-001) or HP tamper- resistant bits (Smart Cover FailSafe Key, PN 166527-002) Screws The screws used in the computer are not interchangeable. They may have standard or metric threads and may be of different lengths. -
Page 39: Lithium Coin Cell Battery
Lithium Coin Cell Battery The battery that comes with the computer provides power to the real-time clock and has a minimum lifetime of about three years. See the appropriate removal and replacement chapter for the chassis you are working on in this guide for instructions on the replacement procedures. -
Page 40: Illustrated Parts Catalog
Illustrated parts catalog Computer major components Item Description Spare part number System board 607818-001 Heat sink assembly (thermal module) (includes replacement thermal material) MXM graphic interface 625255-001 UMA graphic interface 625256-001 Memory modules (PC3-10600, 1333-MHz; not illustrated) 4-GB 593896-001 2-GB 593895-001 Graphics card Chapter 6 Illustrated parts catalog... - Page 41 Item Description Spare part number G210, 512 MB 621426-001 HD5570, 1 GB 628380-001 TV tuner module For use in the United States 613990-001 For use in the Asia-Pacific region 621424-001 For use in Hong Kong and China 621423-001 Webcam module 625254-001 Processor (includes replacement thermal material) Intel Core2 Duo processors...
- Page 42 Item Description Spare part number Keyboard (not illustrated) ● Brazil 590271-201 ● International English 590271-L31 ● Latin America 590271-161 PS/2 ● Brazil 611374-203 ● International English 611374-L33 ● Latin America 611374-163 Wireless for use in the United States 611376-003 USB Smartcard for use in the United States 613463-003 Washable for use in the United States 613125-001...
-
Page 43: Mass Storage Devices
Mass storage devices Item Description Spare part number Optical drives 8X DVD±RW SuperMulti DL Drive with LightScribe 619238-001 4X DVD±RW SuperMulti DL Drive with LightScribe 619239-001 8X DVD±RW SuperMulti DL Drive with LightScribe, HF 615944-001 Hard drive 1000-GB 621418-001 500-GB 621421-001 320-GB 621420-001... -
Page 44: Sequential Part Number Listing
Sequential part number listing Spare part Description number 418950-001 Intel Core2 Duo E6700 processor (3.20-GHz, 2-MB L2 cache, 1066-MHz FSB) 444740-001 Mouse, USB, optical, carbon 466169-001 Intel Core2 Duo E8400 processor (3.00-GHz, 6-MB L2 cache, 1333-MHz FSB) 466170-001 Intel Core2 Duo E8500 processor (3.16-GHz, 6-MB L2 cache, 1333-MHz FSB) 497732-001 Intel Core2 Duo E8600 processor (3.33-GHz, 6-MB L2 cache, 1333-MHz FSB) 531988-001... - Page 45 Spare part Description number 615944-001 8X DVD±RW SuperMulti DL Drive with LightScribe, HF 617047-001 Bluetooth module 617450-001 Cable, DisplayPort to HDMI 618019-001 AC adapter, 150W (external) 618020-001 AC adapter, 180W (external) 619238-001 8X DVD±RW SuperMulti DL Drive with LightScribe 619239-001 4X DVD±RW SuperMulti DL Drive with LightScribe 619580-001 Mouse, washable...
-
Page 46: Removal And Replacement Procedures All-In One (Aio) Chassis
Removal and Replacement Procedures All-in One (AIO) Chassis The following sections provide information about disassembling various components of the HP Pro All-in-One. Preparing to Disassemble the Computer To avoid injury and equipment damage, always complete the following steps in order, when opening the HP Pro All-in-One. -
Page 47: Small Rear Cover
Small Rear Cover The small rear cover is located above the stand. You must remove it to remove the drive cover. To remove the small rear cover: Prepare the computer for disassembly (see Preparing to Disassemble the Computer on page 38). -
Page 48: Port Cover
Port Cover The port cover is located on the rear, bottom of the back of the computer. You must remove it to access the I/O panel on the back of the computer. To remove the port cover: Prepare the computer for disassembly (see Preparing to Disassemble the Computer on page 38). -
Page 49: Stand
Stand The stand is secured with four screws. To remove the stand: Prepare the computer for disassembly (see Preparing to Disassemble the Computer on page 38). Remove the small rear cover (see Small Rear Cover on page 39). Remove the port cover (see Port Cover on page 40). -
Page 50: Optical Drive
Optical Drive Description Spare part number 8X DVD±RW SuperMulti DL Drive with LightScribe 619238-001 4X DVD±RW SuperMulti DL Drive with LightScribe 619239-001 8X DVD±RW SuperMulti DL Drive with LightScribe, HF 615944-001 The optical drive is located under the drive cover on the left side of the computer (when viewed from behind). - Page 51 Slide the drive cover off the computer. Figure 7-5 Removing the drive cover Move the screw (1) that secures the drive to the computer. Insert a tool into the slot (2) to push the drive out of the bay, and then slide the drive out of the computer (3).
-
Page 52: Hard Drive
Hard Drive Description Spare part number 1000-GB 621418-001 500-GB 621421-001 320-GB 621420-001 250-GB 621419-001 80-GB solid-state drive 607817-001 The hard drive is located under the drive cover on the left side of the computer (when viewed from behind). The drive is secured with one captive screw and is housed in a removable cage. Figure 7-7 Hard drive location To remove the hard drive:... - Page 53 Slide the drive cover off the computer. Figure 7-8 Removing the drive cover Loosen the captive screw (1) that secures the drive to the computer. Using the drive cage handle (2), slide the cage away from the computer, and then lift the drive out of the computer (3).
- Page 54 To remove the hard drive from the hard drive cage, remove the four Phillips screws that secure the drive to the cage (1), and then slide the drive out of the cage (2). Figure 7-10 Removing the hard drive from the hard drive cage To replace the hard drive, reverse the removal procedures.
-
Page 55: Memory
Memory Description Spare part number 4 GB 593896-001 2 GB 593895-001 Memory modules are located on the right side of the computer (when viewed from behind) under the memory cover. The computer has two memory slots. Figure 7-11 Memory location To remove a memory module: Prepare the computer for disassembly (see Preparing to Disassemble the Computer... - Page 56 Slide the memory cover off the computer. Figure 7-12 Removing the memory cover Open both latches of the memory module socket (1), and remove the memory module from the socket (2). Figure 7-13 Removing the memory module NOTE: If you are removing both cards, you must remove the upper one before removing the lower one.
-
Page 57: Upper Rear Panel
Upper Rear Panel The upper rear panel is secured with three screws. Removing it allows access to the fans, heat sink, processor, and optional TV tuner. Figure 7-14 Upper rear panel location To remove the upper rear panel: Prepare the computer for disassembly (see Preparing to Disassemble the Computer on page 38). - Page 58 Remove the three screws that secure the panel to the computer. Figure 7-15 Removing the upper rear panel Lift the panel from the computer. To replace the panel, reverse the removal procedures. Chapter 7 Removal and Replacement Procedures All-in One (AIO) Chassis...
-
Page 59: Webcam Module
Webcam Module Description Spare part number Webcam module 625254-001 The webcam module is located at the top of the computer. It is secured with two screws and has one connector. Figure 7-16 Webcam module location To remove the webcam module: Prepare the computer for disassembly (see Preparing to Disassemble the Computer on page... - Page 60 Remove the two screws that secure the webcam module to the computer. NOTE: Make note of grounding wire placement for proper installation later. Figure 7-17 Removing the webcam module Lift the webcam module as much as the cable allows, and then disconnect the cable from the module.
-
Page 61: Bluetooth Module
Bluetooth Module Description Spare part number Bluetooth module 617047-001 The Bluetooth module is located at the top of the computer to the right of the webcam module. The Bluetooth module is secured in a plastic holder and has one cable. Figure 7-18 Bluetooth module location To remove the Bluetooth module:... - Page 62 Lift the Bluetooth module as much as the cable allows, remove the tape from the connector on the module (4), and then unplug the cable from the module. Figure 7-19 Removing the Bluetooth module To install a Bluetooth module, reverse the removal procedures. Chapter 7 Removal and Replacement Procedures All-in One (AIO) Chassis...
-
Page 63: Small Fan
Small Fan The small fan is located on the right side of the computer near the memory modules. To remove the small fan: Prepare the computer for disassembly (see Preparing to Disassemble the Computer on page 38). Remove the small rear cover (see Small Rear Cover on page 39). -
Page 64: Heat Sink (Thermal Module)
Heat Sink (Thermal Module) Description Spare part number Heat sink (thermal module), MXM graphics 625255-001 Heat sink (thermal module), UMA graphics 625256-001 The heat sink is secured with nine screws. You do not have to remove the large fan to remove the heat sink. -
Page 65: Processor
To replace the heat sink, reverse the removal procedures. Processor Description Spare part number Intel Core2 Duo processors (include replacement thermal material) E8600, 6-MB cache, 3.33 GHz 497732-001 E8500, 6-MB cache, 3.16 GHz 466170-001 E8400, 6-MB cache, 3.00 GHz 466169-001 E7600, 3-MB cache, 3.06 GHz 573954-001 E7500, 3-MB cache, 2.93 GHz... - Page 66 Carefully lift the processor from the socket (3). CAUTION: Do NOT handle the pins in the processor socket. These pins are very fragile and handling them could cause irreparable damage. Once pins are damaged it may be necessary to replace the system board. CAUTION: The heat sink must be installed within 24 hours of installing the processor to prevent damage to the processor’s solder connections.
-
Page 67: Graphics Board
Graphics Board Description Spare part number Graphics card, G210, 512 MB 621426-001 Graphics card, HD5570, 1 GB 628380-001 The graphics board is located under the bottom part of the heat sink. You must remove the heat sink to remove the graphics board. The board is secured with two screws. Figure 7-22 Graphics board location To remove the graphics board:... - Page 68 Rotate the outer side of the board upward (2), and then remove it at an angle (3). Figure 7-23 Removing the graphics board To install the graphics board, reverse the removal procedures. NOTE: Graphics boards are designed with a notch to prevent incorrect insertion. Chapter 7 Removal and Replacement Procedures All-in One (AIO) Chassis...
-
Page 69: I/O Panel
I/O Panel The I/O panel is secured with two screws. Figure 7-24 I/O panel location To remove the I/O panel: Prepare the computer for disassembly (see Preparing to Disassemble the Computer on page 38). Remove the small rear cover (see Small Rear Cover on page 39). - Page 70 Lift the panel from the computer (2). Figure 7-25 Removing the I/O panel Remove the panel from the computer. To replace the panel, reverse the removal procedures. Chapter 7 Removal and Replacement Procedures All-in One (AIO) Chassis...
-
Page 71: Tv Tuner Module
TV Tuner Module Description Spare part number HP TV tuner 613990-001 TV tuner module for use in the Asia-Pacific region 621424-001 TV tuner module for use in Hong Kong and the People’s Republic of China 621423-001 The TV tuner module is located on the right side of the computer just above the I/O panel. The module is secured with one screw and has one antenna. - Page 72 Lift the module to a 45-degree angle, and then remove it from the system board (3). Figure 7-27 Removing the TV tuner module To install a TV tuner module, reverse the removal procedures. NOTE: TV tuner modules are designed with a notch to prevent incorrect insertion. Chapter 7 Removal and Replacement Procedures All-in One (AIO) Chassis...
-
Page 73: Cable Connector
Cable Connector The cable connector is located toward the bottom, right side of the computer. It is secured with two screws and had one antenna cable that also connects to the TV tuner module. Figure 7-28 Cable connector location To remove the cable connector: Prepare the computer for disassembly (see Preparing to Disassemble the Computer on page... - Page 74 Lift the cable connector from the computer. Figure 7-29 Removing the cable connector To install the cable connector, reverse the removal procedures. Chapter 7 Removal and Replacement Procedures All-in One (AIO) Chassis...
-
Page 75: Wlan Module
WLAN Module Description Spare part number WLAN module (802.11b/g/n) 593897-001 The WLAN module is located on the lower right side of the computer. The module is secured with one screw and has two connected antennas. Figure 7-30 WLAN module location To remove the WLAN module: Prepare the computer for disassembly (see Preparing to Disassemble the Computer... - Page 76 Lift the module to a 45-degree angle, and then remove it from the system board (3). Figure 7-31 Removing the WLAN module To install the WLAN module, reverse the removal procedures. NOTE: WLAN modules are designed with a notch to prevent incorrect insertion. Chapter 7 Removal and Replacement Procedures All-in One (AIO) Chassis...
-
Page 77: Outer/Left Rear Panel
Outer/Left Rear Panel The outer/left rear panel is secured with two screws. You must pry it off at the seams around the edges of the computer. To remove the outer/left rear panel: Prepare the computer for disassembly (see Preparing to Disassemble the Computer on page 38). - Page 78 Using a wedge-type tool, insert the tool in the seams on the sides of the computer and work your way around, loosening the tabs that secure the front of the computer to the rear. Figure 7-33 Removing the outer/left rear panel Remove the panel from the computer.
-
Page 79: Display Control Board
Display Control Board The display control board is mounted on its side on the left side of the computer. It is secured with two screws and has one connector. Figure 7-34 Display control board location To remove the display control board: Prepare the computer for disassembly (see Preparing to Disassemble the Computer on page... - Page 80 Disconnect the cable from the board (2). NOTE: Be careful not to damage the cable when disconnecting it from the board. Do not pull on the wires. Figure 7-35 Removing the display control board Remove the board from the computer. To install the display control board, reverse the removal procedures.
-
Page 81: Power Button Board
Power Button Board The power button board is located on the bottom left side of the computer. It is secured with three screws and has two connectors. Figure 7-36 Power button board location To remove the power button board: Prepare the computer for disassembly (see Preparing to Disassemble the Computer on page 38). - Page 82 Lift the board as far as the cables allow, and then disconnect the two cables from the board (3). NOTE: Be careful not to damage the cables when disconnecting them from the board. Do not pull on the wires. Figure 7-37 Removing the power button board Remove the board from the computer.
-
Page 83: Inverter Board
Inverter Board The inverter board is located on the left side of the computer. It is secured with two screws and has three connectors. Figure 7-38 Inverter board location To remove the inverter board: Prepare the computer for disassembly (see Preparing to Disassemble the Computer on page 38). - Page 84 Disconnect the three cables from the board (2). NOTE: Be careful not to damage the cables when disconnecting them from the board. Do not pull on the wires. Figure 7-39 Removing the inverter board Remove the inverter board from the computer. To install the inverter board, reverse the removal procedures.
-
Page 85: Optical Drive Connector Board
Optical Drive Connector Board The optical drive connector board is located near the bottom left side of the fan sink. It is secured by two screws and has one connector. Figure 7-40 Optical drive connector board location To remove the optical drive connector board: Prepare the computer for disassembly (see Preparing to Disassemble the Computer on page... - Page 86 Lift the board to gain easier access to the connector, and then disconnect the cable from the board (2). NOTE: Be careful not to damage the cable when disconnecting it from the board. Do not pull on the wires. Figure 7-41 Removing the optical drive connector board Remove the board from the computer.
-
Page 87: Hood Sensor
Hood Sensor The hood sensor is located just below the fan sink. It is secured with one screw and has one connector. Figure 7-42 Hood sensor location To remove the hood sensor: Prepare the computer for disassembly (see Preparing to Disassemble the Computer on page 38). - Page 88 Lift the connector end of the hood sensor, slide the sensor at an angle toward the large fan to remove it from the tab in the holder, and then remove the sensor from the computer (3). NOTE: Be careful not to damage the cable when disconnecting it from the connector. Do not pull on the wires.
-
Page 89: Hard Drive Connector
Hard Drive Connector The hard drive connector is located near the middle of the computer, below the fan. It is secured with two screws and has two connectors. The cables are routed under the metal casing to the system board connectors. Figure 7-44 Hard drive connector location To remove the hard drive connector:... - Page 90 Remove the tape that secures the power cable to the computer, and then pull the cables through the metal casing (3). Figure 7-45 Removing the hard drive connector Remove the hard drive connector from the computer. To install the hard drive connector, reverse the removal procedures. Chapter 7 Removal and Replacement Procedures All-in One (AIO) Chassis...
-
Page 91: Fan
The fan is located near the top of the computer. It is secured with three screws. Figure 7-46 Fan location To remove the fan: Prepare the computer for disassembly (see Preparing to Disassemble the Computer on page 38). Remove the small rear cover (see Small Rear Cover on page 39). - Page 92 Remove the three screws that secure the fan to the computer. Figure 7-47 Removing the fan Lift the fan from the computer. To install the fan, reverse the removal procedures. Chapter 7 Removal and Replacement Procedures All-in One (AIO) Chassis...
-
Page 93: Speakers
Speakers The speakers are located at the bottom of the computer. Two separate speakers are each secured by two screws. The left speaker connects to the right speaker, and the right speaker connects to the system board. Figure 7-48 Speaker location To remove the speakers: Prepare the computer for disassembly (see Preparing to Disassemble the Computer... -
Page 94: System Board Shield
Remove the tape that secures the speaker wires to the computer. Disconnect the speaker cable from the system board connector. NOTE: The speakers can be disconnected from each other. The right speaker connects to the system board. To install the speakers, reverse the removal procedures. System Board Shield The system board shield sits above the system board. - Page 95 Remove the seven screws that secure the shield to the computer. NOTE: Ground cables for the inverter, speaker, and webcam module (circled in yellow in the image) are secured by system board shield screws. If you previously removed these components, these screws have already been removed. Figure 7-50 Removing the system board shield Lift the shield from the computer.
-
Page 96: System Board
System Board Description Spare part number System board 607818-001 The system board is located on the upper right side of the computer (when viewed from the rear). It is secured with nine screws. Figure 7-51 System board location To remove the system board: Prepare the computer for disassembly (see Preparing to Disassemble the Computer on page... - Page 97 Remove the outer/left panel (see Outer/Left Rear Panel on page 69). Remove the WLAN module (see WLAN Module on page 67). Remove the fan (see Fan on page 83). Remove the graphics board (see Graphics Board on page 59). Remove the system board shield (see System Board Shield on page 86).
-
Page 98: Display Panel
Display Panel The display panel is secured with 14 screws. To remove the display panel: Prepare the computer for disassembly (see Preparing to Disassemble the Computer on page 38). Remove the small rear cover (see Small Rear Cover on page 39). - Page 99 Lift the display panel from the computer. Figure 7-53 Removing the display panel To install a display panel, reverse the removal procedures. Display Panel...
-
Page 100: Appendix A Post Error Messages
POST Error Messages This appendix lists the error codes, error messages, and the various indicator light and audible sequences that you may encounter during Power-On Self-Test (POST) or computer restart, the probable source of the problem, and steps you can take to resolve the error condition. POST Message Disabled suppresses most system messages during POST, such as memory count and non-error text messages. -
Page 101: Post Numeric Codes And Text Messages
POST Numeric Codes and Text Messages This section covers those POST errors that have numeric codes associated with them. The section also includes some text messages that may be encountered during POST. NOTE: The computer will beep once after a POST text message is displayed on the screen. Table A-1 Numeric Codes and Text Messages Control panel message... - Page 102 Table A-1 Numeric Codes and Text Messages (continued) Control panel message Description Recommended action 163-Time & Date Not Set Invalid time or date in configuration Reset the date and time under Control memory. Panel (Computer Setup can also be used). If the problem persists, replace the RTC RTC (real-time clock) battery may need to battery.
- Page 103 Table A-1 Numeric Codes and Text Messages (continued) Control panel message Description Recommended action 301-Keyboard Error Keyboard failure. Reconnect keyboard with computer turned off. Check connector for bent or missing pins. Ensure that none of the keys are depressed. Replace keyboard. 303-Keyboard Controller Error I/O board keyboard controller.
- Page 104 Table A-1 Numeric Codes and Text Messages (continued) Control panel message Description Recommended action 1720-SMART Hard Drive Detects Imminent Hard drive is about to fail. (Some hard Determine if hard drive is giving correct Failure drives have a hard drive firmware patch that error message.
- Page 105 Table A-1 Numeric Codes and Text Messages (continued) Control panel message Description Recommended action 2201-MEBx Module did not checksum Memory error during POST execution of the Reboot the computer. correctly Management Engine (ME) BIOS Extensions Unplug the power cord, re-seat the option ROM.
- Page 106 Table A-1 Numeric Codes and Text Messages (continued) Control panel message Description Recommended action 2218-ME Firmware Version should be ME firmware must be updated to match Update to the latest ME firmware updated current functionality contained in the system version. BIOS.
- Page 107 Table A-1 Numeric Codes and Text Messages (continued) Control panel message Description Recommended action 2232-AMT error during MEBx execution Error occurred during MEBx execution Reboot the computer. which fails into “AMT” grouping. If the error persists, update to the latest BIOS version and ME firmware version.
-
Page 108: Interpreting Post Diagnostic Front Panel Leds And Audible Codes
Interpreting POST Diagnostic Front Panel LEDs and Audible Codes This section covers the front panel LED codes as well as the audible codes that may occur before or during POST that do not necessarily have an error code or text message associated with them. WARNING! When the computer is plugged into an AC power source, voltage is always applied to the system board. - Page 109 Table A-2 Diagnostic Front Panel LEDs and Audible Codes (continued) Activity Beeps Possible Cause Recommended Action Red Power LED flashes four Power failure (power Open the hood and ensure the 4 or 6-wire times, once every second, supply is overloaded). power supply cable is seated into the followed by a two second connector on the system board.
- Page 110 Table A-2 Diagnostic Front Panel LEDs and Audible Codes (continued) Activity Beeps Possible Cause Recommended Action Red Power LED flashes eight Invalid ROM based on Reflash the system ROM with the latest times, once every second, bad checksum. BIOS image. followed by a two second Replace the system board.
- Page 111 Table A-2 Diagnostic Front Panel LEDs and Audible Codes (continued) Activity Beeps Possible Cause Recommended Action Red Power LED flashes The current processor Install a TXT capable processor. eleven times, once every does not support a Disable TXT in the Computer Setup (F10) second, followed by a two feature previously utility.
-
Page 112: Appendix B Connector Pin Assignments
Connector Pin Assignments This appendix contains the pin assignments for many computer and workstation connectors. Some of these connectors may not be used on the product being serviced. Ethernet BNC Connector and Icon Signal Data Ground Connector and Icon Signal +5 VDC - Data + Data... -
Page 113: Headphone
Headphone Connector and Icon (1/8” miniphone) Signal 1 (Tip) Audio_left 2 (Ring) Power_Right 3 (Shield) Ground Line-in Audio Connector and Icon (1/8” miniphone) Signal 1 (Tip) Audio_In_Left 2 (Ring) Audio_In_Right 3 (Shield) Ground Line-out Audio Connector and Icon (1/8” miniphone) Signal 1 (Tip) Audio_Out_Left... -
Page 114: Appendix C Power Cord Set Requirements
Power Cord Set Requirements The power supplies on some computers have external power switches. The voltage select switch feature on the computer permits it to operate from any line voltage between 100-120 or 220-240 volts AC. Power supplies on those computers that do not have external power switches are equipped with internal switches that sense the incoming voltage and automatically switch to the proper voltage. -
Page 115: Country-Specific Requirements
Country-Specific Requirements Additional requirements specific to a country are shown in parentheses and explained below. Country Accrediting Agency Country Accrediting Agency Australia (1) EANSW Italy (1) Austria (1) Japan (3) METI Belgium (1) CEBC Norway (1) NEMKO Canada (2) Sweden (1) SEMKO Denmark (1) DEMKO... -
Page 116: Appendix D Specifications
Specifications All-in One Models Table D-1 Specifications Desktop Dimensions 16.9 in 42.9 cm Height 21.5 in 54.6 cm Width 2.6 in 6.6 cm Depth Approximate Weight 18.2 lb 8.25 kg Temperature Range 41° to 95°F 5° to 35°C Operating -22° to 149°F -30°... -
Page 117: Index
Index heat sink assembly AC adapter display panel spare part number 32, 37 spare part numbers 33, 37 removing 90 hood sensor audible codes 100 DisplayPort to HDMI cable removing 79 spare part number 34, 37 DVD±RW SuperMulti DL Drive battery I/O panel with LightScribe... - Page 118 port cover 40 opening the computer 38 power button board 73 tamper-proof screws operating guidelines 27 preparing to disassemble the tool 30 optical drive computer 38 temperature control 27 removing 42 small fan 55 thermal module spare part numbers 34, 35 small rear cover 39 removing 56 optical drive connector board...