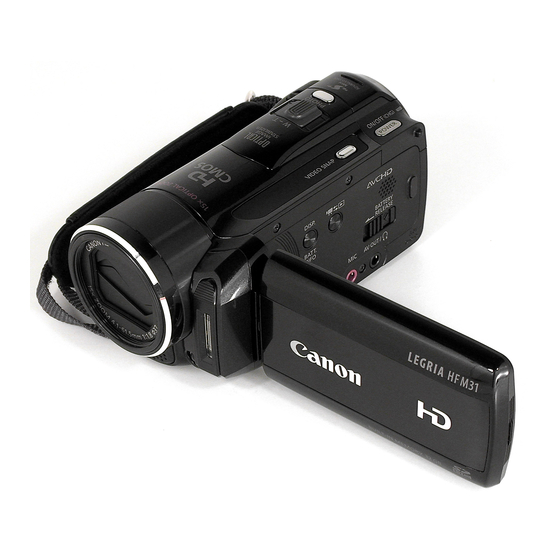
Canon VIXIA HF M30 Quick Manual
Hd camcorder
Hide thumbs
Also See for VIXIA HF M30:
- Quick manual (279 pages) ,
- Instruction manual (66 pages) ,
- Manual (26 pages)
Table of Contents
Advertisement
Advertisement
Chapters
Table of Contents
Troubleshooting

Related Manuals for Canon VIXIA HF M30


Summary of Contents for Canon VIXIA HF M30
-
Page 56: Instruction Manual
PUB. DIE-0367-000 HD Camcorder Instruction Manual... -
Page 57: Important Usage Instructions
Unauthorized recording of copyrighted materials may infringe on the rights of copyright owners and be contrary to copyright laws. HD Camcorder, VIXIA HF M30 A / VIXIA HF M31 A / VIXIA HF M32 A / VIXIA HF M300 A systems This device complies with Part 15 of the FCC Rules. - Page 58 The Mains plug is used as the disconnect device. The Mains plug shall remain readily operable to disconnect the plug in case of an accident. CAUTION: • Danger of explosion if the wrong type of batteries are attached. Use only the same type of batteries.
-
Page 59: Important Safety Instructions
IMPORTANT SAFETY INSTRUCTIONS In these safety instructions the word “product” refers to the Canon HD Camcorder VIXIA HF M30 A / VIXIA HF M31 A / VIXIA HF M32 A / VIXIA HF M300 A and all its accessories. Read these instructions. - Page 60 Placing or Moving — Do not place on an unstable cart, stand, tripod, bracket or table. The product may fall, causing serious injury to a child or adult, and serious damage to the product. A product and cart combination should be moved with care. Quick stops, excessive force, and uneven surfaces may cause the product and cart combination to overturn.
- Page 61 Replacement Parts — When replacement parts are required, be sure the service technician has used replacement parts that are specified by Canon or that have the same characteristics as the original part. Unauthorized substitutions may result in fire, electric shock or other hazards.
- Page 62 Model Name: VIXIA HF M30 A / VIXIA HF M31 A / VIXIA HF M32 A / VIXIA HF M300 A Date of Purchase: Serial No.:...
-
Page 63: Exciting Features And New Functions
(0 39). “Full HD 1080” refers to Canon camcorders compliant with high-definition video composed of 1,080 vertical pixels (scanning lines). Video is recorded at this resolution only when the recording mode is set to MXP or FXP mode. -
Page 64: Video Snapshot
Smart AUTO (0 43) Smart AUTO automatically selects the best scene mode for the scene you want to shoot. You get spectacular recordings every time without worrying about settings. Just point the camcorder and it will automatically select the best settings for your subject Video Snapshot (0 68) - Page 65 Enjoying your Recordings on Other Devices AVCHD discs Photo DVDs Connect the camcorder to the optional DW-100 DVD Connect the camcorder Burner (0 131, 135) to an HDTV (0 124) AVCHD-compatible HDTVs and Play video directly digital recorders with a card slot from your recorded compatible with the type of memory card...
-
Page 67: Table Of Contents
Table of contents „ Introduction Exciting Features and New Functions About this Manual Getting to Know the Camcorder Supplied Accessories and CD-ROMs Names of Parts „ Preparations Getting Started Charging the Battery Pack Preparing the Accessories Adjusting the Position and Brightness of the LCD Screen Basic Operation of the Camcorder Using the Touch Screen Operating Modes... - Page 68 „ Dual Shot Mode Basic Recording Shooting Video and Taking Photos in Dual Shot Mode About the Smart AUTO mode Zooming Quick Start Function „ Video Basic Playback Playing Back the Video The Index Selection Screen: Selecting the Content to Play Back 3D Flip View Narrowing Down the Scenes Shown in the Index Screen...
- Page 69 Using the Mini Advanced Shoe Using an External Microphone Using a Zoom Remote Controller Selecting the Playback Starting Point Playing Back Scenes Set to Background Music Onscreen Displays and Data Code Playlist and Scene Operations Editing the Playlist: Adding, Deleting, Moving and Playing Back Capturing Photos and Video Snapshot Scenes from a Movie...
- Page 70 „ External Connections 121 Terminals on the Camcorder Connection Diagrams 124 Playback on a TV Screen 126 Saving and Sharing Your Recordings Copying Recordings to a Memory Card Saving Recordings on a Computer Saving Movies onto High-Definition Discs (AVCHD/Blu-ray Discs) Saving Movies onto Standard-Definition Discs (DVD) Saving Photos on Photo DVDs...
-
Page 71: About This Manual
About this Manual Thank you for purchasing the Canon VIXIA HF M32 / VIXIA HF M31 / VIXIA HF M30 / VIXIA HF M300. Please read this manual carefully before you use the camcorder and retain it for future reference. Should your camcorder fail to operate correctly, refer to Troubleshooting (0 168). - Page 72 indicates that a function is available in the Brackets [ ] are used to refer to operating mode indicated and indicates control buttons and menu options that the function is not available. For a detailed you will touch on the screen and to explanation refer to Operating Modes (0 31).
-
Page 73: Getting To Know The Camcorder
Getting to Know the Camcorder Supplied Accessories and CD-ROMs The following accessories are supplied with the camcorder: XCA-570 Compact Power Adapter (incl. power cord) BP-808 Battery PackW XWL-D89 Wireless Controller (incl. CR2025 lithium button battery) STV-250N Stereo Video CableW Yellow • Red • White plugs XCTC-100/S Component Cable Red •... - Page 74 The following CD-ROMs and software are supplied with the camcorder: • PIXELA Application - Disc 1 CD-ROM* and ‘PIXELA Applications’ Installation Guide - ImageMixer 3 SE Transfer Utilities – Software for saving and transferring movies and music files you can use as background music. •...
-
Page 75: Names Of Parts
Names of Parts Left side view 1 DISP. (onscreen display) button (0 93)/ BATT. INFO button (0 167) 2 2 (camera/play) button (0 31) 3 Speaker (0 51) 4 Memory card slot cover 5 Memory card slot (0 38) 6 MIC terminal (0 85) 7 AV OUT terminal (0 121, 123)/ X (headphones) terminal (0 82) 8 BATTERY RELEASE switch (0 24) - Page 76 Top view A l Mini advanced shoe (0 83) S q Mode switch (0 31) S a PHOTO button (0 42, 104) S s Zoom lever (0 46) S d VIDEO SNAP (video snapshot) button (0 68) S f POWER button S g ON/OFF (CHG) (charge) indicator: Green –...
- Page 77 Bottom view D s Serial number D d Tripod socket (0 187) Wireless Controller WL-D89 1 START/STOP button (0 42, 58) 2 b (index selection) button (0 52) Press and hold for more than 2 seconds to switch between shooting and playback mode.
-
Page 78: Getting Started
Preparations This chapter describes basic operations, such as using the touch panel, navigating the menus, and first time settings to help you learn more about your camcorder. Getting Started Charging the Battery Pack The camcorder can be powered with a battery pack or directly using the compact power adapter. - Page 79 5 Charging will start when the ON/OFF (CHG) (charge) indicator camcorder is turned off. • If the camcorder was on, the green ON/OFF (CHG) indicator will go out when you turn off the camcorder. After a moment, the ON/OFF (CHG) indicator will start flashing in red (battery pack charging).
- Page 80 • To prevent equipment breakdowns and excessive heating, do not con- nect the supplied compact power adapter to voltage converters for overseas travels or special power sources such as those on aircraft and ships, DC-AC inverters, etc. NOTES • The battery pack will be charged only when the camcorder is off. •...
-
Page 81: Preparing The Accessories
Preparing the Accessories Wireless Controller First, insert the supplied CR2025 lithium button battery into the wire- less controller. 1 Press the tab in the direction of the arrow and pull out the battery holder. 2 Place the lithium button battery with the + side facing up. - Page 82 Grip Belt and Straps Fasten the grip belt. Adjust the grip belt so that you can reach the zoom lever with your index finger, and the g button with your thumb. To remove the grip belt 1 Lift the padded handgrip's flap and detach the strap from the Velcro pad.
-
Page 83: Adjusting The Position And Brightness Of The Lcd Screen
To attach an optional wrist strap Pass the attaching end of the wrist strap through the rear bracket on the camcorder, thread the wrist strap through the loop and fasten. You can also attach the wrist strap to the strap mount on the grip belt to use both for extra convenience and protection. - Page 84 180° 180° 90° Subject can monitor the LCD screen NOTES • About the LCD screen: The screen is produced using extremely high-pre- cision manufacturing techniques, with more than 99.99% of the pixels operating to specification. Less than 0.01% of the pixels may occasion- ally misfire or appear as black, red, blue or green dots.
-
Page 85: Basic Operation Of The Camcorder
Basic Operation of the Camcorder Using the Touch Screen The control buttons and menu items that appear on the touch screen change dynamically depending on the operating mode and the task you are performing. With the intuitive touch screen interface you have all the controls at your fingertips. -
Page 86: Operating Modes
Operating Modes Recording When recording video or photos, the camcorder’s operating mode is determined by the position of the mode switch and the onscreen con- trol buttons. Operating Mode switch Onscreen icon Operation mode Dual Shot Record video and take photos easily, letting the camcorder take care of all the settings –... -
Page 87: Using The Menus
NOTES • When switching to a playback mode, the memory selected for playback will be the same currently used for recording. • You can also press and hold B on the wireless controller for more than 2 seconds to switch between recording and playback mode. Using the Menus Many of the camcorder’s functions can be adjusted from the FUNC. - Page 88 Example of the Edit panel in mode Touch the control button of the desired operation The Setup Menus mode only: Touch [FUNC.] 2 Touch [MENU] to open the setup menus. 3 Touch the tab of the desired menu. 4 Drag your finger up and down along the scroll bar to bring the setting you want to change into the orange selection bar.
-
Page 89: First Time Settings
First Time Settings Setting the Date and Time You will need to set the date and time of the camcorder before you can start using it. The [Date/Time] screen will appear automatically when the cam- corder’s clock is not set. When the [Date/Time] screen appears, the year will be selected. -
Page 90: Changing The Language
Changing the Language The default language of the camcorder is English. You can set it to one of 22 other languages. Operating modes: [Language a] [FUNC.]* [MENU] Desired language * Only when performing the procedure in a recording mode. NOTES •... -
Page 91: Using A Memory Card
Using a Memory Card Memory Cards Compatible for Use with the Camcorder You can use commercially available Secure Digital (SD) cards with this camcorder. However, depending on the memory card, you may not be able to record movies. Refer to the table below. As of May 2010, the movie recording function has been tested using SD/SDHC memory cards made by Panasonic, Toshiba and SanDisk. - Page 92 SDXC Memory Cards As of May 2010, SDXC memory cards have been tested to work under Windows 7. For details on whether your computer's operating system is SDXC-compatible, check with your computer's manufacturer. IMPORTANT • If you use an SDXC memory card with a computer OS that is not SDXC- compatible, you may be prompted to format the memory card.
-
Page 93: Inserting And Removing A Memory Card
Inserting and Removing a Memory Card Make sure to initialize (0 40) all memory cards before using them with this camcorder. 1 Turn off the camcorder. Make sure the indicator ON/OFF (CHG) is off. 2 Open the memory card slot cover. 3 Insert the memory card straight, with the label facing up, all the way into the memory card slot until it... -
Page 94: Relay Recording Of Movies
POINTS TO CHECK • Be sure you understand the information provided in Eye-Fi Cards (0 37) before using an Eye-Fi card. [FUNC.] [MENU] [Rec Media for Movies] or [Rec Media for Photos] [f] (built-in memory)or [g] (memory card)* * When selecting the memory, you can check the approximate available recording time/number of photos, based on currently used settings. -
Page 95: Initializing The Memory
NOTES • Any of the following actions will deactivate the relay recording function: - Turning off the camcorder. - Opening the memory card slot cover. - Changing the position of the mode switch. - Changing the camcorder's operating mode. - Selecting the memory card as the memory for recording movies. Initializing the Memory Initialize memory cards when you use them with this camcorder for the first time. - Page 96 * Touch this option if you want to physically erase all the data rather than just clear the file allocation table of the memory. ** If you selected the [Complete Initialization] option, you can touch [Cancel] to cancel the initialization while it is in progress. All recordings will be erased and the memory can be used without any problem.
-
Page 97: Basic Recording
Dual Shot Mode This chapter covers how to easily record video and photos in the all-automatic Dual Shot mode, and how to use basic shoot- ing functions like zoom and Quick Start. To enjoy full access to menus and more advanced functions, refer to the relevant chapters for video (0 58) and photos (0 104). -
Page 98: About The Smart Auto Mode
When you have finished recording 1 Make sure that the ACCESS indicator is off. 2 Turn off the camcorder. 3 Close the LCD panel. About Dual Shot • Only the following functions are available in mode. - Zoom (0 46). - Quick Start (0 47). - Page 99 Smart AUTO icons Background o Bright Blue skies Vivid colors Sunsets (color of the icon) (grey) (light blue) (green/red) (orange) Subject p People (stationary) — People (moving) — Subjects other than people, such as landscapes Close objects — The icon in parentheses appears under backlight conditions. Background o Dark (dark blue)
- Page 100 • Be sure to save your recordings regularly (0 126), especially after making important recordings. Canon shall not be liable for any loss or corruption of data. • When recording photos on an Eye-Fi card, photos will be uploaded automatically if you are within the range of a configured network. Always verify that Eye-Fi cards have been approved in the country/region of use.
-
Page 101: Zooming
Zooming Operating modes: There are three ways you can zoom in and out: using the zoom lever on the camcorder, using the zoom buttons on the wireless controller or using the zoom controls on the touch screen. In addition to the 15x optical zoom*, in mode, you can turn on the 300x digital zoom with the 7 [Digital Zoom] setting. -
Page 102: Quick Start Function
2 Touch the zoom controls to operate the zoom. Touch anywhere within the Q area to zoom out or anywhere within the P area to zoom in. Touch closer to the center for a slow zoom; touch closer to the e/d icons for faster zooms. - Page 103 2 When you wish to resume recording, open the LCD panel. The ON/OFF (CHG) indicator turns back green and the camcorder is ready to record. IMPORTANT • Do not disconnect the power source during standby mode (while the ON/OFF (CHG) indicator is lit in orange). NOTES •...
-
Page 104: Basic Playback
Video This chapter covers functions related to movies, including play- back, advanced shooting, advanced functions and playlist and scene operations. For details about basic video shooting, refer to Dual Shot Mode (0 42). Basic Playback Playing Back the Video Operating modes: 1 Press S. - Page 105 A Memory being read B Index screen currently displayed C Drag your finger left for the next index page* D Drag your finger right for the previous index page* E Select a different index screen to read different content or from a different memory ( only) (0 52) F Scene's timeline (0 87) and recording information...
- Page 106 A Stop the playback. B Jump to the beginning of the scene. Double-tap to jump to the previous scene. C Pause the playback. D Drag your finger left and right along the volume bar to adjust the volume. E Touch anywhere else to hide the playback controls. F Fast playback backward*.
-
Page 107: The Index Selection Screen: Selecting The Content To Play
IMPORTANT • Observe the following precautions while the ACCESS indicator is on or flashing. Failing to do so may result in permanent data loss. - Do not open the memory card slot cover. - Do not disconnect the power source or turn off the camcorder. - Do not change the camcorder’s operating mode. - Page 108 Touch the tab of the desired memory: built- in memory or memory card. B Touch a control button to select the content you want to play back. Options [Original] Original movies as you recorded them. [Playlist] Scenes that were added to the playlist (0 94) and may have been rearranged to your liking.
-
Page 109: D Flip View
3D Flip View 3D Flip View is a fun way to display your video recordings (original scenes) in a 3D layout, organized by recording date. In any index screen, touch [b] [3D Flip View]. During single photo view, touch the screen once to display the controls then touch [Q] to open the [Photos] index screen. -
Page 110: Narrowing Down The Scenes Shown In The Index Screen
Narrowing Down the Scenes Shown in the Index Screen From the [Original] index screen, you can narrow down the scenes shown, leaving only scenes that were recorded on a specific date or only those scenes in which people's faces were detected. Operating modes: Showing Only Scenes that Contain People’s Faces This will narrow down the scenes shown in the [Original] index screen,... -
Page 111: Deleting Scenes
2 Open the calendar screen. [y All Scenes] [Scenes by Date] • Dates that contain scenes (that is, movies were recorded on that date) appear in black against a silver background. Dates without recordings appear grayed out. • Touch [y] or [A] to jump to the previous/next calendar month that contains recordings. - Page 112 3 Touch on the individual scenes you want to delete. • A checkmark O will appear on scenes selected. Touch a selected scene again to remove the checkmark. • To select all the scenes at once: Touch [Select All] instead of touching individual scenes.
-
Page 113: Advanced Functions
- Do not disconnect the power source or turn off the camcorder. - Do not change the camcorder’s operating mode. • Be sure to save your recordings regularly (0 126), especially after making important recordings. Canon shall not be liable for any loss or corruption of data. Š... -
Page 114: Selecting The Video Quality (Recording Mode
NOTES • The zoom, Quick Start function, power saving modes, etc. operate the same way in mode as in mode. For details, refer to Dual Shot Mode (0 42). Selecting the Video Quality (Recording Mode) The camcorder offers 5 recording modes. Changing the recording mode will change the recording time available on the memory. -
Page 115: Special Scene Recording Programs
Approximate recording times Default value Recording mode o Memory p 4 GB 20 min. 30 min. 40 min. 1 hr. 1 hr. 10 min. 30 min. Memory card 8 GB Memory card/ 40 min. 1 hr. 1 hr. 2 hr. - Page 116 Options Default value) Portrait] The camcorder uses a large aper- ture, to achieve a sharp focus on the subject while blurring the background. Sports] To record sports scenes such as tennis or golf. Night Scene] To record nightscapes with lower noise.
- Page 117 Fireworks] To record fireworks. Underwater] To record underwater scenes in natural colors. Surface] To record after getting out of the water, such as on a boat after diving. NOTES • [F Portrait]/[G Sports]/[I Snow]/[J Beach]: The picture may not appear smooth during playback. •...
-
Page 118: Cinema Mode: Giving A Cinematic Look To Your
recordings while on land, we recommend using the [s Surface] recording program. - To switch the recording program between [r Underwater] and [s Surface] while the camcorder is in the waterproof case, turn on the camcorder while holding pressed down. - p will appear on the screen when the camcorder's temperature becomes too high. -
Page 119: Advanced Image Stabilization
Operating modes: To change the frame rate [FUNC.] [MENU] [Frame Rate] [E PF24] Advanced Image Stabilization The image stabilizer reduces camcorder blur (blur due to the cam- corder moving) so you can get nice, stable shots. Select the image sta- bilization mode according to the shooting conditions. -
Page 120: Pre-Recording
Powered IS When shooting video, you can use Powered IS to make the image stabilization even more powerful. Powered IS is most effective when you are stationary and zooming in on far subjects using high zoom ratios (the more you approach the telephoto end). Holding the LCD panel with your left hand will add to the stability of the shot. -
Page 121: Face Detection
1 Activate the pre-recording function. [FUNC.] [d Pre REC] [A On] • d appears. • Repeat, selecting [B Off], to turn off pre-recording. 2 Press g. The scene recorded in the memory will start 3 seconds before g was pressed. NOTES •... - Page 122 POINTS TO CHECK • Select a recording program other than [q Night Scene], [p Low Light], [M Fireworks] or [r Underwater]. By default, face detection is activated. If the function was turned off, per- form the following procedure to turn it on. [FUNC.] [MENU] [A On o]...
-
Page 123: Touch & Track
Touch & Track When recording people, face detection will track the main subject and keep it always in focus. But also when recording other moving subjects such as your pet, a moving vehicle or people not facing the camera directly, you can use Touch & Track to keep your subject in focus at all times. -
Page 124: Digital Effects
1 Press z. • A blue border appears on the screen. • Press z again to return to normal video recording mode. 2 Press • By default, the camcorder records for about 4 seconds (the blue frame serves as a visual progress bar) and then automatically returns to record pause mode. -
Page 125: Manually Setting The Shutter Speed Or Aperture
To fade in/out Press g in record pause mode (M) to start recording with a fade in. Press g while recording ( ) to fade out and pause the recording. Options Default value) Off] Select this setting when you do not intend to use the dig- ital effects. - Page 126 [FUNC.] [Rec. Programs] [B Shutter-Pri. AE] or [C Aperture-Pri. AE] Drag your finger left and right along the dial to set the desired shutter speed (B) or aperture value (C) Options Default value) [A Programmed AE] The camcorder automatically adjusts the aperture and shutter speed to obtain the optimal exposure for the subject.
- Page 127 Shutter Speed and Aperture Value Guidelines XWith slower shutter speed you can add a nice motion blur and sense of movement. With faster shutter speeds you can “freeze the action” for powerful images of moving subjects.W mode A mode 1/15 1/30 1/60 1/100...
-
Page 128: Manual Exposure Adjustment
Manual Exposure Adjustment At times, backlit subjects may appear too dark (underexposed) or sub- jects under very strong lights may appear too bright or glaring (overex- posed). To correct this, you can adjust the exposure manually or use the Touch AE function to automatically set the optimal exposure for the subject you select. -
Page 129: Automatic Gain Control (Agc) Limit
NOTES • If the recording program is changed during exposure lock, the cam- corder will return to automatic exposure. • When shooting subjects with a strong light source behind them, the camcorder automatically corrects for the backlight. You can turn off the automatic backlight correction with the 7/8 [Auto Backlight Correction] setting. - Page 130 POINTS TO CHECK • Adjust the zoom before you start the procedure. 1 Open the manual focus screen. [FUNC.] [X Focus] 2 Touch a subject that appears inside the X frame. • The Touch AF mark (P) will flash and the focusing distance will be adjusted automatically.
-
Page 131: White Balance
White Balance The white balance function helps you to accurately reproduce colors under different lighting conditions so that white objects will always look truly white in your recordings. Operating modes: POINTS TO CHECK • Select a recording program other than the Special Scene recording pro- grams. -
Page 132: Image Effects
NOTES • When you select the custom white balance: - Set 7 [Digital Zoom] to [B Off]. - Reset the white balance when you change locations or the lighting or other conditions change. - Depending on the light source, g may keep flashing. The result will still be better than with [Y Automatic]. -
Page 133: Mini Video Light
Options Default value) [U Off] Records with no image enhancing effects. [V Vivid] Emphasizes the contrast and color saturation. [W Neutral] Tones down the contrast and color saturation. [X Low Sharpening] Records subjects with softened outlines. [Y Soft Skin Detail] Softens the details in the skin tone area for a more complimentary appearance. -
Page 134: Self Timer
NOTES • We recommend not using the mini video light while the optional Wide- converter or Tele-converter is attached; its shadow can appear on the screen. Using an External Video Light You can use the optional VL-5 Video Light or VFL-2 Video Flash Light when you need a video light that is stronger than the built-in mini video light. -
Page 135: Audio Recording Level
mode: Press j, first halfway to activate the autofocus and then fully. The camcorder will record the photo after a 10-second countdown*. The countdown appears on the screen. * 2 seconds when using the wireless controller. NOTES • Once the countdown has begun, any of the following actions will cancel the self timer. - Page 136 Manual audio level adjustment Audio level indicator Current audio level Audio level adjustment bar 2 Touch and hold [y] or [A] to adjust the audio recording level as necessary. As a guideline, adjust the audio recording level so that the audio level meter will go to the right of the -12 dB mark (yellow area) only occasionally.
-
Page 137: Using Headphones
Using Headphones Use headphones for playback or to check the audio level while record- ing. The headphones are connected to the AV OUT/X terminal, which is used for both the headphones and the audio/video output. Before connecting the headphones, follow the procedure below to change the function of the terminal from AV output to X (headphones) output. -
Page 138: Using The Mini Advanced Shoe
IMPORTANT • When using headphones, make sure to lower the volume to an appro- priate level. • Do not connect the headphones to the AV OUT/X terminal if the J icon does not appear on the screen. The noise output in such case may be harmful to your hearing. -
Page 139: Using An External Microphone
NOTES • Accessories designed for the Advanced Accessory Shoe cannot be used with this camcorder. Look for video accessories bearing this logo to ensure compatibility with the mini advanced shoe. Using an External Microphone When recording in very quiet surroundings, the built-in microphone may pick up the sound of the camcorder's internal machinery. -
Page 140: Using A Zoom Remote Controller
Using other microphones You can also use commercially avail- able microphones. Connect the exter- nal microphone to the MIC terminal. Use commercially available condenser microphones with their own power supply. You can connect almost any stereo microphone with a ‡ 3.5 mm plug but audio recording levels may vary. - Page 141 Attach the optional RA-V1 Remote Control Adapter to the mini advanced shoe. Refer to Using the Mini Advanced Shoe (0 83). appears. For details about using the adapter, refer to the instruction manual of the RA-V1. For details about using the zoom remote controller, refer to the instruction manual of the ZR-2000 or ZR-1000.
-
Page 142: Selecting The Playback Starting Point
Selecting the Playback Starting Point If you have a very long scene, you may want to start playing back the scene from a certain point. You can use the movie timeline to break the scene to segments at fixed time intervals ranging from 6 seconds to 6 minutes. - Page 143 A Touch twice to return to the index screen. B Previous/next scene. C Drag your finger left along the ruler to display the next 5 frames. D Current scene / Total number of scenes. E Scene's recording mode and length. F Recording date and time.
-
Page 144: Playing Back Scenes Set To Background Music
Playing Back Scenes Set to Background Music You can play back video snapshot scenes, scenes in the playlist and photo slideshows set to background music (instead of the original sound). You can use one of the supplied music tracks or connect an external audio player to use your favorite songs as background music. - Page 145 A Select the desired music track. B Play back the original sound (no background music). C Delete the music track selected. D Listen to the music track selected. Touch again (B) to stop the playback. 3 Back in the index screen, touch a scene to start the playback set to the selected music track.
- Page 146 2 Activate the external audio input. y / z [MENU] [External Audio Input] [A On 3 Connect the external player to the camcorder's MIC terminal. 4 Adjust the audio input as necessary. • Start the music playback on the external player and adjust its volume according to the onscreen indications.
- Page 147 NOTES • You can also add to the playlist just the video snapshot scenes you want to watch and arrange their playback order. • Initializing a memory card will permanently erase any music files you may have transferred to the card. ( The music files that come pre-installed in the built-in memory will be restored after it is initial- ized.)
-
Page 148: Onscreen Displays And Data Code
Onscreen Displays and Data Code You can turn most onscreen displays on or off. Operating modes: Repeatedly press h to turn the onscreen displays on/off in the following sequence: mode: • All displays on • Most displays off mode mode •... -
Page 149: Playlist And Scene Operations
Playlist and Scene Operations Editing the Playlist: Adding, Deleting, Moving and Playing Back Create a playlist to play back only the scenes you prefer and in the order of your choice. You can play back the scenes in the playlist using your favorite song as background music (0 89). - Page 150 • You can copy scenes from the built-in memory to the memory card (0 126) to include in the memory card’s playlist also scenes that were originally recorded in the built-in memory. Deleting Scenes from the Playlist Deleting scenes from the playlist will not affect your original recordings. 1 Open the [Playlist] index screen.
-
Page 151: Capturing Photos And Video Snapshot Scenes From A
A Destination icon. B Move the scene to the position indicated by the destina- tion icon. C Touch an empty box to select it as the destination. D Scene selected to be moved. E Original position of the scene and currently selected des- tination. - Page 152 NOTES • A video snapshot scene can be captured only during playback; it can- not be captured during playback pause mode. • The captured video snapshot scene is saved to the same memory that contains the source scene. • Video snapshot scenes cannot be captured from any of the following types of scenes.
-
Page 153: Dividing Scenes
To capture the photos 1 Play back the scene from which you want to capture the photo. 2 Pause the playback at the point you want to capture. 3 Press j fully. To capture a photo sequence, hold j pressed down. The scene will be played back by frames and each frame captured as a separate photo. - Page 154 2 Select the scene you want to divide and touch it to start playing it back. 3 Pause the playback at the point where you want to divide the scene. 4 Open the scene division screen. [Edit] [Divide] 5 Bring the scene to a precise point, if necessary. •...
-
Page 155: Viewing Photos
Photos Refer to this chapter for details on taking photos (advanced shooting functions), viewing photos and printing them. For details about basic photo shooting, refer to Dual Shot Mode (0 42). Basic Playback Viewing Photos Operating modes: 1 Press S. 2 Open the [Photos] index screen, if it is not displayed. - Page 156 A Memory being read. B Index screen currently displayed. C Drag your finger left for the next index page. D Drag your finger right for the previous index page. E Select a different index screen to read different content or from a different memory ( only) (0 52).
-
Page 157: Deleting Photos
IMPORTANT • Observe the following precautions while the ACCESS indicator is on or flashing. Failing to do so may result in permanent data loss. - Do not open the memory card slot cover. - Do not disconnect the power source or turn off the camcorder. - Do not change the camcorder’s operating mode. - Page 158 3 Touch on the individual photos you want to delete. • A checkmark O will appear on photos selected. Touch a selected photo again to remove the checkmark. • To select all the photos at once: Touch [Select All] instead of touching individual photos.
-
Page 159: Additional Functions
Additional Functions Taking Photos in y Manual Mode Operating modes: 1 Set the mode switch to y. 2 Turn on the camcorder. • By default, photos are recorded in the built-in memory. You can select the memory that will be used to record photos (0 38). •... -
Page 160: Selecting Photo Size And Quality
NOTES • If the subject is not suitable for autofocus, the onscreen icon h turns yellow. Adjust the focus manually (0 74). • When the subject is too bright, [Overexp.] will flash on the screen. In such case, use the optional FS-H37U ND filter. Deleting a Photo Right After Recording It You can delete a photo you have just recorded while reviewing it within the time set for the 8... - Page 161 Options Large capacity memory cards, like those usually used for video record- ing, can contain a very large number of photos. As a reference, the number of photos that can be recorded on a 1 GB memory card is given in the following table. NOTES •...
-
Page 162: Flash
Approximate number of photos available on a 1 GB memory card Default value Memory card Photo quality Photo size p E [Super Fine] G [Normal] [Fine] L 2100x1575 1,265 K 2304x1296 1,390 M 1600x1200 1,075 2,115 H 1920x1080 1,000 1,970 N 640x480... - Page 163 2 Press , first halfway to activate the autofocus and then fully to record the photo. Depending on the setting selected and shooting conditions, the flash will fire. Options Default value) [U Automatic] The flash fires automatically according to the brightness of the subject.
-
Page 164: Drive Mode: Continuous Shooting And Exposure
• About the AF-Assist Lamp: While you press j halfway, if the sur- roundings of the subject are too dark, the mini video light may light up briefly in order to enable the camcorder to focus more accurately (AF- assist lamp). - You can also set 8 [AF-Assist Lamp] to [B Off] so the assist lamp is not activated. - Page 165 Options Default value) [A Single] Records a single photo. [D AE Bracketing] The camcorder records 3 photos using 3 dif- ferent exposures (dark, normal, light in 1/2 EV steps), allowing you to choose the photo you like the best. [B Continuous], [C Hi-Speed Cont.] Captures a series of up to 60 photos as long as you hold j pressed down.
- Page 166 [FUNC.] [MENU] [Simultaneous Recording] Desired photo quality* (top row)** Desired photo size* (bottom row) * The number displayed on the right corner indicates the approximate number of photos that can be recorded with the current quality/size setting. ** Touch [X] if you do not intend to use simultaneous recording. Operating modes: While recording, or in record pause mode, press j to capture the photo.
-
Page 167: Slideshow
Light Metering Mode The camcorder measures the light reflected from the subject in order to calculate the optimal exposure settings. Depending on the subject, you may want to change the way the light is measured and evaluated. Operating modes: POINTS TO CHECK •... -
Page 168: Magnifying Photos During Playback
Slideshow set to a music track 3 Touch the screen to display the playback controls, then touch [A] to play back the slideshow set to the selected music track. Slideshow not linked to the external audio 3 Touch the screen to display the playback controls, then touch [A] to start the slideshow. -
Page 169: Rotating Photos
2 Drag your finger across the photo to display the area you want to see enlarged. To cancel the magnification, move the zoom lever toward Q until the frame disappears. Rotating Photos You can rotate photos 90 degrees to change their orientation. Operating modes: 1 In single photo view, select the photo you want to rotate. -
Page 170: Protecting Photos
The histogram and Exif information panel are displayed as well. Press h to hide the histogram and Exif information panel. The area to the right of the histogram represents highlights and the left side represents shadows. A photo whose histogram skews to the right is relatively bright;... - Page 171 [Edit] [Protect] [Protect]* [OK] * Touch [Remove Protection] to remove the protection from the selected photos. IMPORTANT • Initializing the memory will permanently erase all recordings, including protected photos. r Functions You Can Use when Taking Photos You can also use the following functions... The following functions and features of the camcorder can be used either for shooting video or for taking photos.
-
Page 172: Printing Photos (Direct Print
You can mark in advance the photos you want to print and set the desired number of copies as a print order (0 119). Canon printers: SELPHY printers of the CP, DS and ES series and PIXMA printers carry- ing the PictBridge logo. - Page 173 • Refer also to the printer’s instruction manual. • If you have no intention to use the optional DW-100 DVD Burner, you can set 8 [USB Connection Type] to [N Computer/Printer] so the device type selection screen does not appear every time you con- nect the camcorder to a printer.
-
Page 174: Print Orders
If that option is not available, touch [Stop] and then restart printing from the beginning. • Other printers or if the error still persists with a Canon printer: If printing does not resume automatically, disconnect the USB cable and turn off the camcorder. - Page 175 • The total number of copies in the DPOF print order appears next to the H icon. • To cancel the print order, set the number of copies to 0. 4 Drag your finger left/right to select another photo to mark with a print order or touch [a].
-
Page 176: Terminals On The Camcorder
External Connections This chapter explains how to connect your camcorder to an external device such as a TV, VCR, or computer. Terminals on the Camcorder COMPONENT OUT Terminal* Access: Open the rear terminal cover. The component video terminal is for video only. When you use connection B do not forget the audio connections using the AV OUT/X terminal. -
Page 177: Connection Diagrams
Connection Diagrams In the following connection diagrams, the left side shows the terminals on the camcorder and the right side shows (for reference only) an example of terminals on a connected device. Connection A HDMI Type: Digital Quality: High definition Output only Connect to a high-definition TV (HDTV) with an HDMI input terminal. - Page 178 Connection B Component Video Type: Analog Quality: High Definition Output only Connect to a high-definition TV (HDTV) with component video input terminals. Change the following settings on the camcorder: [AV/Headphones] to [H AV] Blue CTC-100/S Component Cable Green (supplied) White STV-250N Stereo Video Cable (supplied) Connection C...
-
Page 179: Playback On A Tv Screen
Connection D Type: Digital data connection Connect to a computer to save your recordings, to the optional DW-100 DVD Burner to create DVD discs from them, or to a printer to print out photos. USB Cable (supplied) NOTES • Power the camcorder using the compact power adapter and only then connect it to the computer using the supplied USB cable in the follow- ing cases. - Page 180 4 Turn on the camcorder and set it to mode. Play back the movies or photos. NOTES • To correctly play back movies recorded with x.v.Color (0 156) on an HDTV compatible with this standard, additional settings may be required on the connected HDTV. Refer to the TV’s instruction manual. •...
-
Page 181: Saving And Sharing Your Recordings
Saving and Sharing Your Recordings Copying Recordings to a Memory Card You can copy your recordings only one-way: from the built-in memory to the memory card. Scenes and photos will be copied from the index screen you selected to the corresponding index screen on the memory card. - Page 182 Copying a Single Photo Operating modes: 1 In single photo view, select the photo you want to copy. Check that you are viewing photos recorded in the built-in memory. (f appears next to the photo number.) 2 Touch the screen to display the playback controls. 3 Copy the photo.
-
Page 183: Saving Recordings On A Computer
IMPORTANT • Observe the following precautions while the ACCESS indicator is on or flashing. Failing to do so may result in permanent data loss. - Do not open the memory card slot cover. - Do not disconnect the power source or turn off the camcorder. - Do not change the camcorder’s operating mode. - Page 184 Installation See ‘PIXELA Applications’ Installation Guide. Using the software See ‘ImageMixer 3 SE Software Guide’ (PDF file). Saving Photos With the supplied software Photo Application you can save photos to your computer, and easily organize and edit them. Installation Install the software before you connect the camcorder to the computer for the first time.
- Page 185 4 Save the photos onto the computer. r Refer to Downloading Still Images to the Computer. IMPORTANT • When the camcorder is connected to a computer: - Do not open the memory card slot cover and do not remove the memory card.
-
Page 186: Saving Movies Onto High-Definition Discs
• If you connect the camcorder to the computer while it is set to mode, the process of creating scene thumbnails will start automatically. If your intention was to save photos to the computer, you can touch [Skip] to stop the process and use the computer’s Safely Remove Hard- ware function (Windows) or Eject function (Mac OS) to end the connec- tion to the camcorder. - Page 187 3 For original recordings only: Choose whether to add to the disc all the scenes or only scenes that have not been previously added to a disc. When you create the disc from the [Playlist] index screen (including the playlist of video snapshot scenes), the disc will contain the entire playlist.
- Page 188 • When the last disc is finalized, [Task completed] will be displayed. Take out the disc and close the disc tray. When the data requires multiple discs After a disc is finalized, it will be ejected automatically and a message will appear.
- Page 189 Playing back AVCHD discs created with the DW-100 DVD Burner DVD players not AVCHD-compatible compatible DVD players, Blu-ray DW-100 with AVCHD* Disc players AVCHD disc created with the DW-100 (no MXP scenes) * Do not insert a disc into an incompatible device, as you may not be able to eject the disc.
- Page 190 6 Select the scene you want to play back and touch it to start playing it back. IMPORTANT • While the camcorder is connected to the DVD Burner, do not open the memory card slot cover and do not remove the memory card. NOTES •...
- Page 191 Carefully read the information in SDXC Memory Cards (0 37) before performing the procedure using recordings made on an SDXC memory card. Operating modes: Converting Scenes into Standard Definition 1 Power the camcorder using the compact power adapter. 2 Make sure there is a memory card in the camcorder with sufficient available space.
- Page 192 To embed the recording date and time The recording date and time will always be displayed on the converted scene. [Embed Date/Time] [On] To select the bit rate Using a higher bit rate will result in better video quality for the con- verted scenes.
- Page 193 3 Connect the camcorder to the computer using the supplied USB cable. • Connection D. Refer to Connection Diagrams ( 124). • If the device type selection screen appears, touch [Computer/ Printer]. • On the computer, ImageMixer 3 SE will start up automatically and the startup screen (ImageMixer 3 Launcher) will appear.
- Page 194 4 Connect the camcorder to the DW-100 DVD Burner and create the disc. The procedure is the same as that for burning AVCHD discs (0 132). To play back standard-definition DVDs Standard-definition DVDs are created using DVD-Video specifications. Play back these DVDs using standard DVD players. NOTES •...
-
Page 195: Copying Recordings To An External Video Recorder
To play back Photo DVDs Photo DVDs are created using DVD-Video specifications. Play back these DVDs using standard DVD players. If you computer has a DVD drive, you can play back the slideshow as a DVD and you can also access individual photos as JPG files. -
Page 196: Uploading Movies To Video Sharing Web
Recording 1 External device: Load a blank cassette or disc and set the device to record pause mode. 2 Turn on the camcorder and set it to mode. Verify that 6 [AV/Headphones] is set to [H AV]. 3 Camcorder: Locate the scene you wish to copy and pause the playback shortly just before the desired scene. - Page 197 Using the software See ‘ImageMixer 3 SE Software Guide’ (PDF file). Operating modes: Converting Scenes into Standard Definition 1 Power the camcorder using the compact power adapter. 2 Make sure there is a memory card in the camcorder with sufficient available space.
- Page 198 7 When the conversion is completed, a confirmation screen will appear. Connect the camcorder to the computer at this point (0 144) to continue uploading the converted videos to the Web or touch [End Without Connecting] to connect to the computer later. To embed the recording date and time The recording date and time will always be displayed on the converted scene.
- Page 199 • When converting scenes in the [Playlist]: - All the scenes are merged into one converted scene. - If the converted scene is too large, it will be split into smaller 10- minute long scenes. - When converting only part of a scene, the maximum length of the converted scene will be 10 minutes from the starting (playback pause) point.
- Page 200 IMPORTANT • While the camcorder is connected to the computer, do not open the memory card slot cover and do not remove the memory card. • Observe the following precautions while the ACCESS indicator is on or flashing. Failing to do so may result in permanent data loss. - Do not open the memory card slot cover.
- Page 201 IMPORTANT Using an Eye-Fi Card • This product is not guaranteed to support Eye-Fi card functions (includ- ing wireless transfer). In case of an issue with an Eye-Fi card, please check with the card manufacturer. Also note that an approval is required to use Eye-Fi cards in many countries or regions.
-
Page 202: Appendix: Menu Options Lists
Additional Information This chapter contains troubleshooting advice, screen mes- sages, handling and maintenance tips, and other information. Appendix: Menu Options Lists Menu items not available appear grayed out. For details about how to select an item, refer to Using the Menus (0 32). For details about each function, see the reference page. - Page 203 4 3 0 Control Button Setting options/Function [S Flash] [U Automatic], [V Red-Eye Auto], – [S Flash On], [W Flash Off] [X Focus] [2] (manual focus): Toggle on (x) or off (w), Touch AF frame [e Exposure] [y] (manual exposure): Toggle on (x) or off (w), Touch AE frame Zoom controls, g control [ZOOM]...
- Page 204 Setup Menus [Edit] Panel - Mode 1: Original scenes s: Playlist scenes (including the playlist only of video snapshot scenes) Z: Original video snapshot scenes u: SD scenes on the memory card ( only) 1 s Z u 0 Control Button Target Scenes/Function [Selected Scenes] –...
- Page 205 [Edit] Panel - Mode Single Photo View Control Button Index Screen [Selected Photos], [Copy ( [All Photos] [Delete] [Protect] [Print Orders] [Rotate] – Š Additional Information...
-
Page 206: Setup Menus
Setup Menus 7 / 8 Camera Setup 4 3 0 Menu item Setting options [Digital Zoom] [B Off], [G 60x], [H 300x] – – [Zoom Speed] [I Variable], [J Speed 3], [K Speed 2], [L Speed 1] [AF Mode] [R Instant AF], [S Normal AF] –... - Page 207 [Digital Zoom]: Determines the Optical zoom Digital zoom operation of the digital zoom. The color of the indicator indi- cates the zoom. • When activated, the cam- White Light Dark corder will switch automatically to digital zoom when you zoom blue blue in beyond the optical zoom...
- Page 208 • Using focus assistance will not affect the recordings. It will be cancelled automatically after 4 seconds or when you start recording. [Auto Slow Shutter]: The camcorder automatically uses slow shutter speeds to obtain brighter recordings in places with insufficient lighting. •...
- Page 209 [Onscreen Markers]: You can display a grid or a horizontal line at the cen- ter of the screen. Use the markers as a reference to make sure your sub- ject is framed correctly (vertically and/or horizontally). • Using the onscreen markers will not affect the recordings. [POWERED IS Button]: Determines the operation mode of the POWERED IS button.
- Page 210 Menu item Setting options [Photo Quality/Size] [K 2304x1296], – – – [L 2100x1575], [M 1600x1200], [N 640x480] [E Super Fine], [F Fine], [G Normal] [Photo Capture from [A Single Photo], – – – Video] [B Photo Sequence] [Photo Capture [P Super Fine / 1920x1080], –...
- Page 211 [Memory Info]: Displays a screen where you can verify how much of the built-in memory ( only) or the memory card is currently in use (l total recording time and k total number of photos) and how much space remains available for recording. •...
- Page 212 • The photo number indicates the name and location of the file on the memory card. For example, the file name of a photo numbered 101- 0107 is “IMG_0107.JPG”, stored under the folder “DCIM\101CANON”. [USB Connection Type]: Select the connection protocol to use when con- necting the camcorder to an external device using the supplied USB cable.
-
Page 213: System Setup
• When the TV type is set to [ Normal TV], during the playback of video originally recorded with an aspect ratio of 16:9, the picture will not be displayed fullscreen. 6 System Setup Menu item Setting options [Font Size] [A Large], [B Small] –... - Page 214 Menu item Setting options [f Built-in Mem.], [Initialize f/g] [g Mem. Card] [Complete Initialization]: Toggle on (x) or off (w) [Complete Initialization]: [Initialize g] Toggle on (x) or off (w) [Time Zone/DST] [S] (home time zone) or [V] (travel time zone): [New York], list of world time zones [U] (DST adjustment) [Date/Time]...
- Page 215 [Font Size]: Changes the size of the font for the menu and other screens. • When the font size is set to [ Large], some information may be dis- played in shortened form (icons only, etc.). Some screens will be dis- played using the small font size regardless of the setting.
- Page 216 • You can set Quick Start to [B Off], for example, if the camcorder is set on a fixed position and you want to keep recording video with the LCD panel closed in order to conserve the battery's power. [Calendar Start Day]: Select the day on which the week in the calendar screen (0 55).
- Page 217 [Demo Mode]: The demonstration mode displays the camcorder's main features. It starts automatically when the camcorder is powered with the compact power adapter if you leave it turned on without a memory card for more than 5 minutes. • To cancel the demo mode once it has started, press any button or turn off the camcorder.
-
Page 218: Appendix: Onscreen Icons And Displays
Appendix: Onscreen Icons and Displays Recording Movies (in Dual Shot mode) 7 Zoom (0 46) 1 Smart AUTO mode (0 43) 8 Recording mode (0 59) 2 Onscreen zoom controls (0 46) 9 Control button: Start/Stop video 3 Operating mode (0 31) recording 4 In record pause mode: A q Face detection frame (0 66) - Page 219 Recording Movies (in y Manual mode) S g x.v.Color (0 156) A s Control button: Open the FUNC. S h Face detection (0 66) panel (0 32) S j Photo quality/size A d Recording program (0 60, 63, 70) (simultaneous recording) (0 110) A f R Instant AF (0 152), S k Wind screen off (0 153) MF Manual focus (0 74)
- Page 220 Recording Photos (in y Manual mode) F f Number of available photos D k Drive mode (0 109) On the memory card D l Light metering mode (0 112) In the built-in F q Control button: Last function used memory ([MENU] in this case) F g Photo quality/size (0 105) F a Self timer (0 79)
- Page 221 Viewing Photos Exif information panel H s Control button: Slideshow (0 112) G g Control button: Open the setup H d Control button: Open the Edit panel menus (0 151) (0 150) G h Protected photo mark (0 115) H f Control button: Switch to [Photos] G j Current photo / Total number of index screen (0 100) photos...
- Page 222 5 Memory operation N Record, M Record pause, A Playback, C Playback pause, I Fast playback, J Fast reverse playback, G Slow playback, H Slow reverse playback, E Frame advance, F Frame reverse. 6 Remaining battery time • The icon shows a rough estimate of 100% the remaining charge as a percentage of the full charge of the...
-
Page 223: Trouble
- please read the “CHECK THIS FIRST” box before going on to the more detailed problems and solutions. Consult your dealer or a Canon Service Center if the problem persists. CHECK THIS FIRST Power supply •... - Page 224 - The camcorder cannot communicate with the battery pack attached. Such battery packs can- not be charged using this camcorder. A noise can be heard from the compact power adapter. - A faint sound can be heard while the compact power adapter is connected to a power outlet. This is not a malfunction.
-
Page 225: Additional Information
- The camcorder may become hot after using it continuously for long periods of time; this is not a malfunction. If the camcorder becomes unusually hot or it becomes hot after using it only for a short while, it may indicate a problem with the camcorder. Consult a Canon Service Cen- ter. - Page 226 - The camcorder has malfunctioned. Consult a Canon Service Center. Even after stopping recording, the ACCESS indicator does not go off. - The scene is being recorded in the memory. This is not a malfunction.
- Page 227 The red ON/OFF (CHG) indicator flashes very slowly ( one flash at 2- second intervals). - The temperature of the battery pack is outside the charging range. If the battery pack’s tem- perature is below 0 °C (32 °F), warm it before charging it; if it is above 40 °C (104 °F), let the battery pack cool down before charging it.
- Page 228 Sound is distorted or is recorded at lower levels. - When recording near loud sounds (such as fireworks, shows or concerts), sound may become distorted or it may not be recorded at the actual levels. Activate the microphone attenuator (0 153) or adjust the audio recording level manually (0 80). The picture is displayed correctly but there is no sound from the built-in speaker.
- Page 229 Connections with External Devices Video noise appears on the TV screen. - When using the camcorder in a room where a TV is located, keep a distance between the compact power adapter and the power or antenna cables of the TV. Playback looks fine on the camcorder but there is no image on the TV screen.
-
Page 230: List Of Messages
After connecting the camcorder to a printer, the message [Busy] continues to appear on the screen - Disconnect the USB cable and restore the connection after a short while. Photos are not correctly printed - You may not be able to print correctly, using a PictBridge-compatible printer, photos whose file names have been changed or that were recorded, created, edited or changed using another device. - Page 231 Cannot communicate with the battery pack. Continue using this battery pack? - You attached a battery pack that is not recommended by Canon for use with this camcorder. - If you are using a battery pack recommended by Canon for use with this camcorder, there may be a problem with the camcorder or battery pack.
- Page 232 Cannot play back - There is a problem with the memory. If this message appears often without apparent reason, contact a Canon Service Center. Cannot play back Cannot access the built-in memory - There is a problem with the built-in memory. Save your recordings (0 128) and initialize the built-in memory using the [Complete Initialization] option (0 40).
- Page 233 Cannot record movies in the built-in memory Initialize only using the camcorder - The camcorder's built-in memory was initialized using a computer. Initialize the built-in mem- ory with this camcorder (0 40). Cannot record movies on this memory card - Movies cannot be recorded on a 64 MB or smaller memory card. Use a recommended mem- ory card (0 36).
- Page 234 Do not disconnect the USB cable or the power source until you safely end the connection from the computer. Connect the compact power adapter - When the camcorder is in mode and is connected to the computer with the supplied USB cable, the camcorder cannot be operated.
- Page 235 Memory card is full - The memory card is full. Delete some recordings (0 56, 102) to free some space or replace the memory card. Memory card is write-protected - The LOCK switch on the memory card is set to prevent accidental erasure. Change the posi- tion of the LOCK switch.
- Page 236 The lens cover is not fully open. Turn the camcorder off, then on again. - The lens cover did not open fully. Turn the camcorder off, then on again. If this does not solve the problem, consult a Canon Service Center. This memory card contains scenes. Delete all scenes to use relay recording.
- Page 237 This scene was recorded using another device and cannot be added to the playlist. - Scenes that were not recorded with this camcorder cannot be added to the playlist. This scene was recorded using another device and cannot be copied. - Scenes that were not recorded with this camcorder cannot be copied to the memory card.
- Page 238 Close the memory card slot cover - The memory card slot cover is open. Close the cover after correctly inserting the memory card (0 38). Connect the compact power adapter - The camcorder is being powered by the battery pack. Connect the compact power adapter to the camcorder.
-
Page 239: Direct Print Related Messages
- Check the printer status. - Ink tank errors have occurred. Replace the ink tank. Ink absorber full - Touch [Continue] to resume printing. Consult a Canon Service Center (refer to the list included with the printer) to replace the ink absorber. Ink error - The ink level cannot be detected correctly or the ink cartridge is out of ink. - Page 240 - Close the printer cover securely. Printer error - A malfunction has occurred that may require repairs. (Canon PIXMA printers: the printer's green power lamp and orange error lamp flash alternately.) - Disconnect the USB cable and turn off the printer. Unplug the printer's power cord from the power outlet and contact the appropriate customer support center or service center.
-
Page 241: Do's And Don'ts
(0 126) and save them on a regular basis. This will protect your impor- tant recordings in case of damage and create more free space on the memory. Canon shall not be liable for any data loss. • Do not carry the camcorder by the LCD panel. Be careful when closing the LCD panel. - Page 242 • When mounting the camcorder on a 5.5 mm tripod, make sure that the tripod's fas- tening screw is shorter than 5.5 mm (0.2 in.). Using other tripods may dam- age the camcorder. • When recording movies, try to get a calm, stable picture.
- Page 243 Regarding the use of non-Canon battery packs • For your safety, battery packs that are not genuine Canon battery packs will not be charged even if you attach them to this camcorder or to the optional CG-800 Battery Charger.
- Page 244 • Secure Digital (SD) memory cards have a physical switch to prevent writ- ing on the card so as to avoid the accidental erasure of the card's con- tent. To write-protect the memory card set the switch to the LOCK position. LOCK switch Built-in Rechargeable Lithium Battery The camcorder has a built-in rechargeable lithium battery to keep the...
- Page 245 • Wipe the battery with a clean dry cloth to ensure proper contact. • For California, USA only: The lithium battery included contains Perchlorate Material – special handling may apply. See www.dtsc.ca.gov/hazardouswaste/perchlorate for details. Disposal When you delete movies or initialize the memory, only the file allocation table is altered and stored data is not physically erased.
-
Page 246: Maintenance/Others
Maintenance/Others Cleaning Camcorder Body • Use a soft, dry cloth to clean the camcorder body. Never use chemically treated cloths or volatile solvents such as paint thinner. Lens and Instant AF Sensor • If the lens surface or Instant AF sensor is dirty, autofocus may not work properly. -
Page 247: Using The Camcorder Abroad
You can use the compact power adapter to operate the camcorder and to charge battery packs in any country with power supply between 100 and 240 V AC, 50/60 Hz. Consult a Canon Service Center for information on plug adapters for overseas use. -
Page 248: General Information
General Information Accessories (Availability differs from area to area) AVCHD discs/ Photo DVDs D PictBridge- compatible printers Card reader/writer Computer TV/HDTV VCR/DVD recorder Optional accessories not listed below are described in more detail in the following pages. SS-600/SS-650 Shoulder Strap IFC-300PCU USB Cable WS-20 Wrist Strap Memory card... -
Page 249: Optional Accessories
Use of genuine Canon accessories is recommended. This product is designed to achieve excellent performance when used with genuine Canon accessories. Canon shall not be liable for any dam- age to this product and/or accidents such as fire, etc., caused by the malfunction of non-genuine Canon accessories (e.g., a leakage and/or... - Page 250 5 CG-800 Battery Charger Use the battery charger to charge the battery packs. It plugs directly into a power outlet without a cable. Charging Times The charging times given in the following table are approximate and vary according to charging conditions and initial charge of the battery pack. Battery packo BP-808 BP-819...
- Page 251 Using a memory card Recording mode Battery pack Usage time Recording (maximum) 95 min. 95 min. 100 min. 100 min. 105 min. BP-808 Recording (typical)* 60 min. 60 min. 65 min. 65 min. 65 min. BP-809 Playback 160 min. 160 min. 160 min. 165 min. 165 min. Recording (maximum) 200 min.
- Page 252 A q FS-H37U Filter Set Neutral density and MC protector filters help you to control difficult lighting condi- tions. A a SC-2000 Soft Carrying Case A handy camcorder bag with padded compartments and plenty of space for accessories. A s SM-V1 Surround Microphone Use 5.1ch surround sound to add a sense of presence to your movies.
- Page 253 This case allows you to record movies and take photos underwater without get- ting the camcorder wet. This mark identifies genuine Canon video accessories. When you use Canon video equipment, we recommend Canon-brand accessories or products bearing the same mark.
-
Page 254: Product Codes
Product Codes Provided Accessories CA-570 Compact Power Adapter 8468A002AA BP-808 Battery Pack 2740B002AA WL-D89 Wireless Controller D83-0790-000 STV-250N Stereo Video Cable 3067A002AA (D82-0590-002) IFC-300PCU USB Cable 6906A001AA Optional Accessories BP-809 Battery Pack 2588B003AA (silver), 2588B004AA (black) BP-819 Battery Pack 2589B002AA BP-827 Battery Pack 3185B002AA CG-800 Battery Charger... -
Page 255: Specifications
Specifications VIXIA HF M32 / VIXIA HF M31 / VIXIA HF M30 / VIXIA HF M300 — Values given are approximate figures. System • Recording System Movies: AVCHD Video compression: MPEG-4 AVC/H.264; Audio compression: Dolby Digital 2ch; Dolby Digital 5.1ch* * Only when using the optional SM-V1 Surround Microphone. - Page 256 * When two values are given, the first indicates the value at full telephoto (T) and the second the value at full wide-angle (W). • LCD Touch Screen: 2.7 in., wide, TFT color, approx. 211,000 dots , touch operation •...
- Page 257 • MIC Terminal ‡ 3.5 mm stereo minijack –57 dBV (with 600 : microphone) / 5 k: or more Power/Others • Power supply (rated) 7.4 V DC (battery pack), 8.4 V DC (compact power adapter) • Power consumption 3.5 W (SP mode, AF on, LCD normal brightness) •...
- Page 258 Audio sampling: 48 kHz, 16 bits, 2 channels Minimum length: 1 second File extension: WAV The music data is saved in the memory under the following folder structure. In the built-in memory: CANON MY_MUSIC MUSIC_01.WAV to MUSIC_99.WAV On the memory card: CANON PRIVATE MY_MUSIC MUSIC_01.WAV to MUSIC_99.WAV...
-
Page 259: Index
Index ....191 ... . .63 Condensation 24p Cinema Mode ....54 Connections to external 3D Flip View . - Page 260 ....82 ....156 Headphones Photo numbers ....114 .
- Page 261 ....22 Serial number ... . .33, 151 Setup menus . . 62 Underwater (recording program) .
- Page 262 B) If the Equipment is defective as a result of leaking batteries, sand, dirt or water damage; C) If defects or damages are caused by the use of unauthorized parts or by service other than by Canon USA's factory service centers or authorized service facilities;...
- Page 263 THE USE, MISUSE OR INABILITY TO USE THE EQUIPMENT, REGARDLESS OF THE LEGAL THEORY ON WHICH THE CLAIM IS BASED, AND EVEN IF CANON USA HAS BEEN ADVISED OF THE POSSIBILITY OF SUCH DAMAGES. NOR SHALL RECOVERY OF ANY KIND AGAINST CANON USA BE GREATER THAN THE PURCHASE PRICE OF THE EQUIPMENT SOLD BY CANON USA AND CAUSING THE ALLEGED DAMAGE.
- Page 264 Ship your Equipment in its original carton, box or equivalent, properly packed, fully insured with shipping charges prepaid, together with a copy of your bill of sale or other proof of purchase and a description of the problem to any of the Canon Service Facilities in Canada.
- Page 265 CANON CANADA INC. MONTREAL 8801 Route Transcanadienne, Saint-Laurent, QC H4S 1Z6 ❖ If you have any questions, call the Canon Canada Information Center toll free (in Canada only) at 1-800-OK-CANON (1-800-652-2666). ❖ Si vous avez des questions, veuillez téléphoner 1-800-OK-CANON (1-800-652-2666, sans frais au Canada seulement).
- Page 278 Photo Application Version 34 Instruction Manual English...
- Page 279 Contents Read This First ......................4 Checking Supplied Accessories ................4 System Requirements ....................5 What is Photo Application? ..................6 Windows ........................7 CameraWindow ..................... 7 [Import Images from Camera] Window ............. 7 [Organize Images on Camera] Window ............8 [Import Images from Camera] Window .............
- Page 280 Running a Slide Show ..................60 Adding Sound to a Still Image................62 Reviewing and Changing the Owner Name of the Camcorder......63 Uninstalling the Software ..................64 Uninstalling ZoomBrowser EX ................64 Troubleshooting ....................... 65 Contents...
-
Page 281: Read This First
Canon. • Canon makes no warranties for damages resulting from corrupted or lost data due to mistaken operation or malfunction of the camcorder, the software, memory cards (SD, SDHC and SDXC), personal computers, or peripheral devices, or due to use of a memory card not initialized by a Canon camcorder. -
Page 282: System Requirements
Windows 7 64-bit: 2 GB or more Windows 7 32-bit / Windows Vista: 1 GB or more Windows XP: 512 MB or more Interface: Free Hard Disk Space: • Canon Utilities - ZoomBrowser EX: 200 MB* or more × Display: 1024 768 pixels/High Color (16 bit) or better * When using Windows XP, you must install Microsoft .NET Framework 2.0 or later (up... -
Page 283: What Is Photo Application
What is Photo Application? Photo Application allows you to download still images you recorded with the camcorder to a computer and manage, print, and edit them. ZoomBrowser EX • Viewing still images as thumbnails • Managing by shooting date folders with still images •... -
Page 284: Windows
Windows CameraWindow After you connect the camcorder to your computer, you can use CameraWindow to download still images to the computer. Furthermore, you can delete still images saved on the camcorder, without having to download them to the computer, and you can upload still images from the computer to the camcorder ( 56). -
Page 285: [Organize Images On Camera] Window
[Organize Images on Camera] Window Delete still images saved on the camcorder, without having to download them to the computer, and upload still images from the computer to the camcorder. Windows... -
Page 286: [Import Images From Camera] Window
[Import Images from Camera] Window Protected image. Return to the CameraWindow menu screen. Display the Help menu. Configure Preferences settings (camcorder owner's name and download destination, etc.). Adjust the size of the thumbnails. Toggle the shooting date/time and file name displays. Select all still images. -
Page 287: [Organize Images On Camera] Window
[Organize Images on Camera] Window Return to the CameraWindow menu screen. Display the Help menu. Configure Preferences settings (camcorder owner's name and download destination, etc.). Adjust the size of the thumbnails. Toggle the shooting date/time and file name displays. Upload selected still images to the camcorder. Delete still images on the camcorder. -
Page 288: Main Window
[Print & Email]: After you download still images to a computer, use this to print them or to attach them to e-mail messages. [CANON iMAGE GATEWAY]: Use this to connect to CANON iMAGE GATEWAY. Windows... - Page 289 2 Folders Area You can select a folder to be displayed in the Browser Area. In the [Last Acquired Images] panel, the newly downloaded still images are placed into virtual folders classified by recording date. In the panel below, the folders where the downloaded still images are actually saved in are displayed.
- Page 290 5 View Mode You can select the view mode of images in the Browser Area. [Zoom Mode]: The images in the selected folder are shown as thumbnails. [Scroll Mode]: Double clicking a folder shows thumbnails of the still images inside. [Preview Mode]: Double clicking the folders at the bottom of the window opens the folder and shows a large still image in the folder along with detailed information.
- Page 291 6 Command buttons 1 View Image Displays a selected image in the [Image Viewer] window. Properties Displays properties of the selected still image. When you select a different image while the [Properties] window is open, the information switches to the one of the selected image.
-
Page 292: [Image Viewer] Window
[Image Viewer] Window The [Image Viewer] window appears when you select an image and click [View Image] or double-click an image. 1 Previous/Next Displays the previous/next image in the current folder. Zoom In/Zoom Out Enlarges/Reduces a still image. When the image is larger than the window, you can move the image in the desired direction. -
Page 293: [Red Eye Correction] Window
Fit to Window Matches the image size to the size of the Image Viewer Window. Restore Restores the standard display size. Zoom Slider Allows you to enlarge/reduce the displayed image. Show Image Full Displays an image in full screen size. Screen Change the Star Allows you to change the star rating. -
Page 294: [Auto Adjustment] Window
[Auto Adjustment] Window Select [Auto Adjustment] from the [Edit] menu, or click the icon and select [Auto Adjustment]. Use this to automatically correct the color balance of the still image. [Color/Brightness Adjustment] Window Select [Color/Brightness Adjustment] from the [Edit] menu, or click the icon and select [Color/Brightness Adjustment]. -
Page 295: [Sharpness] Window
[Sharpness] Window Select [Sharpness] from the [Edit] menu, or click the icon and select [Sharpness]. Use this to emphasize and clarify the outlines of people and objects. [Trim Image] Window Select [Trim] from the [Edit] menu, or click the icon and select [Trim]. Specify the area in the still image to crop and click [Trim Image] to trim the image. -
Page 296: [Insert Text] Window
[Insert Text] Window Select [Insert Text] from the [Edit] menu, or click the icon and select [Insert Text]. Use this to write text on still images. These image correction tools can be selected by clicking [Edit] [Edit Image] in Task Area of the main window. Windows... -
Page 297: Installing Photo Application
Installing Photo Application Be sure to install Photo Application before connecting the camcorder to the computer. You must have authorization as a Computer System Administrator to install programs. Your digital video camcorder is equipped with the standard Picture Transfer Protocol (PTP). This protocol enables you to download still images by simply connecting the camcorder to a computer with the USB cable (applications such as the [Scanner and Camera Wizard] start automatically). - Page 298 • Windows XP: The folder appears automatically. Double-click the [setup.exe] icon. If the folder does not open automatically, use the following procedures to display it. 1) Select [My Computer] from the [start] menu. 2) Right-click the CD-ROM icon and select [Open] from the displayed menu.
- Page 299 Review the installation settings and click [Install]. Read the license agreement and click [Yes] to accept the terms and to start installation. Installing Photo Application...
- Page 300 Click [Next]. When the installation is complete, make sure [Restart computer immediately (Recommended)] is selected and then click [Restart]. When you do not need to restart the computer, the [Finish] screen will be displayed. Click [Finish]; remove the Instruction Manual/Photo Applications Ver. 34/Music Data Disc Photo Applications Ver.
- Page 301 When the computer has restarted and the regular desktop screen is displayed, remove the Instruction Manual/Photo Applications Ver. 34/ Music Data Disc Photo Applications Ver. 34/ Music Data Disc from the CD-ROM drive. When installation is complete, remove the Instruction Manual/Photo Applications Ver. 34/Music Data Disc Photo Applications Ver.
-
Page 302: Before Downloading Still Images
Before Downloading Still Images Connecting the Camcorder to a Computer Be sure to install Photo Application before you connect the camcorder to the computer. Make sure the camcorder is being powered using the power adapter before connecting it to a computer. Connect the USB cable directly to one of the computer’s main USB ports. - Page 303 Attach the supplied USB cable to the computer’s USB port and the camcorder’s USB Terminal. • Restart the computer if you are prompted to restart it the first time you connect the camcorder to the computer. • A window appears allowing you to select an application program to start. •...
-
Page 304: Downloading Still Images
Downloading Still Images Observe the following precautions when the camcorder’s access indicator is flashing. Failure to do so may cause data to become corrupted. - Do not remove the memory card or detach the USB cable. - Do not turn off the camcorder or the computer. - Do not switch between the shooting and playback modes. -
Page 305: Starting Camerawindow
[Downloads Images From Canon Camera using Canon CameraWindow]. • If a camcorder and card reader are connected at the same time, a dialog appears allowing you to select the camcorder model. Confirm that [Canon Camera] or your camcorder model name is displayed and click [OK]. -
Page 306: Downloading Still Images To The Computer
Downloading Still Images to the Computer You can select a downloading method in the [Import Images from Camera] window. Downloading Untransferred Images Download only the images not yet imported to the computer. Connect the camcorder to the computer. Click [Import Images from Camera] in the CameraWindow menu screen. -
Page 307: Downloading Selected Images
Downloading Selected Images Download only the images that you select. Click [Import Images from Camera] in the CameraWindow menu screen. Click [Select Images to Import]. Downloading Still Images... - Page 308 Select images for download in the [Import Images from Camera] window, and click the [Import] button. When the download completion screen appears, click [OK] to close the CameraWindow screen. The downloaded images will appear in the main window of ZoomBrowser EX. Downloading Still Images...
-
Page 309: Downloading All The Images On The Camcorder
Downloading All the Images on the Camcorder Download all the images saved on the camcorder. Click [Import Images from Camera] in the CameraWindow menu screen. Click [Import All Images]. When the download completion screen appears, click [OK] to close the CameraWindow screen. -
Page 310: Using A Card Reader/Writer
When a window appears allowing you to select an application program to start, select [View/Download Images using Canon ZoomBrowser EX] and click [OK]. Clicking [Acquire & Camera Settings] [Acquire Images from Memory Card] in the main window of ZoomBrowser EX also opens the image download window. -
Page 311: Auto-Downloading
Auto-Downloading Click [Download Images]. • For instructions on how to set the Auto-download settings, see Auto- Downloading Settings ( 34). • Click [Exit] to close the window after downloading images. Auto-Downloading Settings Select the setting for downloading images by operating your computer. You can change the image type and the destination folder. - Page 312 Configure the settings and click [OK]. The window below will be displayed when you select [Perform selected processes consecutively] or [Select] under [Action After Download]. Select a process to perform after the image is downloaded, and click [OK]. Downloading Still Images...
-
Page 313: Downloading The Selected Still Images From Zoombrowser Ex
Downloading the Selected Still Images from ZoomBrowser EX Click [Lets you select and download images]. ZoomBrowser EX opens. In ZoomBrowser EX, select the image you wish to download and click [Image Download]. • Clicking on 2 images while holding down the [Shift] key selects also all images between the 2 images. -
Page 314: Printing Still Images
Printing Still Images You can select one of the following 2 methods to print still images. • [Photo Print] - Prints one still image per page. • [Index Print] - Prints selected images in rows with file names and image information. You can select the program to use for printing by clicking [Print &... - Page 315 Specify the print settings and click [Print]. Selects the printer. Sets the paper size settings. Click this button to switch between still Sets the number of print copies images if multiple images are selected. of the displayed image. Sets the shooting date/time imprint and color settings. Printing Still Images...
-
Page 316: [Index Print]
[Index Print] Click [Print & Email] in the main window and click [Index Print]. Select the still images you wish to print and click [Printer and Layout Settings]. Printing Still Images... - Page 317 Specify the print settings and click [Print]. Rotates still images. Sets the paper size and orientation. Click this to use the trimming function (crops a portion of Selects the printer. the still image). Click these buttons to switch between pages. Sets the print settings for shooting information, comments, headers, footers and page numbers.
-
Page 318: Organizing Images
Organizing Images Applying Star Ratings and Keywords This task allows you to apply ratings to your images from one star to three stars. The star rating can be used as one of the search conditions, or for the selection of images to be displayed in the Browser Window. -
Page 319: Classifying The Images
Classifying the Images This task allows you to classify selected images according to the shooting date. Click [View & Classify] in the main window. Click [Classify into Folder]. Select the images you wish to classify and click [Specify Classification Settings]. Organizing Images... - Page 320 Specify the folder structure and the saving folder and click [Finish]. The selected images are classified into the specified folder. Organizing Images...
-
Page 321: Renaming Multiple Files
Renaming Multiple Files This task allows you to rename multiple files at the same time, or to rename and copy multiple files. Click [View & Classify] in the main window. Click [Rename Multiple Files]. Select the images you wish to rename and click [Specify Rename Settings]. - Page 322 Specify the settings and click [Finish]. Placing a check mark here makes copies of images with new names. The name of the original images will not be changed. To rename a folder, select a folder, and open the [Rename Folder] window by selecting [Rename] from the [File] menu.
-
Page 323: Searching For Images
Searching for Images This task allows you to search for images by star rating, modification date, shooting date, comment or keywords. Click [View & Classify] in the main window. You can also search for images by clicking [Search] on the Application Tool Bar. Skip to step 3. - Page 324 Specify the search conditions and click [Start Search]. • The search results are displayed as thumbnails. • Select at least one search condition. Click [Finish]. • To change the search parameters and perform another search, click [Specify Search Conditions] and repeat steps 3-4. Organizing Images...
- Page 325 • The images of the search result are displayed in the [Search Results] folder. You can print or copy these images to another folder. Folders Area The searched images will remain in this folder until ZoomBrowser EX is closed or another search is performed, but if you delete an image in this folder, the corresponding original image will be deleted as well.
-
Page 326: Exporting Images
Exporting Images You can change the data type for selected still images and movies and save them as new files. You can also export selected movies and still image properties to a text file or copy and rename movies and still images. Furthermore, you can export still images for use as a screen saver or a wallpaper. - Page 327 Select images and click [Specify Export Settings]. Specify the export settings and click [Finish]. The window varies depending on the selected export type in step 2. When you have selected [Export Still Images]: You can convert still images to another file type, resize and save them as new files. You can select the file type from BMP, JPEG and TIFF.
- Page 328 When you have selected [Export Shooting Properties]: You can select the information you wish to export and save as a text file. When you have selected [Export as a Screen Saver]: You can export and save the image as a screen saver. Exporting Images...
- Page 329 When you have selected [Export as a Wallpaper]: You can export and save the image as Windows wallpaper. This task cannot be performed if you have selected multiple images. Exporting Images...
-
Page 330: Saving On Cd-R/Rw Discs
Saving on CD-R/RW Discs You can copy and save images to CD-R or CD-RW discs. The shooting information is copied along with the images. This function can only be used on a computer that came with a CD-R/RW drive as standard equipment. Place a CD-R/RW disc in the computer’s CD-R/RW drive. - Page 331 Click [Backup to CD]. Select the folders or images you wish to save and click [Specify Backup Settings]. Exporting Images...
- Page 332 Set the backup settings and click [Start Backup]. The disc will be ejected from the drive when copying is complete. You can add images to a CD-R/RW disc that already contains images. Exporting Images...
-
Page 333: Uploading Still Images To The Camcorder
Uploading Still Images to the Camcorder You can copy still images saved on the computer to the camcorder. Connect the camcorder to the computer ( 25). The still images will be added to the memory selected for the playback of still images (built-in memory or memory card). -
Page 334: Deleting Still Images On The Camcorder
Deleting Still Images on the Camcorder Organizing Images on the Camcorder Click [Organize Images on Camera] [Organize Images] in the CameraWindow menu screen. Click the still image you want to delete, and click [Delete]. • Still images cannot be restored once they are deleted. Exporting Images... -
Page 335: Using Various Functions
Using Various Functions Attaching Still Images to E-mail Messages You can attach selected still images to an e-mail message. If necessary, you can make the image file size smaller. Click [Print & Email] in the main window. Click [Email Images]. Select the still images you wish to send and click [Change Image Size]. - Page 336 Select image size and quality, and click [Finish]. • If you selected [Using the recommended settings.], your e-mail software starts and the selected still images appear as an attachment in the message window. Input address, subject and your comments and send the message. •...
-
Page 337: Running A Slide Show
Running a Slide Show You can view selected still images in a slide show. Click [View & Classify] in the main window. You can also view a slide show by clicking [Slide Show] on the Application Tool Bar. Skip to step 4. Click [View as a Slide Show]. - Page 338 Select the slide show settings. • [Image Size]: Select the size of the still images. • [Image Information]: Select to show image information such as file name or title. • [Advance to Next Slide]: Select to advance manually or automatically. When you select “Every 3 second(s)”, you can select the interval in the control below (from 1 to 120 seconds).
-
Page 339: Adding Sound To A Still Image
Adding Sound to a Still Image • You can add a sound to an image. The sound file that can be added to the image must be WAVE type (extension “.wav”). • The sound cannot be played back on the camcorder. In the main window, select an image and select [Add/ Remove Sound] from the [Edit] menu. -
Page 340: Reviewing And Changing The Owner Name Of The Camcorder
Reviewing and Changing the Owner Name of the Camcorder You can change and confirm the owner’s name of the camcorder. Connect the camcorder to the computer ( 25). Click [ Preferences] in the CameraWindow menu screen. Click the [General] tab, and then click the [Connected Camera] tab. -
Page 341: Uninstalling The Software
You must have authorization as a Computer System Administrator to uninstall programs. Uninstalling ZoomBrowser EX Other programs in the [Canon Utilities] folder can also be uninstalled in the same way. Click the Windows [start] menu and select [All Programs] [Canon Utilities] [ZoomBrowser EX] and [ZoomBrowser EX Uninstall]. -
Page 342: Troubleshooting
Troubleshooting Connection Camcorder is not recognized when connected to the computer. There is no memory card in the camcorder. Insert a memory card into the camcorder. The camcorder is not set to the correct mode. Set the camcorder to still image playback mode. Camcorder is not correctly connected to the computer. - Page 343 Tel (US): 1-800-828-4040 (Mon.-Fri., 9 AM to 8 PM Eastern Time) CANADA ––––––––– Canon CANADA Inc. Tel (Canada): 1-800-OK-CANON (1-800-652-2666) ASIA –––––––––––– Canon Hongkong Co., Ltd. 19/F., The Metropolis Tower, 10 Metropolis Drive, Hunghom, Kowloon, Hong Kong Tel: 852-3191-2333 Fax: 852-2428-3963 The information in this manual is verified as of 1 June 2010.
- Page 344 Software Guide Content Click the article to jump to the content of the operation. To view the overall content, click the [Content] in the top right. This guide explains how to operate "ImageMixer 3 SE Ver.6 Transfer Utility" included in Disc 1. Please refer to P.9 for the difference from "ImageMixer 3 SE Ver.6 Video Tools"...
- Page 345 Content Introduction How to use this guide .............4 System requirements ............6 Install ..................9 Start ImageMixer 3 ............12 Supported data ..............13 Precautions ................14 Exit ImageMixer 3 ..............16 Uninstall................17 Simple operation Video file import ...............21 Web upload ..............24 Other operations Music file export ..............28 Video file export ...............31...
-
Page 346: Introduction
Introduction How to use this guide ..................4 System requirements ..................6 Install .........................9 Start ImageMixer 3 ..................12 Supported data ....................13 Precautions ......................14 Exit ImageMixer 3 ....................16 Uninstall ......................17... -
Page 347: How To Use This Guide
How to use this guide This section gives an introduction to this guide, such as the scope of this guide and symbols used in this guide. Precautions • "ImageMixer 3 SE Ver.6 Transfer Utility" is referred to as "ImageMixer 3" unless otherwise mentioned. •... - Page 348 Trademarks • ImageMixer™ is a trademark of PIXELA CORPORATION. • Windows® is a registered trademark of Microsoft Corporation in the U.S.A. and other countries. • The official name of Windows is Microsoft® Windows® Operating System. • "AVCHD" and "AVCHD" logo are trademarks of Panasonic Corporation and Sony Corporation. •...
-
Page 349: System Requirements
System requirements The system requirements are different between ImageMixer 3 SE Ver.6 Transfer Utility included in Disc 1 and ImageMixer 3 SE Ver.6 Video Tools included in Disc 2. The following configuration does not guarantee full operation. Better system configurations may be necessary depending on the number of videos and total data volume of the content to be authored. -
Page 350: Hard Disk
System configuration for importing, exporting, and Web uploading The following configuration is required to use ImageMixer 3 SE Ver.6 Transfer Utility included in Disc 1. Requirement Intel Pentium 4 / 1.49 GHz or higher Microsoft Windows XP Intel Celeron / 1.7 GHz or higher Microsoft Windows Vista Intel Pentium 4 / 2.4 GHz or higher Intel Celeron D / 3.0 GHz or higher... - Page 351 System configuration for full use of functions The following is required to use ImageMixer 3 SE Ver.6 Video Tools included in Disc 2. Intel Pentium D / 3.0 GHz or higher Intel Core 2 Duo / 2.13 GHz or higher Intel Core 2 Duo / 2.33 GHz or higher is required for handling videos recorded in MXP mode.
-
Page 352: Install
Install 2 discs are provided for software installation. Use Disc 1 to install ImageMixer 3 SE Ver.6 Transfer Utility. Difference between Disc1 and Disc2 The software in Disc1 and Disc2 is different: You cannot install Disc 2 while Disc 1 Disc1 (ImageMixer 3 SE Ver.6 Transfer Utility) is not installed. - Page 353 Click [Next]. Confirm the License Agreement. Please confirm the content of the Click [I accept the terms of the license agreement] then [Next]. License Agreement before clicking. Select the installation folder, and click [Next]. If you want to change the destination, By default the software is installed in the following location: click [Change...] and specify the C:\Program Files\PIXELA\ImageMixer 3 SE Ver.6\Transfer Utility...
- Page 354 Software Guide, click the shortcut icon named "ImageMixer 3 SE Ver.6 Software Guide". You cannot use PIXELA software that came bundled with a different Canon camcorder with the camcorder with which this version (ImageMixer 3 SE Ver.6) was bundled.
-
Page 355: Start Imagemixer 3
Start ImageMixer 3 Connecting the camcorder starts ImageMixer 3 automatically. For camcorder operation, refer to the instruction manual of the camcorder. Start the software by connecting the camcorder Connect the camcorder to a wall outlet using the compact power adapter. If the camcorder is disconnected from the computer while using ImageMixer 3, video files in the camcorder may... -
Page 356: Supported Data
ImageMixer 3 SE Ver.6 Video Tools can handle the following data. Supported files • Videos recorded with the CANON camcorder with which ImageMixer 3 SE Ver.6 Transfer Utility is bundled. Still image files cannot be used. Importable files Recording standard... -
Page 357: Precautions
Do not put the computer in Standby mode when a camcorder is connected. • You cannot use PIXELA software that came bundled with a different Canon camcorder with the camcorder with which this version (ImageMixer 3 SE Ver.6) was bundled. - Page 358 When using the YouTube upload function, the number of videos uploaded per hour may be restricted according to YouTube specifications. Also, full operation cannot be guaranteed for future modifications of the YouTube specifications, or for every environment. • Refer to the following Web site for the latest information about operating limitations. http://www.pixela.co.jp/oem/canon/e/...
-
Page 359: Exit Imagemixer 3
Click [Eject CANON(X:)]. The letter that appears as "(X:)" varies depending on the computer. If two or more "CANON(X:)" are displayed, click all "CANON(X:)". A message informing you that it is safe to remove hardware will be displayed. -
Page 360: Uninstall
Uninstall Deletes ImageMixer 3 from the computer. Exit ImageMixer 3 if it is running. Windows XP Click the [Start] menu. Click [Control Panel]. Click [Add or Remove Programs]. Select [ImageMixer 3 SE Ver.6 Transfer Utility] and click [Remove]. Click [OK]. Click [Finish] when a confirmation message is displayed. - Page 361 Windows Vista / Windows 7 Click the Start menu. Click [Control Panel]. Click [Uninstall a program]. Select [ImageMixer 3 SE Ver.6 Video Tools] and click [Uninstall]. Click [Continue] (Windows Vista)/[Yes] (Windows 7). Click [OK]. Click [Finish] when a confirmation message is displayed. After uninstallation, delete administrative files if needed.
- Page 362 Deleting administrative files Administrative files are files that contain information related to the video files used in ImageMixer 3. If you keep these files, you can restore the information such as read files. Perform this procedure if you do not need these files. Delete administrative files.
-
Page 363: Simple Operation
Simple operation Video file import ..................21 Web upload ....................24... -
Page 364: Video File Import
Video file import You can import the video files recorded with the camcorder to the computer. Connect the camcorder or the source device to the computer. Refer to P.12 for how to connect. ImageMixer 3 Launcher will be displayed. Click [Video file import]. - Page 365 Select the memory that contains the video files you want to import. The SD Memory Card inserted in the camcorder. The built-in memory of the camcorder. Both the built-in memory and SD Memory Card in the camcorder. A card reader/writer or other devices. Select the method to import and click [OK].
- Page 366 Video files in the camcorder will be imported to the computer. By default, files are saved in the following location: If [My Video]/[Videos] folder does not exist, the files are saved in Windows XP [IMx3SEVer6] folder created in [My C:\Documents and Settings\(User account name)\My Video\IMx3SEVer6\ Documents]/[Documents] folder.
-
Page 367: Web Upload
Web upload You can upload the video files recorded with the camcorder directly to the video sharing Web site (YouTube) on the Internet. Create video files for Web upload using the camcorder. Refer to the camcorder's instruction manual for details. Connect the camcorder to the computer. - Page 368 Select files and click [OK]. Check the video files to upload. You can upload up to 10 files at once. Enter your account information and click [Next]. You can use your Google account if it is linked with your YouTube account. Enter the full Google email address as shown below into the YouTube account.
- Page 369 Enter the upload information and click [Upload]. Note the following limitations for uploading files to YouTube: The number of files to upload within 1 hour may be limited according to YouTube specifications. When uploading files continuously, you may not be able to access YouTube.
-
Page 370: Other Operations
Other operations Music file export ..................28 Video file export ..................31... -
Page 371: Music File Export
Music file export Exports the music files in the computer. The exported music files can be used as background music that can be played back together with video files. Connect the device to export to to the computer. Note the following when using SD Connect the camcorder (supported model only) or insert an SD Memory Memory Cards: Card into the computer. - Page 372 Click [Add]. Music file export screen: P.38 Select music files to add and click [Open]. You can add up to 10 files that meet the following conditions: File format WAVE (.wav, .wave) files in linear PCM File size Less than 1 GB Channel 2 channels Quantization bit rate...
- Page 373 Select the destination to export to. The value in the capacity bar turns red when the total size of the files to export exceeds the capacity of the selected destination. Reduce the total file size in the Music List. Click [Refresh].
-
Page 374: Video File Export
Video file export Exports the video files in the computer back to the camcorder (supported model only) or other removable media. Exported files can be played back with the camcorder. Before exporting Note the following: • You can export the video files imported from the camcorder using ImageMixer 3 SE Ver.6. However the files converted to SD-Video or MPEG-2 format cannot be exported. - Page 375 Export video files Connect the device to export to to the computer. Note the following when using SD Connect the camcorder (supported model only) or insert an SD Memory Memory Cards: Card into the computer. Use SD Memory Cards initialized Refer to P.12 for how to connect the camcorder.
- Page 376 Select the folders to export. Video files are exported by date folders. Date folders are created when importing video files from the camcorder. Video file export screen: P.40 Thumbnails are displayed only when the thumbnail file exists in the folder. The thumbnail file is created from the first video file in the folder.
- Page 377 Select the destination to export to. Check the capacity bar and click [OK]. When the total size of the file exceeds the capacity, the value in the capacity bar turns red. Reduce the number of folders in this case. Read the message and click [OK]. W h i l e e x p o r t i n g f i l e s , d o n o t disconnect the device to which you are exporting.
-
Page 378: Search From Screens
Search from screens Startup screen ImageMixer 3 Launcher screen ..................36 Export screen Music file export screen ....................38 Video file export screen ....................40 Preferences screen When importing video files ....................41 �������������������������������������������������������������������������������������������������������� 42 When exporting files... -
Page 379: Startup Screen
Startup screen The following screen appears first after starting ImageMixer 3. This screen is called the Launcher. ImageMixer 3 Launcher screen Clicking the button navigates you to the screen to operate. [Video file import] button Imports video files in the camcorder to the computer. (P.21) [Web upload] button Uploads video files in the camcorder to the video sharing Web site. - Page 380 [Information settings] button Configures online confirmation settings. If the information of the checked articles are updated, you will be notified when starting ImageMixer 3. Only when the computer is connected to the Internet. [Exit] button Exits ImageMixer 3. [Version information] button Shows the version of ImageMixer 3 currently installed.
-
Page 381: Export Screen
Export screen Following are the screens to export music and video files. The screens vary depending on the file type you export. Music file export screen Clicking [Music file export] in ImageMixer 3 Launcher displays following screen. To export music files: P.28 Music List The list of music files to export. - Page 382 [Playback]/[Stop] button Plays back the file selected in the Music List. This button becomes [Stop] button during playback. Operations such as fast forwarding, rewinding, and pausing are not available, Destination to export The name of the destination to export and the drive letter are displayed. Select the destination to export Capacity bar Displays the free space in the destination to export and the total size of the files in the Music List.
- Page 383 Video file export screen Clicking [Video file export] in ImageMixer 3 Launcher displays following screen. To export video files: P.31 Show thumbnails Check the box to show the thumbnails. A thumbnail is displayed only when the thumbnail file exists in the folder.
-
Page 384: Preferences Screen
Preferences screen You can change the destination to save video files and the work space for the computer. Clicking [Preferences...] in the [Settings] menu opens Preferences setting. Setting options varies depending on the screen currently displayed. When importing video files Destination to save Set a folder to save video files imported from the camcorder. - Page 385 When exporting files Workspace Set a place for the ImageMixer workspace used when exporting files. The system volume is selected as default. Volumes which you may not write to will not be displayed. Select a destination whose length is up to 200 bytes long including the directory path.
-
Page 386: Useful Information
Useful information Function list .....................44 Frequently asked questions ................45 Inquiries ......................49... -
Page 387: Function List
Function list Following is the list of functions available in ImageMixer 3. Note that some functions cannot be used depending on the file type. File type Files recorded with Files converted with Files converted with Function camcorder camcorder camcorder (AVCHD) (SD-Video) (MPEG-2) Video file import... -
Page 388: Frequently Asked Questions
Frequently asked questions Questions about the operations of ImageMixer 3 are classified according to the scenes. Preparation I can't install ImageMixer 3. ImageMixer 3 can be installed in computers with following operating systems: Microsoft Windows XP Service Pack 2 Microsoft Windows XP Service Pack 3 Microsoft Windows Vista Service Pack 1 Microsoft Windows Vista Service Pack 2... - Page 389 My camcorder is not recognized by the computer. Check the following: Have you installed ImageMixer 3? Have you turned on the camcorder? Is the camcorder powered using the compact power adapter? Is the USB cable connected to the computer properly? ...
- Page 390 Importing to computer Importing stops halfway. Try another USB port of the computer. For desktop computers, try the USB port on the back. It takes a long time to import video from the camcorder to the computer. ...
- Page 391 Others I can't exit ImageMixer 3. Close all dialog boxes and setting screens before exiting. File extensions are not displayed. Follow the steps below to show file extensions. Windows XP 1. Open any folder. 2. Click [Tool] menu - [Folder Options] - [View] tab. 3.
-
Page 392: Inquiries
Language: English, German, French, Spanish Other Countries in Europe +44-1489-564-764 Language: English, German, French, Spanish, Italian, Dutch Asia (Philippines) +63-2-438-0090 Language: English China 10800-163-0014 (toll-free) Language: Chinese ImageMixer 3 Web site Please check our Web site for the latest information and downloads. http://www.pixela.co.jp/oem/canon/e/... - Page 393 Software Guide Content Click the article to jump to the content of the operation. To view the overall content, click the [Content] in the top right. This guide explains how to operate "ImageMixer 3 SE Ver.6 Video Tools" included in Disc 2. Please refer to P.9 for the difference from "ImageMixer 3 SE Ver.6 Transfer Utility"...
- Page 394 Content Introduction Edit video files How to use this guide .............4 Preparation (project setting) ..........77 System requirements ............6 Add/delete clips..............80 Install ..................9 Change playback order ..........82 Start ImageMixer 3 ............16 Trim a video clip ............83 Supported data ..............17 Cut out multiple scenes from a video clip .....
-
Page 395: Introduction
Introduction How to use this guide ..................4 System requirements ..................6 Install .........................9 Start ImageMixer 3 ..................16 Supported data ....................17 Precautions ......................19 Exit ImageMixer 3 ....................22 Uninstall ......................23... -
Page 396: How To Use This Guide
How to use this guide This section gives an introduction to this guide, explaining points such as the scope of this guide and symbols used in this guide. Precautions • "ImageMixer 3 SE Ver.6 Transfer Utility" and "ImageMixer 3 SE Ver.6 Video Tools" are together referred to as "ImageMixer 3"... - Page 397 Trademarks • ImageMixer™ is a trademark of PIXELA CORPORATION. • Windows® is a registered trademark of Microsoft Corporation in the U.S.A. and other countries. • The official name of Windows is Microsoft® Windows® Operating System. • Manufactured under license from Dolby Laboratories. "Dolby" and the double-D symbol are trademarks of Dolby Laboratories.
-
Page 398: System Requirements
System requirements The system requirements are different between ImageMixer 3 SE Ver.6 Transfer Utility included in Disc 1 and ImageMixer 3 SE Ver.6 Video Tools included in Disc 2. The following configuration does not guarantee full operation. Better system configurations may be necessary depending on the number of videos and total data volume of the content to be authored. - Page 399 System configuration for full use of functions The following is required to use ImageMixer 3 SE Ver.6 Video Tools included in Disc 2. ■ Intel Pentium D / 3.0 GHz or higher Intel Core 2 Duo / 2.13 GHz or higher Intel Core 2 Duo / 2.33 GHz or higher is required for handling videos recorded in MXP mode.
- Page 400 System configuration for importing, exporting, and Web uploading The following configuration is required to use ImageMixer 3 SE Ver.6 Transfer Utility included in Disc 1. ■ Requirement Intel Pentium 4 / 1.49 GHz or higher Microsoft Windows XP Intel Celeron / 1.7 GHz or higher Microsoft Windows Vista Intel Pentium 4 / 2.4 GHz or higher Intel Celeron D / 3.0 GHz or higher...
-
Page 401: Install
Install 2 discs are provided for software installation. Make sure to install Disc 1 first. You cannot install Disc 2 without installing first Disc 1. Difference between Disc1 and Disc2 The software in Disc1 and Disc2 is different: ■ Disc1 (ImageMixer 3 SE Ver.6 Transfer Utility) This software enables you to import video files from the camcorder to the computer, and export them to a SD Memory Card or other storage media. - Page 402 ⒊ Click [Next]. ⒋ Confirm the License Agreement. Please confirm the content of the Click [I accept the terms of the license agreement] then [Next]. License Agreement before clicking. ⒌ Select the installation folder, and click [Next]. If you want to change the destination, By default the software is installed in the following location: click [Change...] and specify the C:\Program Files\PIXELA\ImageMixer 3 SE Ver.6\Transfer Utility...
- Page 403 Software Guide, click the shortcut icon named "ImageMixer 3 SE Ver.6 Software Guide". You cannot use PIXELA software that came bundled with a different Canon camcorder with the camcorder with which this version (ImageMixer 3 SE Ver.6) was bundled.
- Page 404 Install Disc2 (ImageMixer 3 SE Ver.6 Video Tools) During the installation procedure, the certification of the software is performed via Internet. Users with an Internet connection: please have your computer W h e n I n t e r n e t c o n n e c t i o n i s connected to the Internet before the installation.
- Page 405 ⒋ Confirm the License Agreement. Please confirm the content of the Click [I accept the terms of the license agreement] then [Next]. License Agreement before clicking. ⒌ Select the installation folder, and click [Next]. By default the software is installed in following location: If you want to change the destination, click [Change...] and specify the C:\Program Files\PIXELA\ImageMixer 3 SE Ver.6\Video Tools...
- Page 406 ⒎ Enter your camcorder's serial number and click [Next]. When using security software, the registration of the certification code may not be performed properly depending on the firewall settings. In this case, change the settings of the security software. Refer to the manual of the security software to change the settings.
- Page 407 Software Guide, click the shortcut icon named "ImageMixer 3 SE Ver.6 Software Guide". You cannot use PIXELA software that came bundled with a different Canon camcorder with the camcorder with which this version (ImageMixer 3 SE Ver.6) was bundled.
-
Page 408: Start Imagemixer 3
Start ImageMixer 3 Connecting the camcorder starts ImageMixer 3 automatically. For camcorder operation, refer to the instruction manual of the camcorder. Start the software by connecting the camcorder ⒈ Connect the camcorder to a wall outlet using the compact power adapter. If the camcorder is disconnected from the computer while using ImageMixer 3, video files in the camcorder may... -
Page 409: Supported Data
ImageMixer 3 SE Ver.6 Video Tools can handle the following data and discs. Supported files • Videos recorded with the CANON camcorder with which ImageMixer 3 SE Ver.6 Video Tools is bundled. • Discs created from the above videos, that were edited and/or authored using ImageMixer 3 SE Ver.6 Video Tools. - Page 410 Exportable files/discs ■ Recording standard DVD-Video standard AVCHD standard BD-R 2.0 standard BD-RE 3.0 standard ■ File format (extension) Video Editing: H.264(.m2ts) Web upload: Windows Media Video (.wmv) File export (for video-sharing site): Windows Media Video (.wmv) File export (for computer): MPEG-2 (.mpg) File export (for iTunes): QuickTime Movie (.mov) Music file export: WAVE (.wav, .wave) files in linear PCM To export a music file, the file must meet the conditions on P.39 .
-
Page 411: Precautions
Read-protected data and copy-protected data cannot be imported. • Do not operate other software while writing a disc. • You cannot use PIXELA software that came bundled with a different Canon camcorder with the camcorder with which this version (ImageMixer 3 SE Ver.6) was bundled. - Page 412 Operating limitations • While ImageMixer 3 is running, do not switch user accounts and do not set the computer to Sleep, Hibernate or Standby mode. • If the computer is configured to automatically enter a power saving mode after a certain period of time, change the Power Options in the Control Panel in advance.
- Page 413 When using the YouTube upload function, the number of videos uploaded per hour may be restricted according to YouTube specifications. Also, full operation cannot be guaranteed for future modifications of the YouTube specifications, or for every environment. • Refer to the following Web site for the latest information about operating limitations. http://www.pixela.co.jp/oem/canon/e/...
-
Page 414: Exit Imagemixer 3
Click [Eject CANON(X:)]. camcorder from the computer. The letter that appears as "(X:)" varies depending on the computer. If two or more "CANON(X:)" are displayed, click all "CANON(X:)". A message informing you that it is safe to remove hardware will be displayed. -
Page 415: Uninstall
Uninstall Deletes ImageMixer 3 from the computer. Exit ImageMixer 3 if it is running. Windows XP ⒈ Click the [Start] menu. ⒉ Click [Control Panel]. ⒊ Click [Add or Remove Programs]. ⒋ Select [ImageMixer 3 SE Ver.6 Video Tools] and click [Remove]. - Page 416 Windows Vista / Windows 7 ⒈ Click the Start menu. ⒉ Click [Control Panel]. ⒊ Click [Uninstall a program]. ⒋ Select [ImageMixer 3 SE Ver.6 Video Tools] and click [Uninstall]. Uninstall ImageMixer 3 SE Ver.6 Video Tools first. You cannot uninstall ImageMixer 3 SE ⒌...
- Page 417 Deleting administrative files Administrative files are files that contain information related to the video files used in ImageMixer 3. If you keep these files, you can restore the information such as file reading and Albums. Perform this procedure if you do not need these files.
-
Page 418: Simple Operation
Simple operation Video file import ..................27 Web upload ....................29 Disc writing ....................32 Video & music file combination ..............35... -
Page 419: Video File Import
Video file import You can import the video files recorded with the camcorder to the computer. ⒈ Connect the camcorder or the source device to the computer. Refer to P.16 for how to connect. ImageMixer 3 Launcher will be displayed. ⒉... - Page 420 ⒊ Select the memory that contains the video files you want to import. The SD Memory Card inserted in the camcorder. The built-in memory of the camcorder. Both the built-in memory and SD Memory Card in the camcorder. A card reader/writer or other devices. ⒋...
-
Page 421: Web Upload
Web upload You can upload the video files recorded with the camcorder directly to the video sharing Web site (YouTube) on the Internet. ⒈ Create video files for Web upload using the camcorder. Refer to the camcorder's instruction manual for details. ⒉... - Page 422 ⒋ Select files and click [OK]. Check the video files to upload. You can upload up to 10 files at once. ⒌ Enter your account information and click [Next]. You can use your Google account if it is linked with your YouTube account. Enter the full Google email address as shown below into the YouTube account.
- Page 423 ⒍ Enter the upload information and click [Upload]. Note the following limitations for uploading files to YouTube: The number of files to upload within 1 hour may be limited according to YouTube specifications. When uploading files continuously, you may not be able to access YouTube.
-
Page 424: Disc Writing
Disc writing You can write a disc simply by selecting the picture quality and the memory that contains the video files. ⒈ Create a playlist or SD-Video files using the camcorder. Refer to the camcorder's instruction manual for details. ⒉ Connect the camcorder to the computer. - Page 425 ⒋ Select the picture quality and click [Next]. HD (high quality) Writes a disc keeping the original high-definition picture quality. You can write on a Blu-ray disc or DVD disc (AVCHD standard). Video files recorded in MXP mode will be converted using a maximum bit rate of 18 Mbps.
- Page 426 ⒍ Select the drive to write and set a disc. ⒎ Click [Write]. Writing will start.
-
Page 427: Video & Music File Combination
Video & music file combination Combines video files added to the playlist on the camcorder and music files, then imports to the computer as a single video file. ⒈ Create a playlist and select the music file in the camcorder. Refer to the camcorder's instruction manual for details. - Page 428 ⒋ Select the memory that contains the video files you want to import. The SD Memory Card inserted in the camcorder. The built-in memory of the camcorder. ⒌ Read the message and click [OK]. The separate video files and the music file are combined and imported as a single video file.
-
Page 429: Other Operations
Other operations Music file export ..................38 Video file export ..................41 Edited video file export ................45... -
Page 430: Music File Export Screen
Music file export Exports the music files in the computer. The exported music files can be used as background music that can be played back together with video files. ⒈ Connect the device to export to to the computer. Note the following when using SD Connect the camcorder (supported model only) or insert an SD Memory Memory Cards: Card into the computer. - Page 431 ⒊ Click [Add]. Music file export screen: P.126 ⒋ Select music files to add and click [Open]. You can add up to 10 files that meet the following conditions: File format WAVE (.wav, .wave) files in linear PCM File size Less than 1 GB Channel 2 channels...
-
Page 432: Video File Export Screen
⒌ Select the destination to export to. The value in the capacity bar turns red when the total size of the files to export exceeds the capacity of the selected destination. Reduce the total file size in the Music List. ... -
Page 433: When Importing Video Files
Video file export Exports the video files in the computer back to the camcorder or other removable media. Exported files can be played back with the camcorder. Before exporting Note the following: • You can export video files that were imported from the camcorder using ImageMixer 3 SE Ver.6. However the files converted to SD-Video or MPEG-2 format cannot be exported. -
Page 434: When Exporting Files
Export video files ⒈ Connect the device to export to to the computer. Note the following when using SD Connect the camcorder (supported model only) or insert an SD Memory Memory Cards: Card into the computer. Use SD Memory Cards initialized Refer to P.16 for how to connect the camcorder. - Page 435 ⒊ Select the folders to export. Video files are exported by date folders. Date folders are created when importing video files from the camcorder. Video file export screen: P.128 Thumbnails are displayed only when the thumbnail file exists in the folder. The thumbnail file is created from the first video file in the folder.
- Page 436 ⒋ Select the destination to export to. ⒌ Check the capacity bar and click [OK]. When the total size of the file exceeds the capacity, the value in the capacity bar turns red. Reduce the number of folders in this case. ⒍...
-
Page 437: Edited Video File Export
Edited video file export Exports video files edited with ImageMixer 3. Exported files can be played back with the camcorder. Before exporting Note the following: • You can export video files edited with ImageMixer 3 SE Ver.6. When exporting non-edited files, refer to P.41 . •... - Page 438 Export edited video files ⒈ Connect the device to export to to the computer. Note the following when using SD Connect the camcorder (supported model only) or insert an SD Memory Memory Cards: Card into the computer. Use SD Memory Cards initialized Refer to P.16 for how to connect the camcorder.
- Page 439 ⒋ Select the files to export. ⒌ Check the capacity bar and click [Export]. When the total size of the file exceeds the capacity, the value in the capacity bar turns red. Reduce the number of files in this case. ⒍...
-
Page 440: Manage Video Files
Manage video files What's the Library? ..................49 Basic operations in the Library ..............51 Play back video files ..................60 Show video file details .................61 Edit video file information ................62 Create Album/Smart Albums ...............64 Save a video file as a new file ...............69 Upload to YouTube ..................71... -
Page 441: What's The Library
What's the Library? The Library is the location in the computer where the video files used with ImageMixer 3 are stored. The files saved in the Library can be used in the Library screen. What you can do with the Library screen In the Library screen (P114-121), you can manage or edit video files imported from the camcorder. - Page 442 Locations of the Library Video files imported from the camcorder to the computer are saved in the following locations: You can change the locations in the Preferences (P.147) screen. ■ Files imported with [Video file import] in the ImageMixer 3 Launcher Windows XP C:\Documents and Settings\(User account name)\My Document\My Video\IMx3SEVer6\ Windows Vista...
-
Page 443: Basic Operations In The Library
Basic operations in the Library The following section explains the basic operations in the Library screen. Display the Library screen Click [Video file management & edit] in the ImageMixer 3 Library screen. It may take time to read imported video files into the Library. The Library screen will be displayed. - Page 444 Select video files ⒈ Click the format tab that contains the target files. Format tab: P.115 File type [AVCHD] Files recorded with the camcorder. Files converted to SD-V ideo format with the [SD-Video] camcorder. [MPEG-2] Files converted to MPEG-2 format with the camcorder. ⒉...
- Page 445 ⒊ Click individual video files. Browser pane: P.118...
- Page 446 Change the screen layout You can change the layout and file order in the following ways: Change the file layout with the display filter and Thumbnails and file information are displayed in a list List format. Only thumbnails and titles are displayed. You can Thumbnail change the size with [Thumbnail size] in upper right screen.
- Page 447 Drag the header to change the thumbnail size.
- Page 448 Change the file order Click the header to arrange the files in ascending/ descending order. By changing the file order, you can play back files in the desired order. Drag and drop a file to change the order. I n a S m a r t A l b u m , y o u c a n n o t change the file order by dragging and dropping.
- Page 449 Add video files Go to [Video file import] (P.27) to add video files to the Library. Refer to P.155 for how to return to the Library files deleted by [Keep files] or files with (cannot find this file). Imported video files will be added to the Library automatically when opening the Library screen.
- Page 450 Delete video files ⒈ Select files. You cannot delete files in a Smart Select the files to delete from the Library, Album, or Writing List. Album. ⒉ Press Del (Delete) key in the keyboard. If you selected the file in the Library, go to the next step. Note the following when deleting files from the Library.
- Page 451 Delete an Album/Smart Album/Writing List ⒈ Select Album/Smart Album/Writing List. ⒉ Press Del (Delete) key in the keyboard. ⒊ Click [OK].
-
Page 452: Play Back Video Files
Play back video files Select video files in the Library screen to play back. ⒈ Click [Video file management & edit] in the ImageMixer 3 launcher screen. ⒉ Select a file and click [Playback]. You can change the size of the screen in the following ways: Select the screen size from the [View] menu. -
Page 453: Show Video File Details
Show video file details You can check the detailed information of a video file. ⒈ Click [Video file management & edit] in the ImageMixer 3 launcher screen. ⒉ Select a file and click [Information]. The Information panel will be displayed. Click [Information] again to close the ... -
Page 454: Edit Video File Information
Edit video file information You can change the thumbnails and titles displayed in the Library screen. You can also add your rating and comments. ⒈ Click [Video file management & edit] in the ImageMixer 3 launcher screen. ⒉ Select a file and click [Information]. The Information panel will be displayed. - Page 455 ⒊ Click [Options]. ⒋ Edit desired items and click [Information]. Information panel (Options): P.121 Title The name entered here is displayed as the title in the Library screen. The title is also reflected on the menu screen (P.107) of a written disc. Thumbnail Changes the thumbnail image.
-
Page 456: Create Album/Smart Albums
Create Album/Smart Albums You can sort video files in the Library by folders based on a certain theme. There are two types of folders: Album and Smart Album. Features of Albums With an Album/Smart Album, you can group video files based on a certain theme in the Library screen. This will help you to use video files in the following cases: •... - Page 457 Create an Album ⒈ Click [Video file management & edit] in the ImageMixer 3 launcher screen. ⒉ Click ⒊ Enter the Album name and click [OK]. A new Album is added to the Source pane.
- Page 458 ⒋ Drag and drop files to add to the Album created in Step 2. Even if you delete a file in an Album, the original file in the Library will remain. Video files will be added to the Album.
- Page 459 Create a Smart Album ⒈ Click [Video file management & edit] in the ImageMixer 3 launcher screen. The Video Snapshot scenes are added to the "Video Snapshot" Smart Album automatically. ⒉ Click and select [New Smart Album...]. You cannot add files in the [MPEG-2] tab to a Smart Album.
- Page 460 ⒊ Set the rules and click [OK]. When sorting by file size, sorting is If you wish to add rules, click on the right and set the rule. based on the integer number of the If you wish to remove rules after setting up multiple rules, click file size displayed in the [Information] panel of the Library.
-
Page 461: Save A Video File As A New File
Save a video file as a new file By saving a new file converted to a different format, you can use it to upload to a video sharing Web site or play back on an iPod. ⒈ Click [Video file management & edit] in the ImageMixer 3 launcher screen. - Page 462 ⒋ Configure the writing settings and click [Export]. Additional operations in the video sharing Web site or in iTunes are required for using files saved by this method. Destination to save files Click [Browse...] and select the destination if you want a different destination.
-
Page 463: Upload To Youtube
Upload to YouTube Uploads the video files stored in the Library. It is necessary to create a YouTube account before starting this operation. ⒈ Click [Video file management & edit] in the ImageMixer 3 launcher screen. ⒉ Click [Web upload]. - Page 464 ⒊ Select files and click [Add]. Files longer than 10 minutes are You can add up to 10 files. divided 10-minute files and each divided file is handled as one file. Therefore, even if there are fewer than 10 files in the Upload List, you may not be able to add any more files.
- Page 465 ⒌ Select the picture quality and click [Next]. File specifications after conversion will vary depending on the file format and picture quality selected. High quality After SD-Video AVCHD conversion MPEG-2 File format Resolution 1280 x 720 Based on original file Bit rate 3Mbps Standard quality...
- Page 466 ⒍ Enter your account information and click [Next]. You can use your Google account if it is linked with your YouTube account. Enter the full Google email address as shown below into the YouTube account. *******(username)@gmail.com If you fail to enter the correct user name and password several times, you may not be able to access YouTube.
- Page 467 Title Enter the title of the file you want to upload. If you selected two or more Note the following limitations for files, "serial number/total number of files uploaded in the same batch" uploading files to YouTube: will be displayed in the end after uploading. The number of files to upload within 1 hour may be limited according to Description...
-
Page 468: Edit Video Files
Edit video files Preparation (project setting) ................77 Add/delete clips ....................80 Change playback order ................82 Trim a video clip ..................83 Cut out multiple scenes from a video clip ............85 Add text on videos ..................87 Add music on videos ..................90 Adjust volume .....................92 Save a project ....................95 Save edited videos as a single file... -
Page 469: Preparation (Project Setting)
Preparation (project setting) You need to set a project before editing video files. ⒈ Click [Video file management & edit] in ImageMixer 3 Launcher. The term "project" indicates the entire operation of video editing. By saving a project, you can stop editing at any point and resume editing later. - Page 470 ⒊ Click [Edit new movie]. ⒋ Select the resolution and click [OK]. This step is to select the screen size of the video edited and exported as one file. The Edit screen will be displayed. The message that the conversion will take time appears when selecting a resolution different from that of the video files selected in step 2.
- Page 471 ⒌ Start editing. In the edit screen, video and audio The selected files (clips) are placed on the Working area. files, as well as text (titler) added in the editing are called "clips". Edit screen (Outline): P.131 Refer to following procedures for your choice of editing. Change playback order (P.82) Trim a video clip (P.83) Cut out multiple scenes from a video clip (P.85)
-
Page 472: Add/Delete Clips
Add/delete clips You can add extra clips or delete clips after setting a project. Add extra clips ⒈ Click [Library]. Edit screen (Library panel): P.135 ⒉ Select the folder that contains the clip you wish to add. - Page 473 ⒊ Drag and drop a clip into the Working area. Delete clips ⒈ Select a clip. ⒉ Click...
-
Page 474: Change Playback Order
Change playback order You can change the playback order by arranging the order of clips. ⒈ Drag and drop clips to arrange the order. This operation can be performed both in Timeline and Storyboard view. You cannot scroll through the Working area by dragging a clip. ... -
Page 475: Trim A Video Clip
Trim a video clip You can trim unnecessary scenes from a video clip. ⒈ Select a clip. In Timeline view (P.144) , you can also This operation can be performed both in Timeline and Storyboard view. trim videos by dragging the top/end of the clip in the Working area. - Page 476 ⒊ Drag the OUT-point slider to the end of the scene to keep. Click to check the result. Refer to P.96 for saving the edited content as a single video file.
-
Page 477: Cut Out Multiple Scenes From A Video Clip
Cut out multiple scenes from a video clip You can cut out multiple scenes from a video clip. ⒈ Right-click the clip to trim and select [Trim multiple ranges]. ⒉ Drag the OUT-point slider to the end of the scene to keep. - Page 478 ⒋ Click ⒌ Repeat steps 2 to 4 to trim out other scenes you may want to keep. You can set up to 20 ranges. ⒍ Click [OK]. Specified ranges are placed in the Working area. Select a clip and click to check the result.
-
Page 479: Add Text On Videos
Add text on videos You can add text on videos. Text size, font, and way to display can also be changed. ⒈ Click [Titler]. The screen changes to Timeline view if it is in Storyboard view. ⒉ Drag the slider to the beginning point where you wish to display text. - Page 480 ⒊ Enter the text. You can also change text size, font, You can enter up to 64 characters. If the text is too long to display, insert line breaks or and text color. change the text size. Edit screen (Titler panel): P.137 ⒋...
- Page 481 ⒍ Click [Apply]. When editing videos, if you set a titler over videos recorded in x.v. Color, x.v. Color is not applied while the titler is being played back. The text (titler clip) is placed in the Working area. Click then to check the result.
-
Page 482: Add Music On Videos
Add music on videos You can add music on videos. ⒈ Click [Audio file]. The screen changes to Timeline view if it is Storyboard view. Edit screen (Audio file panel): P.136 ⒉ Select the folder that contains the music file you wish to add. - Page 483 ⒊ Drag and drop a music file into the Working area. You can change the start point of the You can use “.wav” files. music by dragging the audio clip to Only files longer than 0.5 second with a quantization bit rate of 16 bit. the right or left.
-
Page 484: Adjust Volume
Adjust volume You can adjust the volume of the video and audio clip. You can also use sound effects to make the volume become louder gradually (Fade-in) or softer gradually (Fade-out). ⒈ Click [Adjust Volume]. ⒉ Select a clip. You can adjust the volume of video and audio clips. To adjust audio clips, click the [Timeline] tab to select audio clip. - Page 485 ⒊ Adjust the volume. Adjust the volume with the vertical slider. Edit screen (Adjust volume panel): P.139 ⒋ Adjust the Fade-in / Fade-out duration. Adjust with the horizontal slider.
- Page 486 ⒌ Click [Apply]. Click to check the result. Refer to P.96 for saving the edited content as a single video file.
-
Page 487: Save A Project
Save a project By saving a project, you can stop editing at any point and resume editing later. By saving a project before saving, it is easier for you to check the actual results and re-edit the project if necessary. ⒈... -
Page 488: Save Edited Videos As A Single File
Save edited videos as a single file The edited content is saved as a single file. The original video files used for editing will remain without change. ⒈ Click [Save] tab. ⒉ Click [Save]. ⒊ Select the save destination and click [Save]. Edited files have following limitations: [Video bitrate] information of the edited video does not appear in the... -
Page 489: Write A Disc
Write a disc Write video files onto a disc ................98 Play back a written disc .................106... -
Page 490: Write Video Files Onto A Disc
Write video files onto a disc You can write a disc of video files stored in the Library. To write a disc of video files in the camcorder, refer to P.32 . ⒈ Click [Video file management & edit] in the ImageMixer 3 launcher screen. - Page 491 ⒊ Click the Writing List that meets your purpose. Writing List DVD List AVCHD List Blu-ray List DataDisc List S t o r e s t a n d a r d d e f i n i t i o n v i d e o S t o r e h i g h S t o r e...
- Page 492 ⒋ Enter the list name and click [OK]. The list name entered in this step becomes the menu title (P.107) of the written disc. Long titles may not be fully displayed. Enter the title within the following length. [DVD List] Approximately 20 bytes [AVCHD/Blu-ray/DataDisc List] Approximately 30 bytes...
- Page 493 ⒍ Decide whether to combine files or not. Files will be combined if files of the Click [Yes] when combining multiple files as one title. same resolution are played back in Click [No] when applying a title to every single file. series when written onto a disc.
- Page 494 ⒏ Change playback order and title name. When combining files, the number of If necessary, change the playback order (P.56) after clicking the Writing titles will change depending on the List created in Step 4, or change the title name (P.62). playback order.
- Page 495 Configure menu screen settings and click [OK]. The menu screen (P.107) is the screen that appears first when playing back the written disc. In this step, you decide the design of the screen. Select menu Select the design of the menu screen. Disc size Select the disc type to write.
- Page 496 Configure the writing settings and click [Create]. If other programs are set up to automatically receive files and save them on the [Workspace] hard disk (download files from the Internet, receive e-mail, update antivirus profiles, Windows Update, etc.), close those programs or set them up so files will not be received and saved automatically.
- Page 497 Decide whether to write another disc. When writing is completed, the following message will be displayed. Click [OK] to write another disc with the same content. Click [Cancel] to finish writing.
-
Page 498: Play Back A Written Disc
Play back a written disc When you write video files onto a disc, titles and chapters are created at the same time. Also the menu screen will appear first when playing back the written disc. Titles and chapters When you write a disc, the number of the video unit (title) will change depending on the resolution, playback order, and file combination settings. - Page 499 Menu screen The following screen will be displayed first when you play back a written disc. ₁ Menu title The name of the Writing List will appear as the menu title of the disc. ₂ Title thumbnail The top scene of the title is displayed. ₃...
-
Page 500: Imagemixer 3 Se Player Ver.6
ImageMixer 3 SE Player Ver.6 Play back with ImageMixer 3 SE Player Ver.6 ..........109... -
Page 501: Play Back With Imagemixer 3 Se Player Ver.6
Play back with ImageMixer 3 SE Player Ver.6 ImageMixer 3 SE Player Ver.6 is installed together with ImageMixer 3 SE Ver.6 Video Tools. ⒈ Start ImageMixer 3 SE Player Ver.6 Double-click the shortcut icon or start from the [Start] menu. You cannot use ImageMixer 3 SE Player Ver.6 and ImageMixer 3 at the same time. - Page 502 ⒊ Select a video file/disc and start playback. You can change the size of the screen in following ways: Select the screen size from the [View] menu. Drag the edge of the window. Double-click the screen (full screen display). When playing back videos recorded in XP+ mode/SP mode/LP mode (1440 x 1080 pixels) in [Actual size] in the [View]...
-
Page 503: Search From Screens
Search from screens Startup screen ImageMixer 3 Launcher screen ..................112 Library screen Outline ..........................114 Format tab ......................... 115 Source pane ......................116 Browser pane ......................118 File Information panel ....................120 Playback screen ImageMixer 3 preview screen ..................122 ImageMixer 3 SE Player Ver.6 controller .............. -
Page 504: Startup Screen
Startup screen The following screen appears first after starting ImageMixer 3. This screen is called the Launcher. ImageMixer 3 Launcher screen Clicking the button navigates you to the screen to operate. ₁ [Video file import] button Imports video files in the camcorder to the computer. (P.27) ₂... - Page 505 ₆ [Video file export] button Exports video files imported to the computer with ImageMixer 3 to an SD Memory Card or other storage media. (P.41) ₇ [Edited video file export] button Exports video files edited with ImageMixer 3 SE to an SD Memory Card or other storage media. (P.45) ₈...
-
Page 506: Library Screen
Library screen The Library screen is used to manage video files imported from the camcorder to the computer. Refer to P.49 for the operations from this screen. Outline The Library screen is composed of three parts. For details, refer to the explanation of the respective parts. -
Page 507: Format Tab
Format tab Imported video files are sorted by file format. Select the format of the video file. ₁ [AVCHD] tab Displays the video files recorded with the camcorder. ₂ [SD-Video] tab Displays the video files converted to SD-Video with the camcorder. ₃... -
Page 508: Source Pane
Source pane The Source pane has a list of folders that sorts the video files. When you select a folder, the video files in it are displayed in the Browser pane (P.118). The items in the Source pane vary according to the format tab (P.115) selected. Items in Source pane AVCHD SD-Video... - Page 509 ₄ Smart Album A list of video files collected from the Library by specific conditions. ₅ Writing List A list of video files selected from the Library to create your original disc. The disc type and standard will vary depending on the type of list. Some lists cannot be used depending on the Format tab selected. Writing List Functions DVD List...
-
Page 510: Browser Pane
Browser pane The Browser pane displays the list of video files stored in the location you selected in the Source pane (P.116). ₁ Display Filter Shows/hides thumbnails or changes the thumbnail size. (P.54) ₂ Browser pane Displays the video files stored in the location you selected in the Source pane. File status is indicated by the following marks. - Page 511 ₃ Control buttons The buttons vary depending on the selected item in the Source Pane. When selecting Library/Album/Smart Album Button Format tab Function [Playback] Plays back the selected video file. Displays the information panel (P.120) at the bottom of [Information] the Browser pane.
-
Page 512: File Information Panel
File Information panel When you select a video file in the Browser pane and click the [Information] button, detailed information about the selected file will be displayed. ■ File Information tab To display file information: P.61 The value in [System bitrate] and [Video bitrate] may differ from those of the camcorder. When selecting [SD-Video] or [MPEG-2] tab, the value in [Video bitrate] will not be displayed. - Page 513 ■ Options tab Click [Options] tab to display. To edit file information: P.62 ₁ Title You can change the titles of the videos in the Library. The title you enter here will appear on the menu screen of the written disc. ₂...
-
Page 514: Playback Screen
Playback screen Screen components are different between ImageMixer 3 and ImageMixer 3 SE Player Ver.6. ImageMixer 3 preview screen Clicking [Playback] after selecting files in the Browser pane displays following screen. To play back video files: P.60 ₁ Elapsed time Shows the time of current playback position. - Page 515 ₅ Playback button Plays back/pauses the video. During playback, the button will appear as Pause button. ₆ Skip to next button Jumps to the beginning of the next file. ₇ Mute Mutes/restores the volume. ₈ Volume level Adjusts the volume of the video you are playing.
-
Page 516: Imagemixer 3 Se Player Ver.6 Controller
ImageMixer 3 SE Player Ver.6 controller The controller is displayed when playing back video files and discs with ImageMixer 3 SE Player Ver.6. To play back with ImageMixer 3 SE Player Ver.6: P.109 ₁ Navigation button Controls the menu screen when playing back a disc. ₂... - Page 517 � Fast Forward button Advances the video at a higher speed. Every time you click this button, the speed changes x10, x30, x60, and x5. � Skip to next button Jumps to the next chapter. � Mute button Mutes/restores the volume. �...
-
Page 518: Export Screen
Export screen Following are the screens to export music, video, and edited video files. The screens vary depending on the file type you export. Music file export screen Clicking [Music file export] in ImageMixer 3 Launcher displays following screen. To export music files: P.38 ₁... - Page 519 ₄ [Playback]/[Stop] button Plays back the file selected in the Music List. This button becomes [Stop] button during playback. Operations such as fast forwarding, rewinding, and pausing are not available, ₅ Destination to export The name of the destination to export and the drive letter are displayed. Select the destination to export ₆...
-
Page 520: Video File Export Screen
Video file export screen Clicking [Video file export] in ImageMixer 3 Launcher displays following screen. To export video files: P.41 ₁ Show thumbnails Check the box to show the thumbnails. A thumbnail is displayed only when the thumbnail file exists in the folder. -
Page 521: Edit Video File Export Screen
Edit video file export screen Clicking [Edited video file export] in ImageMixer 3 Launcher displays following screen. To export edited video file: P.45 ₁ Source pane Displays the Library, Albums, and Smart Albums. ₂ Destination to export The name of the destination to export and the drive letter are displayed. Select the destination to export ₃... -
Page 522: Web Upload Screen
Web upload screen The following screen is used to upload video files from the Library to YouTube. Web upload screen from the Library Clicking [Web upload] in the Library screen displays the following screen. To upload to YouTube: P.71 ₁... -
Page 523: Edit Screen
Edit screen Following are the screens used to edit video files. The screen varies depending on the edit type. Outline The Edit screen is composed of five parts. For details, refer to the explanation of the respective parts. ₁ Mode bar (P.132) Switches between the editing screen and save screen. -
Page 524: Mode Bar
Mode bar Switches the screen to edit and save. ₁ [Edit] tab Displays the edit screen. ₂ [Save] tab Displays the screen to save the edited content. ₃ [Back] button Returns to the Library screen. -
Page 525: Function Bar
Function bar Select the edit type. ₁ [Library] button Adds extra video clips. (P.80) ₂ [Audio file] button Adds music on videos. (P.90) ₃ [Titler] button Adds text on videos. (P.87) ₄ [Adjust Volume] button Adjusts the volume of the clip. (P.92) -
Page 526: Settings Panel
Settings panel Panel display differs according to the items selected in the Function bar (P.133). For details, refer to the explanation of the respective settings. • Library panel (P.135) • Audio file panel (P.136) • Titler panel (P.137) • Adjust volume panel (P.139) - Page 527 ■ Library panel Clicking [Library] button displays following panel. To add extra clips: P.80 ₁ Source A list of locations where the clips are stored. ₂ Clip list A list of usable clips. ₃ [Apply] button Places selected clips onto the Working area. ₄...
- Page 528 ■ Audio file panel Clicking [Audio file] button displays following panel. To add music on videos: P.90 ₁ Source A list of locations where the clips are stored. ₂ Clip list A list of usable clips. ₃ [Apply] button Places selected clips onto the Working area.
- Page 529 ■ Titler panel Clicking [Titler] button displays following panel. To add text on videos: P.87 ₁ Titler list Select how the text will appear and move. When you select the [Credit roll] or [Display-Top center], [Stop at stop position] and [Display time] will be invalid. ₂...
- Page 530 ₇ Color palette Select the text color. ₈ Alignment Set text alignment (left, center, right). When you select the [Vertical (top to bottom)] line alignment will be invalid. ₉ Text style Set text style (bold, italic, underline, strike-through). � Text direction Set text direction (vertical, horizontal).
- Page 531 ■ Adjust volume panel Clicking [Adjust volume] button displays following panel. To adjust volume: P.92 ₁ Volume slider Adjusts the volume of the video file. The green area shows the volume. ₂ Fade-in slider Allows you to set the sound so it becomes louder gradually (Fade-in). ₃...
-
Page 532: Preview/Trimming Panel
Preview/Trimming panel Displays the clip being selected and trims the length. To trim videos: P.83 ₁ Elapsed time Shows the current playback time. ₂ Playback slider Drag to change the playback position. ₃ IN-point slider Drag to set the start point of the video you want to keep. ₄... - Page 533 ₉ Mute button Mutes/restores the volume. � Volume level Adjusts the volume.
-
Page 534: Working Area
Working area The clips are placed in the order of playback beginning from the left. There are two ways to display: Storyboard and Timeline. • Common items (P.143) • Storyboard display (P.144) • Timeline display (P.144) - Page 535 ■ Common items Following items are displayed in both Storyboard and Timeline display. ₁ [Storyboard] tab Displays the order of clips visually. ₂ [Timeline] tab Displays the order of clips as well as the start/end point of effects such as titler and music. ₃...
- Page 536 ■ Storyboard display The thumbnails of applied clips are placed in playback order. In the early stage of editing, it is useful because you can arrange the playback order of the video files visually. ₁ Clip Video file placed on the Working area. ■...
-
Page 537: Multiple Trimming Window
Multiple trimming window Trims multiple videos from a selected clip. To trim multiple scenes from a clip: P.85 ₁ Elapsed time Shows the current playback time. ₂ Playback slider Drag to change the playback position. ₃ IN-point slider Drag to set the start point of the video you want to keep. ₄... - Page 538 ₈ Skip to previous button Jumps to the previous trimming point. If there is no trimming point, jumps to the beginning of the clip. ₉ Skip to next button Jumps to the next trimming point. If there is no trimming point, jumps to the end of the clip. �...
-
Page 539: Preferences Screen
Preferences screen You can change the settings such as the destination to save imported video files and video system when writing a disc. Preferences screen (All items) Clicking [Preferences...] in the [Settings] menu displays following window. Setting options varies depending on the screen currently displayed. ₁... -
Page 540: Video System
₃ Reset all Imported Marks Click [Reset] if you want to reset all the Imported marks (P.118). ₄ Video System Select the video system when creating a disc or exporting files in a different format. Video system will be confined depending on the disc creation method. When creating a disc from a Writing List in the Library, the video system set in the Preferences will determine the video system of the disc. -
Page 541: Useful Information
Useful information Function list ....................150 Frequently asked questions ................151 Inquiries ......................161... -
Page 542: Function List
Function list Following is the list of functions available in ImageMixer 3. Note that some functions cannot be used depending on the file type. File type Files recorded with Files converted with Files converted with Function camcorder camcorder camcorder (AVCHD) (SD-Video) (MPEG-2) Video file import... -
Page 543: Frequently Asked Questions
Frequently asked questions Questions about the operations of ImageMixer 3 are classified according to the scenes. Preparation I can't install ImageMixer 3. ImageMixer 3 can be installed in computers with following operating systems: Microsoft Windows XP Service Pack 2 Microsoft Windows XP Service Pack 3 Microsoft Windows Vista Service Pack 1 Microsoft Windows Vista Service Pack 2... - Page 544 My camcorder is not recognized by the computer. Check the following: Have you installed ImageMixer 3? Have you turned on the camcorder? Is the camcorder powered using the compact power adapter? Is the USB cable connected to the computer properly? ...
- Page 545 Importing to computer Importing stops halfway. Try another USB port of the computer. For desktop computers, try the USB port on the back. It takes a long time to import video from the camcorder to the computer. ...
- Page 546 Playback I want to change the screen size. Select the screen size from the [View] menu, or drag the edge of the window. The joining points between chapters are not played back smoothly. If you do not combine files when creating a disc, the joining points between scenes may not be played back smoothly.
- Page 547 File management (Library) (Cannot find this file) appears. ImageMixer 3 cannot find files if, for example, the files are deleted in Windows Explorer after being added to the Library. Do not delete or move the video files you use in ImageMixer 3. If you moved a file by mistake, you can erase this mark by returning the file to the original location.
- Page 548 Video edit It takes a long time to save videos edited with ImageMixer 3. It takes a long time if the video format (video system/resolution) of the project setting differs from that of the original file. Processing speed may vary depending on your computer's configuration (for example, CPU ...
- Page 549 Disc writing Drives are not detected. Drives may not be detected if writing software (packet writing) is already installed. I can't add a file to the Writing List. In the following cases, you cannot add files to the Writing List. The number of the title in the Capacity Bar has reached the limit of the Writing List.
- Page 550 The message “Not enough disk space for the workspace.” is displayed. The following free space is required in the workspace to create a disc. Increase the free space in the workspace, or change the workspace in the Preferences (P.147). DVD/AVCHD List : at least three times the volume of data to be written on the disc Blu-ray List : at least twice the volume of data to be written on the disc DataDisc List : at least the size of data to be written on the disc...
- Page 551 Menu title and title names are not fully displayed. The number of characters which can be displayed in the menu screen is limited. (The number changes depending on the characters used.) Menu title DVD List : approximately 20 bytes AVCHD / Blu-ray / DataDisc List : approximately 30 bytes Title DVD List : approximately 8 bytes...
- Page 552 Others I can't exit ImageMixer 3. Close all dialog boxes and setting screens before exiting. File extensions are not displayed. Follow the steps below to show file extensions. Windows XP 1. Open any folder. 2. Click [Tool] menu - [Folder Options] - [View] tab. 3.
-
Page 553: Inquiries
Other Countries in Europe +44-1489-564-764 Language: English, German, French, Spanish, Italian, Dutch ■ Asia (Philippines) +63-2-438-0090 Language: English ■ China 10800-163-0014 (toll-free) Language: Chinese ImageMixer 3 Web site Please check our Web site for the latest information and downloads. http://www.pixela.co.jp/oem/canon/e/...