
Related Manuals for Pioneer DEH-3100UB


Summary of Contents for Pioneer DEH-3100UB
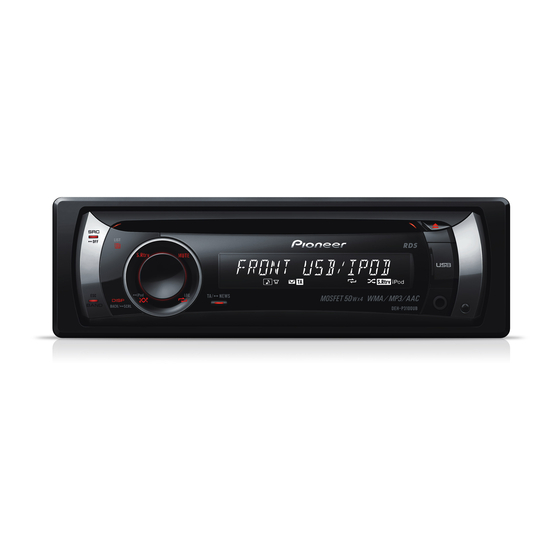
- Page 1 CD RECEIVER RADIO CD DEH-4150SD DEH-3100UB Operation Manual Manual de instrucciones...
-
Page 2: Table Of Contents
Contents Thank you for purchasing this PIONEER product. Please read through this manual before using the product for the first time, to en- sure proper use. After reading, please keep the manual in a safe and accessible place for future reference. - Page 3 Contents Adjusting source levels 24 iPod 34 – iPod compatibility 34 Initial Settings – About handling the iPod 34 Adjusting initial settings 25 – About iPod settings 34 Setting the clock 25 Copyright and trademark notice 34 Setting the FM tuning step 25 Specifications 36 Setting the AM tuning step 25 Switching the auxiliary setting 26...
-
Page 4: Before You Start
CAUTION ! “CLASS 1 LASER PRODUCT” ! Pioneer accepts no responsibility for data lost This product contains a laser diode of higher on the USB memory/USB portable audio class than 1. To ensure continued safety, do... -
Page 5: Attaching The Front Panel
Section Before You Start ! When using for the first time, pull out the Grab the front panel and remove. film protruding from the tray. Put the front panel into the provided protective case for safe keeping. Attaching the front panel WARNING Keep the battery out of the reach of children. -
Page 6: Operating This Unit
1 SRC/OFF button directly. This unit is turned on by selecting a source. Pioneer CD-U50E USB cable is also avail- Press to cycle through all the available able. For details, consult your dealer. sources. -
Page 7: Remote Control
Section Operating this unit h VOLUME buttons (random)/iPod button Press to turn random function on or off Press to increase or decrease the volume. while using CD or USB/SD. i MUTE button While using an iPod, press to shuffle all Press to turn off the sound. - Page 8 Section Operating this unit 2 c indicator When repeat function is on, only is dis- Appears when an upper tier of folder or played. menu exists. (folder random) indicator (list) indicator Appears when folder random is on. Appears when operating list function. When random function is on, only is dis- played.
-
Page 9: Basic Operations
DEH-4150SD TUNER (tuner)—COMPACT DISC (built-in CD player)—USB (USB storage device)/USB-IPOD (iPod connected using USB input)—SD (SD memory card)—AUX (AUX) DEH-3100UB TUNER (tuner)—COMPACT DISC (built-in CD player)—USB (USB storage device)/USB-IPOD (iPod connected using USB input)—AUX (AUX) Notes ! In the following cases, the sound source will not change. -
Page 10: Tuner
Section Operating this unit # To return to the ordinary display, press Tuner BAND/ESC or /LIST. Basic Operations # If you do not operate the list within about 30 seconds, the display automatically returns to the Important ordinary display. If you are using this unit in North, Central or Note South America, reset the AM tuning step (refer to Setting the AM tuning step on page 25). -
Page 11: Tuning In Strong Signals
Section Operating this unit Press MULTI-CONTROL to turn BSM on. Built-in CD Player The six strongest broadcast frequencies are Basic Operations stored in the order of their signal strength. # To cancel, press MULTI-CONTROL again. % Inserting a CD/CD-R/CD-RW into the disc loading slot Playback will automatically start. -
Page 12: Displaying Text Information On Disc
Section Operating this unit ! There is sometimes a delay between starting the display. Refer to Switching the ever scroll up disc playback and the sound being issued. on page 27. When being read, FORMAT READ is dis- played. Selecting files from the file ! If an error message is displayed, refer to Error name list messages on page 29. -
Page 13: Selecting A Repeat Play Range
Section Operating this unit % Press Use MULTI-CONTROL to select /iPod to turn random play on. FUNCTION. Tracks play in a random order. # To turn random play off, press Turn to change the menu option. Press to se- /iPod again. lect. -
Page 14: Playing Songs In An External Storage Device (Usb, Sd)
Section Operating this unit # 2 is more effective than 1. Playing songs in an external storage device (USB, SD) Note You can play compressed audio files stored in You can also perform this operation in the menu an external storage device (USB, SD). that appears by using MULTI-CONTROL. -
Page 15: Displaying Text Information Of An Audio File
Section Operating this unit Playback will start. to Displaying text information on disc on page 12.) % Selecting a folder Push MULTI-CONTROL up or down. Selecting files from the file % Fast forwarding or reversing name list Push and hold MULTI-CONTROL left or right. The operation is the same as that of the built- % Selecting a track in CD player. -
Page 16: Playing Songs On Ipod
! Read the precautions for iPod in the following section. Refer to page 34. ! While iPod is connected to this unit, PIONEER (check mark)) is displayed on the iPod. ! If an error message is displayed, refer to Error messages on page 29. -
Page 17: Browsing For A Song
Section Operating this unit Browsing for a song Searching by alphabet in the list Operations to control an iPod with this unit is Use MULTI-CONTROL to select a cate- designed to be as close to the iPod as possible gory. to make operation and song search easy. -
Page 18: Introduction To Advanced Operations
Section Operating this unit ! To return to the ordinary display, press Introduction to advanced BAND/ESC. operations ! If you do not operate functions within about Press MULTI-CONTROL to display the 30 seconds, the display automatically returns main menu. to the ordinary display. ! When CONTROL is on, only CONTROL, Use MULTI-CONTROL to select PAUSE and SOUND RETRIEVER can be oper-... -
Page 19: Selecting Songs From Lists Related To The Currently Playing Song
Section Operating this unit Selecting songs from lists related This unit’s iPod function can be operated from your iPod. Sound can be heard from the car’s to the currently playing song speakers, and operation can be conducted Lists related to the currently playing song are from your iPod. - Page 20 Section Operating this unit Press MULTI-CONTROL to display the setting mode. Use MULTI-CONTROL to select the de- sired setting. Turn to change the setting. ! FASTER – Playback faster than normal speed ! NORMAL – Playback in normal speed ! SLOWER – Playback slower than normal speed Press MULTI-CONTROL to determine the selection.
-
Page 21: Audio Adjustments
Section Audio Adjustments ! When selecting FM as the source, you cannot Introduction of audio switch to SRC LV ADJUST. adjustments ! If you do not operate functions within about Press MULTI-CONTROL to display the 30 seconds, the display automatically returns to the ordinary display. -
Page 22: Recalling Equalizer Curves
Section Audio Adjustments Recalling equalizer curves Press MULTI-CONTROL to select the seg- ment you wish to set. There are six stored equalizer curves which Press MULTI-CONTROL repeatedly to switch you can easily recall at any time. Here is a list the segment in the following order: of the equalizer curves. -
Page 23: Adjusting Loudness
Section Audio Adjustments Turn MULTI-CONTROL to select the de- Q factor 2W—1W—1N—2N sired setting. # You can also perform the same operations by NORMAL (normal phase)—REV (reverse pushing MULTI-CONTROL up or down. phase)—OFF (subwoofer off) # You can also perform the same operations by pushing MULTI-CONTROL up or down. -
Page 24: Using The High Pass Filter
Section Audio Adjustments # You can also perform the same operations by # You can also perform the same operations by pushing MULTI-CONTROL up or down. pushing MULTI-CONTROL up or down. Press MULTI-CONTROL to determine Note the selection. You can also switch to this setting mode in the # Even if the menu has been cancelled before menu that appears by using determination, operation is settled. -
Page 25: Initial Settings
Section Initial Settings Adjusting initial settings Setting the FM tuning step The FM tuning step employed by seek tuning Press SRC/OFF and hold until the unit can be switched between 100 kHz, the preset turns off. step, and 50 kHz. Press MULTI-CONTROL and hold until ! If seek tuning is performed in 50 kHz steps, CLOCK SET appears in the display. -
Page 26: Switching The Auxiliary Setting
Section Initial Settings Press MULTI-CONTROL to display the output is connected to full range speakers setting mode. (when REAR SP :FULL is selected), you can connect the RCA subwoofer output to a sub- Turn MULTI-CONTROL to select the AM woofer. In this case, you can select whether to tuning step. -
Page 27: Switching The Ever Scroll
Section Initial Settings Switching the ever scroll When Ever Scroll is set to ON, recorded text in- formation scrolls continuously in the display. Set to OFF if you prefer the information to scroll just once. Use MULTI-CONTROL to select EVER SCROLL in the initial setting menu. Refer to Adjusting initial settings on page 25. -
Page 28: Other Functions
Section Other Functions # Even if the display indication is turned off, op- Using the AUX source eration can be conducted. If operation is con- You can connect an auxiliary device to this ducted while the display indication is off, display unit using a stereo mini plug cable. -
Page 29: Additional Information
NO DEVICE When you contact your dealer or your nearest not connected to device. Pioneer Service Center, be sure to have the the USB port of this unit. error message recorded. ! The SD memory card is only available for... -
Page 30: Handling Guideline Of Discs And Player
Appendix Additional Information Communication Perform one of the iPod is not Check if the con- failure following opera- charged but op- nection cable for ERROR-19 ERROR-A1 tions. erates correctly iPod shorted out CHECK USB –Turn the ignition (e.g., not caught in switch OFF and metal objects). -
Page 31: Dual Discs
Appendix Additional Information ! Please refer to the information from the ! Do not use cracked, chipped, warped, or otherwise damaged discs as they may da- disc manufacturer for more detailed infor- mage the player. mation about Dual Discs. ! Unfinalized CD-R/CD-RW disc playback is not possible. -
Page 32: Sd Memory Card
Appendix Additional Information ! Bit rate: 48 kbps to 320 kbps (CBR), 48 kbps SD memory card to 384 kbps (VBR) ! This unit supports only the following SD ! Sampling frequency: 32 kHz to 48 kHz memory cards. ! Windows Media Audio 9 Professional, Loss- —... -
Page 33: Compressed Audio Files On The Disc
Appendix Additional Information Compressed audio files on : Folder : Compressed audio file the disc ! ISO 9660 Level 1 and 2 compliant. Romeo and Joliet file systems are both compatible with this player. ! Multi-session playback is possible. ! Compressed audio files are not compatible with packet write data transfer. -
Page 34: Ipod
! When using an iPod, iPod Dock Connector to USB Cable is required. ! Pioneer CD-IU50 interface cable is also Windows Media and the Windows logo are tra- available. For details, consult your dealer. demarks or registered trademarks of Microsoft Corporation in the United States and/or other countries. - Page 35 Appendix Additional Information This product includes technology owned by microSD Logo is a trademark. Microsoft Corporation and cannot be used or distributed without a license from Microsoft Licensing, Inc. Supply of this product only conveys a license for private, non-commercial use and does not SDHC Logo is a trademark.
-
Page 36: Specifications
Appendix Additional Information Specifications Bass boost: Gain ........+12 dB to 0 dB General CD player Rated power source ....14.4 V DC System .......... Compact disc audio system (allowable voltage range: Usable discs ......Compact disc 12.0 V to 14.4 V DC) Signal-to-noise ratio .... - Page 37 Appendix Additional Information WAV signal format ....Linear PCM & MS ADPCM (Non-compressed) FM tuner Frequency range ...... 87.5 MHz to 108.0 MHz Usable sensitivity ..... 9 dBf (0.7 µV/75 W, mono, S/N: 30 dB) Signal-to-noise ratio ....72 dB (IEC-A network) AM tuner Frequency range ......
- Page 38 Contenido Gracias por haber comprado este producto PIONEER. Lea con detenimiento este manual antes de utilizar el producto por primera vez, para que pueda darle el mejor uso posible. Una vez leído, guarde este manual en un lugar seguro y a mano para consultarlo en el futuro.
- Page 39 Contenido – Ajuste preciso de la curva de – Información suplementaria de audio ecualización 61 comprimido (disco, USB, SD) 73 Ajuste de la sonoridad 62 Archivos de audio comprimido en el Uso de la salida de subgraves 62 disco 73 –...
-
Page 40: Antes De Comenzar
! Mantenga siempre el volumen lo suficiente- mente bajo para escuchar los sonidos proce- PRECAUCIÓN ! Pioneer no asume ninguna responsabilidad dentes del exterior del vehículo. ! Proteja esta unidad de la humedad. por la pérdida de datos en la memoria USB/en ! Si se desconecta o se descarga la batería, la... -
Page 41: Extracción Del Panel Delantero
Sección Antes de comenzar ! Mantenga el panel delantero fuera del alcan- ce de la luz solar directa y no lo exponga a altas temperaturas. ! Antes de extraer el panel delantero, asegúrese de retirar del mismo el cable AUX/USB y el dispositivo USB. -
Page 42: Uso Del Mando A Distancia
Sección Antes de comenzar ! Para desechar las pilas usadas, cumpla con los reglamentos gubernamentales o las nor- mas ambientales pertinentes de las institucio- nes públicas aplicables en su país/zona. Uso del mando a distancia Apunte el mando a distancia hacia la carátula para hacer funcionar la unidad. -
Page 43: Utilización De Esta Unidad
Manténgalo presionado para cambiar al El cable USB CD-U50E de Pioneer tam- modo de reproducción de enlace cuando bién está disponible. Para obtener infor- utilice un iPod. -
Page 44: Mando A Distancia
Sección Utilización de esta unidad b Botón CLOCK/DISP OFF Mando a distancia Pulse este botón para cambiar a la visualiza- Las funciones se utilizan de la misma manera ción del reloj. que al usar los botones de la unidad principal. Mantenga presionado para activar o desac- tivar la indicación del display y la ilumina- ción de los botones. -
Page 45: Indicaciones Del Display
Sección Utilización de esta unidad n Botón LIST/ENTER 6 Indicador (disco) Presione este botón para visualizar la lista Aparece cuando se muestra el nombre del de títulos de los discos, de títulos de las pis- disco (álbum) en la sección principal del tas, de carpetas, de archivos o de canales display. -
Page 46: Funciones Básicas
CD incorporado)—USB (disposi- tivo de almacenamiento USB)/USB-IPOD (iPod conectado por la entrada de USB)—SD (tarjeta de memoria SD)—AUX (AUX) DEH-3100UB TUNER (sintonizador)—COMPACT DISC (re- productor de CD incorporado)—USB (disposi- tivo de almacenamiento USB)/USB-IPOD (iPod conectado por la entrada de USB)—... -
Page 47: Ajuste Del Volumen
Sección Utilización de esta unidad ! AUX está activada de forma predeterminada. Sintonizador Desactive AUX cuando no la utilice (consulte Funciones básicas Cambio del ajuste de un dispositivo auxiliar en la página 66). Importante ! Si el reproductor de audio portátil se carga Si se utiliza esta unidad en América del Norte, mediante la fuente de alimentación CC del ve- América Central o América del Sur, se deberá... -
Page 48: Introducción A Las Funciones Avanzadas
Sección Utilización de esta unidad Utilice MULTI-CONTROL para almacenar Notas la frecuencia seleccionada en la memoria. ! Para volver a la visualización anterior, presione Gire el control para cambiar el número de pre- DISP/BACK/SCRL. sintonía. Manténgalo presionado para almace- ! Para volver al menú principal, mantenga pre- narla. -
Page 49: Reproductor De Cd Incorporado
Sección Utilización de esta unidad Reproductor de CD Nota incorporado También puede realizar esta operación en el menú que aparece al utilizar Funciones básicas MULTI-CONTROL. % Introducción de un CD/CD-R/CD-RW en la ranura de carga de discos La reproducción comenzará automáticamen- # Cuando inserte un CD/CD-R/CD-RW, colo- que el lado de la etiqueta del disco hacia arri- % Expulsión de un CD/CD-R/CD-RW... -
Page 50: Visualización De Información De Texto En El Disco
Sección Utilización de esta unidad ! Según sea la versión de iTunes utilizada para Notas grabar archivos MP3 en un disco, es posible ! El reproductor de CD incorporado puede re- que no se visualice correctamente la informa- producir CD de audio y audio comprimido gra- ción de los comentarios. -
Page 51: Introducción A Las Funciones Avanzadas
Sección Utilización de esta unidad — cuando se selecciona una carpeta, manten- ! Si no se utiliza ninguna función en unos 30 ga presionado para reproducir una canción segundos, el display volverá automáticamente en la carpeta seleccionada. a la visualización normal. # También puede reproducir el archivo presio- nando MULTI-CONTROL derecha. -
Page 52: Exploración De Carpetas Y Pistas
Sección Utilización de esta unidad Exploración de carpetas y pistas Nota La reproducción con exploración busca la También puede realizar esta operación en el canción dentro de la gama de repetición se- menú que aparece al utilizar leccionada. MULTI-CONTROL. Utilice MULTI-CONTROL para seleccio- nar SCAN en el menú... -
Page 53: Reproducción De Canciones En Un Dispositivo De Almacenamiento Externo (Usb, Sd)
Sección Utilización de esta unidad Reproducción de canciones 2 Inserte una tarjeta de memoria SD en la ra- nura para la tarjeta SD. en un dispositivo de Insértela con la superficie de contacto almacenamiento externo hacia abajo y presione la tarjeta hasta que (USB, SD) escuche un clic y quede completamente bloqueada. -
Page 54: Visualización De Información De Texto De Un Archivo De Audio
Sección Utilización de esta unidad Gire MULTI-CONTROL para seleccionar 4 Coloque el panel delantero. Para obtener más información, consulte la función. Colocación del panel delantero en la página REPEAT (repetición de reproducción)— RANDOM (reproducción aleatoria)—SCAN (reproducción con exploración)—PAUSE (pausa)—SOUND RETRIEVER (sound retrie- Notas ver) ! Lea las precauciones relativas a los dispositi-... -
Page 55: Para Reproducir Canciones En El Ipod
! Lea las precauciones relativas al iPod en la si- guiente sección. Consulte la página 75. ! Mientras el iPod está conectado a esta uni- dad, aparece en él PIONEER (o (marca de verificación)). ! Si aparece un mensaje de error, consulte Men-... -
Page 56: Para Buscar Una Canción
Sección Utilización de esta unidad ! Cuando la llave de encendido del automóvil MULTI-CONTROL. También puede realizar esta está fijada en ACC o en ON, la batería del operación manteniendo presionando iPod se carga mientras está conectado a esta MULTI-CONTROL derecha. # También puede cambiar de categoría presio- unidad. -
Page 57: Visualización De Información De Texto En El Ipod
Sección Utilización de esta unidad Visualización de información Nombre de la función Operación de texto en el iPod Consulte Selección de una % Presione DISP/BACK/SCRL para seleccio- gama de repetición de repro- ducción en la página 51. nar la información de texto deseada. Sin embargo, las gamas de Tiempo de reproducción—título de la canción repetición de reproducción... -
Page 58: Reproducción De Todas Las Canciones En Un Orden Aleatorio
Sección Utilización de esta unidad ! Dependiendo del número de archivos en el Utilice MULTI-CONTROL para seleccio- nar el ajuste deseado. iPod, puede haber un retraso al mostrar Gire el control para cambiar de ajuste. una lista. ! SONGS – Reproduce canciones siguiendo Mantenga presionado /LIST para un orden aleatorio dentro de la lista. -
Page 59: Cambio De La Velocidad Del Audiolibro
Sección Utilización de esta unidad Mantenga presionado /iPod para Utilice MULTI-CONTROL para seleccio- cambiar el modo de control. nar AUDIOBOOKS SPEED en el menú de Cada vez que se mantiene presionado funciones. iPod se cambia el modo de control de la si- Presione MULTI-CONTROL para mostrar guiente manera: el modo de ajuste. -
Page 60: Ajustes De Audio
Sección Ajustes de audio ! Se puede seleccionar SW SETTING 2 sólo Introducción a los ajustes cuando la salida de subgraves se activa en de audio SW SETTING 1. ! Al seleccionar FM como fuente, no se puede Presione MULTI-CONTROL para visuali- cambiar a SRC LV ADJUST. -
Page 61: Uso Del Ecualizador
Sección Ajustes de audio Uso del ecualizador Presione MULTI-CONTROL para deter- minar la selección. El ecualizador le permite ajustar la ecualiza- # Aunque se haya cancelado el menú antes de ción de acuerdo con las características acústi- determinarla, la operación se lleva a cabo. cas del interior del automóvil. -
Page 62: Ajuste De La Sonoridad
Sección Ajustes de audio Utilice MULTI-CONTROL para seleccio- Presione MULTI-CONTROL para deter- nar EQ SETTING 2. minar la selección. # Aunque se haya cancelado el menú antes de Presione MULTI-CONTROL para mostrar determinarla, la operación se lleva a cabo. el modo de ajuste. Presione MULTI-CONTROL para seleccio- Uso de la salida de subgraves nar el segmento que desea ajustar. -
Page 63: Uso Del Filtro De Paso Alto
Sección Ajustes de audio ! Cuando la salida de subgraves está activa- Utilice MULTI-CONTROL para seleccio- da, se puede seleccionar SW SETTING 2. nar HIGH PASS FILTER. Presione SW/BASS para ver el modo de Presione MULTI-CONTROL para mostrar ajuste de subgraves. el modo de ajuste. -
Page 64: Ajuste De Los Niveles De La Fuente
Sección Ajustes de audio Ajuste de los niveles de la fuente La función SLA (ajuste del nivel de fuente) le permite ajustar el nivel de volumen de cada fuente para evitar cambios radicales en el vo- lumen cuando se cambia entre las fuentes. ! Los ajustes se basan en el nivel de volumen de FM, que se mantiene inalterado. -
Page 65: Ajustes Iniciales
Sección Ajustes iniciales Configuración de los Haga girar MULTI-CONTROL para poner el reloj en hora. ajustes iniciales # También puede realizar estas operaciones pre- Mantenga presionado SRC/OFF hasta sionando MULTI-CONTROL arriba o abajo. que la unidad se apague. Mantenga presionado MULTI-CONTROL Ajuste del paso de sintonía hasta que CLOCK SET aparezca en el dis- de FM... -
Page 66: Ajuste Del Paso De Sintonía De Am
Sección Ajustes iniciales Ajuste del paso de sintonía Pulse MULTI-CONTROL para activar AUX. de AM # Para desactivar la función AUX, vuelva a pre- El paso de sintonía de AM se puede cambiar sionar MULTI-CONTROL. entre 9 kHz, el paso predefinido, y 10 kHz. Si se utiliza el sintonizador en América del Norte, América Central o América del Sur, se deberá... -
Page 67: Cambio Del Desplazamiento Continuo
Sección Ajustes iniciales Utilice MULTI-CONTROL para seleccio- Utilice MULTI-CONTROL para seleccio- nar el ajuste deseado. nar EVER SCROLL en el menú de ajustes ini- Presiónelo para cambiar el segmento que ciales. quiera configurar entre izquierda y derecha. Consulte Configuración de los ajustes iniciales Gire el control para cambiar el ajuste de cada en la página 65. -
Page 68: Otras Funciones
Sección Otras funciones % Mantenga presionado CLOCK/ Uso de la fuente AUX DISP OFF. Puede conectar un dispositivo auxiliar a esta Cada vez que se mantiene presionado CLOCK/ unidad utilizando un cable miniconector esté- DISP OFF, se activa o desactiva la indicación reo. -
Page 69: Información Adicional
Dispositivo de almacenamiento externo (USB, SD) Cuando contacte con su proveedor o con el Mensaje Causa Acción Servicio Técnico Oficial de Pioneer más cerca- no, asegúrese de haber anotado el mensaje de NO AUDIO No hay cancio- Transfiera archivos de audio al disposi- error. - Page 70 Apéndice Información adicional iPod El conector USB Verifique que no o el cable USB esté enganchado CHECK USB Mensaje Causa Acción está cortocircui- en algo ni dañado ERROR-19 Fallo de comuni- Desconecte el tado. el conector USB o cación cable del iPod. Una el cable USB.
-
Page 71: Pautas Para El Manejo De Discos Y Del Reproductor
Apéndice Información adicional ! No fije etiquetas, no escriba ni aplique sus- El dispositivo de Conecte un iPod tancias químicas en la superficie de los almacenamiento compatible. NO DEVICE USB o el iPod no discos. está conectado ! Para limpiar un CD, pásele un paño suave al puerto USB de desde el centro hacia afuera. -
Page 72: Pautas Para El Manejo Del Dispositivo De Almacenamiento Externo (Usb, Sd) Y Para Esta Unidad
Apéndice Información adicional ! En función del dispositivo de almacena- Pautas para el manejo del miento USB conectado a esta unidad, se dispositivo de puede generar ruido en la radio. almacenamiento externo (USB, SD) y para esta unidad Tarjeta de memoria SD La tarjeta de memoria SD sólo está... -
Page 73: Compatibilidad Con Audio Comprimido (Disco, Usb, Sd)
Apéndice Información adicional Compatibilidad con audio Información suplementaria de audio comprimido (disco, USB, SD) comprimido (disco, USB, SD) ! La reproducción de archivos de audio codi- La tarjeta de memoria SD sólo está disponible ficados con datos de imagen puede tardar en DEH-4150SD. -
Page 74: Ejemplo De Una Jerarquía Y De Secuencias De Reproducción
Apéndice Información adicional Para obtener información sobre la compatibili- diendo del software de codificación o escri- dad de la tarjeta de memoria SD, consulte Es- tura. ! Se permite una jerarquía de carpetas de pecificaciones en la página 77. ! Los archivos protegidos mediante derechos hasta ocho niveles. -
Page 75: Ipod
! Cuando utiliza un iPod, se requiere un co- nector del Dock del iPod para el cable USB. ! El cable de la interfaz CD-IU50 de Pioneer también está disponible. Para obtener in- formación, consulte a su proveedor. Acerca del manejo del iPod... - Page 76 Apéndice Información adicional El logotipo SDHC es una marca comercial. La venta de este producto sólo otorga una li- iPod cencia para su uso privado, no comercial. No otorga ninguna licencia ni concede ningún derecho a utilizar este producto en transmisio- nes comerciales (es decir, lucrativas) en tiem- po real (terrestres, vía satélite, por cable y/o por cualquier otro medio), transmisiones/...
-
Page 77: Especificaciones
Apéndice Información adicional Pendiente ......–12 dB/oct Especificaciones Altavoz de subgraves (mono): General Frecuencia ......50/63/80/100/125 Hz Pendiente ......–18 dB/oct Fuente de alimentación nominal Ganancia ......+6 dB a –24 dB ............. 14,4 V CC Fase ........Normal/Inversa (gama de tensión permisi- Intensificación de graves: ble: 12,0 V a 14,4 V CC) Ganancia ...... - Page 78 Apéndice Información adicional Capacidad máxima de memoria ............. 16 GB (para SD y SDHC) Capacidad mínima de memoria ............. 256 MB Sistema de archivos ....FAT16, FAT32 Formato de decodificación MP3 ............. MPEG-1 & 2 Audio Layer 3 Formato de decodificación WMA .............
- Page 80 ٣٣...
- Page 81 ﺕ ﺎ ﻘ ﺤ ﻠ ﻤ ﻟ ﺍ ﺔ ﻴ ﻓ ﺎ ﺿ ﺇ ﺕ ﺎ ﻣ ﻮ ﻠ ﻌ ﻣ ﻒ ﻟ ﺍ ﻮ ﻣ ـ ﻫ ﻡ ١٠٨٫٠ ﻰ ﻟ ﺇ ـ ﻫ ﻡ ٨٧٫٥ ﻦ ﻣ ﺕ ﺍ...
- Page 82 ﺕ ﺎ ﻘ ﺤ ﻠ ﻤ ﻟ ﺍ ﺔ ﻴ ﻓ ﺎ ﺿ ﺇ ﺕ ﺎ ﻣ ﻮ ﻠ ﻌ ﻣ ﺕ ﺎ ﻔ ﺻ ﺍ ﻮ ﻤ ﻟ ﺍ : ﺮ ﻴ ﻬ ﺠ ﻟ ﺍ ﺰ ﻳ ﺰ ﻌ...
- Page 83 ﺕ ﺎ ﻘ ﺤ ﻠ ﻤ ﻟ ﺍ ﺔ ﻴ ﻓ ﺎ ﺿ ﺇ ﺕ ﺎ ﻣ ﻮ ﻠ ﻌ ﻣ iPod ﻲ ﺼ ﺨ ﺸ ﻟ ﺍ ﻝ ﺎ ﻤ ﻌ ﺘ ﺳ ﻼ ﻟ ﺺ ﻴ ﺧ ﺮ ﺗ ﻰ...
- Page 84 ﺑ ﺮ ﻟ ﺍ ﺢ ﻄ ﺳ ﻞ ﺒ ﻛ ﺎ ﻳ ﺃ ﺮ ﻓ ﻮ ﺘ ﻳ Pioneer. CD-IU50 . ﻞ ﻴ ﻛ ﻮ ﻟ ﺍ ﺓ ﺭ ﺎ ﺸ ﺘ ﺳ ﺎ ﺑ ﻢ ﻗ ، ﻞ ﻴ...
- Page 85 ﺕ ﺎ ﻘ ﺤ ﻠ ﻤ ﻟ ﺍ ﺔ ﻴ ﻓ ﺎ ﺿ ﺇ ﺕ ﺎ ﻣ ﻮ ﻠ ﻌ ﻣ ﺯ ﺎ ﻬ ﺟ ﻲ ﻓ ﻁ ﻮ ﻐ ﻀ ﻤ ﻟ ﺍ ﺕ ﻮ ﺼ ﻟ ﺍ ﺕ ﺎ...
- Page 86 ﺕ ﺎ ﻘ ﺤ ﻠ ﻤ ﻟ ﺍ ﺔ ﻴ ﻓ ﺎ ﺿ ﺇ ﺕ ﺎ ﻣ ﻮ ﻠ ﻌ ﻣ ﺔ ﺟ ﻭ ﺩ ﺰ ﻣ ﺕ ﺎ ﻧ ﺍ ﻮ ﻄ ﺳ ﺍ ﺓ ﺮ ﻛ ﺍ ﺫ ﺔ...
- Page 87 ﺕ ﺎ ﻘ ﺤ ﻠ ﻤ ﻟ ﺍ ﺔ ﻴ ﻓ ﺎ ﺿ ﺇ ﺕ ﺎ ﻣ ﻮ ﻠ ﻌ ﻣ ﺔ ﺻ ﺎ ﺨ ﻟ ﺍ ﺕ ﺍ ﺩ ﺎ ﺷ ﺭ ﺇ ﻊ ﻣ ﻞ ﻣ ﺎ ﻌ ﺘ...
- Page 88 ﺕ ﺎ ﻘ ﺤ ﻠ ﻤ ﻟ ﺍ ﺔ ﻴ ﻓ ﺎ ﺿ ﺇ ﺕ ﺎ ﻣ ﻮ ﻠ ﻌ ﻣ ﺄ ﻄ ﺨ ﻟ ﺍ ﺕ ﺍ ﺭ ﺎ ﻄ ﺧ ﺇ ﺕ ﻮ ﺻ ﻒ ﻠ ﻤ ﻟ ﻉ ﺎ...
- Page 89 ﻢ ﺴ ﻘ ﻟ ﺍ ﻯ ﺮ ﺧ ﺃ ﻒ ﺋ ﺎ ﻇ ﻭ ٠٥ ﻱ ﻮ ﻧ ﺎ ﺜ ﻟ ﺍ ﺭ ﺪ ﺼ ﻤ ﻟ ﺍ ﻝ ﺎ ﻤ ﻌ ﺘ ﺳ ﺇ ﺲ ﺑ ﺎ ﻗ ﻱ ﺫ ﻞ...
- Page 90 ﻢ ﺴ ﻘ ﻟ ﺍ ٠٤ ﺔ ﻴ ﺋ ﺪ ﺒ ﻤ ﻟ ﺍ ﺕ ﺎ ﺌ ﻴ ﻬ ﺘ ﻟ ﺍ ﻱ ﻮ ﻧ ﺎ ﺜ ﻟ ﺍ ﻊ ﺿ ﻮ ﻟ ﺍ ﻞ ﻳ ﻮ ﺤ ﺗ ( ﻲ ﻋ...
-
Page 91: Clock Set
ﻢ ﺴ ﻘ ﻟ ﺍ ﺔ ﻴ ﺋ ﺪ ﺒ ﻤ ﻟ ﺍ ﺕ ﺎ ﺌ ﻴ ﻬ ﺘ ﻟ ﺍ ٠٤ ﺔ ﻴ ﺋ ﺪ ﺒ ﻤ ﻟ ﺍ ﺕ ﺎ ﺌ ﻴ ﻬ ﺘ ﻟ ﺍ ﺕ ﺎ ﻴ ﻠ... - Page 92 ﻢ ﺴ ﻘ ﻟ ﺍ ٠٣ ﺕ ﻮ ﺼ ﻟ ﺍ ﻂ ﺒ ﺿ ﺕ ﺎ ﻴ ﻠ ﻤ ﻋ ﺭ ﺪ ﺼ ﻤ ﻟ ﺍ ﺕ ﺎ ﻳ ﻮ ﺘ ﺴ ﻣ ﻂ ﺒ ﺿ ﻂ ﺒ ﺿ ﺭ ﺪ ﺼ...
- Page 93 ﻢ ﺴ ﻘ ﻟ ﺍ ﺕ ﻮ ﺼ ﻟ ﺍ ﻂ ﺒ ﺿ ﺕ ﺎ ﻴ ﻠ ﻤ ﻋ ٠٣ ﻯ ﻮ ﺘ ﺴ ﻤ ﻟ ﺍ ﺕ ﺍ ﺩ ﺩ ﺮ ﺘ ﻟ ﺍ ﺭ ﺎ ﻬ ﺠ ﻣ ﺔ...
- Page 94 ﻢ ﺴ ﻘ ﻟ ﺍ ٠٣ ﺕ ﻮ ﺼ ﻟ ﺍ ﻂ ﺒ ﺿ ﺕ ﺎ ﻴ ﻠ ﻤ ﻋ ﺭ ﺎ ﻴ ﺘ ﺧ ﻻ ﻞ ﻤ ﻌ ﺘ ﺳ ﺍ ١ ﺢ ﻴ ﺤ ﺼ ﺗ ﻭ ﺃ ﺔ...
- Page 95 ﻢ ﺴ ﻘ ﻟ ﺍ ﺕ ﻮ ﺼ ﻟ ﺍ ﻂ ﺒ ﺿ ﺕ ﺎ ﻴ ﻠ ﻤ ﻋ ٠٣ ﻥ ﺯ ﺍ ﻮ ﺘ ﻟ ﺍ ﻂ ﺒ ﺿ ﻝ ﺎ ﻤ ﻌ ﺘ ﺳ ﺇ ﺕ ﻮ ﺼ ﻟ...
- Page 96 ﻢ ﺴ ﻘ ﻟ ﺍ ٠٢ ﺯ ﺎ ﻬ ﺠ ﻟ ﺍ ﺍ ﺬ ﻫ ﻞ ﻴ ﻐ ﺸ ﺗ ﻲ ﺗ ﻮ ﺼ ﻟ ﺍ ﺏ ﺎ ﺘ ﻜ ﻟ ﺍ ﺔ ﻋ ﺮ ﺳ ﺮ ﻴ ﻴ ﻐ ﺗ ﺔ...
- Page 97 ﻢ ﺴ ﻘ ﻟ ﺍ ﺯ ﺎ ﻬ ﺠ ﻟ ﺍ ﺍ ﺬ ﻫ ﻞ ﻴ ﻐ ﺸ ﺗ ٠٢ ﻲ ﺋ ﺍ ﻮ ﺸ ﻋ ﺐ ﻴ ﺗ ﺮ ﺘ ﺑ ﺕ ﺎ ﻴ ﻨ ﻏ ﻸ ﻟ ﻉ ﺎ ﻤ...
-
Page 98: Shuffle All
ﻢ ﺴ ﻘ ﻟ ﺍ ٠٢ ﺯ ﺎ ﻬ ﺠ ﻟ ﺍ ﺍ ﺬ ﻫ ﻞ ﻴ ﻐ ﺸ ﺗ ً ﺎ ﺜ ﺔ ﻴ ﻨ ﻏ ﺃ ﻦ ﻋ ﺤ ﺑ ﺢ ّ ﻔ ﺼ ﺘ ﻟ ﺍ ﺀ ﺎ... - Page 99 ﺯ ﺎ ﻬ ﺟ ﻰ ﻠ ﻋ ( ﺮ ﻴ ﺷ ﺄ ﺘ ﻟ ﺍ ﺔ ﻣ ﻼ ) ﻋ ) ﻭ ﺃ PIONEER iPod ﺄ ﻄ ﺨ ﻟ ﺍ ﺕ ﺍ ﺭ ﺎ ﻄ ﺧ ﺇ ﻊ ٢٥ ﺔ...
- Page 100 ﻢ ﺴ ﻘ ﻟ ﺍ ٠٢ ﺯ ﺎ ﻬ ﺠ ﻟ ﺍ ﺍ ﺬ ﻫ ﻞ ﻴ ﻐ ﺸ ﺗ ﺯ ﺎ ﻬ ﺟ ﻰ ﻠ ﻋ ﺕ ﺎ ﻴ ﻨ ﻏ ﻸ ﻟ ﻉ ﺎ ﻤ ﺘ ﺳ ﻻ ﺍ ﻱ...
- Page 101 ﻢ ﺴ ﻘ ﻟ ﺍ ﺯ ﺎ ﻬ ﺠ ﻟ ﺍ ﺍ ﺬ ﻫ ﻞ ﻴ ﻐ ﺸ ﺗ ٠٢ ً ﺎ ً ﺍ ﺭ ﺪ ﺘ ﻗ ﺆ ﻣ ﺽ ﺮ ﻌ ﻟ ﺍ ﻑ ﺎ ﻘ ﻳ ﺇ ﻕ...
- Page 102 ﻢ ﺴ ﻘ ﻟ ﺍ ٠٢ ﺯ ﺎ ﻬ ﺠ ﻟ ﺍ ﺍ ﺬ ﻫ ﻞ ﻴ ﻐ ﺸ ﺗ ﺄ ﻄ ﺨ ﻟ ﺍ ﺕ ﺍ ﺭ ﺎ ﻄ ﺧ ﺇ ﻊ ﺽ ﺮ ﻌ ﻠ ﻟ ﻂ ﻐ ﺿ...
- Page 103 ﻢ ﺴ ﻘ ﻟ ﺍ ﺯ ﺎ ﻬ ﺠ ﻟ ﺍ ﺍ ﺬ ﻫ ﻞ ﻴ ﻐ ﺸ ﺗ ٠٢ ﻲ ﻠ ﺧ ﺍ ﺪ ﻟ ﺍ ﺕ ﺎ ﻧ ﺍ ﻮ ﻄ ﺳ ﻻ ﺍ ﻞ ّ ﻐ ﺸ ﻣ...
- Page 104 ﻢ ﺴ ﻘ ﻟ ﺍ ٠٢ ﺯ ﺎ ﻬ ﺠ ﻟ ﺍ ﺍ ﺬ ﻫ ﻞ ﻴ ﻐ ﺸ ﺗ ﻒ ﻟ ﺍ ﻮ ﻤ ﻟ ﺍ ﺔ ﻈ ﺣ ﻼ ﻣ ﺍ ً ﺎ ﺔ ﻴ ﺳ ﺎ ﺳ ﻷ...
-
Page 105: Compact Disc
ﺴ ﻣ ﻝ ﺎ ﻤ ﻌ ﺘ ﺳ ﺍ ﻊ ﺟ ﺍ ﺭ ، ﻞ ﻴ ﺻ ﺎ ﻔ ﺘ ﻠ ﻟ DEH-3100UB ﻞ ﻐ ﺸ ) ﻣ — ﻒ ﻟ ﺍ ﻮ ﻤ ) ﻟ ﺍ COMPACT DISC TUNER ﺮ... - Page 106 ﻢ ﺴ ﻘ ﻟ ﺍ ٠٢ ﺯ ﺎ ﻬ ﺠ ﻟ ﺍ ﺍ ﺬ ﻫ ﻞ ﻴ ﻐ ﺸ ﺗ ﺔ ﺿ ﺭ ﺎ ﻌ ﻟ ﺍ ﻥ ﺎ ﻴ ﺑ ﺔ ﻤ ﺋ ﺎ ﻘ ﻟ ﺍ ﻞ ﻴ ﻐ...
- Page 107 ، ﺯ ﺎ ﻬ ﺠ ﻟ ﺍ ً ﻀ ﺯ ﺍ ﺮ ﻃ ﻞ ﺒ ﻛ ﺎ ﻳ ﺃ ﺮ ﻓ ﻮ ﺘ ﻳ Pioneer CD-U50E ﺓ ﺮ ﻛ ﺍ ﺫ ﺔ ﻗ ﺎ ﻄ ﺑ ﺔ ﺤ ﺘ ﻓ...
- Page 108 ﻢ ﺴ ﻘ ﻟ ﺍ ٠١ ﺃ ﺪ ﺒ ﺗ ﻥ ﺃ ﻞ ﺒ ﻗ ﺔ ﻴ ﻣ ﺎ ﻣ ﻷ ﺍ ﺔ ﺣ ﻮ ﻠ ﻟ ﺍ ﺐ ﻴ ﻛ ﺮ ﺗ ﻪ ﻴ ﺒ ﻨ ﺗ . ﺔ ﻘ...
- Page 109 ﺼ ﻟ ﺍ ﻯ ﻮ ﺘ ﺴ ﻤ ﺑ ﻆ ﻔ ﺘ ﺣ ﺍ ﺎ ً ﻤ ﺋ ﺍ ﺩ http://pioneer.jp/group/index-e.html . ﺓ ﺭ ﺎ ﻴ ﺴ ﻟ ﺍ ﺝ ﺭ ﺎ ﺧ ﺓ ﺭ ﺩ ﺎ ﺼ ﻟ ﺍ...
- Page 110 ﺕ ﺎ ﻳ ﻮ ﺘ ﺤ ﻤ ﻟ ﺍ ٢٤ ﺭ ﺪ ﺼ ﻤ ﻛ ﻱ ﻮ ﻧ ﺎ ﺜ ﻟ ﺍ ﺭ ﺎ ﻴ ﺘ ﺧ ﺇ – ٢٤ ﺔ ﻋ ﺎ ﺴ ﻟ ﺍ ﺔ ﺿ ﺭ ﺎ ﻋ ﻑ...
- Page 111 ﻦ ﻣ ﺞ ﺘ ﻨ ﻤ ﻟ ﺍ ﺍ ﺬ ﻫ ﻚ ﺋ ﺍ ﺮ ﺸ ﻟ ﺍ ً ﺮ ﻜ ﺷ PIONEER ً ﻼ ﻅ ﺎ ﻔ ﺘ ﺣ ﻻ ﺍ ﻰ ﺟ ﺮ ﻳ ، ﺓ ﺀ ﺍ ﺮ...
- Page 112 TEL: (03) 9586-6300 PIONEER ELECTRONICS OF CANADA, INC. 300 Allstate Parkway, Markham, Ontario L3R 0P2, Canada TEL: 1-877-283-5901 TEL: 905-479-4411 PIONEER ELECTRONICS DE MEXICO, S.A. de C.V. Blvd.Manuel Avila Camacho 138 10 piso Col.Lomas de Chapultepec, Mexico, D.F. 11000 TEL: 55-9178-4270 先鋒股份有限公司...