Table of Contents
Advertisement
Quick Links
User Guide
Operation Search
Before use
Getting started
Recording
Playback
Playing images on a TV
Saving images with a
computer
Using the Wi-Fi function
Customizing your
camcorder
Troubleshooting
Maintenance and
precautions
Contents list
HDR-MV1
Music Video Recorder User Guide
Use this manual if you encounter any problems, or have any questions about the
camcorder.
Copyright 2013 Sony Corporation
1
Search
Print
Top page
Back to top
Advertisement
Table of Contents

Related Manuals for Sony HDR-MV1


Summary of Contents for Sony HDR-MV1
- Page 1 Use this manual if you encounter any problems, or have any questions about the Recording camcorder. Playback Playing images on a TV Saving images with a computer Using the Wi-Fi function Customizing your camcorder Troubleshooting Maintenance and precautions Contents list Back to top Copyright 2013 Sony Corporation...
- Page 2 Before use Operation Search Getting started Search by operation Recording Back to top Playback Playing images on a TV Saving images with a computer Using the Wi-Fi function Customizing your camcorder Troubleshooting Maintenance and precautions Contents list Copyright 2013 Sony Corporation...
-
Page 3: Before Use
Saving images with a computer About language setting Using the Wi-Fi function About language setting Customizing your Operating your camcorder camcorder Selecting items on the LCD screen Troubleshooting Back to top Maintenance and precautions Contents list Copyright 2013 Sony Corporation... -
Page 4: Preparing The Recording Media
Turning the power on, and setting the date and time Customizing your camcorder Turning the power on, and setting the date and time Troubleshooting Preparing the recording media Maintenance and Inserting a memory card precautions Back to top Contents list Copyright 2013 Sony Corporation... - Page 5 Screen indicators during recording Playing images on a TV Useful functions for recording Saving images with a computer Intelligent Auto Using the Wi-Fi function Audio monitoring Customizing your Back to top camcorder Troubleshooting Maintenance and precautions Contents list Copyright 2013 Sony Corporation...
- Page 6 Before use Playback Getting started Playing movies/audio files Recording Back to top Playback Playing images on a TV Saving images with a computer Using the Wi-Fi function Customizing your camcorder Troubleshooting Maintenance and precautions Contents list Copyright 2013 Sony Corporation...
- Page 7 Playing images on a TV supporting “BRAVIA” Sync Playback Using “BRAVIA” Sync Playing images on a TV Back to top Saving images with a computer Using the Wi-Fi function Customizing your camcorder Troubleshooting Maintenance and precautions Contents list Copyright 2013 Sony Corporation...
- Page 8 Playing images on a TV Starting the editing/management software Saving images with a Importing files to your computer without using software computer Back to top Using the Wi-Fi function Customizing your camcorder Troubleshooting Maintenance and precautions Contents list Copyright 2013 Sony Corporation...
- Page 9 Connecting to your Android smartphone or tablet precautions Connecting to your iPhone or iPad Contents list Connecting to your NFC-compatible Android smartphone or tablet Installing the PlayMemories Mobile On the “PlayMemories Mobile” software Back to top Copyright 2013 Sony Corporation...
-
Page 10: Recording Mode
User Guide Search Print Top page > Customizing your camcorder Operation Search Customizing your camcorder Before use Using menu items Getting started Setting up menu items Recording Recording Mode Playback Movie Playing images on a TV Audio Saving images with a computer Camera/Audio Using the Wi-Fi function... - Page 11 SSID/PW Reset HDMI Resolution CTRL FOR HDMI (Control for HDMI) USB Connect USB Power Supply USB LUN Setting Beep Monitor Brightness Language Setting Airplane Mode Power Save Initialize Date & Time Setting Area Setting Back to top Copyright 2013 Sony Corporation...
-
Page 12: Troubleshooting
Using the Wi-Fi function Memory card Recording Customizing your camcorder Playback Troubleshooting Playback on the TV Maintenance and Connecting to a computer precautions Wi-Fi Contents list Self-diagnosis display/Warning indicators Self-diagnosis display Warning Indicators Back to top Copyright 2013 Sony Corporation... -
Page 13: Maintenance And Precautions
Expected time of recording and playback with the battery pack precautions Expected shooting time of movies Contents list Expected recording time of sound Using your camcorder abroad Using your camcorder abroad On trademarks On trademarks License Notes on the License Specifications Specifications Back to top Copyright 2013 Sony Corporation... -
Page 14: Before Use
User Guide Search Print Top page > Contents list Operation Search Contents list Before use Getting started Operation Search Recording Operation Search Playback Search by operation Playing images on a TV Back to top Saving images with a computer Before use Using the Wi-Fi function How to use this User Guide Customizing your... - Page 15 Back to top Recording Recording Shooting movies Recording sound Screen indicators during recording Useful functions for recording Intelligent Auto Audio monitoring Back to top Playback Playback Playing movies/audio files Back to top Playing images on a TV Playing images on a high definition TV Connecting the camcorder to a high definition TV Playing images on a TV supporting “BRAVIA”...
-
Page 16: Connecting A Smartphone
Control your camcorder via smartphone Using your smartphone or tablet as a remote control without using Using your smartphone or tablet as a remote control using NFC Sending movies to the smartphone Transferring movies to your smartphone or tablet without using NFC Transferring movies to your smartphone or tablet using NFC Connecting a smartphone Connecting to your Android smartphone or tablet... - Page 17 My Button Grid Line Display Setting Audio Level Display Auto Monitor Off Image Quality/Size REC Mode Playback Function Playback Function Edit/Copy Send to Smartphone Delete Protect Setup Media Info Format Repair Img. DB F. File Number Edit Device Name SSID/PW Reset HDMI Resolution CTRL FOR HDMI (Control for HDMI) USB Connect...
-
Page 18: Self-Diagnosis Display/Warning Indicators
If you have problems If you have problems Troubleshooting Overall operations Batteries/power sources LCD screen Memory card Recording Playback Playback on the TV Connecting to a computer Wi-Fi Self-diagnosis display/Warning indicators Self-diagnosis display Warning Indicators Back to top Maintenance and precautions Maintenance and precautions About the memory card About the battery pack... - Page 19 Notes on the License Specifications Specifications Back to top Copyright 2013 Sony Corporation...
-
Page 20: Search By Operation
User Guide Search Print Top page > Operation Search > Operation Search > Search by operation Operation Search Search by operation Before use Getting started Setting the date and time Recording Date & Time Setting Playback Area Setting Identifying part names Playing images on a TV Saving images with a Parts and controls... -
Page 21: Deleting Files
Power Save Recording without worrying about the remaining battery power Using the camcorder while supplying it with power Playing images on a TV Connecting the camcorder to a high definition TV Deleting files Delete Back to top Copyright 2013 Sony Corporation... -
Page 22: Selecting A Topic To Display
User Guide Search Print Top page > Before use > How to use this User Guide > How to use this User Guide Operation Search Before use How to use this User Guide Getting started Recording Selecting a topic to display Searching a topic by keyword Playback Returning to a previous page... -
Page 23: Changing The Font Size
Changing the font size Change the font size by changing the setting of your web browser. For how to change the font size setting, refer to the Help of your web browser. Searching a topic by keyword Enter the keyword in the search window, then click the [Search] button. Returning to a previous page Use the back button of your web browser or the breadcrumb trail navigation (A) to return to a page you previously viewed. - Page 24 Printing out a page Click the [Print] button to print out a page you are viewing. Marks and notations used in this User Guide ) (A). In this User Guide, the sequence of operations is shown by arrows ( Operate the camcorder in the order indicated.
- Page 25 Icons in the operating procedure sentences appear when the camcorder is in its default settings. The default setting is indicated by Back to top Copyright 2013 Sony Corporation...
-
Page 26: Parts And Controls
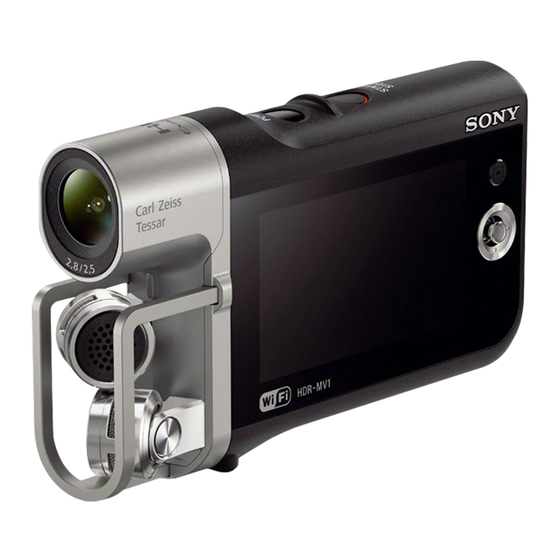
User Guide Search Print Top page > Before use > Parts and controls/Screen indicators > Parts and controls Operation Search Parts and controls Before use Getting started Recording Playback Playing images on a TV Saving images with a computer Using the Wi-Fi function Customizing your camcorder Troubleshooting... -
Page 27: (Playback) Button
Attach a tripod (sold separately: the length of the screw must be less than 5.5 mm (7/32 in.)). Depending on the specifications of the tripod, your camcorder may not attach in the proper direction. Memory card slot Memory card access lamp Back to top Copyright 2013 Sony Corporation... -
Page 28: Screen Indicators
User Guide Search Print Top page > Before use > Parts and controls/Screen indicators > Screen indicators Operation Search Screen indicators Before use Getting started The following indicators appear when you change the settings. Recording Check also for the indicators that appear during recording or playing. Playback Playing images on a TV Saving images with a... - Page 29 Audio input settings (internal microphone/external microphone/other devices) Audio Format Low Cut Filter Protect Indicators and their positions are approximate and may differ from what you actually see. Some indicators may not appear, depending on your camcorder model. Back to top Copyright 2013 Sony Corporation...
-
Page 30: About Language Setting
[Details] Playback Select [Setup] General Settings] [Language Setting] Playing images on a TV desired language. Saving images with a Back to top computer Using the Wi-Fi function Customizing your camcorder Troubleshooting Maintenance and precautions Contents list Copyright 2013 Sony Corporation... - Page 31 2. Press the center of the multi-selector to enter. Playback Playing images on a TV Saving images with a computer Using the Wi-Fi function Customizing your camcorder Troubleshooting Maintenance and precautions Back to top Contents list Copyright 2013 Sony Corporation...
-
Page 32: Supplied Items
USB cable (Micro USB cable) (1) Maintenance and precautions Rechargeable battery pack NP-BX1 (1) Contents list Lens cap (1) Cap string (1) “Operating Guide” (1) Notes The editing/management software can be downloaded from the Sony website. [Details] Back to top Copyright 2013 Sony Corporation... -
Page 33: Attaching The Battery Pack
User Guide Search Print Top page > Getting started > Power supply > Attaching the battery pack Operation Search Attaching the battery pack Before use Getting started 1. Remove the battery cover. Recording Playback Playing images on a TV Saving images with a computer Using the Wi-Fi function Customizing your... -
Page 34: To Remove The Battery Pack
The remaining battery power may not be displayed correctly depending on ambient conditions and the environment in which you are using your camcorder. Your camcorder cannot display the remaining battery life in minutes using the “InfoLITHIUM” battery. Back to top Copyright 2013 Sony Corporation... - Page 35 User Guide Search Print Top page > Getting started > Power supply > Charging the battery using your computer Operation Search Before use Charging the battery using your computer Getting started Recording 1. Attach the battery pack. [Details] 2. When the camcorder is on, press the POWER button to turn it off. Playback Playing images on a TV Saving images with a...
-
Page 36: Charging Time
The charging time is measured when charging the camcorder at a room temperature of 25 °C (77 °F). It is recommended that you charge the battery in a temperature range of 10 °C to 30 °C (50 °F to 86 °F). Back to top Copyright 2013 Sony Corporation... - Page 37 User Guide Search Print Top page > Getting started > Power supply > Charging the battery using the AC Adaptor (sold separately) Operation Search Before use Charging the battery using the AC Adaptor (sold Getting started separately) Recording 1. Attach the battery pack. Playback [Details] 2.
- Page 38 The charging time is measured when charging the camcorder at a room temperature of 25 °C (77 °F). It is recommended that you charge the battery in a temperature range of 10 °C to 30 °C (50 °F to 86 °F). Back to top Copyright 2013 Sony Corporation...
- Page 39 User Guide Search Print Top page > Getting started > Power supply > Using the camcorder while supplying it with power Operation Search Before use Using the camcorder while supplying it with Getting started power Recording Playback You can use the camcorder while supplying power by connecting the AC-UD10 AC Adaptor (sold separately) to the camcorder.
- Page 40 The recording function is not available while supplying power from the computer. When you connect the camcorder to a computer using the USB cable during playback, the USB connection screen appears. It will turn to the playback screen if you select [yes]. Back to top Copyright 2013 Sony Corporation...
-
Page 41: Turning The Power On, And Setting The Date And Time
User Guide Search Print Top page > Getting started > Turning the power on, and setting the date and time > Turning the power on, and setting the date and time Operation Search Before use Turning the power on, and setting the date and Getting started time Recording... -
Page 42: To Turn Off The Power
You can change the on-screen displays to show messages in a specified language. Select [Setup] General Settings] [Language Setting] desired language. To turn off the power Press the POWER button. Related topics To set the date and time again: [Date & Time Setting] Back to top Copyright 2013 Sony Corporation... -
Page 43: Inserting A Memory Card
User Guide Search Print Top page > Getting started > Preparing the recording media > Inserting a memory card Operation Search Before use Inserting a memory card Getting started Recording 1. Open the memory card cover. 2. Install a memory card straight in the direction illustrated. Playback 3. -
Page 44: To Eject The Memory Card
To eject the memory card Open the memory card cover and lightly push the memory card in once. Related topics Confirming the recording media: Screen indicators during recording Expected shooting time of movies Back to top Copyright 2013 Sony Corporation... -
Page 45: Shooting Movies
User Guide Search Print Top page > Recording > Recording > Shooting movies Operation Search Shooting movies Before use Getting started Movies are shot in the MP4 format ([Audio Format] is [AAC LC] in the default Recording setting). 1. Press the POWER button to turn on the camcorder. Playback Playing images on a TV Saving images with a... - Page 46 To hide items on the LCD screen: [Display Setting] Recordable time, remaining capacity: [Media Info] Changing the audio recording format: [Audio Format] Canceling the LCD screen automatic lights-out function: [Auto Monitor Off] Recording sound: [Recording sound] Back to top Copyright 2013 Sony Corporation...
-
Page 47: Recording Sound
User Guide Search Print Top page > Recording > Recording > Recording sound Operation Search Recording sound Before use Getting started Sound is recorded as a WAV file. Recording 1. Press the POWER button to turn on the camcorder. Playback Playing images on a TV Saving images with a computer... - Page 48 [Volume] [Ext. Audio Input Set] Button] [Display Setting] [Audio Level Display] [Auto Monitor Off] Functions available for audio files The following functions are available. [Delete] [Protect] Related topics Expected recording time of sound Back to top Copyright 2013 Sony Corporation...
- Page 49 Estimated recording remaining time, Recording format, Movie size Audio input settings Audio recording format for movies Mode switching button Intelligent Auto button Audio level meter My Button (you can assign your favorite functions to icons displayed in this area) Back to top Copyright 2013 Sony Corporation...
-
Page 50: Intelligent Auto
(Low light) To cancel the Intelligent Auto function, select [Off] on the shooting screen. Notes The camcorder may not detect the expected scene or subject, depending on the shooting conditions. Related topics [Low Lux] Back to top Copyright 2013 Sony Corporation... -
Page 51: Audio Monitoring
Saving images with a computer Using the Wi-Fi function To adjust the volume from the headphones, in recording standby mode, Customizing your select on the LCD screen. camcorder Troubleshooting Back to top Maintenance and precautions Contents list Copyright 2013 Sony Corporation... - Page 52 User Guide Search Print Top page > Playback > Playback > Playing movies/audio files Operation Search Playing movies/audio files Before use Getting started 1. Press the POWER button to turn on the camcorder. Recording Playback Playing images on a TV Saving images with a computer Using the Wi-Fi function...
-
Page 53: Playback Screen
The camcorder plays from the selected file to the last file. 5. Select the appropriate buttons on the LCD screen for various playback operations. Volume Fast-reverse/fast-forward Delete Play/Pause Stop Repeat an audio file Previous/Next Some buttons described above may not appear, depending on the file being played back. - Page 54 Also, you may not be able to play back files recorded on other devices with your camcorder. Notes To prevent your file data from being lost, save all your recorded files on external media periodically. Back to top Copyright 2013 Sony Corporation...
- Page 55 3. Play a movie on the camcorder. On an HDMI cable (sold separately) Using an authorized HDMI cable with the HDMI logo or a Sony HDMI cable is recommended. Use an HDMI micro connector on one end (for the camcorder), and a plug suitable for connecting your TV on the other end.
-
Page 56: Using "Bravia" Sync
The operation of “BRAVIA” Sync differs according to each model of BRAVIA. camcorder Refer to the instruction manual of your TV for details. If you turn off the TV, your camcorder is turned off simultaneously. Troubleshooting Back to top Maintenance and precautions Contents list Copyright 2013 Sony Corporation... - Page 57 Playing images on a TV www.sony.net/pm/mvr/ Saving images with a Notes computer An Internet connection is required to install the software. Using the Wi-Fi function Back to top Customizing your camcorder Troubleshooting Maintenance and precautions Contents list Copyright 2013 Sony Corporation...
-
Page 58: Checking The Computer System
You can check the system requirements for software at the following URL. www.sony.net/pm/mvr/ Playback Back to top Playing images on a TV Saving images with a computer Using the Wi-Fi function Customizing your camcorder Troubleshooting Maintenance and precautions Contents list Copyright 2013 Sony Corporation... - Page 59 Playing images on a TV www.sony.net/pm/mvr/ Saving images with a Back to top computer Using the Wi-Fi function Customizing your camcorder Troubleshooting Maintenance and precautions Contents list Copyright 2013 Sony Corporation...
- Page 60 Playing images on a TV Saving images with a computer 1. Double-click the software icon in the Applications folder. Using the Wi-Fi function The editing/management software starts. Customizing your Back to top camcorder Troubleshooting Maintenance and precautions Contents list Copyright 2013 Sony Corporation...
-
Page 61: About File Names
File type Memory card Folder File name Troubleshooting microSD MAH0 .MP4 MP_ROOT Maintenance and Memory Stick Micro precautions microSD PRIVATE/AUDIO WAAV .WAV Contents list Memory Stick Micro AUDIO stands for file numbers (0001 to 9999). Back to top Copyright 2013 Sony Corporation... - Page 62 User Guide Search Print Top page > Using the Wi-Fi function > Using the Wi-Fi function > What you can do using the Wi-Fi function Operation Search Before use What you can do using the Wi-Fi function Getting started Recording The Wi-Fi function of your camcorder allows you to do the following operations.
-
Page 63: Related Topics
Transferring movies to your smartphone or tablet without using NFC Transferring movies to your smartphone or tablet using NFC Using your smartphone or tablet as a remote control without using NFC Using your smartphone or tablet as a remote control using NFC Back to top Copyright 2013 Sony Corporation... - Page 64 Using the Wi-Fi function Refer to the “PlayMemories Mobile” support web page (http://www.sony.net/pmm/) for the latest information of supported OS. Customizing your “PlayMemories Mobile” is not guaranteed to work on all smartphones or camcorder tablets.
- Page 65 The application operation method and screen display are subject to change due to future updates. Related topics On the “PlayMemories Mobile” software Connecting to your Android smartphone or tablet Connecting to your iPhone or iPad Back to top Copyright 2013 Sony Corporation...
- Page 66 Refer to the “PlayMemories Mobile” support web page Using the Wi-Fi function (http://www.sony.net/pmm/) for the latest information of supported OS. “PlayMemories Mobile” is not guaranteed to work on all smartphones or Customizing your tablets.
- Page 67 Files will be recorded not on the smartphone or tablet but on the camcorder. The application operation method and screen display are subject to change due to future updates. Related topics On the “PlayMemories Mobile” software Connecting to your NFC-compatible Android smartphone or tablet Back to top Copyright 2013 Sony Corporation...
- Page 68 Refer to the “PlayMemories Mobile” support web page (http://www.sony.net/pmm/) for the latest information of supported OS. Using the Wi-Fi function “PlayMemories Mobile” is not guaranteed to work on all smartphones or tablets.
- Page 69 The SSID and password appear and the camcorder will be connectable from your smartphone or tablet. A: SSID B: Password 5. Connect the smartphone or tablet to the camcorder by making operations on the smartphone or tablet. When you use an Android smartphone, on the smartphone, start up the “PlayMemories Mobile,”...
- Page 70 Back to top Copyright 2013 Sony Corporation...
- Page 71 Refer to the “PlayMemories Mobile” support web page (http://www.sony.net/pmm/) for the latest information of supported OS. Using the Wi-Fi function “PlayMemories Mobile” is not guaranteed to work on all smartphones or tablets.
- Page 72 Related topics On the “PlayMemories Mobile” software Connecting to your NFC-compatible Android smartphone or tablet Connecting to your Android smartphone or tablet Transferring movies to your smartphone or tablet without using NFC Back to top Copyright 2013 Sony Corporation...
- Page 73 User Guide Search Print Top page > Using the Wi-Fi function > Connecting a smartphone > Connecting to your Android smartphone or tablet Operation Search Before use Connecting to your Android smartphone or tablet Getting started Recording You can connect your Android smartphone or tablet to your camcorder as shown below.
- Page 74 Related topics On the “PlayMemories Mobile” software Transferring movies to your smartphone or tablet without using NFC Using your smartphone or tablet as a remote control without using NFC Back to top Copyright 2013 Sony Corporation...
- Page 75 User Guide Search Print Top page > Using the Wi-Fi function > Connecting a smartphone > Connecting to your iPhone or iPad Operation Search Before use Connecting to your iPhone or iPad Getting started Recording You can connect your iPhone or iPad to your camcorder as shown below. From [Send to Smartphone] or [Ctrl with Smartphone], display the password and the Playback SSID on the LCD screen of the camcorder.
- Page 76 6. Return to Home and start up “PlayMemories Mobile.” Related topics On the “PlayMemories Mobile” software Transferring movies to your smartphone or tablet without using NFC Using your smartphone or tablet as a remote control without using NFC Back to top Copyright 2013 Sony Corporation...
- Page 77 User Guide Search Print Top page > Using the Wi-Fi function > Connecting a smartphone > Connecting to your NFC-compatible Android smartphone or tablet Operation Search Before use Connecting to your NFC-compatible Android Getting started smartphone or tablet Recording Playback You can connect your NFC-compatible Android smartphone or tablet to your camcorder easily.
- Page 78 Related topics On the “PlayMemories Mobile” software Transferring movies to your smartphone or tablet using NFC Using your smartphone or tablet as a remote control using NFC Connecting to your Android smartphone or tablet Back to top Copyright 2013 Sony Corporation...
- Page 79 For details on “PlayMemories Mobile,” refer to the “PlayMemories Mobile” support Saving images with a page (http://www.sony.net/pmm/). computer Back to top Using the Wi-Fi function Customizing your camcorder Troubleshooting Maintenance and precautions Contents list Copyright 2013 Sony Corporation...
-
Page 80: Setting Up Menu Items
User Guide Search Print Top page > Customizing your camcorder > Using menu items > Setting up menu items Operation Search Before use Setting up menu items Getting started Recording The camcorder has various menu items under each of 6 menu categories. Recording Mode (Items for selecting a recording mode) Playback Camera/Audio (Items for customized recording) - Page 81 Grayed out menu items or settings are not available. Your camcorder displays the reason why you cannot select the menu item or the instruction of under which condition you can set the menu item. Back to top Copyright 2013 Sony Corporation...
- Page 82 Recording recording screen as well. Playback [Recording Mode] [Movie]. Playing images on a TV Saving images with a computer Using the Wi-Fi function Customizing your camcorder Back to top Troubleshooting Maintenance and precautions Contents list Copyright 2013 Sony Corporation...
- Page 83 Playback [Recording Mode] [Audio]. Playing images on a TV Saving images with a computer Using the Wi-Fi function Customizing your camcorder Related topics Troubleshooting Recording sound Maintenance and Back to top precautions Contents list Copyright 2013 Sony Corporation...
-
Page 84: White Balance
User Guide Search Print Top page > Customizing your camcorder > Camera/Audio > White Balance Operation Search White Balance Before use Getting started You can adjust the color balance to the shooting environment. Recording Playback Playing images on a TV Saving images with a computer [Camera/Audio]... - Page 85 Set [White Balance] to [Auto] or adjust the color in [One Push] under white or cool white fluorescent lamps. While you are shooting a movie, (One Push) cannot be set. If you set [White Balance], [Scene Selection] is set to [Auto]. Back to top Copyright 2013 Sony Corporation...
- Page 86 Maintenance and The exposure is adjusted automatically. precautions Manual Contents list Select if the subject is white or the backlight is bright, or select the subject is black or the light is dim. Back to top Copyright 2013 Sony Corporation...
- Page 87 Using the Wi-Fi function 2. Select the desired item. Customizing your camcorder Troubleshooting The Low Lux function is not used. Maintenance and precautions On ( ) The Low Lux function is used. Contents list Back to top Copyright 2013 Sony Corporation...
-
Page 88: Scene Selection
User Guide Search Print Top page > Customizing your camcorder > Camera/Audio > Scene Selection Operation Search Scene Selection Before use Getting started You can shoot movies effectively in various situations. Recording [Camera/Audio] Camera Settings] [Scene Selection]. Playback Playing images on a TV Saving images with a computer Using the Wi-Fi function... - Page 89 Takes the vivid blue of the ocean or a lake. (Snow) Takes bright movies of a white landscape. Notes If you set [Scene Selection], the [White Balance] setting is canceled. Back to top Copyright 2013 Sony Corporation...
- Page 90 User Guide Search Print Top page > Customizing your camcorder > Camera/Audio > Fader Operation Search Fader Before use Getting started You can shoot a transition with the following effects adding to the interval between Recording scenes. Select the desired effect in [STBY] (to fading in) or [REC] (to fading out) mode. Playback [Camera/Audio] Camera Settings]...
- Page 91 Copyright 2013 Sony Corporation...
-
Page 92: Auto Back Light
Using the Wi-Fi function 2. Select the desired item. Customizing your camcorder Troubleshooting The exposure for backlit subjects is adjusted automatically. Maintenance and precautions Does not adjust the exposure for backlit subjects. Contents list Back to top Copyright 2013 Sony Corporation... -
Page 93: Face Detection
Shoot in a sufficiently bright place. The subject is not wearing glasses, a hat or mask. The subject faces directly towards the camcorder. Notes Faces may not be detected depending on shooting conditions. Back to top Copyright 2013 Sony Corporation... -
Page 94: Audio Format
Notes MP4 movies shot with [Audio Format] set to [Linear PCM] cannot be played back on some equipment or services, including Blu-ray Disc players (including Sony products). For detailed information, check the camcorder support page before use. Back to top... -
Page 95: Low Cut Filter
Using the Wi-Fi function Customizing your camcorder 2. Select the desired item. Troubleshooting Maintenance and precautions Records low frequency sound without reducing noise. Contents list On ( Reduces noise in the low frequency range during recording. Back to top Copyright 2013 Sony Corporation... - Page 96 We recommend that you check and adjust the recording level wearing headphones. When continuously recording loud sound, lower the recording level in advance to record dynamic sound. Regardless of the setting value of the recording level, the limiter is always available. Back to top Copyright 2013 Sony Corporation...
- Page 97 Regardless of the setting value of the recording level, the limiter is always available. If an external microphone or the like is not connected to the LINE IN/ (microphone) jack (PLUG IN POWER), you cannot adjust the recording level. Back to top Copyright 2013 Sony Corporation...
- Page 98 2. Select the desired item. Customizing your camcorder Troubleshooting Live Outputs the sound without delaying during recording. Maintenance and Lip Sync precautions Synchronizes sound to the movie during shooting and outputs. Contents list Back to top Copyright 2013 Sony Corporation...
- Page 99 [ Audio] [Volume]. Playback Playing images on a TV Saving images with a computer Using the Wi-Fi function 2. Adjust the volume by pressing Customizing your camcorder Back to top Troubleshooting Maintenance and precautions Contents list Copyright 2013 Sony Corporation...
-
Page 100: External Microphone
External Microphone ( ) Suitable setting for an external microphone. Allows you to set [Ext. Mic. Rec. Level]. Other Device ( Suitable setting for devices other than a microphone. Related topics [Ext. Mic. Rec. Level] Back to top Copyright 2013 Sony Corporation... - Page 101 Customizing your camcorder Troubleshooting Related topics Maintenance and Using your smartphone or tablet as a remote control without using NFC precautions Using your smartphone or tablet as a remote control using NFC Contents list Back to top Copyright 2013 Sony Corporation...
- Page 102 2. Select the menu item that you want to assign to a My Button. camcorder Troubleshooting Maintenance and precautions Contents list 3. Select one of the My Buttons to which the menu item will be assigned. 4. Select Back to top Copyright 2013 Sony Corporation...
- Page 103 Does not display the grid lines. Contents list Displays the grid lines. Notes The outer frame of grid lines shows the display area of a TV which is not compatible with full pixel display. Back to top Copyright 2013 Sony Corporation...
-
Page 104: Display Setting
Troubleshooting Auto Maintenance and Displays for about 3 seconds. precautions Contents list Always displays. Notes You cannot change the setting of the icons or indicators on the LCD screen while in playback mode. Back to top Copyright 2013 Sony Corporation... -
Page 105: Audio Level Display
Saving images with a computer Using the Wi-Fi function 2. Select the desired item. Customizing your camcorder Troubleshooting Displays audio level meter. Maintenance and precautions Contents list Does not display the audio level meter. Back to top Copyright 2013 Sony Corporation... - Page 106 Using the Wi-Fi function 2. Select the desired item. Customizing your camcorder Troubleshooting Dims the LCD screen about 3 seconds after starting recording. Maintenance and precautions Does not dim the LCD screen automatically. Contents list Back to top Copyright 2013 Sony Corporation...
-
Page 107: Rec Mode
Saving images with a computer Using the Wi-Fi function 2. Select the desired shooting mode. Customizing your camcorder Troubleshooting 1080 1920 × 1080/30p quality Maintenance and precautions 1280 × 720/30p quality Contents list Back to top Copyright 2013 Sony Corporation... -
Page 108: Playback Function
You can display the Playback Index screen. Recording [Playback Function]. Playback Playing images on a TV Saving images with a computer Using the Wi-Fi function Customizing your Related topics camcorder Playing movies/audio files Troubleshooting Back to top Maintenance and precautions Contents list Copyright 2013 Sony Corporation... -
Page 109: Send To Smartphone
Using the Wi-Fi function Customizing your Related topics camcorder Transferring movies to your smartphone or tablet without using NFC Troubleshooting Transferring movies to your smartphone or tablet using NFC Maintenance and Back to top precautions Contents list Copyright 2013 Sony Corporation... - Page 110 Do not remove the battery pack or the AC Adaptor (sold separately) from your camcorder while deleting the files. It may damage the recording media. Do not eject the memory card while deleting files from the memory card. Related topics Release protection: [Protect] [Format] Back to top Copyright 2013 Sony Corporation...
- Page 111 Troubleshooting Maintenance and precautions Contents list You can select multiple files. Select the file with so that the mark disappears and you can remove the protection. Back to top Copyright 2013 Sony Corporation...
-
Page 112: Media Info
Using the Wi-Fi function Customizing your camcorder Notes Since there is a management file area, the used space is not displayed as 0% Troubleshooting even if you perform [Format]. [Details] Maintenance and Back to top precautions Contents list Copyright 2013 Sony Corporation... - Page 113 Protected files will also be deleted. precautions Make sure not to do the following while [Executing...] is displayed. Contents list Operate buttons on the camcorder. Eject the memory card from your camcorder. Disconnect the AC Adaptor (sold separately). Back to top Copyright 2013 Sony Corporation...
- Page 114 Playback [Setup] Media Settings] [Repair Img. DB F.]. Playing images on a TV Saving images with a computer Using the Wi-Fi function Customizing your 2. Select camcorder Back to top Troubleshooting Maintenance and precautions Contents list Copyright 2013 Sony Corporation...
-
Page 115: File Number
Assigns file numbers in sequence, following the largest file number existing on the recording medium. When the memory card is replaced with another one, the file number is assigned for each memory card. Back to top Copyright 2013 Sony Corporation... -
Page 116: Edit Device Name
User Guide Search Print Top page > Customizing your camcorder > Setup > Edit Device Name Operation Search Edit Device Name Before use Getting started You can change the device name. Recording 1. Select [Setup] Connection] [Edit Device Name]. Playback Playing images on a TV Saving images with a computer... - Page 117 Delete Deletes the character preceding the cursor. Switches the next character to a capital or small letter. Finalizes the entry. To cancel text entry, select Back to top Copyright 2013 Sony Corporation...
-
Page 118: Ssid/Pw Reset
[Setup] Connection] [SSID/PW Reset] Saving images with a computer Using the Wi-Fi function Customizing your camcorder Troubleshooting Notes Maintenance and After resetting the SSID/password, you must set the smartphone again. precautions Back to top Contents list Copyright 2013 Sony Corporation... -
Page 119: Hdmi Resolution
Normal setting (outputs the signal according to the TV automatically.) precautions 1080p Contents list Outputs the 1080p signal. 1080i Outputs the 1080i signal. 720p Outputs the 720p signal. 480p Outputs the 480p signal. 480i Outputs the 480i signal. Back to top Copyright 2013 Sony Corporation... - Page 120 Using the Wi-Fi function Customizing your camcorder Troubleshooting 2. Select the desired item. Maintenance and precautions Operates your camcorder using the TV’s Remote Commander. Contents list Does not operate your camcorder using the TV’s Remote Commander. Back to top Copyright 2013 Sony Corporation...
-
Page 121: Usb Connect
USB cable. Playback [Setup] Connection] [USB Connect]. Playing images on a TV Saving images with a computer Using the Wi-Fi function Customizing your Back to top camcorder Troubleshooting Maintenance and precautions Contents list Copyright 2013 Sony Corporation... -
Page 122: Usb Power Supply
USB device that is compatible with the 500 mA power supply standard. To record files using the [USB Power Supply] function, use an AC-UD10 AC Adaptor (sold separately) with the battery pack attached to the camcorder. Back to top Copyright 2013 Sony Corporation... -
Page 123: Usb Lun Setting
Customizing your 2. Select the desired item. camcorder Troubleshooting Multi Maintenance and Use this setting for ordinary operations. precautions Single Contents list Try this setting only if you cannot connect to an external device. Back to top Copyright 2013 Sony Corporation... - Page 124 Using the Wi-Fi function 2. Select the desired item. Customizing your camcorder Troubleshooting An operation sound is heard when you start/stop recording, or operate your Maintenance and camcorder. precautions Contents list Cancels the operation sound. Back to top Copyright 2013 Sony Corporation...
-
Page 125: Monitor Brightness
Troubleshooting Normal Normal setting (normal brightness). Maintenance and Bright precautions Select this when the LCD screen is not bright enough. Contents list This adjustment does not affect the shooting in any way. Back to top Copyright 2013 Sony Corporation... -
Page 126: Language Setting
General Settings] [Language Setting]. Playback Playing images on a TV Saving images with a computer Using the Wi-Fi function 2. Select the desired language. Customizing your camcorder Back to top Troubleshooting Maintenance and precautions Contents list Copyright 2013 Sony Corporation... -
Page 127: Airplane Mode
Saving images with a computer Using the Wi-Fi function Customizing your 2. Select the desired item. camcorder Troubleshooting Maintenance and Normal setting. precautions On ( ) Contents list Set to [On] when you board an airplane. Back to top Copyright 2013 Sony Corporation... -
Page 128: Power Save
Maintenance and The camcorder turns off automatically. precautions Contents list The camcorder does not turn off automatically. Notes The camcorder does not turn off automatically while power is being supplied via USB connection. Back to top Copyright 2013 Sony Corporation... - Page 129 Even if you use this function, all movie/audio files are retained. Playback [Setup] General Settings] [Initialize]. Playing images on a TV Saving images with a computer Using the Wi-Fi function Customizing your 2. Select camcorder Back to top Troubleshooting Maintenance and precautions Contents list Copyright 2013 Sony Corporation...
-
Page 130: Date And Time Setting
You can change this setting without stopping the clock. Contents list Does not set the summertime. Sets the summertime. The clock is set to move the time forward 1 hour. Date & Time You can set the clock. Back to top Copyright 2013 Sony Corporation... -
Page 131: Area Setting
Select this item when you want to use the camcorder with the area setting set to another place. 3. Select your desired country/region. 4. Select an area with , and then select You can set [Daylight Savings] or [Summer Time] by selecting Related topics World time difference Back to top Copyright 2013 Sony Corporation... -
Page 132: If You Have Problems
[Setup] General Settings] [Initialize]. Using the Wi-Fi function If you select [Initialize], all settings, including the clock setting, are reset. 4. Contact your Sony dealer or local authorized Sony service facility. Customizing your camcorder Back to top Troubleshooting Maintenance and... -
Page 133: Overall Operations
Your camcorder may become warm during operation. This is not a malfunction. Intelligent Auto is canceled. The Intelligent Auto setting is canceled if you change the following settings: [White Balance] [Exposure] [Low Lux] [Scene Selection] [Auto Back Light] [Face Detection] Back to top Copyright 2013 Sony Corporation... -
Page 134: Batteries/Power Sources
[Details] Attach the battery pack to the camcorder correctly. If the problem persists, disconnect the plug from the camcorder and contact your Sony dealer. The battery pack may be damaged. [Details] The remaining battery power is not displayed correctly. - Page 135 The ambient temperature is too high or low. This is not a malfunction. The battery pack has not been charged enough. Fully charge the battery again. If the problem persists, replace the battery pack with a new one. [Details] Back to top Copyright 2013 Sony Corporation...
-
Page 136: Lcd Screen
In the default setting, the backlight of the LCD screen dims automatically if you do not attempt to operate your camcorder for more than about 3 seconds ([Auto Monitor Off]). [Details] Back to top Copyright 2013 Sony Corporation... -
Page 137: Memory Card
The playback device does not support playing back memory cards. [Details] If you insert the memory card upside down or at an angle, the camcorder does not recognize it. Make sure you insert the memory card properly. [Details] Back to top Copyright 2013 Sony Corporation... - Page 138 User Guide Search Print Top page > Troubleshooting > Troubleshooting > Recording Operation Search Recording Before use Getting started Refer also to “Memory card.” Recording Playback Pressing START/STOP does not record files. Playing images on a TV The playback screen is displayed. Stop playback, and then select Saving images with a [Recording Mode] [ Movie] or [Audio].
- Page 139 If you connect or disconnect an external microphone, etc. while recording movies/sound, the sound may not be recorded correctly. The sound will be recorded correctly by restoring the microphone connection at the start of recording. Back to top Copyright 2013 Sony Corporation...
- Page 140 No sound or only a quiet sound is heard during playback. Turn up the volume. [Details] When you record sound with [Int. Mic. Rec. Level] or [Ext. Mic. Rec. Level] set to low, the recorded sound may be difficult to hear. [Details] [Details] Back to top Copyright 2013 Sony Corporation...
-
Page 141: Playback On The Tv
TV which is not compatible with full pixel display. Troubleshooting It is recommended you shoot images using the outer frame of [Grid Line] as a Maintenance and guide. [Details] precautions Back to top Contents list Copyright 2013 Sony Corporation... -
Page 142: Connecting To A Computer
Maintenance and keyboard, mouse, and your camcorder. precautions Disconnect the USB cable (supplied) from the computer and restart the Contents list computer, then connect the computer and your camcorder again in the correct order. Back to top Copyright 2013 Sony Corporation... - Page 143 Do not touch the N mark on the camcorder with 2 or more smartphones at the same time. When running another application that uses the NFC function on your smartphone, close the application. Back to top Copyright 2013 Sony Corporation...
-
Page 144: Self-Diagnosis Display
If the problem persists even after you have tried to fix a couple of times, contact Playback your Sony dealer or local authorized Sony service facility. When you contact them, Playing images on a TV give them the complete error code beginning with C or E displayed on the screen. - Page 145 (Warning indicator pertaining to incompatible memory card) Incompatible memory card is inserted. [Details] (Warning indicator pertaining to the write-protect of the memory card) Access to the memory card was restricted on another device. Back to top Copyright 2013 Sony Corporation...
-
Page 146: Warning Indicators
User Guide Search Print Top page > Troubleshooting > Self-diagnosis display/Warning indicators > Warning Indicators Operation Search Before use Warning Indicators Getting started Recording If messages appear on the screen, follow the instructions. Playback Data error. Playing images on a TV An error occurred during reading or writing files to the memory card. - Page 147 The inserted memory card is not efficient enough for copying the file(s). Use the recommended memory card. [Details] Restoring data... Your camcorder tries to recover data automatically if the data writing was not performed properly. Cannot recover data. Writing data onto the media of the camcorder has failed. Attempts were made to recover the data, but they were unsuccessful.
- Page 148 You can select only 100 saved files at one time for: Deleting saved files Protecting saved files, or releasing the protection Data protected. You tried to delete protected data. Release the protection of the data. Back to top Copyright 2013 Sony Corporation...
-
Page 149: About The Memory Card
“Memory Stick Micro” media (Mark2) This product cannot record or play back data that uses “MagicGate” technology. “MagicGate” is a copyright protection technology that records and transfers the contents in an encrypted format. Back to top Copyright 2013 Sony Corporation... -
Page 150: About The Battery Pack
User Guide Search Print Top page > Maintenance and precautions > Maintenance and precautions > About the battery pack Operation Search Before use About the battery pack Getting started Recording To charge the battery pack Playback Be sure to charge the battery pack before you start using your camcorder. We recommend that you charge the battery pack in an ambient temperature Playing images on a TV range of 10 ˚C to 30 ˚C (50 °F to 86 °F) until the CHG (charge) lamp turns off. -
Page 151: About Battery Life
Battery capacity decreases over time and through repeated use. If the interval between charges becomes significantly short, the battery pack may need to be replaced with a new one. Each battery’s life depends on storage, operating and environmental conditions. Back to top Copyright 2013 Sony Corporation... -
Page 152: Notes On Use
User Guide Search Print Top page > Maintenance and precautions > About handling of your camcorder > On use and care Operation Search Before use On use and care Getting started Recording On recording Notes on use Playback LCD screen Playing images on a TV About this manual, illustrations and on-screen displays Saving images with a... -
Page 153: Lcd Screen
time of purchase. LCD screen The LCD screen is manufactured using extremely high-precision technology, so over 99.99% of the pixels are operational for effective use. However, there may be some tiny black points and/or bright points (white, red, blue, or green in color) that appear constantly on the LCD screen. - Page 154 If any solid object or liquid gets inside the casing, unplug your camcorder and have it checked by a Sony dealer before operating it any further. Avoid rough handling, disassembling, modifying, physical shock, or impact such as hammering, dropping or stepping on the product. Be particularly careful with the lens.
-
Page 155: On Handling The Lcd Screen
Notes on optional accessories We recommend using genuine Sony accessories. Genuine Sony accessories may not be available in some countries/regions. About care of the battery pack You may not be able to turn on the camcorder or the battery pack may not be effectively charged if the terminal section of the battery is dirty. -
Page 156: On Moisture Condensation
When you bring your camcorder from a cold place into a warm place, put your camcorder in a plastic bag and seal it tightly. Remove the bag when the air temperature inside the plastic bag has reached the surrounding temperature (after about 1 hour). Back to top Copyright 2013 Sony Corporation... - Page 157 Connect your camcorder to a wall outlet (wall socket) using the AC-UD10 AC Maintenance and Adaptor or attach the fully charged battery pack, and leave it with the camcorder precautions turned off for more than 24 hours. Back to top Contents list Copyright 2013 Sony Corporation...
- Page 158 Saving images with a body of the memory card. computer Back to top Using the Wi-Fi function Customizing your camcorder Troubleshooting Maintenance and precautions Contents list Copyright 2013 Sony Corporation...
-
Page 159: Battery Pack
25 ˚C (77 °F). It is recommended that you charge the battery in a temperature range of 10 ˚C to 30 ˚C (50 °F to 86 °F). Maintenance and precautions Back to top Contents list Copyright 2013 Sony Corporation... -
Page 160: Recording Time
User Guide Search Print Top page > Maintenance and precautions > Recording time of movies/sound > Expected time of recording and playback with the battery pack Operation Search Before use Expected time of recording and playback with the Getting started battery pack Recording Playback... - Page 161 Back to top Copyright 2013 Sony Corporation...
- Page 162 1080 [720] (265) (535) (1080) When using a Sony memory card. Notes The shooting time may vary depending on the shooting and subject conditions, REC Mode] or [Audio Format]. [Details] The number in ( ) is the minimum shooting time.
- Page 163 Approx. 6.2 Mbps (average) 1,280 × 720 pixels/30p, 16:9, audio format: AAC Approx. 17.6 Mbps (average) 1,920 × 1,080 pixels/30p, 16:9, audio format: Linear PCM Approx. 7.6 Mbps (average) 1,280 × 720 pixels/30p, 16:9, audio format: Linear Back to top Copyright 2013 Sony Corporation...
- Page 164 Using the Wi-Fi function (1115) (2235) (4485) Customizing your camcorder When using a Sony memory card. Troubleshooting Notes Maintenance and The number in ( ) is the minimum recordable time. precautions You can record a maximum of 9,999 audio files.
-
Page 165: Using Your Camcorder Abroad
User Guide Search Print Top page > Maintenance and precautions > Using your camcorder abroad > Using your camcorder abroad Operation Search Before use Using your camcorder abroad Getting started Recording Power supply Playback You can use your camcorder in any countries/regions using the AC-UD10 AC Adaptor within the AC 100 V to 240 V, 50 Hz/60 Hz range. - Page 166 +12:00 Fiji/Wellington –11:00 Midway Island –10:00 Hawaii –09:00 Alaska –08:00 LosAngeles/Tijuana –07:00 Denver/Arizona –06:00 Chicago/MexicoCity –05:00 New York/Bogota –04:00 Santiago –03:30 St. John’s –03:00 Brasilia/Montevideo –02:00 Fernando de Noronha –01:00 Azores/Cape Verde Is. Back to top Copyright 2013 Sony Corporation...
- Page 167 Intel, Intel Core, and Pentium are trademarks or registered trademarks of Intel Corporation or its subsidiaries in the United States and other countries. “ ” and “PlayStation” are registered trademarks of Sony Computer Entertainment Inc. microSDXC logo is a trademark of SD-3C, LLC.
- Page 168 Add further enjoyment with your PlayStation 3 by downloading the application for PlayStation 3 from PlayStation Store (where available.) The application for PlayStation 3 requires PlayStation Network account and application download. Accessible in areas where the PlayStation Store is available. Back to top Copyright 2013 Sony Corporation...
-
Page 169: Notes On The License
GPL/LGPL. Source code is provided on the web. Use the following URL to download it. When downloading the source code, select HDR-MV1 as the model for your camcorder. http://www.sony.net/Products/Linux/ We would prefer you do not contact us about the contents of source code. -
Page 170: Specifications
User Guide Search Print Top page > Maintenance and precautions > Specifications > Specifications Operation Search Specifications Before use Getting started System Recording Signal format: Playback Digital HDTV specification Movie file recording format: Playing images on a TV Movie recording format: MPEG-4 AVC/H.264 Saving images with a Audio recording format: AAC LC 48kHz 128kbps computer... -
Page 171: Wireless Lan
Type: Li-ion Maximum output voltage: DC 4.2 V Output voltage: DC 3.6 V Capacity: 4.5 Wh (1 240 mAh) Design and specifications of your camcorder and accessories are subject to change without notice. Back to top Copyright 2013 Sony Corporation...