Advertisement
Available languages
Available languages
Quick Links
Canada
INSTALLATION
AND SERVICE MUST BE PERFORMED
BY A QUALIFIED
INSTALLER.
IMPORTANT:
SAVE FOR LOCAL ELECTRICAL INSPECTOR'S
USE.
READ AND SAVE THESE INSTRUCTIONS
FOR FUTURE REFERENCE,
Vi__FOR
YOUR SAFETY: Do not store or use gasoline or other
flammable
vapors and liquids in the vicinity of this or any other appliance,
United States
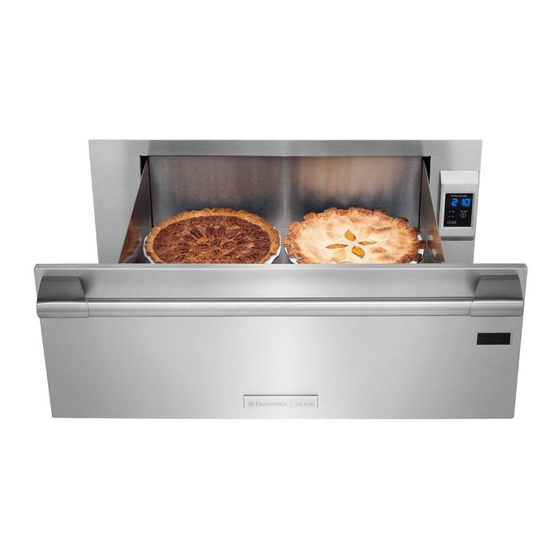
GENERAL INFORMATION: The Warm & Serve Drawer
IMPORTANT:
The warmer drawer
must be installed
on
can be used as a stand alone appliance or combine with a
a leveled surface from left to right, rear to front and the
built-in oven mounted above,
surface must be capable of supporting 100 Ibs (45,4 Kg).
Warm & Serve Drawer
Dimensions
NOTE: A 60" (152,4 cm) long cable is supplied with
the Warm & Serve Drawer.
Stand Alone Installation
60" (152,4 cm)
Cord
and
Serve
Drawer
iii !;iii
i!i!!ii
i i iiiiii
iiiil iii!iiii
iiii!iiii
i i i ii!ii!!il
i!_ i liiii_i!_i!!_+_i!_!!ii!!!
ii!j !!!+!!!iii
i i !i i;!i i!i!!
i i iii!ii!i!
!i!iiiiiiii
i i iii ii!!i_iiii!jiii
if ill iiii!ii!!i;!!!
iill ilii i!iiii_ii!i
i i i_i!!_
_i_ii
ii!! !i!!i
ii!il i!i!i+i+!!!i!!il
i!i!i+_9!!i!
i i i+i+i!iiiii!ii!!!i!i!
i!ii iiill iliil i i i! !!i! !!;_ iiiiii_i_i!_i_i_!+!+
'!!!!ii
iii i+iii
i+i!+ii+
ii+i!+i
+ii+i+i
!+! !i!i!i
i l i!ii
i+i+
11W'(28,6cm)
1
30"(76,2cm) 1
233h"(59'4cm)
Min.
9W' (25,1cm)
28 Y£ (72,4¢m)
24" (61 cm)
Max.
10W' (26cm)
28 3A"(73cm)
IMPORTANT:
The Warm & Serve Drawer
runs off a
single phase three-wire
120 volt, 60 hertz, AC only
electrical supply with ground.
Combination
Warm & Serve Drawer/
Built-in
Oven Installation
Caution:
Two 3" (7,6 cm) wide X
3/4" (1,9 cm) thick planks have to
be install and they should be able to
support 200 pounds. (90,7 Kg)
14" = 11 5/8" (29,6cm)
Min. is a Critical
dimension
and has to be respected.
J** = 3" (7,6crn) Max. Electrical
Junction
Box for wall
oven must be
lower
than
the warmer
drawer
cutout.
(28,6 cm)
1 30"(76,2 cm)
111/4"
:6
Min. 9%"(25,1¢m) 28W'(72,4cm)
Max. 10W'(26cm)
28 3A" (73cm)
23318" (59,4 cm)
24"(61 ¢m) 13A" (4,4cm)
Dependson critical
dimension H
Printed in the USA
P/N 318201810
(0901)
Rev. E
English - pages 1-4
EspaAol- p_qginas5-8
Fran_ais- pages 9-12
Advertisement

Related Manuals for Electrolux E30WD75GPS3


Summary of Contents for Electrolux E30WD75GPS3
- Page 1 INSTALLATION AND SERVICE MUST BE PERFORMED Canada United States BY A QUALIFIED INSTALLER. IMPORTANT: SAVE FOR LOCAL ELECTRICAL INSPECTOR'S USE. READ AND SAVE THESE INSTRUCTIONS FOR FUTURE REFERENCE, Vi__FOR YOUR SAFETY: Do not store or use gasoline or other flammable vapors and liquids in the vicinity of this or any other appliance, GENERAL INFORMATION: The Warm &...
- Page 2 important Notes to the installer Read all instructions contained in these installation instructions before installing appliance. Remove all packing material from appliance before connecting the electrical supply. Observe all governing codes and ordinances. Be sure to leave these instructions with the consumer. important Note to the...
-
Page 3: Model And Serial Number Location
Model and Serial Number Location Combination Warm & Serve Drawer and Theserial p lateis located asshown below. Cooktop Installation Whenordering parts for or making inquiries a boutyour Warm & Serve Drawer, always besureto include the model a ndserial n umbers a nda lot number o r letter fromthe serial p lateonyourWarm&... - Page 4 Notes...
- Page 5 LA INSTALACION Y EL SERVICIO DEBEN SER EFECTUADOS POR Canada Estados Unidos UN INSTALADOR CAUFICADO. IMPORTANTE: GUARDE ESTAS INSTRUCCIONES PARA USO DEL iNSPECTOR LOCAL DE ELECTRICIDAD. LEA Y GUARDE ESTAS INSTRUCCIONES PARA REFERENCIA FUTURA. _PARA SU SEGURIDAD: No almacen& ni utilice gasolina u otros vapores y liquidos inflamables en la proximidad...
- Page 6 Notas importantes para el instalador 1. Lea todas las instrucciones de instalaci0n antes de instalar el electrodomestico. 2. Retire todos los materiales de empaque del electrodomestico antes de conectar la fuente de energia. 3. Observe todos los c0digos y leyes del gobierno 4.
- Page 7 Combinaci6n del caj6n calentador y la Ubicad6n de ia placa de serie instalaci6n de una cubierta Encontrani el nOmero de serie y modelo impresos en la placa de serie. Abertura de Cuando pida componentes o desee obtener informaciones sobre su cajon calentador, asegurese de incluir el modelo y table de el numero de serie o una letra o numero de la placa con el la cubierta...
- Page 8 Notas...
- Page 9 UN INSTALLATEUR QUALIFI_: DOlT EFFECTUER Canada United States L'INSTALLATION ET LE SERVICE. IMPORTANT: CONSERVEZCES INSTRUCTIONS POUR LES INSPECTEURSLOCAUX. LISEZ CES INSTRUCTIONS ET CONSERVEZ-LES POUR RI'=FERENCES ULTERIEURES. POUR VOTRE SECURITE: N'entreposez et n'utilisez d'essence ou d'autres produits inflammables proximit_ de cet appareil ou de tout autre appareil, RENSEIGNEMENTS GENERAUX IMPORTANT: Le tiroir-rechaud doit _tre installe sur une Ce tiroir-rechaud peut _tre utilise de facon autonome ou...
-
Page 10: Note Importante
Notes importantes a I'instailateur 1. Lisez toutes les instructions d'installation avant de proceder I'installation de cet appareil. 2. Retirez tout le materiel d'emballage de I'appareil avant de brancher I'alimentation electrique. 3. Observez tousles reglements et codes Iocaux applicables. 4. Assurez-vous de laisser ces instructions a I'utilisateur. Note importante a I'utilisateur Conservez ces instructions pour references ulterieures. - Page 11 Installation combin_e tiroir-r_chaud / table Emplacement des numeros de modele et de de cuisson s_rie La plaque signaletique est situee tel que montre plus bas. Lots d'une commande de pieces ou pour toute demande D_coupage de renseignements au sujet de votre tiroir rechaud, de la table assurez-vous de toujours inclure les numeros de modele de cuisson...
- Page 12 Notes...