D-Link DWR-116 User Manual
Wireless n300 multi-wan router
Hide thumbs
Also See for DWR-116:
- Quick installation manual (81 pages) ,
- User manual (20 pages) ,
- Quick setup manual (8 pages)
Table of Contents
Advertisement
Advertisement
Table of Contents

Related Manuals for D-Link DWR-116


Summary of Contents for D-Link DWR-116
-
Page 1: User Manual
Version 1.0 | 05/24/2013 User Manual Wireless N300 Multi-WAN Router DWR-116... -
Page 2: Preface
Preface D-Link reserves the right to revise this publication and to make changes in the content hereof without obligation to notify any person or organization of such revisions or changes. Manual Revisions Revision Date Description May 24, 2013 • Initial release for Revision A1... -
Page 3: Table Of Contents
Advanced Wireless .............44 Manual Internet Connection Setup ......16 Advanced Network ............45 Internet Connection Type ..........16 Tools ....................46 Dynamic IP (DHCP) .............17 Admin ..................46 PPPoE ..................18 Time ..................47 PPTP ..................19 Syslog ..................48 L2TP ..................20 Email Settings ..............49 D-Link DWR-116 User Manual... - Page 4 What is WPA? ................62 Configure WPA-PSK ..............63 Configure WPA (RADIUS) ............64 Windows® 8 ...................65 WPA/WPA2 ................65 Windows® 7 ...................67 WPA/WPA2 ................67 WPS ..................69 Windows Vista® ................73 WPA/WPA2 ................74 WPS/WCN 2.0 ...............76 Windows® XP ................77 WPA/WPA2 ................78 D-Link DWR-116 User Manual...
-
Page 5: Product.overview
• Power Adapter • Manual and Warranty on CD • External Wi-Fi antenna Note: Using a power supply with a different voltage rating than the one included with the DWR-116 will cause damage and void the warranty for this product. System Requirements •... -
Page 6: Introduction
The Wireless N300 Multi-WAN Router can be installed quickly and easily almost anywhere. This router is great for situations where an impromptu wireless network must be set up, or wherever conventional network access is unavailable. The DWR-116 can even be installed in buses, trains, or boats, allowing passengers to check e-mail or chat online while commuting. -
Page 7: Hardware Overview
Section 1 - Product Overview Hardware Overview Back Panel POWER LAN.3 LAN.1 LAN.4 LAN.2 Port Function LAN.Port Connects to wired computers or devices. WAN.Port Connects to the Internet. Power.Port Connects to the power adapter. D-Link DWR-116 User Manual... -
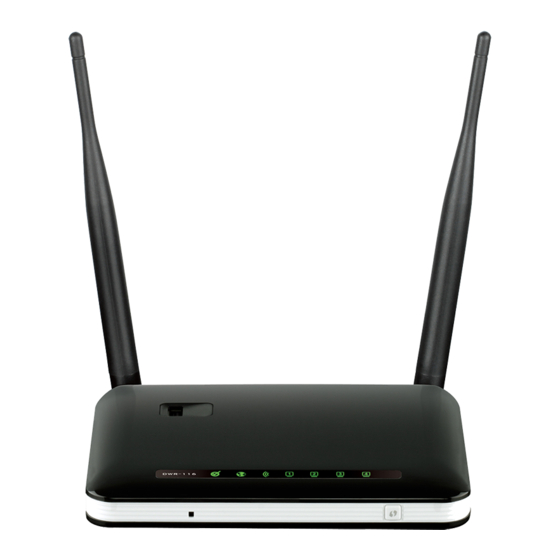
Page 8: Front Panel And Leds
Note: WPS mode can be activated by pressing, and holding the WPS button until the Wi-Fi LED begins to flash rapidly. You can find more details about activating WPS mode in the section titled “Wi-Fi Protected Setup” on page 32 D-Link DWR-116 User Manual... -
Page 9: Top
Section 1 - Product Overview Hardware Overview External.Antennas USB.2.0.Port Port Function USB.Port Connects to 3G/4G LTE Modem Dongle Antennas External WiFi Antennas D-Link DWR-116 User Manual... -
Page 10: Installation
LAN port of your computer or laptop. The Ethernet LED will turn green if the Ethernet connection is successfully established. Note: The DWR-116 Wireless N300 Multi-WAN Router’s LAN ports are “Auto-MDI/MDIX. ” Therefore, patch or crossover Ethernet cables can be used. -
Page 11: Wireless Installation Considerations
Wireless Installation Considerations The DWR-116 can be accessed using a wireless connection from virtually anywhere within the operating range of your wireless network. Keep in mind, however, that the quantity, thickness and location of walls, ceilings, or other objects that the wireless signals must pass through, may limit the range. -
Page 12: Configuration
Section 3 - Configuration Configuration This section will show you how to configure your new D-Link mobile router using the web-based configuration utility. Web-based Configuration Utility To access the configuration utility, open a web-browser such as Internet Explorer and enter the IP address of the router. The default IP address of the router is 192.168.0.1. -
Page 13: Setup
Manual.Internet.Connection.Setup wizard. This wizard will guide you through a step-by-step process to configure your D-Link router to connect to the Internet. Click Internet.Connection.Setup.Wizard to begin. If you want to enter your settings without running the wizard, click Manual. - Page 14 Click Prev to go back to the previous page or click Cancel to close the wizard. Note: The DWR-116 supports several kinds of WAN interfaces, allowing you to assign either a WAN or a WWAN(3G/4G LTE) connection as the backup WAN. If the Primary WAN is down or unavailable, configure the backup WAN to Enable, and all the traffic will be routed through backup WAN.
- Page 15 Static IP Address Choose this option if your Internet Setup Provider provided you with IP Address information that has to be manually configured. Connection: See page 14 for information about how to configure this type of connection. D-Link DWR-116 User Manual...
- Page 16 Password that your ISP provides to you for PPPoE dial-up. Service Name: (Optional) Fill in if provided by your ISP. Click Next to continue, Prev to go back to the previous page or click Cancel to close the wizard. D-Link DWR-116 User Manual...
- Page 17 Enter the information provided by your ISP. Address: L2TP Server IP IP address of PPTP server. Address: User Name: User/account name that your ISP provides to you for PPTP dialup. Password: Password that your ISP provides to you for PPTP dial-up. D-Link DWR-116 User Manual...
- Page 18 Enter the IP address assigned to your network connection. Subnet Mask: Enter the subnet mask. Gateway Address: Enter the default gateway. Primary DNS Enter the primary DNS server. Address: Secondary DNS Enter the secondary DNS server. Address D-Link DWR-116 User Manual...
- Page 19 Section 3 - Configuration You have completed the Setup.Wizard. Click Connect to save your settings. A popup will appear, to confirm your settings. Click OK to save your settings. D-Link DWR-116 User Manual...
-
Page 20: Manual Internet Connection Setup
This connection can serve as a backup for Connection is: your default connection. Click on the Failover. Setting.dropdown box in order to configure this setting. Please refer to page “Failover Setting” on page 23 for more details on how to configure settings. D-Link DWR-116 User Manual... -
Page 21: Dynamic Ip (Dhcp)
MAC address of your PC. Auto-reconnect: This feature enables this product to renew WAN IP address automatically when the lease time is expiring. Click Save. Settings to save your changes, or click Don’t.Save.Settings to discard your changes. D-Link DWR-116 User Manual... -
Page 22: Pppoe
You may need to change the Maximum Transmission Unit (MTU) for optimal performance. The default setting of PPPoE is 1492. Transmission Unit (MTU): Auto-reconnect: The device will dial-up PPPoE connection automatically. Click Save.Settings to save your changes, or click Don’t.Save.Settings to discard your changes. D-Link DWR-116 User Manual... -
Page 23: Pptp
Maximum Idle The time of no activity to disconnect your PPTP session. Set it to zero or choose Always-on to disable this feature. Time: Click Save.Settings to save your changes, or click Don’t.Save.Settings to discard your changes. D-Link DWR-116 User Manual... -
Page 24: L2Tp
Maximum Idle The time of no activity to disconnect your L2TP session. Set it to zero or choose Always-on to disable this feature. Time: Click Save.Settings to save your changes, or click Don’t.Save.Settings to discard your changes. D-Link DWR-116 User Manual... -
Page 25: 3G / 4G Lte
(Optional) Fill in if provided by your ISP. If not, keep the default value. Server: Keep Alive: Disable or Use LCP Echo Request. This depends on ISP requirement. Bridge Ethernet Activate this feature to change Ethernet WAN port to LAN port. Ports: D-Link DWR-116 User Manual... -
Page 26: Static Ip
ISP. You can use the Clone. button to replace the Internet port’s MAC address with the MAC address of your Ethernet card. Click Save.Settings to save your changes, or click Don’t.Save.Settings to discard your changes. D-Link DWR-116 User Manual... -
Page 27: Failover Setting
Secondary WAN: This can be set by clicking on Add.New.Rule,. the available options will be shown in the drop down box that appears. Click Save. Settings to save your changes, or click Don’t.Save.Settings to discard your changes. D-Link DWR-116 User Manual... -
Page 28: Wireless Connection Setup Wizard
You can also set up a wireless connection to a device automatically, or configure your router automatically through Windows by clicking the Wi-Fi Protected Setup button. This is described in “Wi-Fi Protected Setup (WPS)” on page 32. D-Link DWR-116 User Manual... - Page 29 Section 3 - Configuration This wizard will guide you through a step-by-step process to configure your D-Link router’s wireless . Click Next to continue. Note: While using the wizard, you can click Prev to go back to the previous page or you can click Cancel to close the wizard Enter a name for your wireless network, then click Next to continue.
- Page 30 AES encryption, then enter a password to use for your wireless network. It is recommended that you use AES if your wireless computers and devices support it, as it is more secure. Click Next to continue. D-Link DWR-116 User Manual...
- Page 31 (0-9, A-F). If you choose ASCII, the password can be between 5 to 13 alphanumeric characters. Click Next to continue. This completes the Wireless Connection Setup Wizard. Click Save to save your changes and reboot the router. D-Link DWR-116 User Manual...
-
Page 32: Wireless Settings
Visibility Status: Select Invisible if you do not want the SSID of your wireless network to be broadcast by the DWR-116. The SSID of your router will not be seen by site survey utilities. Therefore while setting up your wireless clients, you will have to manually enter your SSID to connect to the router. - Page 33 HEX or ASCII key, you will need to enter different numbers of characters for your key, as indicated below the WEP Key text box. ASCII keys may use letters and numbers only, and HEX keys may use numbers 0-9 and letters A-F only. D-Link DWR-116 User Manual...
- Page 34 AES cipher is the most secure, provided that all of your clients can support it. Network Key: Enter the key/password you want to use for your wireless network. The key must be 8 to 63 characters long, and may only contain letters and numbers. D-Link DWR-116 User Manual...
- Page 35 RADIUS Server IP Enter the IP address of your RADIUS server. Address: RADIUS Server Enter the port used for your RADIUS server. Port: RADIUS Server Enter the shared secret/password for your RADIUS Shared server. Secret: D-Link DWR-116 User Manual...
-
Page 36: Wi-Fi Protected Setup
Note: The DWR-116 has a WPS push button on the front panel that will activate WPS mode by pressing and holding the button for approximately 6 seconds. The Wi-Fi LED will begin to flash rapidly when WPS mode has been activated. -
Page 37: Network Settings
Enter the. Subnet. Mask of the router. The Mask: default subnet mask is 255.255.255.0. Local Domain Enter the local domain name for your network. Name: Click Save. Settings to save your changes, or click Don’t.Save.Settings to discard your changes. D-Link DWR-116 User Manual... -
Page 38: Dhcp Server Settings
Section 3 - Configuration DHCP Server Settings The DWR-116 has a built-in DHCP (Dynamic Host Control Protocol) server. The DHCP server assigns IP addresses to devices on the network that request them. By default, the DHCP Server is enabled on the device. The DHCP address pool contains a range of IP addresses, which are automatically assigned to the clients on the network. -
Page 39: Advanced
In the next box, enter the port number that you would like to open. Enable: Select this box to enable the rule. Schedule Rule #: Specify the schedule rule number. Click Save.Settings to save your changes, or click Don’t.Save.Settings to discard your changes. D-Link DWR-116 User Manual... -
Page 40: Application Rules
Some applications require multiple connections, such as Internet gaming, video conferencing, Internet telephony and others. These applications have difficulties working through NAT (Network Address Translation). Application. Rules allow some of these applications work with the DWR-116. Popular Select from a list of popular applications. Applications:... -
Page 41: Qos Engine
Specify the remote IP address and then the port Ports: after the colon. QoS Priority: Select Low,.Normal,.or.High. Enable: Select a checkbox to enable the particular QoS rules individually. Click Save.Settings to save your changes, or click Don’t.Save.Settings to discard your changes. D-Link DWR-116 User Manual... -
Page 42: Mac Address Filter
If this box is selected, the rule will follow the connection control setting specified in MAC filtering settings. If this box is selected, the rule will follow the connection control setting specified in MAC filtering settings. Click Save.Settings to save your changes, or click Don’t.Save.Settings to discard your changes. D-Link DWR-116 User Manual... -
Page 43: Url Filter
Select this box to enable URL Filtering. Identifies the rule. URL: Enter URL that you would like to block. Enable: Click to enable the specific URL filter. Click Save.Settings to save your changes, or click Don’t.Save.Settings to discard your changes. D-Link DWR-116 User Manual... -
Page 44: Outbound Filter
Specify the schedule rule number. Previous Page: Go back to the previous filter page. Next Page: Advance to the next filter page. Click Save. Settings to save your changes, or click Don’t.Save.Settings to discard your changes. D-Link DWR-116 User Manual... -
Page 45: Inbound Filter
Specify the schedule rule number. Previous Page: Go back to the previous filter page. Next Page: Advance to the next filter page. Click Save. Settings to save your changes, or click Don’t.Save.Settings to discard your changes. D-Link DWR-116 User Manual... -
Page 46: Snmp
SNMP (Simple Network Management Protocol) is a widely used network monitoring and control protocol that reports activity on each network device to the administrator of the network. SNMP can be used to monitor traffic and statistics of the DWR-116. The DWR-116 supports SNMP v1 or v2c. SNMP Local: Selec t Enabled to allow local SNMP administration. -
Page 47: Routing
Enter the subnet mask to be used for the specified net work. Gateway: Enter the gateway IP address to the specified network. Hop: Enter the amount of hops it will take to reach the specified network. Enable: Select this box to enable the rule. D-Link DWR-116 User Manual... -
Page 48: Advanced Wireless
Select the basic transfer rates based on the speed of wireless adapters on your wireless network. It is strongly recommended to keep this setting to Auto. Click Save.Settings to save your changes, or click Don’t.Save.Settings to discard your changes. D-Link DWR-116 User Manual... -
Page 49: Advanced Network
Select the box to allow the WAN port to Ping Respond: be “pinged.” Blocking the Ping option may provide some extra security from hackers. Click Save. Settings to save your changes, or click Don’t.Save.Settings to discard your changes. D-Link DWR-116 User Manual... -
Page 50: Tools
Confirm Password: Confirm the chosen password. Remote Remote management allows the DWR-116 Management: to be configured from the Internet using a web browser. A username and password is still required to access the web-management interface. -
Page 51: Time
Time Zone: Select the appropriate Time. Zone. from the drop-down box. Automatically Select this checkbox to automatically synchronize synchronize the DWR-116 with an Internet with Internet time server. time server: NTP Server Choose the NTP Server used for synchronizing Used: time and date. -
Page 52: Syslog
Section 3 - Configuration Syslog The DWR-116 keeps a running log of events and activities occurring on the router. You may send these logs to a SysLog server on your network. Enable Logging Select this box to send the router logs to a to Syslog Server: Syslog server. -
Page 53: Email Settings
E-mail Subject: Enter a subject for the e-mail. E-mail Log Now: Click this button to access the e-mail log. Click Save. Settings to save your changes, or click Don’t.Save.Settings to discard your changes. D-Link DWR-116 User Manual... -
Page 54: System
Restore To This option will restore all settings back to Factory Default their defaults. Any settings that have not been Settings: backed up will be lost, including any rules that you have created. D-Link DWR-116 User Manual... -
Page 55: Firmware
Browse to upload the file. Please check the D-Link support site for firmware updates at http://support. dlink.com. You can download firmware upgrades to your hard drive from the D-Link support site. -
Page 56: Dynamic Dns
(Web, FTP, or Game Server) using a domain name that you have purchased (www.whateveryournameis.com) with your dynamically assigned IP address. Sign up for D-Link’s free DDNS service at www.dlinkddns.com. Enable DDNS: DDNS is a method of keeping a domain name linked to a changing IP Address. -
Page 57: System Check
Host Name or IP Enter a host name or the IP address that you Address: want to ping and click Ping. PING Result: The status of your Ping attempt will be displayed in the Ping Result box. D-Link DWR-116 User Manual... -
Page 58: Schedules
Enter the time at which you would like the (hh:mm): schedule to become active. End Time Select the time at which you would like the (hh:mm): schedule to become inactive. Click Save. Settings to save your changes, or click Don’t.Save.Settings to discard your changes. D-Link DWR-116 User Manual... -
Page 59: Status
Displays the MAC address and the public IP settings for the router. LAN Computers: Displays the wireless MAC address and your wireless settings such as SSID, channel, and encryption type. Also displays the list of currently connected DHCP clients. D-Link DWR-116 User Manual... -
Page 60: Logs
Here you can view logs and define events that you want to view. This router also has an internal syslog server, so you can send the log files to a computer that is running a syslog utility. D-Link DWR-116 User Manual... -
Page 61: Statistics
Section 3 - Configuration Statistics Here you can view the packets transmitted and received passing through your router on both WAN and LAN ports. The traffic counter will reset if the device is rebooted. D-Link DWR-116 User Manual... -
Page 62: Wireless
Section 3 - Configuration Wireless This table displays a list of wireless clients that are connected to your wireless router. It also displays the connection time and MAC address of the connected wireless clients. D-Link DWR-116 User Manual... -
Page 63: Support
Section 3 - Configuration Support The SUPPORT pages provide help information for each section of the device’s interface. To view the Support pages, click on SUPPORT at the top of the screen. D-Link DWR-116 User Manual... -
Page 64: Wireless.security
Section 4 - Security Wireless Security This section will show you the different levels of security you can use to protect your data from intruders. The DWR-116 offers the following types of security: • WPA2 (Wi-Fi Protected Access 2) • WPA2-PSK (Pre-Shared Key) •... -
Page 65: Configure Wep
7. Click Save.Settings to save your settings. If you are configuring the router with a wireless adapter, you will lose connectivity until you enable WEP on your adapter and enter the same WEP key as you did on the router. D-Link DWR-116 User Manual... -
Page 66: What Is Wpa
The password can include symbols (!?*&_) and spaces. This key must be the exact same key entered on your wireless router or access point. WPA/WPA2 incorporates user authentication through the Extensible Authentication Protocol (EAP). EAP is built on a more secure public key encryption system to ensure that only authorized network users can access the network. D-Link DWR-116 User Manual... -
Page 67: Configure Wpa-Psk
7. Click Save.Settings to save your settings. If you are configuring the router with a wireless adapter, you will lose connectivity until you enable WPA-PSK (or WPA2-PSK) on your adapter and enter the same passphrase as you did on the router. D-Link DWR-116 User Manual... -
Page 68: Configure Wpa (Radius)
6. Next to Port, enter the port you are using with your RADIUS server. 1812 is the default port. 7. Next to Shared Secret, enter the security key. 8. If you have a secondary RADIUS server, enter its IP address, port, and secret key. 9. Click Apply.Settings to save your settings. D-Link DWR-116 User Manual... -
Page 69: Windows® 8
To join an existing network, locate the wireless network icon in the taskbar, next to the time display. Wireless Icon Clicking on this icon will display a list of wireless networks which are within connecting proximity of your computer. Select the desired network by clicking on the network name. D-Link DWR-116 User Manual... - Page 70 WPS button on your router at this point to enable the WPS function. When you have established a successful connection with a wireless network, the word Connected.will appear next to the name of the network to which you are connected. D-Link DWR-116 User Manual...
-
Page 71: Windows® 7
If you are joining an existing network, you will need to know the security key or passphrase being used. 1. Click on the wireless icon in your system tray (lower-right corner). Wireless Icon 2. The utility will display any available wireless networks in your area. D-Link DWR-116 User Manual... - Page 72 It may take 20-30 seconds to connect to the wireless network. If the connection fails, please verify that the security settings are correct. The key or passphrase must be exactly the same as on the wireless router. D-Link DWR-116 User Manual...
-
Page 73: Wps
Section 4 - Security The WPS feature of the DWR-116 can be configured using Windows® 7. Carry out the following steps to use Windows® 7 to configure the WPS feature: 1. Click the Start button and select Computer from the Start menu. - Page 74 Section 4 - Security 3. Double-click the DWR-116 4. Input the WPS PIN number (displayed in the WPS window on the Router’s LCD screen or in the Setup.> Wireless.Setup menu in the Router’s Web UI) and click Next. D-Link DWR-116 User Manual...
- Page 75 Section 4 - Security 5. Type a name to identify the network. 6. To configure advanced settings, click the icon. Click Next to continue. D-Link DWR-116 User Manual...
- Page 76 Make a note of the security key as you may need to provide this security key if adding an older wireless device to the network in the future. 9. Click Close to complete WPS setup. D-Link DWR-116 User Manual...
-
Page 77: Windows Vista
(displayed using the SSID) and click the Connect button. If you get a good signal but cannot access the Internet, check you TCP/ IP settings for your wireless adapter. Refer to the Networking.Basics section in this manual for more information. D-Link DWR-116 User Manual... -
Page 78: Wpa/Wpa2
1.. Open the Windows Vista® Wireless Utility by right-clicking on the wireless computer icon in your system tray (lower right corner of screen). Select Connect.to.a.network. 2.. Highlight the Wi-Fi name (SSID) you would like to connect to and click Connect. D-Link DWR-116 User Manual... - Page 79 It may take 20-30 seconds to connect to the wireless network. If the connection fails, please verify that the security settings are correct. The key or passphrase must be exactly the same as on the wireless router. D-Link DWR-116 User Manual...
-
Page 80: Wps/Wcn 2.0
Current PIN that is displayed on the Advanced > Wi-Fi.Protected.Setup section or choose to click the Generate.New.PIN button or Reset.PIN.to.Default button. If you are using third party software to set up Wi-Fi Protection, carefully follow the directions. When you are finished, proceed to the next section to set up the newly-configured router. D-Link DWR-116 User Manual... -
Page 81: Windows® Xp
Wi-Fi network (displayed using the SSID) and click the Connect button. If you get a good signal but cannot access the Internet, check you TCP/ IP settings for your wireless adapter. Refer to the Networking.Basics section in this manual for more information. D-Link DWR-116 User Manual... -
Page 82: Wpa/Wpa2
1. Open the Windows® XP Wireless Utility by right-clicking on the wireless computer icon in your system tray (lower-right corner of screen). Select View.Available.Wireless.Networks. 2. Highlight the Wi-Fi network (SSID) you would like to connect to and click Connect. D-Link DWR-116 User Manual... - Page 83 It may take 20-30 seconds to connect to the wireless network. If the connection fails, please verify that the WPA-PSK settings are correct. The Wi-Fi password must be exactly the same as on the wireless router. D-Link DWR-116 User Manual...
-
Page 84: Troubleshooting
1..Why.can’t.I.access.the.web-based.configuration.utility? When entering the IP address of the D-Link router (192.168.0.1 for example), you are not connecting to a website on the Internet or have to be connected to the Internet. The device has the utility built-in to a ROM chip in the device itself. Your computer must be on the same IP subnet to connect to the web-based utility. - Page 85 • Close your web browser (if open) and open it. • Access the web management. Open your web browser and enter the IP address of your D-Link router in the address bar. This should open the login page for your the web management.
-
Page 86: Wireless Modes
An Infrastructure network contains an Access Point or wireless router. All the wireless devices, or clients, will connect to the wireless router or access point. An Ad-Hoc network contains only clients, such as laptops with wireless cardbus adapters. All the adapters must be in Ad-Hoc mode to communicate. D-Link DWR-116 User Manual... -
Page 87: Networking.basics
Check your IP address After you install your new D-Link adapter, by default, the TCP/IP settings should be set to obtain an IP address from a DHCP server (i.e. wireless router) automatically. To verify your IP address, please follow the steps below. -
Page 88: Statically Assign An Ip Address
Set Primary DNS the same as the LAN IP address of your router (192.168.0.1). The Secondary DNS is not needed or you may enter a DNS server from your ISP. Step.5 Click OK twice to save your settings. D-Link DWR-116 User Manual... -
Page 89: Technical.specifications
Operating: 0 to 40 °C (32 to 104 °F) Firewall Operating.Humidity IP Filtering Operating: 10% to 95% non-condensing Network Address Translation (NAT) MAC Filtering L2TP/PPTP/IPSEC VPN Pass-through Ports 4 x LAN (RJ-45) 1x WAN 1 x USB D-Link DWR-116 User Manual...