
Related Manuals for Panasonic PLC-XF60A


Summary of Contents for Panasonic PLC-XF60A
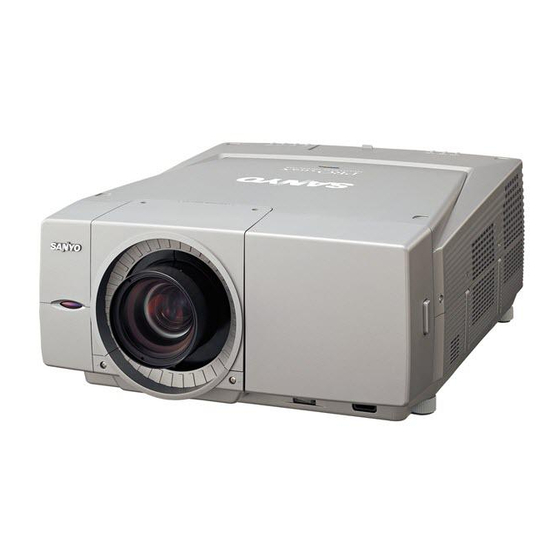
- Page 1 Multimedia Projector PLC-XF60A MODEL PLC-EF60A ✽ Projection lens is optional. Owner's Manual...
-
Page 2: Features And Design
Features and Design This Multimedia Projector is designed with most advanced technology for portability, durability, and ease of use. This projector utilizes built-in multimedia features, a palette of 16.77 million colors, and matrix liquid crystal display (LCD) technology. ◆ ◆ Compatibility My Menu Selection The projector widely accepts various video and computer... -
Page 3: Table Of Contents
Table of Contents Features and Design ....2 D. Zoom +/– Function ......32 How to Operate On-Screen Menu . -
Page 4: To The Owner
To The Owner Safety Precaution Before operating this projector, read this manual thoroughly and operate the projector properly. WARNING : TO REDUCE THE RISK OF FIRE OR ELECTRIC This projector provides many convenient features and SHOCK, DO NOT EXPOSE THIS APPLIANCE functions. -
Page 5: Safety Instructions
Safety Instructions This projector should be operated only from the type of power All the safety and operating instructions should be read before the product is operated. source indicated on the marking label. If you are not sure of the type of power supplied, consult your authorized dealer or Read all of the instructions given here and retain them for later local power company. -
Page 6: Air Circulation
Safety Instructions Air Circulation Setup In Proper Directions Openings in the cabinet are provided for ventilation and to Use the projector properly in specified positions. Improper ensure reliable operation of the product and to protect it from positioning may reduce the lamp life and result in severe overheating, and these openings must not be blocked or accident or fire hazard. -
Page 7: Moving The Projector
Safety Instructions Moving the Projector Carry the projector by two or more people by the carrying handle. Carrying Handle Disconnect all the cables from the projector before moving the projector. Moving the projector with the cables connected may cause damage to the projector or result in serious injury. -
Page 8: Compliance
Compliance Federal Communication Commission Notice This equipment has been tested and found to comply with the limits for a Class A digital device, pursuant to Part 15 of FCC Rules. These limits are designed to provide reasonable protection against harmful interference when the equipment is operated in a commercial environment. -
Page 9: Preparation
Preparation Parts Name q Remote Receiver Front w Projection Lens (Option) e Front Cover (inside Terminals) r Carrying Handle t Air Exhaust Vent CAUTION Hot air is exhausted from the exhaust vent. Do not put heat-sensitive objects near this side. CAUTION This projector is equipped with cooling fans for protection from overheating. -
Page 10: Indicators
Preparation Indicators q LAMP 1 REPLACE indicator t READY indicator Turns orange when the life of the projection Lamp 1 - Lights green when the projector is ready to be turned draws to an end. (p.62, 67) on and remains green lighting during operations. - Blinks green in the Power Management mode or when the projector is shutdown due to a power failure. -
Page 11: Top Control
Preparation Top Control LENS SHIFT MENU AUTO PC ADJ. INPUT SHUTTER ZOOM CANCEL INFORMATION FOCUS SELECT POWER q LENS SHIFT button u INPUT button Activates the Lens shift function. (p.29) Switches input sources. (p.30) w MENU button i SHUTTER button Opens or closes the On-Screen Menu. -
Page 12: Terminals
Preparation Terminals INPUT 1 ANALOG IN ANALOG OUT DIGITAL (DVI-D) INPUT 2 INPUT 3 S-VIDEO VIDEO/Y Cb/Pb Cr/Pr VIDEO/Y Cb/Pb Cr/Pr INPUT 1 terminals INPUT 3 terminals DIGITAL (DVI-D) (HDCP compatible) VIDEO/Y, Cb/Pb, and Cr/Pr Connect digital output signal from a computer or Connect video or component output signal (Y, Cb/Pb, video equipment to this terminal with a DVI-D cable. - Page 13 Preparation ✽ t USB (Series B) INPUT 4 (Vacant for Optional Interface Board) This port is used for the projector maintenance. Optional interface board can be installed into this slot. (p.21, 73) y SERIAL PORT OUT This terminal outputs signal from SERIAL PORT IN. INPUT 5 (Vacant for Optional Interface Board) When controling more than two projectors from a computer, connect the other projector to this terminal...
-
Page 14: Remote Control
Preparation Remote Control S H U T T E R D . Z O O M O N - O F F KE YST ONE Z O O M F O C U S L ENS SHI FT SHU T T ER D .Z O O M O N - OF F KEYSTO NE Z OO M... - Page 15 SHUTTER D.ZOOM ON-OFF KE YST ONE Preparation ZOOM FOCUS LE NS SH I FT CANCEL MENU AUTO PC INFO FREEZE SCREEN VOL. SOUND P-TIMER INPUT 1 MUTE INPUT 2 INPUT 4 REMOTE INPUT 5 INPUT 3 REMOTE RESET ON ALL OFF q MENU button o INFO button Opens or closes the On-Screen Menu.
-
Page 16: Remote Control Transmitter
Preparation Remote Control Transmitter This wireless remote control uses radio frequency signal. You can switch four frequency channels prepared and select a remote control ID from eight IDs. The Remote Control Channel selection prevents radio frequency interference from the other equipment and the Remote Control ID selection allows you to operate several projectors with their respective remote controls without mutual interference among those projectors. -
Page 17: Remote Control Battery Installation
Preparation Channel switches sequentially for ID switches sequentially for one one pressing the SELECT button. pressing the SELECT button. Remote Control CH Radio Frequency Remote Control ID ✽ ✽ CH 1 2.472 GHz ID 1 CH 2 2.403 GHz ID 2 CH 3 2.446 GHz ID 3... -
Page 18: Installation
Installation Installation Install the projector in a safe place. Before installation, read Safety Instructions thoroughly and check the installation place. Install the projector in a place with sufficient strength to support the projector's weight. Installation on an unstable stand, cart, or ceiling may cause serious injury or accidents. -
Page 19: Lens Shift Adjustment
Installation Lens Shift Adjustment Lens shift feature is provided to move the position of the projected image vertically by 50% and horizontally by 10% respectively without any image distortion. ✽ Lens shift range varies depending on lens and projectors. The range in this manual is the case of LNS-W04. Level Adjustable Feet This projector has four level adjustable feet. -
Page 20: Connecting Ac Power Cord
Installation Connecting AC Power Cord This projector uses nominal input voltages of 120 V or 200-240 V AC. This projector automatically selects correct input voltage. It is designed to work with single-phase power systems having a grounded neutral conductor. To reduce risk of electrical shock, do not plug into any other type of power system. -
Page 21: Connection Terminals
Installation Connection Terminals Terminals for connecting the AC power cord and other equipment Front cover are located in the front part of the projector for easy setup. The terminal area is covered with a front cover to protect from dust and others, and hide messy cable connections. -
Page 22: Connecting To Computer (Digital And Analog Rgb)
Installation Connecting to Computer (Digital and Analog RGB) Cables used for connection q VGA Cable (HDB 15 pin) (Only one cable is supplied.) w DVI-D Cable ✽ e BNC Cable ✽ r Serial Cross Cable (RS-232C) ✽ ✽ = Not supplied with this projector.) PC Serial Port Monitor Output Monitor Output... -
Page 23: Connecting To Video Equipment (Digital And Video)
Installation Connecting to Video Equipment (Digital and Video) Cables used for connection q Video Cable w S-Video Cable e DVI-D Cable ✽ Cables are not supplied with the projector. Digital Output Video Output S-Video Output (HDCP compatible) DIGITAL (DVI-D) S–VIDEO VIDEO INPUT 3 S-VIDEO... -
Page 24: Connecting To Video Equipment (Component And Rgb Scart)
Installation Connecting to Video Equipment (Component and RGB Scart) Cables used for connection q BNC Cable w Scart-VGA Cable e Component Cable ✽ Cables are not supplied with the projector. Component RGB Scart Component Video Output Video Output 21-pin Output (Y, Pb/Cb, Pr/Cr) (Y, Pb/Cb, Pr/Cr) ANALOG IN... -
Page 25: Basic Operation
Basic Operation Operating the Projector You can operate the projector with the projector's top control, the remote control or a USB mouse (not provided). he remote control can be used wireless or wired. Operational range of the wireless remote control is within about 32.8’ (10m) from the projector. Operational range differs depending on environments where the projector is used. -
Page 26: Basic Operation And Reference Buttons
Basic Operation Basic Operation and Reference Buttons For detail operations other than those on this page, follow the respective menu operations described later. Remote Control Top Control LENS SHIFT MENU AUTO PC ADJ. INPUT CANCEL SHUTTER ZOOM INFORMATION FOCUS SELECT POWER Operations &... -
Page 27: Turning On The Projector
Basic Operation Turning On the Projector Complete peripheral connections (with Computer, VCR, etc.) before turning on the projector. (Refer to pages 22~24 for connection.) Turn on the MAIN On/Off switch of the projector. The LAMP indicator lights red, and the READY indicator lights green. The preparation display disappears after 20 seconds. -
Page 28: Turning Off The Projector
Basic Operation Turning Off the Projector Press the POWER ON-OFF button on the top control or the remote control, and a message “Power off?” appears on the screen. Press the POWER ON-OFF button again to turn off the projector. The LAMP indicator brightly lights red and the READY indicator goes out. -
Page 29: Lens Shift Adjustment
Basic Operation Lens Shift Adjustment Press the LENS SHIFT button and adjust the lens position with the Point buttons (e, d, 7, and 8) or with the Control pad. • When the lens position comes right in center vertically, the vertical arrows turn red. •... -
Page 30: Input Selection
Basic Operation Input Selection Choose either Input 1, Input 2, Input 3, Input 4, or Input 5 by INPUT button pressing the INPUT button on the top control or the INPUT 1, Input 1 INPUT 2, INPUT 3, INPUT 4, or INPUT 5 buttons on the remote control. -
Page 31: Keystone Adjustment
Basic Operation Keystone Adjustment Keystone function is provided to correct image distortions. Press the KEYSTONE button on the remote control and correct vertical and horizontal distortions with the Point buttons (e, d, 7, and 8) or the Control pad. The Keystone adjustment can be memorized. -
Page 32: Zoom +/- Function
Basic Operation D. Zoom +/- Function D. Zoom + Press the D. ZOOM button on the remote control once and then expand the image size with the SELECT button and pan the image with the Point buttons (e, d, 7, and 8) or the Control pad. D. -
Page 33: How To Operate On-Screen Menu
Basic Operation How to Operate On-Screen Menu The projector can be adjusted or set via the On-Screen Menu. Refer to the following pages for respective adjustment and setting procedure. Top Control Operation Top Control Press the MENU button on the projector's top control to display the On-Screen Menu. - Page 34 Basic Operation On-Screen Menu Menu icon Guide Currently selected menu. Control bar for Mouse Operation This bar appears when a USB mouse is connected to the USB terminal of the projector. Mouse cursor When clicking 77 or 88 on the control bar, menu SELECT icons rotate fast.
-
Page 35: Menu Icons And Their Features
Basic Operation Menu Icons and Their Features The projector can be adjusted or set via the On-Screen Menu. Refer to the following pages for respective adjustment and setting procedure. Menu icons What You Can Do with Each Menu Page no. INPUT : selects input sources. -
Page 36: Input
Input Input selects computer and video input sources. Press the MENU button to display the On-Screen Menu. Input Menu Spin Menu icons with the Point buttons (7 and 8) or the Control pad and press the SELECT button when the INPUT icon comes right in front. - Page 37 Input Input 2 Move a pointer to Input 2 and press the SELECT button. Source Select Menu When the input source is analog coming Move the pointer to from a computer through the Input 2 (5 RGB, Video, or Y, Pb/Cb, BNC-type: Red, Green, Blue, H.
-
Page 38: System
System System selects system of the connected computer and video source. PC System Menu PC System Selection Auto This projector automatically tunes to various types of computers based on VGA, SVGA, XGA, SXGA, UXGA, or WXGA with its Multi- System icon scan system and Auto PC Adjustment. -
Page 39: Video Or S-Video Signal Selection
System AV System Menu (Video or S-Video) Video or S-Video Signal Selection Auto The projector automatically detects incoming video system, and adjusts itself to optimize its performance. When Video System is PAL-M or PAL-N, select system manually. PAL / SECAM / NTSC / NTSC4.43 / PAL-M / PAL-N If the projector cannot reproduce proper video image, it is Move the yellow necessary to select a specific broadcast signal format from among... -
Page 40: Computer Adjustment
Computer Adjustment selects Auto PC adj., Fine sync, Total dots, Current mode, Clamp, Display area, Position, V -sync phase, Reset, and Mode. PC Adjustment PC Adjust Menu Auto PC Adjust Auto PC adj. Press the MENU button to display On-Screen Menu. Spin Menu icons with the Point buttons (7 and 8) or the Control PC ADJ. -
Page 41: Manual Pc Adjust
Computer Adjustment Manual PC Adjust PC Adjust Menu Some computers employ special signal formats which may not be tuned by Multi-scan system of this projector. Manual PC Adjustment enables you to precisely adjust several parameters to match those signal formats. The projector has 50 independent memory areas to memorize those parameters adjusted manually. - Page 42 Computer Adjustment Position Adjusts picture position. V-sync phase Adjust this item when the projected image is affected by the noise from the external equipment. (From 0 to 15) Press the SELECT button ✔ Note: at the Display area and the Display area dialog box V-sync phase is not displayed as the item is initially checked off on My menu in the appears.
-
Page 43: Image Adjustment
Image Adjustment Image selects image level from Standard, Cinema, Real, and Image 1~10. Press the MENU button to display On-Screen Menu. Spin Image Menu (PC) Menu icons with the Point buttons (7 and 8) or the Control pad and press the SELECT button when the IMAGE icon comes right in front. -
Page 44: Image Adjust
Image Adjustment adjusts Contrast, Brightness, Color, Tint, Color management, Auto picture control, Color temp., Red, Green, Blue, Sharpness, Gamma, Noise reduction, Image Adjust Progressive, and Film; selects Reset and Store. Press the MENU button to display On-Screen Menu. Spin Image Adjust Menu Menu icons with the Point buttons (7 and 8) or the Control pad and press the SELECT button when the IMAGE ADJ. - Page 45 Image Adjustment Move the pointer to one of the followings with the Point Color management list buttons (e, d, 7, and 8) or the Control pad and press the SELECT button. M o v e t h e p o i n t e r t h e s e l e c t e d LIST .....displays Color Management List window to store...
- Page 46 Image Adjustment Gamma Adjust with the Point buttons (e and d) or the Control pad to obtain better balance of contrast. (From 0 to 15.) Noise reduction Select one of the followings to reduce noise of the image. Off ..disabled L1 .
-
Page 47: Screen Setting
Screen Setting selects the screen size from Normal, Wide, True, and Full screen; customizes it by Scale, H&V, Position, Common, and Reset; adjusts it by Screen Setting Digital zoom +/–, Keystone; sets Ceiling and Rear. Press the MENU button to display On-Screen Menu. Spin Screen Setting Menu Menu icons with the Point buttons (7 and 8) or the Control pad and press the SELECT button when the SCREEN... - Page 48 1600 x 1200, reset the resolution to the lower before connecting the source to the projector. • The image data in other than XGA (1024 x 768 for PLC-XF60A) or SXGA (1400 x 1050 for PLC-EF60A) is modified to fit the screen size in initial mode.
-
Page 49: Setting
Setting changes various settings: Language, Menu, Logo, Background, Lamp, Remote control, Display, Input search, Power management, On start, Analog Setting out, Lens memory, Shutter, Security, and Factory default. Press the MENU button to display On-Screen Menu. Spin Setting Menu (Language) Menu icons with the Point buttons (7 and 8) or the Control pad and press the SELECT button when the SETTING icon Setting icon... - Page 50 Setting Logo Select Logo Logo settings can be altered as follows: Logo select This function decides what to be displayed on the starting-up display as follows: Default ..the factory-set logo My logo . . .the image you captured Off .
- Page 51 Setting PIN Code Change PIN Code change Dialog Box Logo PIN code can be changed to your desired four-digit number. Select PIN code change and Select “PIN code change” with the Point buttons (e, d, 7, and press the SELECT button. 8) or the Control pad and press the SELECT button.
- Page 52 Setting Display This function decides whether to display On-Screen Displays. On ..shows all the On-Screen Displays. Off ..sets On-Screen Displays disappeared except; ● On-Screen Menu ● “Power off?” message ● P-TIMER ● “No signal”...
- Page 53 Setting Analog out The ANALOG OUT terminal is for output of the analog signal coming from the ANALOG IN terminal in the Input 1 terminals. (See page 12.) Select “On” to enable the signal output through the ANALOG OUT terminal always except in the stand-by mode or “Off” to Lens memory disable the signal output.
- Page 54 Setting Shutter Management Shutter Management The Shutter Management function turns off the projection lamp when the projector is left with the shutter closed and the set time has passed away. The count-down time can be set between 5 and 180 minutes. After the count-down time has elapsed, the shutter is opened up automatically and the lamp is turned off to cool itself down.
- Page 55 Setting PJ lock PJ lock This function prevents the projector from being operated by an unauthorized person and provides the following settings for security options. On1 ..requires to enter the PIN code every time turning on the projector.
- Page 56 Setting Factory default Factory default This function returns all setting values to the factory default settings except for those including: User logo, PJ PIN code, Logo PIN code, Security setting, Lamp time, Filter time, and PJ time. Quit Exits the Setting menu. Select Factory default and this box appears.
-
Page 57: Special
Special customizes control functions: Lamp, Fan control, Filter, Auto PC adj., Test pattern, RS- Special 232C, and USB memory and displays Warning log. Press the MENU button to display On-Screen Menu. Spin Special Menu (Lamp) Menu icons with the Point buttons(e, d, 7, and 8) or Control pad and press the SELECT button when the SPECIAL icon comes right in front. - Page 58 Special Test pattern Auto PC adj. Select “On” to enable the Auto PC adjust function and “Off” to disable it. Refer to page 30 and 40 for Auto PC adjust function. Select Test pattern and then the Test pattern selection box is displayed.
-
Page 59: Information
Special USB Memory Menu Warning log Move the yellow frame pointer to a USB memory Warning log shows the information of the past warning history of to store the data and then the projector. Up to 50 logs can be displayed. Log contents are as press the SELECT button. -
Page 60: Maintenance And Cleaning
Maintenance and Cleaning Warning Temp Indicator The WARNING TEMP indicator shows the state of the function which protects the projector. Check the state of the WARNING TEMP indicator and the READY indicator to take proper maintenance. The projector is shut down and WARNING TEMP indicator is blinking red. -
Page 61: Air Filter Replacement
ORDER REPLACEMENT FILTER When ordering the replacement air filter, give the following information to the dealer. ● Model No. of your projector PLC-XF60A / PLC-EF60A ● Replacement Filter Part No. 610 315 1588... -
Page 62: Lamp Replacement
Maintenance and Cleaning Lamp Replacement When the life of the projection lamps of this projector draw to an Top Control end, the LAMP 1 and 2 REPLACE indicators light orange. If one of these indicators lights orange, replace the lamp with a new one promptly. -
Page 63: Lamp Handling Precautions
Replacement Lamp can be ordered through your dealer. When ordering a Projection Lamp, give the following information to the dealer. ● Model No. of your projector PLC-XF60A / PLC-EF60A ● Replacement Lamp Type No. POA-LMP80 (Service Parts No. 610 315 7689) LAMP HANDLING PRECAUTIONS This projector uses a high-pressure lamp which must be handled carefully and properly. -
Page 64: Cleaning The Projection Lens
Maintenance and Cleaning Cleaning the Projection Lens Follow these steps to clean the projection lens. Disconnect the AC power cord before cleaning. Softly wipe the projection lens with a cleaning cloth that contains a small amount of non-abrasive camera lens cleaner, or use lens cleaning paper or a commercially available air blower to clean the lens. -
Page 65: Indicators And Projector Condition
Maintenance and Cleaning Indicators and Projector Condition Main Indicators Indicators Projector Condition WARNING READY LAMP TEMP Green The projector is OFF. (The AC power cord is unplugged.) The projector is preparing for stand-by or the projection lamp is being cooled down. -
Page 66: Shutter Indicator
Maintenance and Cleaning Shutter Indicator Indicators Projector Condition LAMP READY SHUTTER Green Blue The shutter is closed. (The projector is On.) In the Shutter management mode. (The projector is in the stand-by mode.) Slow In the Shutter management mode. (The projector is in the cooling mode.) Slow The shutter is out of control. -
Page 67: Lamp Replace Indicators
Maintenance and Cleaning Lamp Replace Indicators Indicators Projector Condition LAMP 1/2 LAMP READY REPLACE Green Orange The lamp cannot light up. (The projector is preparing for stand-by or the projection lamp is being cooled down. The projector cannot be turned on until cooling is completed.) Slow The lamp cannot light up. -
Page 68: Appendix
Appendix Troubleshooting Before calling your dealer or service center for assistance, check the items below once again. – Make sure you have properly connected the projector to peripheral equipment as described on pages 22~24. – Make sure all equipment is connected to AC outlet and the power is turned on. –... - Page 69 Appendix ☞ Some displays are not seen – Check the Display item. ( “Setting” on page 52) during the Operation. ☞ Only part of image is displayed. – Check if you are in D. Zoom+/– mode. ( p.32, 48) ☞ (Large/Small) –...
-
Page 70: Compatible Computer Specifications
Appendix Compatible Computer Specifications Basically this projector can accept a signal from all computers with V- and H-Frequency mentioned below and less than 230 MHz of Dot Clock. ON-SCREEN H-Freq. V-Freq. ON-SCREEN H-Freq. V-Freq. RESOLUTION RESOLUTION DISPLAY (kHz) (Hz) DISPLAY (kHz) (Hz) VGA 1... - Page 71 Appendix When a input signal is digital from DVI terminal, refer to chart below. ON-SCREEN H-Freq. V-Freq. ON-SCREEN H-Freq. V-Freq. RESOLUTION RESOLUTION DISPLAY (kHz) (Hz) DISPLAY (kHz) (Hz) D-VGA 640 x 480 31.47 59.94 D-SXGA1 1280 x 1024 63.98 60.02 720 x 480 D-480p 31.47...
-
Page 72: Technical Specifications
20.39” x 9.92” x 23.86” (518mm x 252mm x 606mm) (Not including adjustable feet) Net Weight 54.3 lbs (24.7kg) Feet Adjustment 0˚ to 3.65˚ Panel Resolution PLC-XF60A PLC-EF60A LCD Panel System 1.4” TFT Active Matrix type, 3 panels Panel Resolution 1024 x 768 dots... -
Page 73: Optional Parts
Appendix Accessories Owner’s Manual (CD-ROM + Quick Reference Guide) AC Power Cord Remote Control and Batteries VGA Cable Lens Attachment Light Block Plates (2 types) Real Color Manager Pro (CD-ROM) Cord Cover Strap Security Label (PIN Code/USB Key) ● The specifications are subject to change without notice. ●... -
Page 74: Menu Tree
Appendix Menu Tree INPUT Input 1 RGB (PC Analog) System (1) RGB (Scart) Auto RGB (PC Digital) System (1) RGB (AV HDCP) System (1) Input 2 System (1) Video System (2) Y, Pb/Cb, Pr/Cr System (3) Input 3 Video System (2) Y, Pb/Cb, Pr/Cr System (3) S-Video... - Page 75 Appendix IMAGE Standard (AV) SETTING English Language Cinema German Standard (PC) French Real Italian Image 1 Spanish Image 2 Portuguese Image 3 Dutch Image 4 Swedish Image 5 Russian Image 6 Chinese Image 7 Korean Image 8 Japanese Image 9 Image 10 Position Menu...
- Page 76 Appendix INFORMATION Input System Signal Screen Language Lamp mode Lamp status Power management Shutter management Smoke resist Option filter time Security Remote control Quit SPECIAL Lamp Lamp 1 Hour(s) Reset Yes/No Lamp 2 Hour(s) Yes/No Reset Normal Fan control Hour(s) Projector Filter Reset...
-
Page 77: Dimensions
Appendix Dimensions Unit : inch (mm) 7.24 (184) 20.39 (518) 9.92 (252) 5.31 (135) 3.65˚ (Max.) 23.86 (606) 18.11 (460) 1.08 (27.5) 13.58 (345) Screw Holes for Ceiling Mount 18.27 (464) 14.52 (369) Screws: M8 Depth: 0.31(8.0) 2.36 (60) 9.15 (232.5) 9.15 (232.5) -
Page 78: Terminal Configurations
Appendix Terminal Configurations ANALOG INPUT / OUTPUT TERMINAL (ANALOG) Terminal: HDB15-PIN Red (R/Cr) Input / Output ----- Green (G/Y) Input / Output Ground (Vert.sync.) Blue (B/Cb) Input / Output Ground / ----- ----- ----- Ground (Horiz.sync.) Horiz. sync. Input/Output (Composite H/V sync.) Ground (Red) Vert. -
Page 79: Pin Code Number Memo
Appendix PIN Code Number Memo Write down the PIN code number in the column below and keep it with this manual securely. If you forgot or lost the number and unable to operate the projector, contact the service station. PIN Code Lock No. Factory default set No: 1 2 3 4* Logo PIN Code Lock No. -
Page 80: Index
Appendix Index Numerics Federal Communication Commission Notice ..8 Film ........2, 46 2:2 Pulldown . - Page 81 Appendix Moving the Projector ......7 Shutter Indicator ......66 My Menu .
- Page 82 Printed in Japan Part No. 610 327 9398 (1AA6P1P5077-- KH6A) SANYO Electric Co., Ltd.