Table of Contents
Advertisement
Advertisement
Table of Contents

Related Manuals for Miele KWT 1602 Vi


Summary of Contents for Miele KWT 1602 Vi
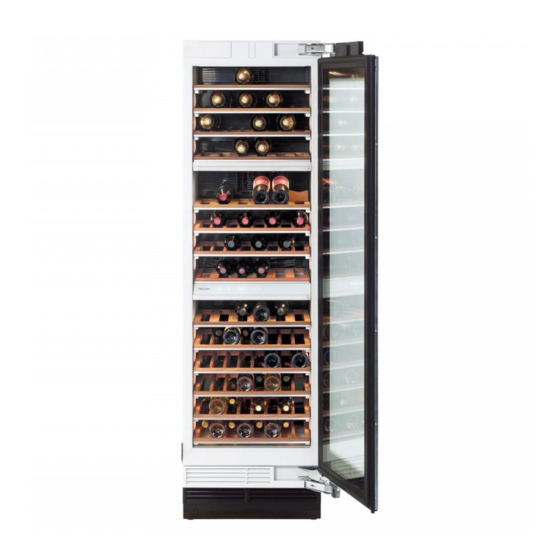
- Page 1 Operating and installation instructions Wine conditioning unit KWT 1602 Vi KWT 1612 Vi en - GB, HK To avoid the risk of accidents or damage to the appliance, it is essential to read these instructions before it is installed and used for the first time.
-
Page 2: Table Of Contents
Contents Description of the appliance ......... 4 Caring for the environment . - Page 3 Contents Door hinging ........... . . 41 Adjoining furniture/units .
-
Page 4: Description Of The Appliance
Description of the appliance Sensor to select the temperature for Access sensor storing wine for a longer period Sensor to select the upper Sensor to select the optimum storage temperature zone temperature for white wine Sensor to select the middle Sensor to select the optimum storage temperature zone temperature for red wine... - Page 5 Description of the appliance Vents/Active charcoal filters Wooden shelves Isolator plate for thermal separation of the upper and middle temperature zones Bottle presenter Control panel/Isolator plate for thermal separation of the middle and lower temperature zones Rocker switch for switching the whole appliance on and off Glass door with UV filter...
-
Page 6: Caring For The Environment
Caring for the environment Disposal of the packing Disposal of your old appliance material Electrical and electronic appliances often contain materials which, if The transport and protective packing handled or disposed of incorrectly, has been selected from materials which could be potentially hazardous to are environmentally friendly for human health and to the environment. -
Page 7: Warning And Safety Instructions
They contain important information on installation, safety, use and maintenance. Miele cannot be held liable for damage caused by non-compliance with these Warning and Safety instructions. - Page 8 The appliance is also not suitable for use in areas susceptible to explosion. Miele cannot accept responsibility for any damage resulting from such misuse or operation. The appliance can only be used by people with reduced...
- Page 9 Warning and Safety instructions This appliance is not a toy! To prevent the risk of injury, do not allow children to play with it or use the controls. Please supervise children whilst you are using the appliance. The door hinges can cause injury. Keep children well away at all times.
- Page 10 Warning and Safety instructions This appliance contains the coolant Isobutane (R600a), a natural gas which is environmentally friendly. Although it is flammable, it does not damage the ozone layer and does not increase the greenhouse effect. The use of this coolant has, however, led to a slight increase in the noise level of the appliance.
- Page 11 Warning and Safety instructions Safe operation of the appliance is only assured if it has been installed and connected in accordance with these operating and installation instructions. Before connecting the appliance, make sure that the connection data on the data plate (voltage and frequency) matches the mains electricity supply.
- Page 12 Warning and Safety instructions Faulty components must only be replaced by genuine Miele original spare parts. The manufacturer can only guarantee the safety of the appliance when Miele replacement parts are used. This appliance must not be used in a non-stationary location (e.g.
- Page 13 Warning and Safety instructions Never use a steam-cleaning appliance to defrost or clean this appliance. Steam could reach the electrical components and cause a short circuit. Disposal of your old appliance Before disposing of an old appliance, first make the door latch or lock unusable.
-
Page 14: How To Save Energy
How to save energy Normal energy Increased energy consumption consumption Installation site In a ventilated room. In an enclosed, unventilated room. Protected from direct In direct sunlight. sunlight. Not near to a heat source Near to a heat source (radiator, oven). (radiator, oven). -
Page 15: Switching On And Off
Switching on and off Before using for the first time Please note: switching the appliance ^ Clean the inside of the appliance and off with the rocker switch does not the accessories with lukewarm water disconnect the appliance from the and a little washing-up liquid, and mains. - Page 16 Switching on and off The zones are set ex-works for the A sensor that has been selected is following types of storage: highlighted in yellow. You can now – set the temperature, or – set the humidity level for the zone you have selected.
-
Page 17: Switching Off
Switching on and off Switching off Switching the sensor tone on/off The tone which sounds each time a sensor is touched can be deactivated. ^ Press the rocker switch. ^ Touch the access sensor so that it is The cooling system and the interior highlighted in yellow. -
Page 18: Switching Off For Longer Periods Of Time
Switching on and off ^ Leave your finger on the X sensor for Switching off for longer another 4 seconds until c and the Y periods of time sensor also appear in the display. If the appliance is not going to be used for a longer period of time, e.g. -
Page 19: The Ideal Temperature And Humidity Level
The ideal temperature and humidity level Setting the temperature Wine keeps on maturing depending on the surrounding conditions. The length The zones are set ex-works for the of time for which wine can be kept in following types of storage: good condition will therefore depend not only on the temperature but also on –... - Page 20 The ideal temperature and humidity level It is possible to set the exact If the highest or lowest temperature that it is possible to set is reached, the X or temperature individually in each zone. Y sensor will disappear from the The zones are set up ex works to store display.
-
Page 21: Isolator Plates For Thermal Separation
The ideal temperature and humidity level Isolator plates for thermal Selecting Fahrenheit or separation Celsius for the temperature The appliance has two fixed isolator The temperature can be displayed in plates which divide the cabinet into degrees Celsius or degrees Fahrenheit. three different temperature zones. -
Page 22: Temperature Display
The ideal temperature and humidity level ^ By touching the X sensor, you can Temperature display now set the temperature to be The temperature display in the displayed in Fahrenheit or Celsius. † 0: Temperature in Fahrenheit control panel always shows the †... -
Page 23: Humidity Level
The ideal temperature and humidity level Humidity level To set the humidity level A conventional refrigerator with its low The appliance is set ex works with a humidity level is not the best place to high humidity level. store wine. It is very important to store If you are going to use the appliance for wine in an atmosphere with a high long-term wine storage, you should... -
Page 24: Air Filtering With Active Charcoal Filters
The ideal temperature and humidity level ^ Leave your finger on the X sensor for another 4 seconds until c and the Y If you have selected a high humidity level, the fan will switch on sensor also appear in the display. automatically. -
Page 25: Temperature And Door Alarm
Temperature and door alarm Switching the temperature Your appliance is fitted with a warning system which ensures that the alarm off early temperature in the three zones cannot If the noise disturbs you, you can rise or fall unnoticed and impair the switch the alarm off early if you wish. - Page 26 Temperature and door alarm Switching the door alarm off early If the noise disturbs you, you can switch the alarm off early if you wish. ^ Touch the sensor for switching the temperature or door alarm off. The alarm will stop and the sensor for switching the temperature or door alarm off will go out.
-
Page 27: Storing Wine Bottles
Storing wine bottles Storage tips Wooden shelves – Always remove wine bottles from their box or packaging before you lay them down. – Always place the bottles in a horizontal position so that the corks can be kept moist on the inside and air is prevented from getting into the bottles. -
Page 28: Bottle Presenter
The wine bottles can now be stored horizontally on the shelf again. Additional bottle presenters can be purchased from your Miele Dealer or the Miele Spare Parts Department. -
Page 29: Display Lighting
Storing wine bottles Display lighting Lighting duration of the display lighting You can set the display lighting in the middle wine zone so that the bottles are The lighting duration for the display illuminated even when the door is lighting is set at 30 minutes at the closed. -
Page 30: Defrosting
Defrosting Condensate and frost can build up on the back wall of the appliance whilst it is in use. These are automatically defrosted and removed by the appliance. -
Page 31: Cleaning And Care
Cleaning and care Before cleaning Make sure that water cannot get into the electronic unit or into the lighting. Do not use steam cleaning apparatus to clean the appliance. ^ Switch the appliance off completely Steam could reach electrical components and cause a short by pressing the On/Off rocker switch on the right side underneath the circuit. -
Page 32: Ventilation Gaps
^ The ventilation gaps should be Replacement filters are available cleaned on a regular basis with a from Miele. brush or vacuum cleaner. A build-up of dust will increase the energy consumption of the appliance. -
Page 33: Problem Solving Guide
^ The temperature in one of the zones and that the mains fuse has not has risen significantly because tripped. If it has, contact the Miele – too much warm air from the room has Service Department. entered the appliance, ^ Check the temperature settings. - Page 34 Problem solving guide . . . A fault message with "_F" Do not touch halogen lamps with appears in the temperature display. your bare fingers. There is a fault. Call the Service Use a soft cloth when changing a Department. halogen lamp.
- Page 35 ^ Wash the wine bottles and remove any adhesive residue. If you still cannot remedy the fault having followed these suggestions, please contact the Miele Service Department. To prevent unnecessary loss of temperature it is advisable not to open the door while waiting for the...
-
Page 36: Noises
Noises Normal noises What causes them Humming noise made by the motor (compressor). This noise can Brrrrr... get louder for brief periods when the motor is switching on. Blubb, blubb..A gurgling noise can be heard when coolant is circulating through the pipes. -
Page 37: After Sales / Guarantee
– your Miele Dealer – Miele (see back cover for contact details). When contacting your Dealer or Miele, please quote the model and serial number of your appliance. This information is given on the data plate inside your appliance. -
Page 38: Electrical Connection
Electrical connection Electrical connection U.K. If the connection cable has to be replaced, this must be done by a All electrical work should be carried out suitably qualified and competent by a suitably qualified and competent person. person in strict accordance with current local and national safety regulations Do not plug other appliances in behind (BS 7671 in the UK). -
Page 39: Installation Advice
Should you require further assistance please – 3 cm away from an electric oven or contact your Miele customer service cooker centre. – 30 cm away from an oil- or coal-fired range. - Page 40 Due to the size and weight of the appliance, installation must be carried out by two people. The weight of the appliance when empty is: KWT 1602 Vi, KWT 1612 Vi . . . 153 kg...
-
Page 41: Floor
When fully loaded, the approx. weight of the appliance is: KWT 1602 Vi, KWT 1612 Vi . . . 319 kg Door hinging The appliance is supplied with fixed hinges. If you need to change the... -
Page 42: Side-By-Side Installation
The partition wall must be at least refrigerator or freezer. 16 mm thick. A side-by-side installation kit, available from Miele, is required. Ask your dealer which appliances are suitable for side-by-side installation with this appliance. See the instructions supplied with the side-by-side installation kit for how to fix the appliances together. -
Page 43: To Limit The Opening Angle Of The Door
Installation advice To limit the opening angle of the door The door hinges are set ex-works to enable the door to be opened wide. However, if the appliance door hits an adjacent wall when opened, for example, the opening angle can be limited to 90°. -
Page 44: Appliance Door Dimensions (Opening Angle 90°)
Installation advice Appliance door dimensions (opening angle 90°) *The dimensions for the door fronts and handles will vary according to the individual kitchen. KWT 1602 Vi, 677 mm Door front (max. 38 mm)* Door handle* KWT 1612 Vi Appliance door dimensions (opening angle 115°) -
Page 45: Building-In Dimensions
Building-in dimensions Niche width KWT 1602 Vi, KWT 1612 Vi 610 mm – 613 mm... - Page 46 Building-in dimensions Laying the electrical cabling Door front dimensions...
-
Page 47: Installation
Installation Other Due to the size and weight of the – Step ladder appliance, it is essential that installation is carried out by two – Sack barrow people. – Wooden beams (min. 75 mm x 100 mm) if required, to prevent Tools and accessories tipping;... -
Page 48: Weight Of The Door Front
When built into a peninsular run, the look plinth grilles are available from rear of the building-in niche must be your dealer or the Miele Spare Parts fitted with a kitchen furniture panel. Department. Building-in at the end of a run... -
Page 49: Aligning The Housing Unit
Installation Aligning the housing unit – Check that all surrounding furniture/units are securely fixed to the wall. – Check the surrounding furniture/units for possible clashes when opening doors. Before installation Warning! This appliance is very heavy and can tip forwards when the door is open. -
Page 50: Preparing The Niche
Installation The appliance can be rolled along the floor using the wheels at the back. Preparing the niche Keep the door to the appliance closed until it is fixed inside the building-in niche. ^ Do not remove the installation aids from the appliance door. -
Page 51: Anti-Tipping Mechanism
Installation ^ Mark the drilling position onto the Anti-tipping mechanism niche floor through the holes in The anti-tipping mechanism ensures anti-tipping mechanisms that the appliance is fixed securely into ^ Put the anti-tipping mechanisms in a the building-in niche, preventing the appliance from tipping forwards. - Page 52 Installation If the anti-tipping mechanism For a unit without a back panel supplied cannot be fixed in the niche, the furniture unit must be firmly screwed to the wall behind to prevent the built-in appliance from tipping. For a unit with a back panel ^ screw the unit to the wall behind using a number of suitable angled fixing brackets.
-
Page 53: An Alternative Anti-Tipping Mechanism
Installation ^ Mark the position of the lower edge of An alternative anti-tipping the wooden beam on the rear wall of mechanism the building-in niche. The appliance can alternatively be ^ Select screws of a length depending secured with a wooden beam across the top of the appliance. -
Page 54: Placing The Appliance In The Niche
Installation ^ Plug in the appliance Placing the appliance in the niche Connection should be made via a suitable switched socket. The socket If you are installing two appliances should be close to the appliance side by side, now secure the and easily accessible. -
Page 55: Aligning The Appliance
Installation Aligning the appliance Important: ^ Align the appliance with work methodically when adjusting neighbouring furniture fronts. the feet: always alternately left, right, etc. ^ A mark is located on the appliance base. When adjusting the height, this mark needs to be aligned at 32 mm from the floor. -
Page 56: Securing The Appliance In The Niche
Installation ^ If a wooden beam has been fitted above the appliance to prevent tipping, the appliance height needs to be adjusted to fit snuggly under the wooden beam. Securing the appliance in the niche ^ Pull out the lugs for the side fixing plates ^ Screw on the lugs for the side plates. - Page 57 Installation ^ Open the appliance door. When installing two appliances side by side, the filler strips for the two appliances need to be joined together to form one long strip. ^ Insert the joining peg from the side-by-side kit halfway into the channel in the filler strip for the left-hand appliance.
-
Page 58: Preparing The Furniture Front
Installation Preparing the furniture front ^ Open the appliance door as far as it will go. ^ Measure gap X between the ^ Unscrew the installation aids adjusting bar and the upper edge of angle trim from the door. the adjacent furniture front. ^ Put the angle trim and screws in a ^ Remove the two nuts from the... - Page 59 Installation – The fixing frame has several different types of holes to take account of a variety of furniture fronts. – When securing the frame, always screw into the strongest part of the furniture door. – To do this, select screws which are slightly shorter than the thickness of the furniture door.
-
Page 60: Securing And Aligning The Furniture Door
Installation Securing and aligning the furniture door ^ Press the angle trim on both sides into the white plastic frame, and screw them down securely. ^ Screw the nuts loosely onto the threaded bolts - but do not tighten yet. ^ Close the appliance door and check the distance between the door and neighbouring furniture doors. -
Page 61: Securing The Covers
Installation Securing the covers ^ Now attach the covers onto the ^ Fit the two cover strips to the sides of retaining clips on both sides. the appliance door, clicking them into In the case of side-by-side the space between the appliance installation, the cover strips are only door and the furniture front, starting required on the outer side. -
Page 62: Fitting The Plinth Facing
Installation Fitting the plinth facing Do not cover the vents in the plinth. This could result in damage to the appliance. ^ Trim the plinth facing to the required length and height (cut along the lower edge of the plinth facing where it touches the floor). -
Page 63: Fitting The Door Trim
Installation ^ Fix the door trim into the gap Fitting the door trim between the furniture front and the plate glass. Cut the door trim to the width of the cut-out in the furniture front as required. ^ Cut the short pieces of door trim for the top and bottom of the door to the An extra length of trim is supplied to length required Y. -
Page 64: Fitting The Air Separator
Installation Fitting the air separator The air separator in the bottom of the ventilation grille separates air entering the appliance from that leaving it. It also stops warm air flowing into the appliance, which would cause a short circuit. ^ Screw the air separator to the middle of the appliance door using two screws. - Page 68 Alteration rights reserved / 5112 M.-Nr. 09 545 820 / 00 M.-Nr. 09 545 820 / 00 KWT 1602 Vi, KWT 1612 Vi...