Table of Contents
Advertisement
Available languages
Available languages
Advertisement
Table of Contents

Related Manuals for Kenmore 116.21614


Summary of Contents for Kenmore 116.21614
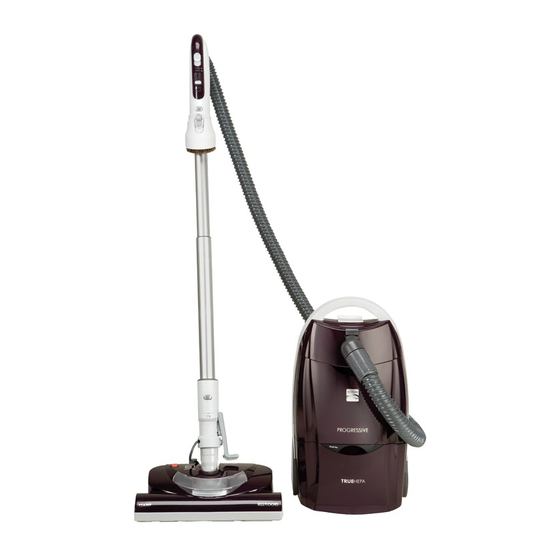
- Page 1 Use & Care Guide Manual de Usay Cuidado EngZish/ Espa_0! ModelsiModelos: 116.21614 Kenmoreo Canister Vacuum CJeaner Aspiradora C01ZDUEOOUO0 - KCOtZDUEZOK0 Sears Brands Management Corporation Hoffman Es_tates, E L 60179 U.S.A www.kenmore0com www.sears,eom...
-
Page 2: Table Of Contents
You will need the complete model and serial numbers when requesting information. Your vacuum cleaner's model and serial numbers are located on the Model and Serial Number Plate. Use the space below to record the model number and serial number of your new Kenmore vacuum cleaner. Model No. - Page 3 Sears store, Sears Parts & Repair Center or other Kenmore outlet for free repair. If this vacuum cleaner is used for other than private family purposes_ this warranty applies for only 90 days from the date of purchase.
- Page 4 Read allinstructions inthis guide b efore assembling using your vacuum cleaner. ,WARNING: Your safety is important to us. To reduce the risk of fire, electrical shock, injury" to persons or damage when using your vacuum cleaner, follow basic safety precautions including the following: Use your vacuum cleaner only as described Use extra care when cleaning on stairs.
- Page 5 It is important to know your vacuum cleaner's parts and features to ensure its proper and safe use. Review these before using your vacuum cleaner, le & Ha=e Assembly Canister...
- Page 6 Replacment Parts Part Part Object Style No. in USA in Canada Belt CB-3 20-5218 20-40118 Headlight BuJb ..20-5248 20-40601 Dust Bag 20-50557 20-50410 Exhaust Filter EF-1 20-86889 20-40324 Motor Safety Filter CF-1 20-86883 20-40321 PowerMate & Telescoping Wand TelescopSng I Wand-_ Wand Length...
- Page 7 HANDLE & HOSE ASSEMBLY 3-W0¥ On/Off Switch Off/Fie0 rev|ce Tool Combination Brush CANISTER PowerMate ® Pet PowerMate Storage Cover (Pet PowerMate Button Tool Fleer Filter Cover Brush (Exhaust Filter inside) (Affachmenf storage inside)-_ Motor Safety Filter Dust Buc Carry Handle...
-
Page 8: Packing List
PACKING LIST (page 2). Use this list to verify that you have received CAUTION identified aft the components of your new Kenmore vacuum cleaner. Never open canister hood with the tool storage cover open. This will help to prevent damage from occurring to the canister hood and/or tool storage cover. - Page 9 HANDLE Insert wand into handle until lock button snaps in place. Be sure hose is not twisted. To remove: Press handle quick release button and pull up on handle. The combination brush can be stared on the hose handle by placing on hose handle before attaching wand.
-
Page 10: Vacuum Cleaner
CAUTION Moving parts! To reduce the risk of personal injury, DO NOT touch the agitator when vacuum cleaner is on. Contacting the agitator while it is rotating can cut, bruise or cause other injuries. Always turn off and unplug from electrical outlet before serviclng. Use caution when operating near children. - Page 11 WAND (TELESCOPING) 5. Select a posltion on the handle three- way On!Off switch. The wand length CARPET - turns on is adjustable and both the canister and requires no OR=_= the PowerMate motors. assembly. To Headlight and agitator ® adjust° simpJy push will come on.
-
Page 12: Vacuuming Tips
VACUUMING TIPS SUGGESTEDSWEEPINGPATTERN STAIRS For best cJeanlng actiont the PowerMate should be pushed straight away f._omyou WARNING and pulled straight back. At the end of each pull stroke, the direction of the Personal injury Hazard PowerMate shouid be changed to point into Use care if canister is placed on stairs. -
Page 13: Suggestedpileheight Settings
EDGECLEANER HOSESWIVEL Active brush edge The 360 ° hose swivel cleaners are on both allows the hoseto turn sides of the without moving the PowerMate. Guide either side of the canister. This is helpful PowerMate along the for cleaning in small wall or next to areas. -
Page 14: Attachments
ATTACHMENTS CAUTION DO NOT attach or remove handle or wands while vacuum cleaner is ON. This could cause sparking and damage the electrical contacts or electronic controls. ATTACHMENTS ON HANDLE F|eor Brush PowerMate is attached, turn vacuum cieaner off before NOTE: if the __//_i_.__wa removing handle... -
Page 15: Attachment Use Table
ATTACHMENTSON WAND 1. To remove wand from PowerMate, io, r lock wand in straight- up position. Pet PawerMate 2. Presswand quick release pedal with foot and pull the wand straight up and out of PowerMate. Wand Qui_k Release NOTE: Pedal To remove combination brush, press the tool release button and slide off. - Page 16 CREVICETOOL COMBINATION BRUSH Attach the crevice tool to the handle The combination brush uses two tools, the dusting brush and the pet tool. Each is for storage locations as shown. use on various surfaces. See ATTACHMENT USE TABLE(page 16). To remove dusting brush or pet tool, release by pressing tab and...
-
Page 17: Attachment Storage
ATTACHMENT STORAGE Floor Brush& Pet Tool Pet PowerMate Thiscanister is equipped with an on-board This canister is equipped with an an-board storage area for a Pet PowerMate storage area for attachments. attachment. To Store: To Store: 1. Open the tool storage cover. 1. -
Page 18: Performancefeatures
PERFORMANCEFEATURES CHECK BAG INDICATOR WARNING When the vacuum cleaner is running with Personal Injury Hazard normal airflow t the CHECK BAG light _s off. The light comes on whenever the bag Always turn off and unplug the vacuum is full, airflow becomes bJocked, or if cleaner before cleaning the agitator area... -
Page 19: Removing Crags
REMOVING CLOGS The vacuum cleaner creates suction that picks up dirL Rapidly moving air carries the dirt to the dust bag through the airflow passages. The dust bag lets the air pass through_while it traps the dirt. For best cleaning results, keep the airflow passage open. -
Page 20: Assembly Instructions
BAG CHANGING For best cleaning results0the dust bag should be changed often. The CHECK BAG indicator will come on when the bag needs to be changed or the airflow is blocked. NOTE: Use replacement dust bag STYLE Q, see part number detail in REPLACEMENT PARTS {page 6}. -
Page 21: Motor Safetyfilterchanging
MOTOR SAFETYFILTERCHANGING The motor safety filter must be replaced when dirty. It should be replaced regularly depending on use conditions. The filter CANNOT be washed as it will lose ils dust trapping ability. NOTE: Use replacement motor safety filter STYLECF-1, see part number detail in REPLACEMENT PARTS (page 6). -
Page 22: Exhaust Filterchanging
EXHAUST FILTERCHANGING The exhaust filter cartridge must be replaced regularly. Replace the filter when the entire surface area is covered evenEy. The filter CANNOT be washed as it will lose its dust trap- ping ability. NOTE: Use replacement exhaust filter STYLEEF-1, see part number detail in REPLACEMENT PARTS(page 6). -
Page 23: Beltchanging And Agitator Cleaning
Always follow all safety precautions when pe_rming maintenance to the PowerMate. WARNING Electrical Shock Or Personal Injury Hazard Always turn off and unplug vacuum cleaner before performing maintenance to the vacuum cleaner. Failure to do so could result in electrical shock or personal injury from vacuum cleaner suddenly starting. - Page 24 TO CLEAN AGITATOR: TO REPLACE BELT NOTE: In order to keep cleaning efficiency NOTE: Use replacement belt STYLECB-3, high and to prevent damage to your vacu- see part number detail in REPLACEMENT um cleaner, the agitator must be cleaned PARTS(page 6). every time the belt is changed.
-
Page 25: Bulb Changing
LIGHT BULBCHANGING ,_WARNING CAUTION Electrical Shock Or Personal injury Do not plug in or turn on until the vacuum Hazard cleaner is completely reassembied. Turn off and unplug vacuum €leaner before performing maintenance to the CAUTION vacuum cleaner. Failure to do so cou]d result in electrical shock or personal Do not use a bulb rated over 9W (13V). - Page 26 J I WARNING Always turn unplug vacuum cleaner before performing maintenance could result in electrical shock vacuum cleaner. Fallure to do or personal injur V. Vacuum c[eaner Won't 1. Unplugged at wall outlet. 1, Plug in firmly, push ON/OFF switch star|.
- Page 27 CHECK BAG indicator I, Change bag. (page 20) I. Full or clogged dust bag. adivalas. 2. Change fillers,(page 21) 2, Di_'ly filters, 3. Blocked airflow passage. 3. Clear blockagefrom oirflaw passczge. (page 19} 4. Certain attachment tools. 4. Thisis normal.Ught shouldgo off when tool is removed.
-
Page 28: Master Protection Agreements
Master Protection Agreements Congratulations on making a smart purchase. Your new Kenmore® product is designed and manufactured for years of dependable operation. But llke all products, it may require preventive maintenance or repair from time to time. That's when having... - Page 29 ... Posterior Cubierta Por favor lea esta guia que le ayudara a ensamblar y operar su aspiradora nueva de Kenmore on una manera rosssecjuray efectiva. Para mas informaci6n acerca del cuidado y operaci6n de esta aspiradora, flame a su tienda Sears mas cercana.
- Page 30 Sears, Sears Parts & Repair Center (Centro de Reparaclones y P_ezas Sears) o a otro distribuiclor Kenmore para que reparen el aparato de forma gratuita. Esta garanfia es vcilida sotamente durante 90 dras desde la fecha de compra, sl Ja aspiradora se utiliza para otros fines que no sean el uso familiar privado.
- Page 31 Lea las instrucciones eneste m anual antes de armar o user su aspiradora, J ADVERTENCIA: Su seguridad es muy importante para nosotros. Pare reduclr el rlesgo de incendia, cheque el6ctrico, tesi6n corporal o dafios al utUizar su aspiradora, actOe de acuerda con precauclones baslcas de segurldad, entre elias:...
- Page 32 Es importante conocer los piezas y caracteristicas de su asplradora pare asegurar su use ade- cuado y seguro. Examine[as antes de user su espiradora. Aspirado_a...
- Page 33 Partes de Reemplazo Pieza N ° Pieza N ° Estilo No. en EUA en Canad6 Objeto cB-3 20-5218 20-40 8 Correa ..20-5248 20-40601 Bombil[a 20-50557 20-50410 Balsa para polvo EF-I 20-86889 20-40324 Filtro de escape CF-! "20-86883 20-40321 Filtro de seguridad motor PowerMate ¥...
- Page 34 MANGUERA & ACCESORIOS Interrupter de encendide/ apclgcldo de tres posit[ones (OFF/FLOOR/CARPET) (Apagado/Piso!Alfombra) .=rram_enta para hencfiduras Cepff|o pore cornbinaci6n giratorio la manguera RECEPT_,CULO PowerMa_ ® Cubier ta de almacenamionto para Pet Power_tale retracci6n (Pet PowerMate adentro Cepillo para del fiJtro polo de de escape (Filtro anlmales Cepillo...
- Page 35 Nunca debe abrir la capucha del contenedor J todos los componentesde su nueva aspirado- estando la tapa ablerta. As[ se evltar& dafios J ra Kenmore. a la capucha de1 contenedory/o a la tapa. MANGUERA introduzca la vara en la...
- Page 36 MANGO Introduzca eJtubo en el mango hasta que el bot6n quede en posici6n. Aseg0rese de que la manguera no est£,torcida. Para retirar: Oprima el bot6n de liberaci6n rc_pida del mango para liberar e! mango y tire del mango hacia arriba. liberaci6n EJ CepTllo de combinacion...
- Page 37 iPartes en rnovimientoE Para reduc|r el riesgo de dories corporales, no toque el agitador cuando la aspiradora est6 encendida. El tocar el agitador mientras que est,_ girando puede cortar, €ontusionar o causar otras CUIDADO ___1_ lesiones. Siempre apague desconecte toma¢orriente antes de dar mantenimiento.
- Page 38 5.Seleccione TUBE TELESCOPICO una posici6n del intetruptor de tres-posJciones en el mongo. Lo extensi6n del tubo es ajustable y CARPET [ALFOMBRA)- O ..no requeire el encTendelos motores del O ..montaje. Para recept6culo y de fa ajustar, empuje el PowerMate.
- Page 39 SUGERENCIAS PARAASPIRAR ESCALERAS Estilode limpleza sugerido. Para obtener la major acci6n de limp[eza se recomTenda empujar la PowerMate en direc- ci6n directamente opuesta austed y jalarla en ffnea recta. AI fina_de coda pasada de Peligro de lesi6n personal regreso, cambie la dlrecc_6nde la PowerMate Tenga culdado si caloca eL receptc_culo sabre| hac[a la s[guientesecci6n a limpiar.
- Page 40 LIMPIADOR DE ORILLAS EI dispositivo giratorio de la manguera 360 ° a ctivos cepitlos permite que _sta gire sin necesidad de mo- estan en coda lado ver eJrecept6culo. limpiadores de orillas j de [a PowerMate. I1//.//_ Esto es muy _til para Pose la PowerMate limpiar en _reas pe- junto a los paredes o...
- Page 41 ACCESORIOS JAcu,o oo JNO instale ni retire el mango ni los tubas Icuanclo la aspiradora est_ encendicla. Esto Jpodria causar ¢hispas y dafiar los contac- Jtos el6ctricos o control electronico. ACCESORIOSDELMANGO NOTA: Si t[ene [nstalada la PowerMate, apague la aspiradoro antes de guitar el mango de los tubas.
- Page 42 ACCESORIOSDELTUBO I. Para retirar los tubos de la PowerMate, col6quelosen la posici6n tel°stop[co vertical de para p_sos bloqueo. Pet PowerMafe ,,odo,,,. _fl 1 1_. e,,oo, llberaci6n _l liberaci6n r6picta o°_°,oo r_,pida dei tubo y tire del L_I _ _,1,<:P" i;,;:oopToo para desprenderlo de la PowerMate.
- Page 43 HERRAMIENTAPARA HENDIDURAS CEPILLO PARA COMBINACION Conecte ia herramienta para hendiduras al El cepilb de combinacibn fiene dos accesorios, eL cepillo para polvo y el cepillo mango coma se muestra. para pelo de animales, estos se utilizan en diferentes superficIes, ver TABLA DE ACCESORIOS (pbg 15}.
- Page 44 ALMACENAJE DEL PET POWERMATE Y ACCESORIOS PET POWERMATE CEPILLOPARA PISOSY CEPILLO PARAANIMALES Estr_aspiradora esta equipada almac6n a bordo para el accesorTo Pet EstOaspiradora esta equipada con PowerMate. almac_n a bordo para accesorios. Para almacenar: Para almacenar: 1. Abra la cubierta de almacena.ie del Pet 1.
- Page 45 CARACTERiSTICAS D E RENDIMIENTO INDICADOR DECHECK BAG _llb ADVERTENCIA Cuando la aspirartora est6 funclonando con el flujo normal de aim, el indicador de CHECK Peligro de lesionespersonales BAG est6 apagado. Se enclende la luz cuando la botsa esta Ilena, e[ ffujo de aim Apagu_ y desconectesiempre la aspiradora est_ obstruido, o si hay una obstrucclon.
- Page 46 QUITAR DE LOSRESIDUOS DEBASURAEN LOSCONDUCTOS Lo aspiradora crea succi6n o aspiraci6n que levanta la tierra. Lo tierra es impu[sada a tray,s de tas v_as /I" _, de flujo aire hasta la balsa par una r6pida !iF"-"_ corriente de aire. La balsa para polvo permite el ,/_,/" flujo de aire, pero atrapa la tierra.
- Page 47 CAMBIO DE LA BOLSA La bolsa debe carnbiarse seguldo pare Iograr los mejoresresu[tadosde Ilmpieza. Elindieador CHECK BAG (indicador e[ectr6nicode la bo[sa) prendera cuando esta necesite set cambiada o cuando el fluido de aire este bloqueado. NOTA: Use el reemplozo de ]a BOLSA DE POLVO Fstilo Q, ver en detalle el nOmerode porte en CAMBIO DE PARTES ( P6g 6).
- Page 48 CAMBIO DELFILTRODESEGURIDADDELMOTOR Este filtro se tiene que cambiar cuando est_ sucio. Debe ¢ambiarse peri6dicamente segOnlas condlclanes de uso. El filtro no se puede lavar pues perderfa su ¢apacidad para atrapar paivo. NOTA: Use el reemplazo del fihro de segur[dad del motor ESTILO CF-1, ver en detalle el nOmero de porte en CAMBIO DE PARTES (P6g 6).
- Page 49 CAMBIO DELFILTRODE ESCAPE Este cartucho del filtro de escape debe ser reemplazado regularmente. Cambie el filtro cuando el _rea superficial est_ cubierta per complete. El fillro no se puede lavar pues perdeHa su capa¢idad para atrapar polvo. NOTA: Use el reemplazo del filtro de escape EST[LO EF-1, ver en detalle el n_mero de parte en CAMBIO DE PARTES(P6g 6).
- Page 50 Siempre deberc_n seguirse todas las precauciones de seguridad antes de efectuar mentenimiento a la PowerMate. AADVERTENCIA Peligro de choque el_ctrico o lesion cor- poral Apagu& y desconect@ la aspiradora antes de efectuar el manlenimiento a su aspiradora. De Io contrario podria pro- ducirse un choque el_ctrlco o causar lesi6n corporal si la aspiradora arranca...
- Page 51 PARARETIRAR LA CORREA LIMPIEZADELAGITADOR NOTA: Para mantener una alta eficiencla NOYA: Use el reemplazo de la correa ESTILO CB-3, ver en detalle el nOmero de de limpieza y evitar dafios a la aspirado- parte en CAMBIO DE PARTES(P6g 6). ra, hay que Iimpiar el agitador cada vez que se cambia la correa.
- Page 52 CAMBIO DE LA BOMBILLA 2. Quite la _--'_--, bombilla vieja de[ ADVERTENCIA portal6mparas Peligro de cheque el_ctrico o lesi6n cor- jaJando derecho poral hacia fuera. Apagu6 y desconecte [a unidad antes de limpiarla o darle servicia. De Io contrario podria producirse un cheque el6ctrico o causar lesi6n corporal sila aspiradora arranca de manera...
- Page 53 Revise este recuadro pare encontrar soJuclones a prob[emas que puede corregir ustecl mlsmo, Cualquier otto servicio debe ser reailzado per SEARS u afro agente de servicio caiificado. J ADVERTENCIA Apagu6 y desconect_ la aspiradora antes efectuar el mantenimiento a su aspirado- podria producirse un cheque e|6ctrico corporal.
- Page 54 :! _ i ! _!!_!_i6_Le _s_ -_;_ El indlcacior de CHECK 1. BoIsa para polvo Ilena o atascada 1. Camb_e la bolsa. (pbg 19} BAG (indicator Fiffros suc[os. Camb[e los filtros. [pbg 20) electr6nico de la bolsa) Vias de flu_o de afre atc_scadas. Desbloquee las vfas de fluja de enciende.
- Page 55 Acuerdos Maestros de Protecci6n Enhorabuena par hacer una compra inteligente. Su nueve, pre,ductn Kenme,re® est6 dTse_,ado y fabricado para e,frecerle arias de funcionamlento confiable. Pete al igual que to,dos los productos pueden precis,_r un mc_ntenimiente, preventive, o alguna reparaci6n de vez en cuanda, Par este motive, toner un Acuerde,...
- Page 56 For repair - in your home - of all major brand appliances, lawn and garden equipment, or heating and cooling systems, no matter who made it, no matter who sold it ! For the replacement parts, accessories owner's manuals that you need to do-it-yourself. For Sears professional installation of home appliances and items like garage door openers and water heaters.