Advertisement
CCD-TR44/TR330/T
SERVICE MANUAL
US Model
CCD- TR44
E Model
CCD- TR330/TR330PK
Hong Kong Model
Tourist Model
CCD- TR330
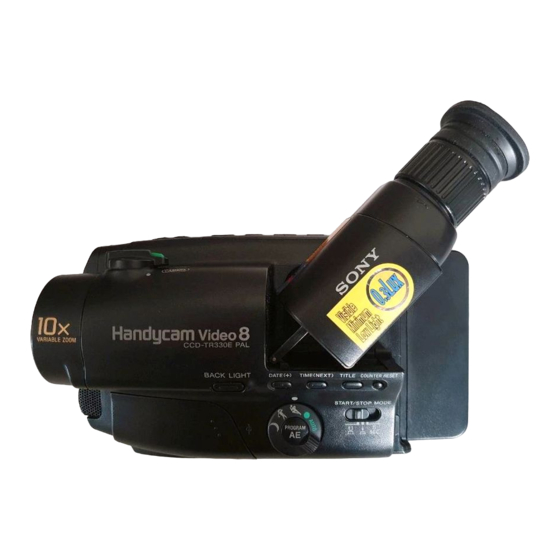
PHOTO : CCD-TR330
Video8
HandgEam
I B MECHANISM
I
SPECIRCATIONS
For MECHANISM ADJUSTMENT, refer to the
"8mm Video MECHANICAL
ADJUSTMENT
MANUAL _"
(9-973-801-11).
Video
Camera
Recorder
System
Video recording system
Two rotary heads, Helical
scanning, FM system
Audio recording system
Rotary heads, FM system
Video signal
color, EIA standards
Usable cassette
8 nun video format cassette
(standard
8 mm)
Tape speed
SP mode: Approx. 1%2inch
(1.43 cm)/second
LP mode: Approx. SA6inch (0.72
cm)/second
Recording/Playback
time
SP mode: 2 hours (P6-120)
LP mode: 4 hours (P6-120)
Fastforward/rewind
time
Approx. 5 min. (P6-120)
Image devide
CCD (Charge
Coupled
Device)
Viewfinder
Electronic viewfinder,
Black and white
EEEEEEEllm
llllEllEll
mElEE
I M CROF LM
Lens
]0 x, Combined power zoom
lens, F1.6 - 2.7, Filter diameter 1
1,_inches (37 ram), TTL
autofocus
system inner focus
wide macro system
Focal distance
f = z/4- 2 lh inches (6.3 - 63 mm)
] 13.46 - 17 3/( inches (45 - 450
mm) when converted
to a 35
mm still camera
Colour temperature
Auto
Minimum illumination
0.6 Ix at F 1.6
Illumination
range
0.6 to 100,000 Ix
Recommended
illumination
More than 100 Ix
Input and Output connectors
Video output
Phono jack, 1 Vpp,
75 _,
unbalanced,
sync negative
Audio output
Monaural, Phono jack, 327 mV,
(at load impedance
47 k.Q),
impedance
less than 2.2 k.Q
RFU DC OUT
specialm_jack, DC5 v
LANC jack
Stereo-mini-mini-jack (e 2.5
ram)
MIC jack
ML_i-jack, 0.388 mV, low
impedance
with 2.5 to 3 V DC,
output impedance
6.8 k.Q (o
3.5 mm)
General
Power requirements
On battery mounting
surface
6.0 V (battery pack), 7.5 V (AC
power adaptor)
Average power consumption
3.6 W
Installation
Vertically, Horizontally
Operating temperature
320}: to 104°F (0°C to 40°C)
Storage
temperature
--4°F to +140°F (-20°C to
+60°C)
Dimensions
Approx. 4 3/8x 4 t/8 x 8 inches
(110 x 103 x 202 ram) (w/h/d)
Mass
Approx.
1 Ib 8 oz (690 g)
Excluding the battery pack,
lithium battery, cassette and
shoulder strap
Approx. 2 lb (910 g)
Including the battery
pack NP-
33, lithium battery CR2025,
cassette P6-120 and shoulder
strap
Microphone
E]ectret condenser
microphone,
monaural
type
Supplied accessories
See page 2.
-- Continuedon next page--
VIDEO
CAMERA
RECORD
Advertisement
Table of Contents

Related Manuals for Sony CCD-TR440PK


Summary of Contents for Sony CCD-TR440PK
- Page 1 CCD-TR44/TR330/T SERVICE MANUAL US Model CCD- TR44 E Model CCD- TR330/TR330PK Hong Kong Model Tourist Model CCD- TR330 Video8 HandgEam I B MECHANISM PHOTO : CCD-TR330 For MECHANISM ADJUSTMENT, refer to the "8mm Video MECHANICAL ADJUSTMENT MANUAL _" (9-973-801-11). SPECIRCATIONS Video Camera Recorder...
- Page 2 Before using your camcorder, you first need to charge and install the battery pack. To charge the battery The instructions in this manual are for CCD-TR44. pack, use the supplied AC-V15 AC power adaptor. As you read through this manual, buttons and settings on the camcorder are shown in capital letter. e.g.
- Page 3 Removing the Battery Pack Slide the battery pack in the direction of the arrow, Installing Battery Pack (1) Insert the top of the battery pack into the top of the battery mounting surface. (2) Push the battery pack so that it attaches firmly. ,b: You can hear the beep sound to confirm your operation.
- Page 4 Make sure that a power source and a cassette is inserted. Make sure that a power source is installed. (1} While pressing the small blue button, slide EJECT in the direction of the arrow. The cassette When you use the camcorder for the first time, power on it and reset the date and time to your time (p.
-
Page 5: Start/Stop Mode
Note on recording Note on Standby mode If you leave the camcorder for 5 minutes or more _ith a cassette inserted in Standby mode, the When you record from the beginning of the tape, run the tape forabout 15 seconds before actual recording.This prevents the camcorder from missing any start-upscenes when you play back the tape. - Page 6 1 / 2 inch (about I cm) in the wide-angle position. When attaching a non-Sony tripod, make sure the tripod screw is shorter than 9/32 inch (6.5 ram). Other-wise, the screw may damage the inner parts of the camcorder. Cautions on the viewflnder •...
-
Page 7: Audio Out
You can use this camcorder as a VCR by connecting it to your TV for playback. It is recommended to use Using ED1TSEARCH, you can reviewthe last recorded scene orcheck the recorded picture in the the house current as the power source (p. 20). viewfindec. - Page 8 You can monitor the playback picture in the viewfinder. You can also monitor on the TV screen, after Various Playback Modes connecting the camcorder to the TV/VCR (p. 17). To view a still picture (playback pause) Press II during playback. To resume playback, press II or D,,-. {1) While pressing the small green button on the POWER s_sitch, turn it to PLAYER.
-
Page 9: Using The House Current
The adaptor isremoved in the same way as the batterypack (p.10). This mark indicates that this product is a genuine accessory for Sony video products. When purchasing Sony video products, Sony recommends that you purchase accessories with this "GENULNE VIDEO ACCESSORIES" mark. -
Page 10: Using The Program
You can select from three PROGRAM AE (Auto Exposure) modes to suit your shooting situation. When Before you start recording,press DATE or TIME. You can record the date or time displayed in the you use PROGRAM AE, you can capture high-speed action or night views. viewfinder with the picture. - Page 11 Long, continuous shots of scenery tend to be dull, and have to be edited to make an interesting video. When you shoot a subject with the light source behind the .¢ubject or a subject with a light background, With the 5 SEC (5-second recording) mode, the camcorder records for about 5 seconds and then switches use the BACK LIGHT.
- Page 12 You can select from nine preset titles to superimpose it on the picture during recording. Each time you You can change the mode settings to further enjoy the features and functions. (1) Slide the cover to the left. You will find the mode switches. press TITLE,the preset titles appear one by one.
- Page 13 5 seconds when you set the POWER switch to CAMERA. In thiscase,replace the battery with the Sony CR2025 or Ouracell O1.-2025 lithium battery. Use of another battery may present After connecting the camcorder to the VCR, (1) Turn the POWER switch to PLAYER.
-
Page 15: When To Replace The Battery
The playback mode is selected automatically according to ti_ recording system (SPILl) mode) in which When the remaining battery indicator reaches the lowest point, the e¢3indicator appears and starts the tape was recorded. flashing in the viewfinder. [b] When the c_O indicator in the viewfinder changes from slow flashing to rapid flashing while you are Foreign 8 mm video recording, turn the POWER switch to OFF on the camcorder and replace the battery pack. -
Page 16: Notes On Charging
If this happens, the tape may stick to the head drum and be damaged or the camcorder may not operate correctly. To prevent possible damage under these Sony Batteries are Recommended circumstances, the camcorder is furnished with moisture sensors. - Page 17 (2) Clean the surface with a commercially available blower. Slight contamination Critical contamination If this happens, clean the video heads with the Sony VS-2._LH cleaning cassette (not supplied). After checking the piCtUre, if it is still "noisy", repeat the cleaning.
-
Page 18: Power Sources
This is normal. • Do not place the unit in locations that are: - Extremely hot or cold - Dusty or dirty - Very humid - Vibrating If any difficulty should arise, unplug the unit and contact your nearest Sony dealer. - Page 19 ® Power zoom lever (p. 14) POWER switch (p. 11, 18) EJECT knob (p. 10) DATE(+) button (p. 22, 31) Hooks for shoulder strap (p. 47) TIME(NEXT) button (p. 22, 31) Eyecup release knob (p. 37) TITLE button (p. 26) START/STOP button (p.
- Page 20 Attaching the shoulder strap Attach the supplied shoulder strap to the hooks for the shoulder strap ([1"_ on page 45). To Watch the Demonstration You can watch a brief demonstration of pictures with titles. If the demonstration appears when you turn on the camcorder for the first time, exit the Demo mode to use your camcorder.
- Page 21 Date, Time or Title (p. 22, 26) Disconnect the power source and contact your Sony dealer or local authorized facility. [] The lithium battery is weak or the lithium battery is not installed (p. 29). This indicator flashes just only after powering...