Table of Contents
Advertisement
Quick Links
Advertisement
Table of Contents

Related Manuals for Asus Eee PC 1000HG


Summary of Contents for Asus Eee PC 1000HG
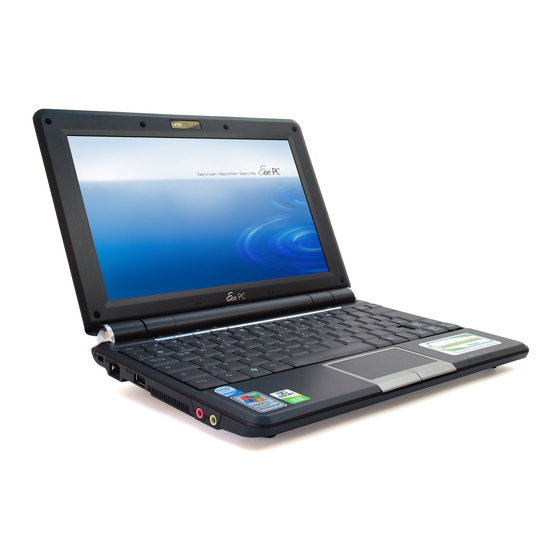
- Page 1 E4300 Eee PC User’s Manual Windows® XP Edition Eee PC 1000HG 15G06Q102100...
-
Page 2: Table Of Contents
Touchpad Usage ..................... 3-8 Single-finger gesture input ............... 3-8 Multi-finger gesture input ...............3-10 Keyboard Usage ....................3-11 Special Function Keys ................3-11 First-time Startup ..................3-14 Desktop ......................3-17 ASUS EeePC Tray Utility ................3-18 Enabling and Disabling Devices ............3-18 Adjusting the display resolution ............3-19 Table of Contents... -
Page 3: Table Of Contents
Browsing web pages .................4-10 ASUS Update ....................4-11 Updating the BIOS through the Internet ...........4-11 Updating the BIOS through a BIOS file ..........4-13 Bluetooth Connection ................4-14 ASUS Instant Key ..................4-16 Super Hybrid Engine ...................4-17 Super Hybrid Engine Modes ..............4-17 Eee Storage .....................4-18 Video Conferencing..................4-20 3.5G Data Connection ................4-21... - Page 4 Table of Contents...
-
Page 5: Chapter 1: Introducing The Eee Pc
About This User’s Manual Notes for This Manual Safety Precautions Preparing Your Eee PC Introducing the Eee PC... -
Page 6: About This User's Manual
About This User’s Manual You are reading the Eee PC User’s Manual. This User’s Manual provides information regarding the various components in the Eee PC and how to use them. The following are major sections of this User’s Manual: 1. Introducing the Eee PC Introduces the Eee PC and this User’s Manual. -
Page 7: Notes For This Manual
WARNING! Important information that must be followed for safe operation. IMPORTANT! Vital information that must be followed to prevent damage to data, components, or persons. TIP: Tips for completing tasks. NOTE: Information for special situations. ASUS Eee PC... -
Page 8: Safety Precautions
Safety Precautions The following safety precautions will increase the life of the Eee PC. Follow all precautions and instructions. Except as described in this manual, refer all servicing to qualified personnel. Do not use damaged power cords, accessories, or other peripherals. Do not use strong solvents such as thinners, benzene, or other chemicals on or near the surface. - Page 9 Check local regulations for disposal of electronic products. DO NOT throw the battery in municipal waste. The symbol of the crossed out wheeled bin indicates that the battery should not be placed in municipal waste. ASUS Eee PC...
-
Page 10: Transportation Precautions
Transportation Precautions To prepare the Eee PC for transport, you should close the display panel to protect the keyboard and display panel. The Eee PC’s surface is easily dulled if not properly cared for. Be careful not to rub or scrape surfaces when transporting your Eee PC. You can put your Eee PC in a carrying case for protection from dirt, water, shock, and scratches. -
Page 11: Preparing Your Eee Pc
Eee PC. Remember to fully charge the battery (8 hours or more) before first use and whenever it is depleted to prolong battery life. The battery reaches its maximum capacity after a few full charging and discharging cycles. ASUS Eee PC... - Page 12 3. Open the display panel 4. Turn ON the Eee PC MEGA PIXELS When you open the display panel, do not force it down to the table or else the hinges may break! Never lift the Eee PC by the display panel! Chapter 1: Introducing the Eee PC...
-
Page 13: Chapter 2: Knowing The Parts
Top Side Bottom Side Right Side Left Side Rear Side Knowing the Parts... -
Page 14: Top Side
Top Side Refer to the illustration below to identify the components on this side of the Eee PC. The top side may vary in appearance depending on model. The keyboard differs for each territory. Chapter 2: Knowing the Parts... - Page 15 Resolution Key The Resolution key allows you to adjust display resolution. Press this key repeatedly to switch resolution. User-defined Key This key is reserved for customized definition. The default definition is for Super Hybrid Engine function. ASUS Eee PC...
- Page 16 User-defined Key This key is reserved for customized definition. The default definition is for launching Skype. Only models with built-in wireless LAN and Bluetooth supoort the user-defined key for Skype. Power Switch The power switch allows powering ON and OFF the Eee PC and recovering from STR.
-
Page 17: Battery Charge Indicator
The solid-state disk drive indicator blinks when data is written to or read from the disk drive. Wireless/Bluetooth Indicator This is only applicable on models with built-in wireless LAN/Bluetooth. When the built-in wireless LAN/Bluetooth is enabled, this indicator lights. ASUS Eee PC... -
Page 18: Bottom Side
Bottom Side Refer to the illustration below to identify the components on this side of the Eee PC. The bottom side may vary in appearance depending on model. The bottom of the Eee PC can get very hot. Be careful when handling the Eee PC while it is in operation or recently been in operation. - Page 19 The built-in stereo speaker system allows you to hear audio without additional attachments. The multimedia sound system features an integrated digital audio controller that produces rich, vibrant sound (results improved with external stereo headphones or speakers). Audio features are software controlled. ASUS Eee PC...
-
Page 20: Right Side
Right Side Refer to the illustration below to identify the components on this side of the Eee PC. Memory Card Slot The built-in memory card reader can read MMC/SD cards from devices such as digital cameras, MP3 players, mobile phones, and PDAs. USB Port (2.0/1.1) The USB (Universal Serial Bus) port is compatible with USB 2.0 or USB 1.1 devices such as keyboards, pointing devices,... - Page 21 To prevent damage to the Eee PC and battery pack, always use the supplied power adapter. CAUTION: MAY BECOME WARM TO HOT WHEN IN USE. BE SURE NOT TO COVER THE ADAPTER AND KEEP IT AWAY FROM YOUR BODY. ASUS Eee PC...
-
Page 22: Left Side
Left Side Refer to the illustration below to identify the components on this side of the Eee PC. Kensington® Lock Port The Kensington® lock port allows the Eee PC to be secured using Kensington® compatible security products. These security products usually include a metal cable and lock that prevent the Eee PC to be removed from a fixed object. -
Page 23: Rear Side
AC power is not connected. This allows use when moving temporarily between locations. Battery time varies by usage and by the specifications for this Eee PC. The battery pack cannot be disassembled and must be purchased as a single unit. ASUS Eee PC 2-11... - Page 24 2-12 Chapter 2: Knowing the Parts...
-
Page 25: Chapter 3: Getting Started
Power System Touchpad Usage Keyboard Usage First-time Startup Desktop ASUS EeePC Tray Utility Shutdown Getting Started... -
Page 26: Power System
Power System Using AC Power The Eee PC power comprises two parts, the power adapter and the battery power system. The power adapter converts AC power from a wall outlet to the DC power required by the Eee PC. Your Eee PC comes with a universal AC-DC adapter for connection to any 100V-120V as well as 220V-240V outlets without setting switches or using power converters. - Page 27 If there is smoke, burning scent, or extreme heat coming from the AC-DC adapter, seek servicing. Seek servicing if you suspect a faulty AC-DC adapter. You may damage both your battery pack(s) and the Eee PC with a faulty AC-DC adapter. ASUS Eee PC...
-
Page 28: Using Battery Power
Using Battery Power The Eee PC is designed to work with a removable battery pack. The battery pack consists of a set of battery cells housed together. A fully charged pack will provide several hours of battery life. Additional battery packs are optional and can be purchased separately through an Eee PC retailer. -
Page 29: Battery Care
DO NOT short circuit the contacts, and DO NOT disassemble the battery. If there is any abnormal operation or damage to the battery pack caused by impact, turn OFF the Eee PC and contact an authorized service center. ASUS Eee PC... -
Page 30: Power Mode
Power Mode Your Eee PC is equipped with a smart power system. The power- saving Battery mode lowers down the CPU frequency and decreases the power consumption to maximize the battery life. The AC mode enables the CPU to run at the full speed and to obtain the best performance. -
Page 31: Emergency Shutdown & Reset
Use a pin or a straightened paper clip to press the reset button. DO NOT use emergency shutdown/reset while data is being written or read; doing so can result in loss or destruction of your data. The reset button is available on selected models. ASUS Eee PC... -
Page 32: Touchpad Usage
Touchpad Usage Single-finger gesture input Clicking/Tapping - With the pointer over an item, press the left button or use your fingertip to touch the touchpad lightly, keeping your finger on the touchpad until the item is selected. The selected item will change color. The following 2 illustrations produce the same results. - Page 33 Or, you can simply double-tap on the item and hold while dragging the item with your fingertip. The following illustrations produce the same results. ASUS Eee PC...
-
Page 34: Multi-Finger Gesture Input
Multi-finger gesture input Finger gesture Applications StarOffice Writer/Impress, Two-finger zooming in/out Adobe reader, Photomanager Two-finger scrolling Two-finger zooming in/out - Moving two fingertips apart or together on the touchpad to zoom in or zoom out. This is convenient when viewing photos or reading documents. Zoom in Zoom out Two-finger scrolling - Use two... -
Page 35: Keyboard Usage
Sun Up Icon (F4): Increases the display brightness. LCD/Monitor Icons (F5): Toggles between the Eee PC’s LCD display and an external monitor in this series: LCD Only -> CRT Only (External Monitor) -> LCD + CRT Clone ASUS Eee PC 3-11... - Page 36 LCD + CRT Clone mode only supports a maximum resolution of 1024 x 600 pixels. Set your Eee PC to High Performance or Super Performance mode if you want to use a higher resolution with a connected external monitor. Connect an external monitor before booting up the Eee PC. Task Manager Icon (F6): Initiates the Task Manager to view the application process or terminates applications.
- Page 37 ): Press to move the pointer to the end of → the line. Windows icon: Displays the start menu. Menu with pointer icon : Activates the properties menu and is equivalent to right-clicking the touchpad/mouse on an object. ASUS Eee PC 3-13...
-
Page 38: First-Time Startup
First-time Startup For the first time you start your Eee PC, the Windows wizard will launch automatically and lead you through setting up your preferences and some basic information. Follow the wizard instructions to finish the initialization: The Welcome message appears. Click Next to continue. Select you system settings by specifying the region you are in, the language you use and the keyboard type you use. - Page 39 Select the time zone you are in and click Next to continue. Read the end user license agreement and click Yes, I accept. Click Next to continue. ASUS Eee PC 3-15...
- Page 40 Click Help protect my PC by turning on Automatic Updates now to get the latest important updates and click Next to continue. Type your computer’s name in the Computer name box and click Next to continue. Follow the on-screen instructions to register with Microsoft and finish the initialization.
-
Page 41: Desktop
Desktop The are several shortcuts on the desktop. Double-click them to launch the corresponding applications and enter the specified folders. Some applications would form minimized icons in the Notification area. ASUS Eee PC 3-17... -
Page 42: Asus Eeepc Tray Utility
ASUS EeePC Tray Utility The preloaded ASUS EeePC Tray utility allows you to turn off some devices to minimize the power consumption and helps you adjust the display resolution easily. Enabling and Disabling Devices To disable or enable devices Right-click the ASUS EeePC Tray Utility icon in the Notification area and the utility shows the available options: Disable WLAN: Turns on and off the wireless LAN connection. -
Page 43: Adjusting The Display Resolution
Adjusting the display resolution Click the ASUS EeePC Tray Utility icon in the Notification area to adjust the display resolution. Select the resolution based on your needs. The CRT-related options are unavailable when there is no connected external monitors. When you select LCD 1024 x 768, move the pointer to scroll up and down the screen. -
Page 44: Shutdown
Shutdown Do the following instructions to turn down your Eee PC. Click the start button to display the start menu. Click Turn Off Computer. Select Turn Off to power off your Eee PC. 3-20 Chapter 3: Getting Started... -
Page 45: Chapter 4: Using The Eee Pc
Network Connection ASUS Update Bluetooth Connection ASUS Instant Key Super Hybrid Engine Eee Storage Video Conferencing 3.5G Data Connection Using the Eee PC... -
Page 46: Network Connection
Network Connection Configuring a wireless network connection Double-click the crossed wireless network icon in the Notification area. If the wireless connection icon does not show in the Notification area. Activate the wireless LAN function by pressing (<Fn> + <F2>) before configuring a wireless network connection. Select the wireless access point you want to connect to from the list and click... - Page 47 After a connection has been established, the connection is shown on the list. You can see the wireless network icon in the Notification area. The wireless connection icon disappears when you Press (<Fn> + <F2>) to disable the WLAN function. ASUS Eee PC...
-
Page 48: Configuring A Network Connection
Configuring a network connection If you want to obtain network access, connect the network cable, with RJ-45 connectors on each end, to the network port on the Eee PC and the other end to a hub or switch. The illustration below is the example of your Eee PC connected to a network hub or switch for use with the built-in Ethernet controller. - Page 49 2. Right-click Local Area Connection and select Properties. 3. Highlight Internet Protocol(TCP/IP) and click Properties. 4. Click Obtain an IP address automatically and click OK. ASUS Eee PC...
- Page 50 5. Click Create a new connection to start the New Connection Wizard. 6. Click Next. 7. Click Connect to the Internet and click Next. 8. Click Set up my connection manually. Chapter 4: Using the Eee PC...
- Page 51 9. Select your connection type and click Next. 10. Enter your ISP Name and click Next. 11. Enter your User name and Password. Click Next. 12. Click Finish to finish the configuration. ASUS Eee PC...
- Page 52 13. Enter your user name and password. Click Connect to connect to the Internet. Contact your Internet Service Provider (ISP) if you have problems connecting to the network. Chapter 4: Using the Eee PC...
- Page 53 4. If needed, enter the preferred DNS Server address and alternative address. 5. After entering all the related values, click OK to build the network connection. Contact your Internet Service Provider (ISP) if you have problems connecting to the network. ASUS Eee PC...
-
Page 54: Browsing Web Pages
Browsing web pages After you finish the network setup, click Internet Explorer on the desktop and start enjoying net surfing. Visit our Eee PC homepage (http://eeepc.asus.com) to obtain the latest information and register at http://vip.asus.com for full service of your Eee PC. -
Page 55: Asus Update
ASUS Update The ASUS Update is a utility that allows you to manage, save, and update the Eee PC BIOS in Windows® environment. The ASUS Update utility allows you to: • Save the current BIOS file • Download the latest BIOS file from the Internet •... - Page 56 Select Update BIOS from Internet from the drop-down menu, then click Next. Select the ASUS FTP site nearest you to avoid network traffic, or click Auto Select. Click Next. 4-12 Chapter 4: Using the Eee PC...
-
Page 57: Updating The Bios Through A Bios File
From the FTP site, select the desired BIOS version and click Next. Follow the screen instructions to complete the update process. The ASUS Update utility is capable of updating itself through the Internet. Always update the utility to avail all its features. -
Page 58: Bluetooth Connection
Bluetooth Connection Bluetooth technology eliminates the need for cables for connecting Bluetooth-enabled devices. Examples of Bluetooth-enabled devices may be Notebook PCs, Desktop PCs, mobile phones, and PDAs. To connect to a Bluetooth-enabled device Press <Fn> + <F2> repeatedly until Bluetooth ON or WLAN & Bluetooth ON is shown. - Page 59 Next. Enter the Bluetooth security code and start pairing. After the paired relationship is built, select the service you are interested in from the list and click Finish to use the selected service. ASUS Eee PC 4-15...
-
Page 60: Asus Instant Key
ASUS Instant Key ASUS Instant Key allows you customized definititons to launch frequently used applications with one touch of a button. Click start > All Programs > ASUS > EeePC > EeeInstantKey. Click the Change button to configure. Locate and select a preferred application for the instant key and click OK. -
Page 61: Super Hybrid Engine
PC to maximize performance versus battery time. The selected mode is shown on the display. To change the power mode • Click start > All Programs > ASUS > EeePC > SuperHybridEngine > SuperHybridEngine. • Press Instant Key 3 repeatedly to switch power modes. -
Page 62: Eee Storage
Eee Storage Eee PC users can enjoy free online space. With Internet connection, you can access and share any files whenever you want and wherever you are. The content of the free service provided to you is subject to Eee Storage Web Hard Drive Service Agreement on Eee Storage official website. - Page 63 Double-cllick Setup Your Eee Storage Account to apply an account and setup a password if you need to use more advanced functions such as Group Share. This set of account and password is also indispensable when you use Eee Storage service with other computer. ASUS Eee PC 4-19...
-
Page 64: Video Conferencing
Video Conferencing Skype enables users to make free calls to other Skype users or cheaper calls to landlines or mobile phones with Internet access. It also offers instant messaging and video conferencing function, which users can use to chat online. To start using Skype application Double-click the Skype icon on the desktop. -
Page 65: 3.5G Data Connection
While inserting the SIM card, ensure to keep the SIM card at a horizontal angle to the Eee PC to prevent it from malfunction. • Ensure to insert the SIM card until it fits completely. Reinstall the battery pack. ASUS Eee PC 4-21... -
Page 66: Using Data Connection
Using data connection Before using 3.5G data connection, ensure you have applied 3G data connection service from your Internet Service Provider (ISP). To use data connection Double-click Mobile Partner on the desktop. Enter the PIN code of your SIM card if prompted. 4-22 Chapter 4: Using the Eee PC... - Page 67 Mobile Partner window, the application will hide and run in the background. To open the Mobile Partner window again, click on the Windows notification area. To end the 3.5G data connection, click Disconnect in the Mobile Partner window. ASUS Eee PC 4-23...
-
Page 68: Flight Mode
Flight mode Before taking transportations with electronic device restrictions, such as international flights, please enable the Flight mode to disable the data connection feature. To use Flight mode, click Tools > Radio > Disable Radio in the Mobile Partner window. You can still use all other Eee PC applications without influence. -
Page 69: Chapter 5: Support Dvd & System Recovery
Support DVD Information System Recovery Support DVD & System Recovery... -
Page 70: Support Dvd Information
Support DVD Information The support DVD that comes with the Eee PC package contains the drivers, software applications, and utilities that you can install to avail all the features. Running the support DVD Insert the support DVD in the external optical drive. The DVD automatically displays the Drivers menu if Autorun is enabled in your computer. -
Page 71: Utilities Menu
Click to go to the previous page Utilities menu The Utilities menu shows the applications that the Eee PC supports. Click to go to the next page ASUS Eee PC... -
Page 72: Contact
Click to go to the previous page Contact Click the Contact tab to display the ASUS contact information. Other information The icons on the top right corner of the screen provide additional information on the Eee PC and the contents of the support DVD. -
Page 73: System Recovery
Please select boot device: HDD:SM-ASUS-PHISON SSD HDD:SS-ASUS-PHISON SSD USB:XXXXXXXX ↑ and ↓ to move selection ENTER to select boot device Press any key to boot from the optical drive. Press any key to boot from CD... ASUS Eee PC... - Page 74 Click OK in the Recovery System for Eee PC dialog box. Click Yes to start the system recovery. You will lose all your data during the system recovery. Ensure to back up your important data before recovering your system. After the system recovery is completed, eject the the Support DVD from the optical drive and click OK to restart the Eee PC.
-
Page 75: Appendix
Declarations and Safety Statements Copyright Information Limitation of Liability Service and Support Appendix... -
Page 76: Declarations And Safety Statements
Declarations and Safety Statements Federal Communications Commission Statement This device complies with FCC Rules Part 15. Operation is subject to the following two conditions: • This device may not cause harmful interference, and • This device must accept any interference received, including interference that may cause undesired operation. -
Page 77: Declaration Of Conformity
Radio test suites according to [EN 300 328-2] CE Mark Warning This is a Class B product, in a domestic environment, this product may cause radio interference, in which case the user may be required to take adequate measures. ASUS Eee PC... -
Page 78: Wireless Operation Channel For Different Domains
Wireless Operation Channel for Different Domains N. America 2.412-2.462 GHz Ch01 through CH11 Japan 2.412-2.484 GHz Ch01 through Ch14 Europe ETSI 2.412-2.472 GHz Ch01 through Ch13 France Restricted Wireless Frequency Bands Some areas of France have a restricted frequency band. The worst case maximum authorized power indoors are: •... - Page 79 This requirement is likely to change over time, allowing you to use your wireless LAN card in more areas within France. Please check with ART for the latest information (www.art-telecom.fr) Your WLAN Card transmits less than 100mW, but more than 10mW. ASUS Eee PC...
-
Page 80: Safety Information
The guidelines use a unit of measurement known as the Specific Absorption Rate, or SAR. The ICNIRP SAR limits for mobile devices used by the general public are as follows: Eee PC 1000HG GSM900 – 0.014W/Kg GSM1800 –0.012W/Kg WCDMA Band I – 0.012W/Kg The SAR limits differ depending on model. - Page 81 Blasting areas To avoid interfering with blasting operations, turn your mobile device off when in a ‘blasting area’ or in areas posted: ‘Turn off two- way radio.’ Obey all signs and instructions. ASUS Eee PC...
-
Page 82: Ul Safety Notices
UL Safety Notices Required for UL 1459 covering telecommunications (telephone) equipment intended to be electrically connected to a telecommunication network that has an operating voltage to ground that does not exceed 200V peak, 300V peak-to-peak, and 105V rms, and installed or used in accordance with the National Electrical Code (NFPA 70). -
Page 83: Power Safety Requirement
H05VV-F, 2G, 0.75mm This symbol of the crossed out wheeled bin indicates that the product (electrical, electronic equipment, and mercury- containing button cell battery) should not be placed in municipal waste. Check local regulations for disposal of electronic products. ASUS Eee PC... - Page 84 Nordic Lithium Cautions (for lithium-ion batteries) CAUTION! Danger of explosion if battery is incorrectly replaced. Replace only with the same or equivalent type recommended by the manufacturer. Dispose of used batteries according to the manufacturer’s instructions. (English) ATTENZIONE! Rischio di esplosione della batteria se sostituita in modo errato.
- Page 85 Mettre au rebut les batteries usagées conformément aux instructions du fabricant. (French) ADVARSEL! Eksplosjonsfare ved feilaktig skifte av batteri. Benytt samme batteritype eller en tilsvarende type anbefalt av apparatfabrikanten. Brukte batterier kasseres i henhold til fabrikantens instruksjoner. (Norwegian) (Japanese) ASUS Eee PC A-11...
-
Page 86: Copyright Information
KIND, EITHER EXPRESS OR IMPLIED, INCLUDING BUT NOT LIMITED TO THE IMPLIED WARRANTIES OR CONDITIONS OF MERCHANTABILITY OR FITNESS FOR A PARTICULAR PURPOSE. IN NO EVENT SHALL ASUS, ITS DIRECTORS, OFFICERS, EMPLOYEES OR AGENTS BE LIABLE FOR ANY INDIRECT, SPECIAL, INCIDENTAL, OR CONSEQUENTIAL DAMAGES... -
Page 87: Limitation Of Liability
ASUS will only be responsible for or indemnify you for loss, damages or claims based in contract, tort or infringement under this Warranty Statement. This limit also applies to ASUS’ suppliers and its reseller. It is the maximum for which ASUS, its suppliers, and your reseller are collectively responsible. - Page 88 Declaration of Conformity We, Manufacturer/Importer (full address) ASUS COMPUTER GmbH HARKORT STR. 25 40880 RATINGEN, BRD. GERMANY declare that the product ( description of the apparatus, system, installation to which it refers) is in conformity with (reference to the specification under which conformity is declared) in accordance with 2004/108/EC-EMC Directive and 1995/5 EC-R &TTE Directive...