Table of Contents
Advertisement
Advertisement
Table of Contents

Related Manuals for Epson PictureMate PictureMate


Summary of Contents for Epson PictureMate PictureMate
-
Page 2: Table Of Contents
Contents PictureMate User’s Guide 6 Getting to Know Your PictureMate 7 Loading Paper 8 Supported Paper Types 9 Printing From Your Computer 10 Printing From a Windows Computer 10 Printing From a Macintosh Computer 13 Printing Photos Using Film Factory 18 Opening Your Photos in Film Factory 18 Printing Your Photos in Film Factory 20 Copying Photos to Your Computer 22... - Page 3 Printing All Your Photos From the PictureMate Print Wizard 38 Printing Some of Your Photos From the PictureMate Print Wizard 39 Viewing the PictureMate Main Menu 40 Selecting the Photos You Want to Print 41 Setting the Number of Copies in the Main Menu 46 Choosing a Layout 47 Confirming and Printing 47 Doing More With Your Prints 48...
- Page 4 Software Installation Problems 90 Printing Problems 91 Memory Card Problems 92 Print Quality Problems 93 Problems With Paper Feeding 94 Miscellaneous Printout Problems 95 Where To Get Help 97 Uninstalling PictureMate Software 98 Uninstalling From a Windows Computer 98 Uninstalling From a Macintosh Using OS X 99 Uninstalling From a Macintosh Using OS 9 99 Setting Up Network Printing 100 Windows XP and 2000 101...
- Page 5 AC Adapter 119 Built-in Card Slots 120 External Storage Devices 120 Standards and Approvals 121 Notices 123 How many photos will I get from a PictureMate Print Pack? 123 PictureMate Print Pack Satisfaction Guarantee: 124 Copyright Notice 124 A Note Concerning Responsible Use of Copyrighted Materials 125 Trademarks 125...
-
Page 7: Picturemate User's Guide
PictureMate User’s Guide This User’s Guide tells you how to print from PictureMate, troubleshoot PictureMate, save your photos, and more. See these documents for additional information: To set up your PictureMate, see the Start Here sheet. For a handy, portable reference to printing without a computer, see the Using PictureMate Without a Computer book. -
Page 8: Getting To Know Your Picturemate
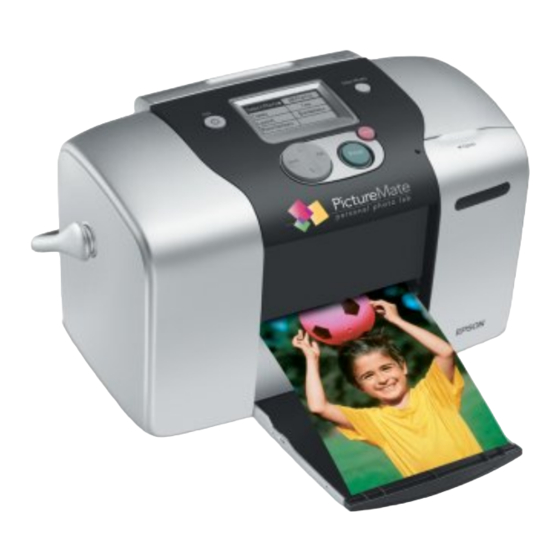
Getting to Know Your PictureMate LCD menu screen Turn PictureMate on or off Use these buttons to move through menu options Paper support (load photo paper here) Output tray (catches printed photos) Save your photos to an external drive (CD-R, Zip disk, or thumb drive) Go back or stop printing... -
Page 9: Loading Paper
Loading Paper 1. Open the output tray. Move handle all the way down Note: Keep the PictureMate handle to the back, under the paper feeder and all the way down, to allow paper to feed through. 2. Open the paper support. 3. -
Page 10: Supported Paper Types
In this case, PictureMate Photo Paper from a new Print Pack or Epson Premium Glossy Photo Paper, Borderless 4 × 6 inches (part# S041727 - 100 sheets) may be used. See How many photos will I get from... -
Page 11: Printing From Your Computer
Printing From a Windows Computer You can print your photos from imaging applications in Windows. 1. Open your photo in your program. 2. From the File menu, click Select EPSON PictureMate here ® Photoshop. . You see a Print window like this one: Print ®... - Page 12 3. Make sure PictureMate is selected. EPSON 4. Click the Preferences button, click it. Then click Options screen.) You see the Printing Preferences or Properties window: 5. You can do the following: Select Borderless print with a white border all around.
- Page 13 To bring out the fine details of a particularly intricate photo, select Fine Details Tip: For more information about printer settings, click the ? or Help button. 6. Click 7. At the Print window, click During printing, this window appears and shows the progress of your print job. You can use the buttons to cancel, pause, or resume printing.
-
Page 14: Printing From A Macintosh Computer
Printing From a Macintosh Computer Follow the steps below for the operating system you are printing from: Macintosh OS X Macintosh OS 9 Macintosh OS X If you’re printing from an OS X compatible application, follow the steps below to print a photo. - Page 15 4. When you’re finished with the Page Setup settings, click 5. Select from the File menu. You see a screen like this: Print 6. Select Print Settings to see the pop-up menu.) You see your printing options: options 7. Select your print settings as follows: To bring out the fine details in your photo, select (printing may be slower).
- Page 16 , to select page layout options Layout , to save your print job as a PDF file Output Options , to view a list of all your selections Summary 9. Click Print 10. To monitor the progress of your print job, click the icon when it appears in the dock.
-
Page 17: Macintosh Os 9
Macintosh OS 9 1. From the File menu, select Make sure you see PictureMate Select the orientation of your photo 2. Make sure PictureMate is selected. If not, you need to select it in the Chooser. 3. Select these print settings: Select Borderless print with a white border all around. - Page 18 8. Click to start printing. Print 9. If you turned on background printing, you can open the EPSON MonitorIV window by selecting it in the Application menu in the upper-right corner of your screen. 10. Monitor the progress of your print job or do one of the following:...
-
Page 19: Printing Photos Using Film Factory
To check your ink levels, click Note: If you’re not using background printing and you need to cancel printing, hold down the J key and press the . (period) key. See Storing and Displaying Your Printed Photos for steps on properly storing your printed photos. - Page 20 Note: If you need help with Film Factory, select it from the Help menu or check the on-screen Getting Started Guide that was installed with Film Factory. 2. Select the folder on your computer that contains your photos. Thumbnails of your photos appear on the screen.
-
Page 21: Printing Your Photos In Film Factory
4. Click Standard Prints Note: You can also select other print options on the left side of the screen. But don’t choose Greeting Cards, Stickers or Calendars; PictureMate doesn’t support these options because they work only with larger paper sizes. If you have another printer that supports larger paper sizes, you can use it with these print options. - Page 22 2. To print the current date with your photo, click the 3. Windows and Macintosh 9.x: Select these options in the Printer Settings box at the bottom of the screen, in this order: 1 Make sure PictureMate is selected 2 Select Sheet Feeder or Sheet Feeder (No Margins) for borderless printing Macintosh OS X: Select these options in the Printer Settings box at the bottom of the screen, in this order:...
-
Page 23: Copying Photos To Your Computer
4. Click the button on the left side of the screen. You see more options: Print Select the number of copies you want to print Leave these boxes checked for the best printed output using P.I.M. and/or Exif Print data, if available 5. -
Page 24: Compatible Memory Cards
Compatible Memory Cards Photo Image File Requirements Inserting Your Memory Card and Copying Photos Configuring PhotoStarter Preparing to Remove a Memory Card Compatible Memory Cards You can insert any of these types of memory cards into PictureMate: CompactFlash Microdrive SD (Secure Digital) miniSD (requires miniSD adapter) (MultiMediaCard... -
Page 25: Inserting Your Memory Card And Copying Photos
Your PictureMate recognizes and prints the first 999 photos on your memory card. Note: PictureMate supports P.I.M. (PRINT Image Matching) and Exif Print image enhancement features. See your camera manual to see if these features are included on your camera. Inserting Your Memory Card and Copying Photos 1. - Page 26 3. Push the card in until it stops (it won’t go in all the way). When the card is in, the card light comes on. 4. Close the memory card door. Note: Insert just one card at a time. PictureMate can’t read multiple cards at once and you may not be able to tell which card PictureMate is taking the images from.
- Page 27 Click the to copy photos to your Macintosh. See iPhoto Help for more information. If you don’t have iPhoto, you need to set up Image Capture to use Epson CardMonitor as described in Configuring CardMonitor.
-
Page 28: Configuring Photostarter
Configuring PhotoStarter Follow these steps to set up PhotoStarter to copy photos to your computer: 1. When you see this message, click The PhotoStarter setup assistant opens: 2. Click again. The setup assistant asks you a series of questions about how you Next want PhotoStarter to work. -
Page 29: Configuring Cardmonitor
EPSON PhotoStarter3.0 Change Settings On a Macintosh, open the EPSON PhotoStarter Configuring CardMonitor Follow these steps to configure Epson CardMonitor in the Macintosh OS X Image Capture utility: 1. Open the Applications 2. Open the Image Capture 3. From the Camera Preferences list, select 4. -
Page 30: Saving Your Photos To An External Cd-R/Rw, Zip, Or Flash Memory Drive
Note: Epson cannot guarantee the compatibility of any drives. If you’re not sure about your drive, try connecting it. 1. Make sure the memory card is inserted in your printer. (See Inserting Your Memory Card and Copying Photos.) - Page 31 For a CD-R/RW or Zip drive, connect your drive’s USB cable to the EXT/IF port on the back of your PictureMate. Insert a CD-R or Zip disk in the drive. For a flash memory drive, plug it into the EXT/IF port on the back of PictureMate.
-
Page 32: Storing And Displaying Your Printed Photos
7. When your photos are saved, you see the following screen. Press Caution: Don’t remove the drive or memory card while the photos are being saved, or you may lose photos on your card or drive. If you need to stop the backup, press the Cancel button. -
Page 33: Storing Unused Paper
Storing Unused Paper Return unused paper to the original package. Store paper away from extreme temperatures, high humidity, and bright light. -
Page 35: Printing Without A Computer
Printing Without a Computer PictureMate lets you print photos quickly and easily without a computer. Just insert your digital camera’s memory card, choose settings from the control panel, and press Print. For details, see these sections: Compatible Memory Cards Photo Image File Requirements Inserting Your Memory Card Printing a Proof Sheet from the PictureMate Print Wizard Printing All Your Photos From the PictureMate Print Wizard... -
Page 36: Photo Image File Requirements
(MultiMediaCard xD Picture Card ® Sony Memory Stick Memory Stick Duo Memory Stick PRO Memory Stick PRO Duo MagicGate Memory Stick MagicGate Memory Stick Duo SmartMedia Photo Image File Requirements Make sure the photo image files on your memory card meet these requirements: JPEG files or uncompressed Tiff files only Resolutions ranging from 120 ×... -
Page 37: Inserting Your Memory Card
Inserting Your Memory Card 1. Make sure PictureMate is on, then flip down the memory card door. 2. Insert the memory card into one of the three slots, as shown. CompactFlash or Microdrive (bottom) 3. Push the card in until it stops (it won’t go in all the way). When the card is in, the card light comes on. -
Page 38: Printing A Proof Sheet From The Picturemate Print Wizard
4. Close the memory card door. Note: Insert just one card at a time. PictureMate can’t read multiple cards at once. Removing Your Memory Card To remove a card, pull it straight out of the PictureMate slot. Caution: Do not remove a card while the card light is flashing, or you may lose data on the card. -
Page 39: Printing All Your Photos From The Picturemate Print Wizard
Press if you have already printed a proof sheet for the photos currently on Cancel your card or if you want to print all your photos and don’t need to see a proof sheet. (To make sure you know which photos are on your card, you should print a proof sheet if you have taken new photos or deleted photos since the last time you inserted your card in PictureMate.) Note: Your proof sheet includes up to 20 photos per sheet. -
Page 40: Printing Some Of Your Photos From The Picturemate Print Wizard
Tip: To start the PictureMate Wizard again, remove and re-insert your card (see Inserting Your Memory Card). Printing Some of Your Photos From the PictureMate Print Wizard To print one or several of your photos, follow these steps: 1. After you print the proof sheet, or cancel it in the PictureMate Print Wizard, you see this screen;... -
Page 41: Viewing The Picturemate Main Menu
If you chose the wrong photo, you can deselect it. Highlight the selected photo and press to uncheck it. If you need to change the number of copies, press twice and change the number as described in step 3. 5. When you’re done selecting photos, press You see this screen: 6. -
Page 42: Selecting The Photos You Want To Print
Tip: You can also crop your photos, print in black and white or sepia, or add the time or date. (See Doing More With Your Prints.) If the PictureMate Print Wizard is on the screen, press Menu appears, as shown above. You will also see the Main Menu after you finish printing from the PictureMate Print Wizard. - Page 43 All Photos 1. Press to highlight 2. Press to highlight 3. Go to Setting the Number of Copies in the Main Menu to continue. One Photo 1. Press to highlight 2. Press to highlight 3. Press to highlight the photo you want to print, then press Tip: Hold down , then press Select Photo...
- Page 44 You see the selected photo on the Main Menu: 4. Go to Setting the Number of Copies in the Main Menu to continue. Several Photos You can choose any photos on your card to print. 1. Press to choose 2. Press to highlight 3.
- Page 45 5. Repeat steps 3 and 4 for each additional photo. The screen shows selected photos and a number of copies for each. (You may need to press all your selected photos.) Note: If you chose the wrong photo, you can deselect it. Highlight the selected photo and press OK to uncheck it.
- Page 46 3. Press to choose the first photo under Tip: Hold down 4. Press to choose the last photo under 5. Go to Setting the Number of Copies in the Main Menu to continue. Camera-selected DPOF Photos If your camera supports DPOF (Digital Print Order Format), you can use it to pre-select which photos you want to print and how many copies.
-
Page 47: Setting The Number Of Copies In The Main Menu
has been deselected and you want to select it again, follow these steps: DPOF 1. On the Main Menu, press 2. Press to highlight The photos that you chose from your camera to print are automatically selected, including the number of copies. Setting the Number of Copies in the Main Menu You can print from 1 to 100 copies. -
Page 48: Choosing A Layout
2. Press to highlight the number of copies you want to print for each photo ), then press 3. Continue with Choosing a Layout to choose a layout for your photos. Choosing a Layout 1. On the Main Menu, press 2. -
Page 49: Doing More With Your Prints
Before printing, you may want to select other options for your photos. See Doing More With Your Prints for details. 1. Press Print 2. Confirm your photo selections (press photos) If the list is okay, press To make changes, press Note: If the Print Confirmation is off, you will not see the screen above and only need to press Print once. -
Page 50: Printing Photos In Black And White Or Sepia
All of these features are available under Note: The features described in this section do not affect or replace the original digital photo file; they customize only the print(s) that you make at that one time. These settings do not appear in the Print Confirmation screen. Printing Photos in Black and White or Sepia You can print your photo in black and white or sepia tone, without changing the original photo. -
Page 51: Cropping Your Photo
Note: This setting remains in effect for all photos until you press and hold Cancel for 3 seconds or turn your PictureMate off. Cropping Your Photo If you want to print only part of a photo, you can crop it to leave out the part you don’t want. - Page 52 4. Choose the number for the area you want to print. 5. Press to highlight 6. Press to highlight the number you chose from the template, then press 7. Confirm the crop number you have selected. 8. Continue with Confirming and Printing to print your photo. Note: This setting remains in effect for all photos until you press and hold Cancel for 3 seconds or turn your PictureMate off.
-
Page 53: Adding The Date Or Time
2. Press to highlight 3. Press to choose one of the options. - automatically adjusts photos using P.I.M. or Exif Print features in Enhance your digital photos (see your camera manual to see if it supports these features). This option is automatically selected if your photo contains P.I.M. or Exif Print information. - Page 54 2. To print the date, press 3. Press to choose a setting: (default; turns off the date stamp) None (2004.May.09) yyyy.mmm.dd (May.09.2004) mmm.dd.yyyy (09.May.2004) dd.mmm.yyyy 4. Press 5. To print the time, press 6. Press to choose a setting: (default; turns off the time stamp) None (03:00 for 3 pm) 12-hour...
-
Page 55: Adjusting Printer Settings
9. Continue with Confirming and Printing to print your photos. Note: This setting remains in effect for all photos until you press and hold Cancel for 3 seconds or turn your PictureMate off. Adjusting Printer Settings You can adjust these settings on your PictureMate: Resetting PictureMate Print Settings Turning the PictureMate Print Wizard Off or On Turning Print Confirmation Off or On... - Page 56 Turning the PictureMate Print Wizard Off or On When you first insert a memory card, the PictureMate Print Wizard guides you to print a proof sheet, then to print some or all of your photos. You may turn this feature off and print directly from the Main Menu all the time, or if you turned the PictureMate Print Wizard off and you want to use it, you can turn it back on.
-
Page 57: Adjusting The Lcd Screen Contrast
When the Print Confirmation is On, you see a screen like this that lets you check settings before printing: When the Print Confirmation is Off, the printer prints without a final confirmation screen. 1. On the Main Menu, press 2. Press to highlight 3. -
Page 58: Printing From A Pictbridge-Enabled Digital Camera
2. Press to highlight 3. Press to highlight 4. When you see this message, press 5. Press to adjust the contrast, then press Printing From a PictBridge-enabled Digital Camera You can connect your PictBridge-enabled digital camera to the back of PictureMate and use the camera to control printing. -
Page 59: Printing From An External Cd, Zip Disk, Or Flash Memory Drive
2. Connect your camera’s USB cable to the port on the back of PictureMate. 3. Use your camera’s controls to print photos on PictureMate. See your camera documentation for instructions. Printing From an External CD, Zip Disk, or Flash Memory Drive If you saved your photos to a CD, Zip disk, or flash memory (thumb) drive (see Saving Your Photos to an External CD-R/RW, Zip, or Flash Memory Drive), you can connect the drive to the back of PictureMate and print just like you do when you... - Page 60 3. Connect your CD or Zip drive’s USB cable to the port on the back of PictureMate, or plug your flash memory drive into the USB port on the back of PictureMate. 4. For a CD or Zip drive, insert a CD or Zip disk with photos into the drive. If you used PictureMate to save photos on the same CD-R, Zip disk, or flash memory drive more than once, it will have multiple folders.
-
Page 61: Printing Wirelessly From A Bluetooth Device
PDAs, mobile phones, and computers, you can use the optional Bluetooth Photo Print Adapter, available from Epson. The Epson Bluetooth Photo Print Adapter (part# C12C824142) is available from your local retailer or the Epson Store site at www.epsonstore.com (U.S. -
Page 62: Printing With Bluetooth
Printing With Bluetooth 1. Make sure PictureMate is on but not printing. Caution: Do not connect the Bluetooth Photo Print adapter while PictureMate is printing; this may cause PictureMate to malfunction. 2. Fold up the top of the Bluetooth Photo Print Adapter. 3. -
Page 63: Choosing Bluetooth Settings
Note: To print from a device with encryption, to use pairing, to use a passkey, or to adjust Bluetooth settings, see Choosing Bluetooth Settings. Disconnecting the Bluetooth Photo Print Adapter Make sure PictureMate isn’t printing, then pull the adapter out from the USB connector, as shown. - Page 64 3. Choose settings in the Bluetooth option menus listed below. Option Settings BT Device Name PictureMate-(number) (Default = 0) BT Comm. Mode Discoverable Not discoverable Pairing (Bonding) BT Encryption On/Off (Default = Off) Description If multiple Bluetooth-enabled printers are in the same communication range, you can distinguish them by assigning each a unique number (from 0...
- Page 65 Option BT Passkey BT Device Address Settings Description Any four-digit number The Passkey Setting allows you to set the four-digit Passkey that (Default = 0000) must be entered into a device Bluetooth PIN before printing if Pairing (Bonding) is selected as the Communication Mode or if Encryption is On.
-
Page 66: Replacing The Photo Cartridge
Replacing the Photo Cartridge Your PictureMate will let you know when the photo cartridge is low or expended. When the photo cartridge is low, it’s a good idea to get a new PictureMate Print Pack, which includes a new PictureMate Photo Cartridge (ink) and 100 sheets of PictureMate Photo Paper. - Page 67 PictureMate Status Monitor for Macintosh OS X PictureMate Status Monitor for Macintosh OS 9 PictureMate LCD Screen 1. On the Main Menu, press 2. Press to highlight 3. Press to highlight 4. You see a screen with the approximate ink level in your photo cartridge. Press to close the screen.
- Page 68 You can check the amount of ink remaining in the photo cartridge using EPSON Status Monitor 3 or the progress meter. Open EPSON Status Monitor 3 in one of the following ways. Double-click the printer icon on your Windows taskbar.
- Page 69 PictureMate Status Monitor for Macintosh OS X 1. Double-click Macintosh HD folder, then double-click the Applications Printer List window appears. 2. Select PictureMate appears. (the default hard disk name), double-click the EPSON Printer Utility , then click . The EPSON Printer Utility dialog box icon. The...
- Page 70 EPSON StatusMonitor appears, showing the approximate amount of ink left in the photo cartridge. 4. Close the Epson Printer Utility. PictureMate Status Monitor for Macintosh OS 9 1. Access the Print or Page Setup dialog box (see Printing From a Macintosh Computer for instructions).
-
Page 71: Buying A Picturemate Print Pack
100 sheets of PictureMate Photo Paper and a new PictureMate Photo Cartridge. Note: If you are out of PictureMate Photo Paper, but do not see the Replace cartridge message, you can still print. Use Epson Premium Glossy Photo Paper, Borderless 4 × 6 inches (part# S041727). -
Page 72: Removing The Used Photo Cartridge
You can also buy the Print Pack from the Epson Store at (800) 873-7766 or visit www.epsonstore.com (U.S. sales only). In Canada, please call (800) 463-7766 for dealer referral. Note: Use your photo cartridge within six months of installing it and before the expiration date on the package. - Page 73 3. Flip the handle over to the front. 4. Open the cartridge door. 5. Move the lever to the position by sliding it in the direction shown. This Release releases the cartridge.
-
Page 74: Inserting The New Photo Cartridge
6. Carefully pull out the cartridge and dispose of it properly. Warning: Keep ink cartridges out of the reach of children and do not drink the ink. If ink gets on your hands, wash them thoroughly with soap and water. If ink gets in your eyes, flush them thoroughly with water. - Page 75 3. Slide the cartridge straight into the slot, label side up, until it is fully inserted. Push in both sides evenly to make sure it is not crooked. If either side is sticking out, remove the cartridge and reinsert it so the cartridge is straight.
- Page 76 4. Move the lever right to the cartridge is crooked; you need to push in whichever side is sticking out too far. (See step 3.) Caution: If the cartridge is not inserted correctly, ink may leak out. 5. Close the cartridge door. Make sure it is completely closed. 6.
-
Page 77: Taking Picturemate With You
When PictureMate recognizes the new photo cartridge, it starts charging the ink and you see an ink charging message. When charging is complete, you can begin printing again. Taking PictureMate With You PictureMate’s handle makes it easy to carry short distances. If PictureMate is going to travel a longer distance, you should pack it carefully to protect it from getting damaged. -
Page 78: Cleaning Picturemate
See Aligning the Print Head Directly From PictureMate. Tip: You can order an optional PictureMate Carrying Case (part# ARC1B) from the Epson Store at (800) 873-7766 or visit www.epsonstore.com (U.S. sales only). In Canada, please call (800) 463-7766 for dealer referral. -
Page 79: Improving Print Quality
Caution: Never use a hard or abrasive brush, or alcohol or thinner for cleaning; they can damage the components and case. Don’t get water on the components and don’t spray lubricants or oils inside PictureMate. Improving Print Quality If your print quality is not as good as it used to be, if your photos are too light or faint, or if you are missing colors in your prints, you may need to clean the PictureMate print head. - Page 80 2. Press to highlight 3. Press to highlight 4. When you see this message, press The cleaning takes about 40 seconds, during which the message . appears on the screen and PictureMate makes some noise. head. Please wait Caution: Never turn off PictureMate while it is cleaning its print head, unless it hasn’t moved or made noise for more than 5 minutes.
-
Page 81: Aligning The Print Head Directly From Picturemate
If you see any gaps (as shown below), you need to clean the print head again. 7. If there are gaps, press to go back to the PictureMate Main Menu. Cancel If you don’t see any improvement after cleaning three or four times, refer to Solving Problems. -
Page 82: Checking The Print Quality Using The Computer
5. Press the button when you see the next message. Print 6. When the pattern prints, look at the print and see which line pattern is the straightest. (You may need to use a magnifying glass.) 7. Press to highlight the number for the best pattern in set #1 (1 to 15), then press 8. -
Page 83: Cleaning The Print Head Using The Computer
(in the lower right Head Cleaning folder and select Applications in the printer list, click menu and choose File Page Setup button. Head Cleaning EPSON Printer , and select Nozzle . Click Print EPSON Printer , and select Head . Click Print... - Page 84 3. Follow the instructions on the screen to clean the print head. Cleaning takes about 40 seconds. PictureMate makes some noise and its screen displays progress messages. Caution: Never turn off PictureMate while it is cleaning its print head, unless it hasn’t moved or made noise for more than 5 minutes.
-
Page 85: Aligning The Print Head Using The Computer
(in the lower right Print Head Alignment folder and select Applications in the printer list, click menu, select File Page Setup Print Head Alignment EPSON Printer , and select Print Head . Click the Print button. - Page 86 4. Follow the instructions on the screen to print a test page. You see a window like this one: 5. On the test page, select the square without any visible bands. You may need to use a magnifying glass. Select one square for each pattern (1 and 2). 6.
-
Page 88: Solving Problems
Solving Problems There are several ways to diagnose problems: To identify the most common problems, check for Control Panel Messages. If your PictureMate is connected to your computer and you’re not sure whether the problem is coming from PictureMate or the computer, run a printer check as described in Running a Printer Check. - Page 89 PictureMate Print Pack. See Replacing the Photo Cartridge. PictureMate has a hardware error that may require service. Contact Epson as described in Where To Get Help. Use a compatible memory card. Format your card with your camera, not a computer. See the card types you can use in Compatible Memory Cards.
-
Page 90: Running A Printer Check
Message Running a Printer Check You may need to run a printer check to see if a problem comes from PictureMate itself or some other source. 1. If PictureMate is connected to your computer or other USB device, make sure they are both turned off. -
Page 91: Software Installation Problems
If the check page did not print, PictureMate may have a problem. Try the suggestions in Printing Problems. If nothing works, contact your dealer or Epson as described in Where To Get Help. 7. After examining the check page, remember to turn off PictureMate and reconnect its cable to your computer, if desired. -
Page 92: Printing Problems
Make sure Windows 98 SE, Me, 2000, or XP was preinstalled on your system. The USB Printer Device Driver may not install correctly if you’ve upgraded from Windows 95. Make sure the USB Controller is working properly in Device Manager. See your Windows help system for details. -
Page 93: Memory Card Problems
Printing is too slow. Because of PictureMate’s high print quality, it may take a little while to print your photos. If you are printing from a computer, check the requirements in System Requirements. If you’re printing a high-resolution image, you need more than the minimum requirements listed. -
Page 94: Print Quality Problems
Print Quality Problems You see banding (light lines). The print head may need cleaning; see Cleaning the Print Head Directly from PictureMate or Cleaning the Print Head Using the Computer for instructions. Make sure the glossy, printable side of the paper is face up. The photo cartridge may need replacing. -
Page 95: Problems With Paper Feeding
The photo cartridge may be old or low on ink. See Replacing the Photo Cartridge for instructions on replacing it. Make sure your paper isn’t damaged, old, dirty, or loaded face down. If it is, reload a new stack of paper with the glossy, printable side up. Colors in your photo are incorrect or missing. -
Page 96: Miscellaneous Printout Problems
Use new paper, loaded printable side up. Don’t load paper above the arrow mark on the left edge guide. Load a maximum of 20 sheets. Place the paper against the right edge and slide the left edge guide against it, but not too tight. - Page 97 Your photo size may not match the width/height proportions (aspect ratio) of the paper size or layout you’re using. Photos may be cropped to fit the paper and layout. The wrong photo is printed. The photo numbering on the proof sheet may not match the numbering in your camera.
-
Page 98: Where To Get Help
Where To Get Help Epson provides technical assistance 24 hours a day through the electronic support services and automated telephone services listed below: Service Access World Wide Web From the Internet, you can reach Epson Support at http://support.epson.com. At this site, you can download... -
Page 99: Uninstalling Picturemate Software
You can purchase a PictureMate Print Pack with PictureMate Photo Paper and a photo cartridge, and other PictureMate accessories from the Epson Store at (800) 873-7766 or visit www.epsonstore.com (U.S. sales only). In Canada, please call (800) 463-7766 for dealer referral. -
Page 100: Uninstalling From A Macintosh Using Os X
Note: Remember that you don’t need to reinstall Film Factory or on-screen User’s Guide, and you won’t see the license agreement. Uninstalling From a Macintosh Using OS X Follow these steps to uninstall Epson PhotoStarter and Card Monitor, and your PictureMate driver: 1. Open your Applications folder. -
Page 101: Setting Up Network Printing
5. Double-click the 6. In the Installer dialog box, select button. Follow the on-screen instructions and click Uninstall you’re done. 7. In the Drivers\English folder, double-click the folder, then double-click the OS 9 agreement, click 8. Select Uninstall Follow the on-screen instructions and click 9. -
Page 102: Windows Xp And 2000
Windows XP and 2000 First, you need to set up PictureMate as a shared printer on the computer that it is directly connected to. Then, you must install the PictureMate software on each computer that will access it through the network. Note: To install software programs in Windows 2000, it is necessary to log on as a user with administrative privileges (a user who belongs to the Administrators group). - Page 103 If you want Windows XP or 2000 to automatically download printer drivers to computers that are running different versions of Windows, click and select the environment and the operating systems for the other Drivers computers. Click CD-ROM drive. Select the folder for Windows Me or 98. Click additional drivers.
-
Page 104: Windows Me And 98
4. Select Network printer 5. On the next screen, click 6. Double-click the icon of the computer that is directly connected to PictureMate. Then, click the icon for PictureMate. 7. Click and follow the on-screen instructions. Next Note: Depending on the operating system and the configuration of the computer to which PictureMate is connected, the Add Printer Wizard may prompt you to install the printer driver from the PictureMate software CD. - Page 105 Note: If a dialog box appears asking you to insert the Windows Me or 98 CD-ROM, insert the CD into the CD-ROM drive and follow the on-screen instructions. If you see a message asking you to restart your computer, restart it and continue with step 6.
-
Page 106: Macintosh Os X 10.2.X - 10.3.X
4. Select Network printer 5. On the next screen, click 6. Double-click the icon of the computer that PictureMate is directly connected to. Then, click the icon for PictureMate. 7. Click and follow the on-screen instructions. Macintosh OS X 10.2.x - 10.3.x This section tells you how to set up PictureMate so that you can print to it on a network. -
Page 107: Macintosh Os 9
4. Click the checkbox next to Note: To share your printer with Windows, click the Windows File Sharing checkbox. See your Mac Help and Windows documentation for more information. Accessing a Networked Printer Follow the steps in this section to access PictureMate from other Macintosh OS X 10.2.x and 10.3.x computers on the network. -
Page 108: Setting Up A Shared Printer
Setting Up a Shared Printer To share PictureMate with other computers on an AppleTalk network, follow these steps to configure the computer that it is directly connected to. 1. Turn on PictureMate. 2. Select from the Apple menu and click the icon for PictureMate. Then, Chooser select the port that the printer is connected to. - Page 109 5. Select the appropriate radio button to turn background Background Printing printing on or off. 6. Close the Chooser.
-
Page 110: System Requirements
System Requirements To use PictureMate with your computer, your system must meet the requirements in these sections: Windows System Requirements Macintosh System Requirements Windows System Requirements ® A Microsoft Windows compatible PC with a Pentium 233 MHz or faster processor Windows 98 SE, Windows Me, Windows 2000, or Windows XP 64MB of RAM (128MB or more recommended, 256MB or more recommended for Windows XP) - Page 111 CD-ROM or DVD drive for installing the PictureMate software Built-in USB port and a shielded USB “AB” cable up to 6.5 feet (2 meters) long. Caution: Using an improperly shielded USB cable—especially a cable more than 6.5 feet (2 meters) long—may cause PictureMate to malfunction.
-
Page 112: Important Safety Instructions
Important Safety Instructions Before using PictureMate, read the following safety instructions to make sure you use it safely and effectively: PictureMate Safety Instructions Photo Cartridge Safety Instructions PictureMate Screen (LCD) Safety Instructions PictureMate Safety Instructions Warning: This product contains chemicals, including lead, known to the State of California to cause birth defects and other reproductive harm. -
Page 113: Photo Cartridge Safety Instructions
Place the printer on a flat, stable surface that extends beyond the base of the printer in all directions. The printer will not operate properly if it is tilted at an angle. If you place the printer by the wall, leave more than 4 inches (10 cm) between the back of the printer and the wall. -
Page 114: Picturemate Screen (Lcd) Safety Instructions
Install the photo cartridge immediately after you remove it from its package. If you leave a cartridge unpacked for a long time before using it, normal printing may not be possible. Do not use a photo cartridge beyond the date printed on the cartridge carton; otherwise, it may result in reduced print quality. -
Page 116: Specifications
Control code Paper Note: Since the quality of any particular brand or type of paper may be changed by the manufacturer at any time, Epson cannot guarantee the quality of any non-Epson brand or type of paper. On-demand ink jet 90 nozzles ×... -
Page 117: Photo Cartridge
Note: Poor quality paper may reduce the print quality and cause paper jams or other problems. To prevent print quality problems, use PictureMate Photo Paper. Do not load curled or folded paper. Photo Cartridge 4 × 6 inches Special paper distributed by Epson 4 × 6 inches Special paper distributed by Epson... -
Page 118: Mechanical
Temperature * Ink thaws and is usable after approximately 3 hours at 77 °F (25 °C). Caution: To ensure good results, use a genuine Epson PictureMate Photo Cartridge and do not refill it. PictureMate calculates the amount of ink remaining using an IC chip on the photo cartridge, so even if the cartridge is refilled, the IC chip will report that it is empty. -
Page 119: Electrical
Dimensions Weight Printable area Electrical Input voltage range Rated frequency range Input frequency range Rated current Power consumption Note: Check the label on the back of PictureMate for the voltage information. Storage Width: 10.0 inches (256 mm) Depth: 6.0 inches (154 mm) Height: 6.4 inches (163 mm) Printing (with paper support and output tray extended) Width: 10.0 inches (256 mm) -
Page 120: Environmental
Environmental Temperature Humidity * Stored in shipping container ** Without condensation AC Adapter Model A251B Input AC 100 - 120 V, 50 - 60 Hz Output DC 42 V, 0.4 A Temperature 41 to 95°F (5 to 35 °C) Operation: 50 to 95 °F (10 to 35 °C) Storage: –4 to 104 °F (–20 to 40 °C) 1 month at 104 °F (40 °C) Transit:* –4 to 140 °F (–20 to 60 °C) -
Page 121: Built-In Card Slots
Built-in Card Slots Card Slots CF Type I and II card slot SmartMedia card slot Sony Stick/MemoryStick PRO card slot Duo (requires adapter) SD (Secure Digital)/MMC (MultiMediaCard) card slot xD-Picture Card Slot Voltage 3.3 v Requirements Maximum current is 500 mA External Storage Devices Connectivity * Not all USB devices are supported. -
Page 122: Standards And Approvals
Standards and Approvals Safety UL 60950 CSA C22.2 No. 60950 FCC part 15 Subpart B class B CSA C108.8 Class B... -
Page 124: Notices
How many photos will I get from a PictureMate Print Pack? Epson has conveniently packaged the PictureMate Photo Cartridge with 100 sheets of PictureMate Photo Paper, so that purchasing supplies for PictureMate is simple and saves time. The PictureMate Photo Cartridge will print about 100 borderless 4 color photos. -
Page 125: Picturemate Print Pack Satisfaction Guarantee
$1.10 for postage. The Satisfaction Guarantee covers only end user claims in the US, and Canada. It does not cover use of any non-Epson ink or paper, commercial use of the printer or paper consumed by proofs or printing errors. -
Page 126: A Note Concerning Responsible Use Of Copyrighted Materials
Neither Seiko Epson Corporation nor its affiliates shall be liable to the purchaser of this product or third parties for damages, losses, costs, or expenses incurred by purchaser or third parties as a result of: accident, misuse, or abuse of this product or unauthorized modifications, repairs, or alterations to this product, or (excluding the U.S.) failure to strictly comply with Seiko Epson Corporation’s operating and...