
Related Manuals for Motorola CLP1060


Summary of Contents for Motorola CLP1060
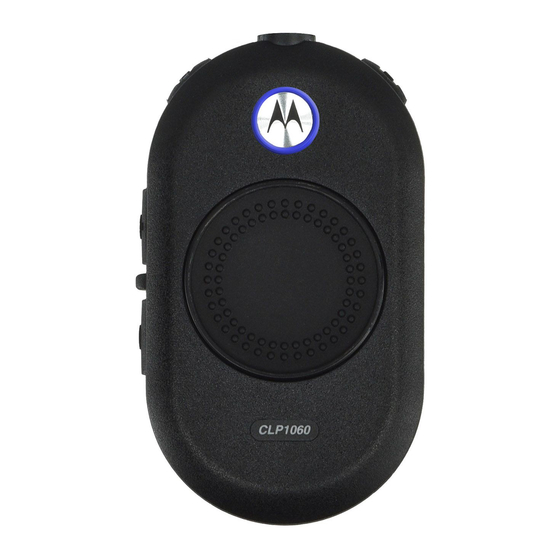
- Page 1 CLP Series Two-Way Radio User Guide Model CLP1010, CLP1040, and CLP1060 (with Bluetooth® Wireless Technology)
- Page 2 No duplication or distribution of this document or any portion thereof shall take place without the express written permission of Motorola. No part of this manual may be reproduced, distributed, or transmitted in any form or by any means, electronic or mechanical, for any purpose without the express written permission of Motorola.
-
Page 3: Table Of Contents
Computer Software Copyrights ..iii Turning the Radio On and Off ..6 Adjusting the Volume ....6 Radio Frequency (RF) Exposure Safety Installing and Removing the Swivel Standards. - Page 4 CPS......22 Motorola Limited Warranty for the United States and Canada ....39 Downloading the (Customer Programming Software) CPS .
-
Page 5: Computer Software Copyrights
Accordingly, any copyrighted Motorola computer programs contained in the Motorola products described in this manual may not be copied, reproduced, modified, reverse-engineered, or distributed in any manner without the express written... -
Page 6: Radio Frequency (Rf) Exposure Safety
For a list of Motorola-approved antennas, batteries, RADIO FREQUENCY (RF) and other accessories, visit the following website: EXPOSURE SAFETY www.motorolasolutions.com/CLP STANDARDS Product Safety and RF Exposure Compliance Before using this product, read the operating instructions for safe usage contained in the Product... -
Page 7: Fcc Licensing Information
The CLP Series radio operates on radio frequencies FCC LICENSING that are regulated by the Federal Communications INFORMATION Commission (FCC). To transmit on these frequencies, you are required to have a license issued by the FCC. INTERFERENCE INFORMATION Application is made available on FCC Form 601 and Schedules D, H, and Remittance Form 159. - Page 8 Changes or modifications not expressly approved by intended to be distributed is subject to government Motorola may void the user’s authority granted by the regulations and may be prohibited. FCC to operate this radio and should not be made. To...
-
Page 9: Introduction
• CLP Series Two-way Radio™ Two-Way Radio™. Your radio is a product of • Swivel Belt Clip Holster Motorola’s 80 plus years of experience as a world • Lithium Ion Battery and Battery Door leader in designing and manufacturing •... -
Page 10: Radio Overview
RADIO OVERVIEW RADIO CONTROLS Accessory Connector Power/Battery Menu Button Button Smart Status Volume Glow Control (+/-) Push-to-Talk (PTT) Button... -
Page 11: Getting Started
GETTING STARTED Align the battery contacts with tabs in the battery compartment. Insert the contact side of the INSTALL THE BATTERY battery first, then press the battery down to secure in place. Push up the latch at the bottom of the battery Put the battery door back on the radio. -
Page 12: Connecting A Wired Audio Accessory
Connecting a Wired Audio Accessory Plug the audio accessory straight into the accessory connector on the radio. Screw the Connect the wired audio accessory. audio accessory plug into the connector until it is tight and fully engaged with the connector. Turn the radio ON. -
Page 13: Connecting A Bluetooth Wireless Accessory (Select Models Only)
CONNECTING A BLUETOOTH WIRELESS Note: The Bluetooth feature is disabled when the wired audio accessory is plugged into the accessory ACCESSORY (SELECT MODELS ONLY) connector on the CLP radio. Add Bluetooth Headset (Initial Pairing) Reconnect to Last Connected Bluetooth Headset Turn the radio OFF. -
Page 14: Turning The Radio On And Off
Turning the Radio On and Off U-shaped groove. Pull tight to lock the cord in place. • To turn the radio ON, press and hold the Power/ Turn the belt clip to the position as needed. Battery button until you hear a short tone and the Smart Status Glow lights up. -
Page 15: Transmitting And Receiving
TRANSMITTING AND RECEIVING To talk, press and hold the PTT button on the front of the radio (or on select wired audio accessories with an inline PTT). Speak clearly into the microphone on the audio accessory. When finished talking, release the PTT to listen. To receive, listen through the earpiece at the volume level you have set. -
Page 16: Operation With Menu Settings
OPERATION WITH MENU SETTINGS Press Menu button to navigate through the Menu settings. Voice Assisted Operation feature* (* may not be available on certain previous shipping radios) At any time in Menu mode, short press PTT or wait 3 seconds to exit the menu. HOW TO... -
Page 17: Selecting A Channel
Selecting a Channel • [Color] “Channel” – [Channel#] – “To change” – “press +/-” For CLP multi-channel models only: Select the channel you want. The LED reflects When powered ON, press the Menu button, you the color of the new channel. Press PTT button can hear the voice prompt: to confirm or it is activated after 3 second hang time. -
Page 18: Monitoring A Channel
Monitoring a Channel Press the Menu button to navigate to Scan mode. To activate, press the Menu button to navigate When Scan is OFF, you can hear the voice to Monitor mode. prompt: “Scan” – “To activate” – “press +/-”. When Monitor is OFF, you can hear the voice Press either “+/-“... -
Page 19: Dynamic Talkaround Scan (*)
Dynamic Talkaround Scan (*) Mute Feature (*) "Dynamic Talkaround Scan" is a simple but You can quickly lower the headset volume using effective method for an on-site repeater enabled the Mute feature. two-way radio systems to maximize Press and hold + or - button while receiving communication coverage. -
Page 20: Battery And Charger Features
BATTERY AND CHARGER Motorola batteries are designed specifically to be used with a Motorola charger and vice versa. FEATURES Charging in non-Motorola equipment may lead to battery damage and void the battery warranty. The BATTERY FEATURES battery should be at about 77 °F (25 °C) (room temperature), whenever possible. -
Page 21: Battery Recycling And Disposal
Motorola fully endorses and encourages the recycling agencies. of Li-Ion batteries. In the U.S. and Canada, Motorola participates in the nationwide Rechargeable Battery Recycling Corporation (RBRC) program for Li-Ion battery collection and recycling. -
Page 22: Removing The Lithium-Ion (Li-Ion)
Removing the Lithium-Ion (Li-Ion) Battery Power Supply, Adapter and Drop-in Tray Charger Battery Latch Turn OFF the radio. The radio is packaged with one Drop-in Tray Charger with transformer. For details, see “Chargers” Section Push up the latch at the bottom of the battery on page 45. -
Page 23: Charging A Standalone Battery
Charging a Standalone Battery Connect the CLP power supply to a proper AC outlet. For your convenience the battery on the CLP radios Insert the battery into the tray, with the inside can be charged as a stand alone battery using either a surface of the battery facing the front of the Single Unit Charger (SUC) or a Multi-Unit Charger charger, as shown. - Page 24 Charging the Radio with the Drop-in Charging with the Drop-In Tray Tray Single Unit Charger (SUC) Multi-Unit Charger (Optional Accessory) The Multi-Unit Charger (MUC) allows drop-in Place the drop-in tray charger on a flat surface. charging of up to 6 radios. Each of the 6 charging Insert the connector of the power supply into the pockets can hold a radio (with battery installed).
-
Page 25: Charging Status Leds
Note: If the radio is ON while charging, it takes longer to • For part number details, refer to the“Accessories” fully charge. Section on page 44. Insert the radio facing down (with battery Charger LED Indicator installed) into the charging pocket, making sure the radio contacts are aligned with the MUC contacts. -
Page 26: Charging The Bluetooth Headset
Charging the Bluetooth Headset • Plug the other end of the cloning cable to the USB port of the Bluetooth headset for charging Refer to your Bluetooth headset leaflet for charging Note: Refer to the charging status light on your Bluetooth instruction. -
Page 27: Checking Battery Status
Checking Battery Status After the Smart Status Glow and Voice Assisted Operation features (*) indicate the BATTERY When powered on, short press and release the STATUS, it returns to the current channel color. Power/Battery button, the Smart Status Glow and Voice Assisted Operation features (* ) gives you Note: (*) May not be available on certain previous... -
Page 28: Batteries And Chargers Safety
Disassembly of the charger may Use of accessories not recommended by result in risk of electrical shock or fire. Motorola may result in risk of fire, electric To reduce risk of electric shock, unplug the shock, or injury. charger from the AC outlet before attempting... -
Page 29: Operational Safety Guidelines
OPERATIONAL SAFETY GUIDELINES • Turn the radio OFF when charging battery. • The charger is not suitable for outdoor use. Use only in dry locations/conditions. • Connect charger only to an appropriately fused and wired supply of the correct voltage (as specified on the product). -
Page 30: Programming The Radio Through
Programming the Radio PROGRAMMING THE To program the radio: RADIO THROUGH THE CPS Connect the radio via the Drop-in Charger Tray or the Charging Pocket with “PROG” label on RADIO PROGRAMMING OVERVIEW the Multi-Unit Charger and CPS Programming Cable. Downloading the (Customer Programming Software) CPS You can program or change features on your CLP radios by using the Computer Programming Software... -
Page 31: Factory Default Settings
(*) CPS Programming Cable (P/N HKKN4025) is an Channel Frequency Frequency Value width accessory sold separately. Please contact your Settings (Hz) (kHz) Motorola Point of Purchase for more information. Note: (*) Bluetooth is available on selected models only. 464.5500 67.0 12.5 467.9250 67.0 12.5 467.8500 67.0... - Page 32 CLP1060 1W UHF 6 CH Bluetooth Radios Default Settings - BRUS Code Band Channel Frequency Frequency Value width Settings (Hz) (kHz) 464.5500 67.0 12.5 467.9250 67.0 12.5 467.8500 67.0 12.5 467.8750 67.0 12.5 461.0625 67.0 12.5 461.1125 67.0 12.5...
-
Page 33: Radio Cloning
CLONING INSTRUCTIONS RADIO CLONING Cloning Radios using the CLP Series CLONING RADIO SETTINGS Cloning Cable Kit P/N HKKN4026 (optional accessory) You can copy the CLP Series radio settings from one radio (the source) to a second radio using the CLP Series Single Unit Charger (SUC) Kit P/N HKPN4008 and CLP Series Cloning Cable Kit P/N HKKN4026 (optional accessory) or CLP Series Multi-Unit Charger (MUC) Kit P/N HKPN4007... - Page 34 Plug one side of the cloning cable After cloning is completed, the “Source microconnector to one Single Unit Charger. Radio” sounds either a “pass” tone (cloning Plug the other end to the second Single Unit was successful) or a “fail” tone (cloning Charger.
- Page 35 What to do if cloning fails Note: This cloning cable is designed to operate only with compatible Motorola Drop-in Tray The radio emits an audible “bonk” indicating Single Unit Charger. When ordering the that the cloning process has failed. In the event...
-
Page 36: Cloning Radios Using The Clp Series Multi-Unit Charger (Muc) Kit P/N Hkpn4007 (Optional Accessory)
Cloning Radios using the CLP Series Multi- Turn the target radio ON and place it in the Unit Charger (MUC) Kit P/N HKPN4007 pairing charging pocket that has the “CLONE” label and start the cloning process. (optional accessory) Press the “Menu” button on the source radio to start the cloning process. -
Page 37: Advanced Radio Configuration (*)
ADVANCED RADIO Note: For Bluetooth models, make sure the wired accessory is connected or the Bluetooth CONFIGURATION (*) headset is paired before entering Advanced Radio Configuration Mode. (*) Enhancement feature on CLP radios. May not be available on previous shipping radios. Press the PTT, “+”... -
Page 38: Troubleshooting
TROUBLESHOOTING Symptom Try this No Power Recharge or replace Li-Ion battery. Extreme operating temperatures affect battery life. Refer to “About the Li-Ion Battery” Section on page 12. Hearing other noises or Confirm Interference Eliminator Code is set. conversation on a channel Frequency or Interference Eliminator Code may be in use. - Page 39 Symptom Try this Limited talk range Steel and/or concrete structures, heavy foliage, buildings or vehicles decrease range. Check for clear line of sight to improve transmission. Change location of radio. To increase range and coverage, you can either reduce obstructions or increase power. UHF radios provide greater coverage in industrial and commercial buildings.
- Page 40 Symptom Try this Heavy static or interference Radios are too close, they must be at least five feet apart. Radios are too far apart or obstacles are interfering with transmission. Low batteries Recharge or replace Li-Ion battery. Extreme operating temperatures affect battery life. Refer to “About the Li-Ion Battery”...
- Page 41 Symptom Try this Cannot activate VOX VOX feature might be OFF. Use the CPS to ensure that the VOX Sensitivity Level is not set to “0”. Accessory not working or not compatible. Battery doesn't charge although it Check drop-in charger is connected and correspond to a has been placed in the drop-in compatible power supply.
-
Page 42: Use And Care
USE AND CARE Use a soft damp cloth Do not immerse in water. Do not use alcohol or to clean the exterior. cleaning solutions. If the portable is submerged in water... Turn OFF and Dry with soft cloth. Do not use until remove batteries. -
Page 43: Radio Frequency And Code Charts
RADIO FREQUENCY AND CODE CHARTS These charts provide frequency information and are useful when using Motorola CLP Series Two- Way Radios with other business radios. Most of the frequency positions are the same as Spirit M, GT, S, XTN, RDX and CLS Series frequency positions (where applicable), the bandwidths are different. - Page 44 CLP UHF Frequencies Band Band Band Band Freq. Freq. Freq. Freq. Freq. Freq. Freq. Freq. width width width width (MHz) (MHz) (MHz) (MHz) (kHz) (kHz) (kHz) (kHz) 467.8375 12.5 462.5125 12.5 451.6375 12.5 468.2125 12.5 467.8625 12.5 467.1875 12.5 452.3125 12.5 468.2625 12.5...
- Page 45 CTCSS/DPL Interference Eliminator Codes CTCSS Code CTCSS/DPL Code Code Code Code Disabled 151.4 156.7 71.9 162.2 74.4 167.9 173.8 79.7 179.9 82.5 186.2 85.4 192.8 88.5 203.5 91.5 210.7 94.8 218.1 97.4 225.7 233.6 103.5 241.8 107.2 250.3 110.9 69.3 114.8 118.8 127.3...
- Page 46 CTCSS/DPL Interference Eliminator Codes (cont’d) Code Code Code Code Inverted DPL 55 Inverted DPL 80 Inverted DPL 104 Inverted DPL 56 Inverted DPL 81 Inverted DPL 105 Inverted DPL 57 Inverted DPL 82 Inverted DPL 106 Customized PL Inverted DPL 58 Inverted DPL 83 Inverted DPL 107 Customized PL...
-
Page 47: Motorola Limited Warranty For The United
This limited warranty is a consumer's exclusive Accessories that are ninety (90) days from the Repaired or date returned to the remedy, and applies as follows to new Motorola Replaced. consumer, whichever is Products, Accessories and Software purchased by longer. - Page 48 (c) use of the Products or Accessories for nonconforming or non-Motorola housings, or commercial purposes or subjecting the Product or parts, are excluded form coverage. Accessory to abnormal usage or conditions; or (d) other acts which are not the fault of Motorola, are excluded from coverage.
- Page 49 OTHER INFORMATION? requirements or will work in combination with any Contact your Motorola point of purchase. hardware or software applications provided by Please call: third parties, that the operation of the software...
- Page 50 You will receive instructions on how to ship the SOFTWARE COPYRIGHT NOTICE Products to Motorola. You must ship the Products The Motorola products described in this manual to us with freight, duties and insurance prepaid. may include copyrighted Motorola and third party...
- Page 51 PATENT NOTICE EXPORT LAW ASSURANCES This product is covered by one or more of the This product is controlled under the export following United States patents. regulations of the United States of America. The Governments of the United States of America may 5896277 5894292 5864752 5699006 5742484 restrict the exportation or re-exportation of this D408396 D399821 D387758 D389158 5894592...
-
Page 52: Accessories
BATTERIES ACCESSORIES Part No. Description AUDIO ACCESSORIES HKNN4013_ CLP Series High Capacity Li-Ion Battery Kit Part No. Description HKNN4014_ CLP Series Standard Li-Ion CLP Series Single Pin Battery Kit HKLN4435_ Adjustable Cord Earpiece HKLN4440_ CLP High Capacity Li-Ion CLP Series Single Pin Battery Door Kit HKLN4436_ Adjustable Inline PTT Earpiece... -
Page 53: Chargers
CLP Series Cloning Cable Kit Note: (*) Certain accessories may be or may not be available at the time of purchase. For latest information on accessories, contact your Motorola point of purchase or visit: www.motorolasolutions.com/CLP For product-related questions, contact: 1-800-448- 6686 in the USA... - Page 54 Notes...
- Page 56 Schaumburg, IL 60196 U.S.A. MOTOROLA, MOTO, MOTOROLA SOLUTIONS and the Stylized M logo are trademarks or registered trademarks of Motorola Trademark Holdings, LLC and are used under license. All other trademarks are the property of their respective owners. © 2010, 2011 Motorola Solutions, Inc.