Table of Contents
Advertisement
Quick Links
Advertisement
Table of Contents

Related Manuals for Acer MP200


Summary of Contents for Acer MP200
- Page 1 Acer MP200 User’s Manual Ver 1.0...
- Page 2 Copyright Copyright 2006 by Acer Inc., All rights reserved. No part of this publication may be reproduced, transmitted, transcribed, stored in a retrieval system, or translated into any language or computer language, in any form or by any means, electronic, mechanical,...
-
Page 3: Table Of Contents
I Safety Instruction.................... 2 II Product Introduction ..................2 1 Major Features ..................2 2 Quick Tour of Acer MP200 ..............3 3 Pack and Accessories ................3 4 Charging the Batteries................4 5 Installation of USB Drive ................. 4 6 Disk Directory Management .............. -
Page 4: I Safety Instruction
II Product Introduction Thank you for choosing Acer’s MP200, which has a chargeable Li-Polymer battery with high-quality disk. You can play your favorite audio or video file and enjoy the perfect listening and watching experience. It is also a portable USB storing device which enables you to store and manage your personal data. -
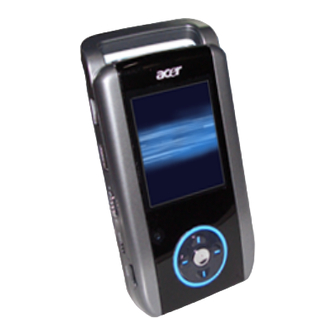
Page 5: Quick Tour Of Acer Mp200
Multiple languages – It supports multi-languages, such as English, German, French, Italian, Dutch, Spanish and. Firmware upgradation – The firmware can be upgraded. 2 Quick Tour of Acer MP200 3 Pack and Accessories Please be sure that the pack and accessories include the following pieces:... -
Page 6: Charging The Batteries
4 Charging the Batteries 1) This device has the built-in Li battery and the user can charge the battery by using the accessory charger. No matter turning on or off, the battery will be charging when the charger connects it to the live power. 2) If the battery indicator shows one grid or no grid, it means lacking the power and charging is needed. -
Page 7: Disk Directory Management
3) Choose “Disk drives” and the installed USB drive will display Attention: if it doesn’t show as upward, then please uninstall your USB drive and reinstall 6 Disk Directory Management 1) When the device is connected to the computer normally, a disk symbol will show in [windows explorer] and it includes 7 directories: [music], [Video], [photo], [text], [Recorder], [Filecopy]and[Config] Attention: The defaulted directories under the root directory such as [music], [Video],... -
Page 8: The Linkage And Safe Remove Of Usb Cable
III Functions 1 Basic Functions 1.1Turn on and off the player 1) Turn on: Press the Power Button for 3 seconds and the screen will show the Acer Logo (shown as PIC 1) and enter the main menu interface. - Page 9 PIC1 PIC2 2) Turn off: Press the same button for 3 seconds and the Logo will show again and later it will turn off automatically. (Shown in PIC 2) 3) Reset: if any unknown reason causes the player into dead status, the power button might be invalid.
-
Page 10: Play Music
1.4 Holding function PIC 5 1) Push up “Hold” button to the position shown in PIC 5 and any key-press to the player will be null. This is to avoid any unnecessary key-press. 2) Push down “Hold” button and now the keys are available. 2 Play Music 1) Main menu The defaulted mode is “Music”... - Page 11 Major functional keys: a) When music is playing, short press “ ”or“ ” to choose the previous or next song b) When music is playing, long push “ ”or“ ”realizes backward and forward within a song. c) When music is playing, short press “MODE” to main menu. d) When music is playing, short press “ESC”...
-
Page 12: Picture Reviewing
PIC 9 PIC 10 8) Sound effect: The player has built in 8 sound effect, namely Normal, Rock, Jazz, Classical, Pop, 3D sound, Bass and User EQ. Sound effect can be set under Mode Setup Music Equalizer. 9) Lyrics Synchronization If a *.MP3 file and a *.LRC file of the same music are copied into the player, the lyrics will show the same time when the music is playing. -
Page 13: Video Playing
PIC14 Rotate: Rotate the picture 90°clockwise Game: Set the current picture as the Puzzle game’s target. Desktop: Set the current picture as the desktop. Slide Show: View pictures in a slide show mode. Exit: Exit setup interface 4 Video Playing 1) Select “Video”... -
Page 14: Game
Pic18 Pic19 2) Press “ENTER” to start recording and press “ENTER” again to end it. 3) Press “ESC” to eject the “Save file” window and then go back to the recording interface, see PIC 19. Press “MODE” to return to the main menu. The recording files will be kept in Record file. -
Page 15: Files Operations
PIC22 PIC 23 PIC 24 2) Select the desired TXT file and press “ENTER” to the text reading interface, see PIC24. Press“ ”or“ ”to get to the previous page or the next one. 3) This player supports the concurrent working of two functions-listening to music and reading Ebook. -
Page 16: 10Setup
PIC26-2 3) Select UFD-1 and press “ENTER” to the directory system of the external storage device. Select the wanted folder or file, and then press “MODE”. The ejected interface will show as PIC 27 and any operation of copying or deleting can be taken. Long press ”ESC”... - Page 17 Equalizer: This setting obtains 8 sound effects, namely Normal, Rock, Jazz, Classical, Pop, 3D Sound, Bass, and User EQ. Press “ ”or“ ”to choose the desired sound effect and press “ENTER” for confirmation. 10.2 Recording Setup Four options will show up after entering the Recording Setup directory, namely “Record Mode”, “Rec Source”, “VAD”...
-
Page 18: Firmware Upgradation
11 Firmware Upgradation To download a new firmware to realize its upgradation can follow the steps as follows: 1) Visit the home page of Acer Corp (Http://www.acer-euro.com) and download the newest firmware. 2) Link the player to the computer with USB cable. -
Page 19: Video Formats Conversion Tool
5) Restart the player and it will finish the upgradation automatically. Attention: Make sure that there is sufficient power before upgradation. The product will suffer badly if power breaks in the process of upgradation. Therefore, be sure to maintain the persistent power supply by linking it with the Power Adaptor to a power outlet before the upgradation takes place. -
Page 20: Faq
IV Common Problems and Solutions The following part is some of the common problems in dealing with the product. Please check it first before contacting the Customer Service Center. 1. Q: The player cannot be started and LCD doesn’t show anything, why? A: Make sure that the battery is fully charged. -
Page 21: Specifications
V Specifications Category Parameter specification Built-in Storage 1’’ 4GB/6GB/8GBHard Disk System Copy and delete Single file or all files in Folder File Management FAT 32 File System Power , A-B , Lock ,Up, Down, Left, Right, ENTER, Key Definition Esc, Mode User interface English, German, French, Italian , Dutch, Spanish and... - Page 22 Supported File Types and Functions File Type Description Support ISO MPEG1/2/2.5 Layer3 including Variable Bit Rate (VBR), stereo. MP3 (*.MP3) sample rate up to 48KHz , Bit rate:8-320Kbps. Support WMA decoding. Audio WMA (*.WMA) sample Rate up to 44KHz , Bit rate :5-192Kbps,stereo Support ID3 V1 tag,ID3 V2 tag Support ACV.
- Page 23 http://www.acer-euro.com...