Yamaha TSX-20 Owner's Manual
Tabletop stereo system
Hide thumbs
Also See for TSX-20:
- Owner's manual (28 pages) ,
- Service manual (47 pages) ,
- Service manual (47 pages)

Related Manuals for Yamaha TSX-20


Summary of Contents for Yamaha TSX-20
- Page 1 TSX-10 TABLETOP STEREO SYSTEM SYSTEM HIFI TABLETOP TSX-1 5 TSX-20 OWNER’S MANUAL MODE D’EMPLOI BEDIENUNGSANLEITUNG BRUKSANVISNING MANUALE DI ISTRUZIONI MANUAL DE INSTRUCCIONES GEBRUIKSAANWIJZING...
- Page 2 SICHERHEITSVERRIEGELUNG UBERBRUCKT IST. aufgeführt sind, kann zu einem Kontakt mit NICHT DEM STRAHL AUSSETZEN. ATTENTION - RADIATION LASER VISIBLE ET/OU INVISIBLE LORSQUE L´ A PPAREIL EST OUVERT ET QUE LE VERROUILLAGE EST DESACTIVE. EVITEZ TOUTE EXPOSITION AU FAISCEAU. gefährlichen Laserstrahlen führen. OBSERVERA Användning av kontroller och justeringar eller...
-
Page 3: Introduction
TSX-15 and TSX-20. enjoyment. For the best performance, read this manual Please check the package number of your product and its carefully. It will guide you in operating your YAMAHA components by refering to the following table. -
Page 4: Table Of Contents
Set up this system by allowing spaces specified in the figure or more around and behind the main unit to assure good ventilation. To prevent the ventilation holes from being obstructed, be sure not to place another unit or any object on top of the main unit. -
Page 5: Precautions
The main unit is not disconnected from the AC power carefully. Keep it in a safe place for future reference. source as long as it is connected to the wall outlet, even To avoid humming sounds, position this system away if the unit itself is turned off. -
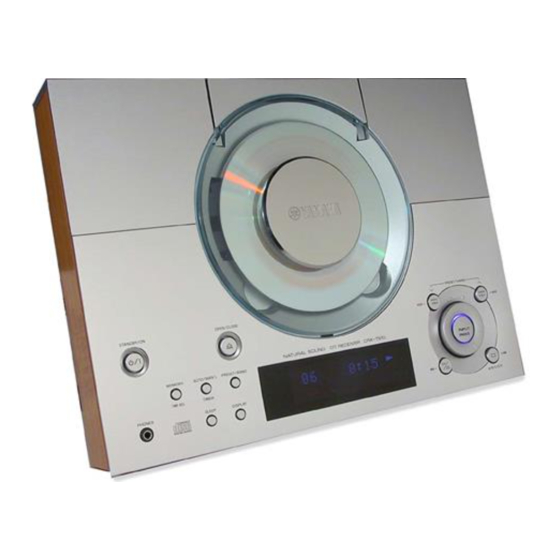
Page 6: Names Of Buttons And Controls
TIMER SLEEP MEMORY TUNED PTY HOLD RANDOM B. BOOST When CD is selected as an input source A/B/C/D/E A ^ (Play/Pause) (P.14) B VOLUME (P.13) 4 8 6 C INPUT/SNOOZE (P.8, 23) D A/B/C/D/E (P.18) When TUNER is selected as an input source &... -
Page 7: Remote Control
NAMES OF BUTTONS AND CONTROLS Remote control 1 STANDBY/ON (P.13) 2 SLEEP (P.23) 3 B. BOOST (Bass boost) (P.13) CRX -TS10/20 RDS V776930 SLEEP STANDBY/ON 4 BASS/TREBLE (P.13) 5 LEVEL +/– (P.13) B. BOOST 6 FREQ/RDS (P.19) BASS/TREBLE LEVEL 7 PTY SEEK MODE/START (P.20, 21) -
Page 8: Getting Started
Connect the speakers to the SPEAKERS terminals of the main unit by using the speaker cables. Make sure that the polarity of the speaker cables is correct, i.e. the + and – markings are observed. If these cables are reversed, the sound will be unnatural and lack bass. -
Page 9: Connecting Antennas
• Digital-to-digital recording is possible from a CD played on this system to an MD (or tape) on an external MD (or DAT) recorder by connecting the CD DIGITAL OUT (OPTICAL) terminal on the rear of the main unit to the MD (or DAT) recorder. -
Page 10: Installation
GETTING STARTED Installation You can install this system in various ways to fit neatly into your listening room (Except for the NX-TS20 speakers). I Mounting the system on the wall * The supplied paper pattern helps you to align the main unit with the speakers properly. - Page 11 GETTING STARTED I Standing the main unit and/or speakers on a surface You can stand the main unit and/or the speakers on a hard surface at an angle of 45 degrees or 70 degrees using the supplied stands. Peel off the seals of the non-slip pads and apply them * The standing angle can be selected as 45 or 70 to the bottom of the main unit and the stands.
-
Page 12: Cd Preventive Care
I Removing the front cover of the speakers The front cover is fastened to the enclosure at four points and can be removed if desired. To remove the cover, hold on to both sides and slowly pull straight away from the speaker. To reattach, line up the four holes on the inner surface of the cover with the four corresponding pegs on the speaker and push gently. -
Page 13: Remote Control
I Remote control operation range I Loading the battery for the remote control When the unit is hung on the wall, or installed with the stands, set the remote control sensor switch to the OTHER position. When using the unit installed horizontally, set the switch to the HRIZ position. -
Page 14: Setting The Clock
8 seconds. Then the normal display returns. Note • In the event of a power failure or when the AC power cord is disconnected for more than five minutes, “Set Clock” may appear on the display instead of the current time. In that case,... -
Page 15: Listening To A Source
Pressing the button again cancels this feature. VOLUME +/– When you use headphones Connect the headphones to the PHONES jack. You can listen to the sound to be output from the speakers through the headphones. When you have finished using this unit Press STANDBY/ON to set this unit to the standby mode. -
Page 16: Compact Disc Player Operations
PRESET backward. Press once for each track to be skipped. Notes INPUT • This operation can also be performed when the unit is in the ⁄ › INPUT pause or stop mode. • During stop mode, if ⁄ › or $ ! is pressed, the &... -
Page 17: Selecting The Time Display
• If ⁄ › is pressed during random-sequence play, the next randomly programmed track will be played. Total disc play time If $ ! is pressed, play will return to the beginning of the TOTAL current track. • The total remaining time on the disc will not be displayed during random-sequence play. -
Page 18: Repeat Play
COMPACT DISC PLAYER OPERATIONS Repeat play You can play any desired track or disc repeatedly. Press REP to select the repeat mode. SLEEP STANDBY/ON B. BOOST BASS/TREBLE LEVEL FREQ/RDS RTY SEEK MODE START TUNER PRESET ABCDE PRESET INPUT MUTE DISPLAY SINGLE REPEAT The current track is played repeatedly. -
Page 19: Tuner Operations
“TUNED” appears on the display. If the located station is not the one you want, repeat steps 4 and 5 until a station you want is tuned in. Notes • If automatic tuning search does not find the desired station, try manual tuning as described next. -
Page 20: Presetting Stations
Notes SLEEP STANDBY/ON • A new station can be preset in place of a previous one. • The preset stations are retained for a week after you disconnect B. BOOST the AC power cord or if a power failure occurs. -
Page 21: Receiving Rds Stations
Receiving RDS data The name of the RDS station being received is displayed. • If the unit cannot find a station with PS data, the unit stops RDS (Radio Data System) is a data transmission system searching and “NO PS” appears on the display. -
Page 22: Pty Seek Mode
RECEIVING RDS STATIONS To locate a station PTY SEEK mode Tune in an FM station. (Refer to page 17 and 18.) You can locate a desired station by selecting a program Press PTY SEEK MODE once so that “PTY” and a type. -
Page 23: Optional Settings For Rds Functions
RDS functions the time setting of that country. • If the built-in clock is not yet set for the current time or was reset due to a power failure, etc., it defs The tuner has the following functions which make use of will be set for the time of the CT data the RDS data service. -
Page 24: Using The Built-In Timer
“ON Time” appears on the display for a second, and then changes to the time setting mode. By using the built-in timer, you can have the unit turn on Press HOUR –/+ to set the hour. at a specified time and begin playing automatically. You Press MIN –/+ to set the minute. -
Page 25: Sleep Timer
TIMER so that “TIMER” goes off on the display. You SLEEP time. can also cancel by pressing TIMER in the standby mode. Note • In the event of a power failure or when the AC power cord is SLEEP STANDBY/ON disconnected for more than five minutes, “Set Clock” may SLEEP B. -
Page 26: Additional Information
Troubleshooting If the unit fails to operate normally, check the following points to determine whether the fault can be corrected by the simple measures suggested. If it cannot be corrected, or if the fault is not listed in the SYMPTOM column, disconnect the power cord and contact your authorized YAMAHA dealer or service center for help. - Page 27 The disc is damaged. Check the disc carefully; replace it if necessary. There is moisture on the laser pick-up. Wait 20 to 30 minutes after switching the unit ON before trying to play a disc. The disc has been loaded upside down.
-
Page 28: Specifications
• Laser output: max. 44.6 µW* AM loop antenna x 1 Speaker cable x 2 * This output is the value measured at a distance of about 200 mm Stand x 3 Mounting bracket x 1 from the objective lens surface on the Optical Pick-up Block.