
Related Manuals for Yamaha GW10


Summary of Contents for Yamaha GW10
- Page 1 OWNER’S MANUAL MODE D’EMPLOI BEDIENUNGSANLEITUNG GUITAR PERFORMANCE EFFECTOR VR57100 JEABR1CR13.2CP VR57110 JEABR1CR13.2CP...
- Page 2 This Product should be used only with the compo- nents supplied or; a cart, rack, or stand that is recommended by Yamaha. If a cart, etc., is used, please observe all safety markings and instruc- tions that accompany the accessory product.
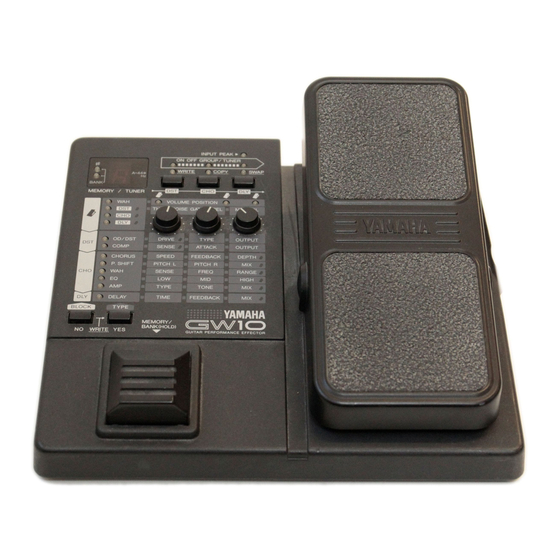
- Page 3 Congratulations and thank you for purchasing the Yamaha GW10 Guitar Performance Effector. The GW10 is a portable and conven- ient multi-effect device for guitar (as well as other instruments). The high-quality effect sound and the flexible pedal control over certain parameters make the GW10 ideal for signal processing in home recording, studio, and live performance applications.
-
Page 4: Table Of Contents
The Effect Structure of the GW10 ........ -
Page 5: How To Use This Manual (Read This First!!)
HOW TO USE THIS MANUAL (READ THIS FIRST!!) You are probably eager to try out your new GW10 right away and hear what it can do, rather than have to read through a lot of instructions before you can even get a sound out of it. -
Page 6: Precautions
Yamaha). Use of another adaptor may cause serious damage to the unit. Also make sure that the adaptor you have is appropriate for the AC mains supply voltage in the area where you intend to use the GW10. (The correct input voltage is marked on the adaptor.) The GW10 contains a special long-life lithium battery that retains the contents of the internal RAM memory even when the power is turned off. - Page 7 ELECTRICAL INTERFERENCE Since the GW10 contains digital circuitry, it may cause interference and noise if placed too close to TV sets, radios or similar equipment. If such a problem occurs, move the GW10 further away from the affected equip-...
-
Page 8: Panel Controls And Terminals
PANEL CONTROLS AND TERMINALS This section shows and explains all of the controls and terminals of the GW10. Since the explanations below are fairly brief, you should turn to the page references given for more information on individual buttons and features. Refer to this section also as necessary when using the GW10, when you need specific information on a certain control or terminal. - Page 9 q INPUT PEAK LED For monitoring of the input signal level. (This lights intermittently at optimum level; see page 14.) w MEMORY/TUNER Indicator Displays the program number. (See page 10.) During Tuner operation, this displays the name of the note or string played. (See page 41.) e BANK LEDs / Sharp (¶) LED Bank LEDs The two LEDs (green and red) indicate which of the four banks of...
- Page 10 u VOLUME POSITION Indicators i Effect Type Indicators o Parameter Dials !0 BLOCK / WRITE NO Button !1 TYPE / WRITE YES Button !2 MEMORY/BANK Pedal Switch !3 Foot Controller When the Foot Controller is used as a volume pedal, one of these lights to indicate the position of the volume pedal in the effect chain.
-
Page 11: Rear Panel
For stereo or mono output of the instrument sound. Connect both of these to the corresponding left and right channels of your stereo amplification system to take full advantage of the stereo effects of the GW10. For mono operation, connect your system only to the L/MONO jack; this provides a mono mix of the instrument sound when the R OUTPUT jack is not connected. -
Page 12: System Overview
This section provides a brief overview of the GW10 — the basic structure of its various functions and the memory system. Once you gain a general understand- ing of the internal workings of the GW10 as given here, you’ll have the tools for taking full advantage of its features. -
Page 13: The Effect Structure Of The Gw10
The Effect Structure of the GW10 Keep in mind as you use the GW10 that the structure of its effects is basically in a four-part hierarchy: 1) Effect programs, 2) Effect blocks, 3) Effect types, and 4) Effect parameters. An effect program is made up of three effect blocks and a Foot Controller block, all of which can be used simultaneously. -
Page 14: Memory Structure
Memory Structure The 20 effect programs of the GW10 are organized in four banks, each with five programs. To select an effect program: Bank 1 Bank 2 Program 5 Program 5 Program 4 Program 4 Program 3 Program 3 Program 2... - Page 15 When using the T(YES) button, the effect programs and banks are selected in order. After the last effect in a bank is selected, the GW10 advances to the first effect in the next bank, as shown here: TYPE BLOCK WRITE Bank 1 After reaching the last effect program, the GW10 “wraps around”...
-
Page 16: Guided Tour
Guided Tour SETTING UP AND PLAYING YOUR GW10 Once you’ve taken your GW10 out of the box and are ready to use it, you’ll have to make a few connections and follow some simple instructions on setting it up. Guided Tour First, make sure that the power switch on the GW10 is off before making ANY connections. - Page 17 (or mixing console). NOTE To set the INPUT LEVEL on the GW10 to the minimum, turn the control all the way counterclockwise. Two example connection systems are shown below. Use the one which most closely resembles your own system.
- Page 18 COPY Next, slowly bring the volume up with the Foot Controller on the GW10. Now that you’ve properly set the level on the GW10, slowly bring up the other volume controls to suitable levels — starting with the amp. If you’ve followed all these instructions carefully, you should now be able to hear your guitar sound processed by the effects of the GW10.
-
Page 19: The Effects Of The Gw10
THE EFFECTS OF THE GW10 The GW10 is equipped with a comprehensive set of effects designed specifically for the guitar player. You can switch these effects on and off as needed and adjust them quickly and easily from the panel controls. -
Page 20: Playing With The Preset Effects
PLAYING WITH THE PRESET EFFECTS Now that you’ve set up your GW10 and are ready to use it, let’s try playing with some of the preset effects. (If you haven’t already done so, read through the SYSTEM OVERVIEW section on pages 8–11 for information on the basic structure of the GW10 and how to select effect programs.) -
Page 21: Using The Foot Controller To Change The Sound
The Foot Controller is one of the most convenient and flexible features of the GW10. It not only allows you to control volume, but also lets you continuously change certain effect parameters as you play. The examples below should give you a taste of what the Foot Controller functions can do for your sound. -
Page 22: Turning Specific Effects On And Off
TURNING SPECIFIC EFFECTS ON AND OFF Since the sound of an effect preset is actually made up of three different effects, you can make distinct changes in the sound by turning individual effect blocks on and off. Guided Tour For this example, select bank 1, program number 2. This effect program has Distortion, Wah, and Delay. - Page 23 Depending on the preset selected, the Foot Controller turns different groups of effect blocks on and off. You can instantly check which effect blocks are enabled for this function by looking at the green ON OFF GROUP LEDs above the Effect Block buttons. For example, in bank 1, program number 2, the ON OFF GROUP LEDs above CHO and DLY are lit.
-
Page 24: Changing The Sound Of The Effects
CHANGING THE SOUND OF THE EFFECTS The GW10 makes it extremely easy to adjust or change the sound of the effects. As you saw in the section TURNING SPECIFIC EFFECTS ON AND OFF above, you can easily change the sound by turning the effect blocks on and off. - Page 25 Press the T button repeatedly to select an effect type. For this exam- ple, select Chorus. (The CHORUS LED will flash.) TYPE BLOCK WRITE Press repeatedly … You’ve now selected the Chorus effect for editing. Before making any other settings, make sure that the right parameter dial is turned to at least the halfway position or higher.
- Page 26 You can either copy the settings down on paper (using a copy of the Blank Effect Parameter Chart on page 48) or go on to the next section and save the settings to the GW10’s memory. Guided Tour Now, use the Effect Block buttons (D and L) to turn the Distortion and Delay effects back on.
-
Page 27: Saving An Effect Program
2) ...and press (YES) The program number in the MEMORY/TUNER indicator and the WRITE LED both flash to indicate that the GW10 is ready to write the settings to memory at the selected program number. NOTE All LEDs may temporarily go out while holding down the B (NO) button. -
Page 28: Reference
This section of the manual explains briefly, yet completely, all of the features and functions of the GW10. Refer to it when you need information about a specific feature or function. OPERATION To select one of the four banks, press and... -
Page 29: Using The Foot Controller To Turn Effect Blocks On And Off
Using the Foot Controller to Turn Effect Blocks On and Off The Foot Controller can be used to instantly turn pre-assigned effect blocks on and off. The green ON OFF GROUP LEDs above the Effect Block buttons indicate which effect blocks are assigned for this. -
Page 30: Editing Effect Parameters
The effect programs of the GW10 can be easily “tweaked” or edited with the convenient parameter dials. OPERATION First, turn off all effect blocks (using the Effect Block buttons; see page 24), except for the one you wish to edit. -
Page 31: Effects And Parameters
This section briefly explains each of the effect types and their parameters. For information on how to select effects and edit them, see the sections SELECTING EFFECT PROGRAMS (page 24), CHANGING THE EFFECT TYPE (page 25) and EDITING EFFECT PARAMETERS (page 26). OD / DST DRIVE TYPE... -
Page 32: Chorus Block
HINT — ABOUT THE OUTPUT LEVEL the Output parameter of the Distortion block determines the loudness of the overall sound, the Distortion block is placed first in the effect chain (except when the Wah effect is used; see illustration in the SYSTEM OVERVIEW section on page 8). -
Page 33: Wah
Pitch Shift output (only the original sound is heard). The midpoint setting corresponds to 50%, or an equal mix of the original direct sound and the Pitch Shift output. The maximum setting corresponds to 100%, or no original sound output (only the Pitch Shift sounds are heard). -
Page 34: Equalizer (Eq)
Equalizer (EQ) The Equalizer effect provides fine tone control over the sound with a three-band equalizer. Determines the amount of boost or cut applied to the low frequencies. The 12:00 position corre- sponds to flat response or no equalization. Determines the amount of boost or cut applied to the midrange frequencies. -
Page 35: Delay Block
Delay can also be used for special applications, such as creating rhythmic repeats in the sound. The Delay effect of the GW10 also has a special Doubling feature, which adds two slightly delayed repeats to the original signal, and outputs them separately in the left and right outputs (as shown in the Delay Parameters illustration at right). -
Page 36: Noise Gate
Noise Gate is a separate effect that is placed between the Distortion block and the other two blocks, and is used to eliminate any noise or hum in the signal when the instrument isn’t being played. All signals below the Threshold point are filtered out, thus cutting off the noise. -
Page 37: Foot Controller Operations
FOOT CONTROLLER OPERATIONS The Foot Controller of the GW10 can be used as a volume pedal or as a realtime controller for specific effect parameters. Moreover, when used as a volume pedal, it can be placed in one of three positions in the effect chain, and be given a minimum volume setting other than zero (for when you need to easily change between two different volume settings). -
Page 38: Parameter Control
The Foot Controller can be used to continuously change an effect parameter in realtime, as you play. One of nine different parameters can be selected: Wah Filter Sweep, Distortion Drive, Compressor Sense, Chorus Depth, Pitch Shift Mix Balance, Wah Range, Equalizer High Gain, Amp Simulator Mix Balance, or Delay Mix. -
Page 39: Effect Block On/Off Control
To disable both the mechanical spring and the effect block on/off control: Turn the power off. Turn the GW10 upside down, and use a Phillips screwdriver to take out the large screw on the back plate. With the screw out or sufficiently loosened, use a slotted screwdriver to pry out the plastic screw cap. - Page 40 Replace the screw cap and large screw. Finally, set the GW10 to Full Range mode to disable effect block on/off switching. To do this, turn on the power while simul- taneously holding down both the B(NO) and T(YES) buttons. BLOCK...
-
Page 41: Saving An Effect Program (Write Operation)
Once you’ve edited an effect program to your satisfaction, you should save the settings to a program number, so that you can recall your new effect program in the future. OPERATION After making the desired parameter settings, simultaneously hold down the B(NO) button and press T(YES). -
Page 42: Copy And Swap Operations
Copy and Swap. These operations let you organize the effect pro- grams of the GW10 and put them in any order you wish, so that you can call up the right effect programs easily in succession onstage or in the studio. -
Page 43: Swapping One Effect Program With Another
Swapping One Effect Program with Another The Swap operation simply exchanges two selected programs, swapping the data of one program number for that of the other. Before swapping: BANK # 1 BANK # 1 PROGRAM # 1 PROGRAM # 2 After swapping: BANK # 1 BANK # 1... -
Page 44: Restoring Factory Preset Effect Programs
If you’ve erased one or more of the factory preset effect programs by replacing it with one of your own creation, you can use this function to restore the original preset or presets. OPERATION Simultaneously hold down the M Pedal Switch and turn the power on. -
Page 45: Tuner
The Tuner function allows you to quickly and accurately tune your guitar without having to disconnect it from the GW10. It also temporarily cuts off the sound, so that you can tune it silently and inconspicuously during a performance. Tuning the Pitch of the Connected Instrument... -
Page 46: Appendices
Delay blocks are set to appropriate levels. • The guitar level is too loud (the INPUT PEAK LED is lit continu- ously). Set the input level of the GW10 and the output level of the guitar appropriately. (See pages 13, 14). - Page 47 PROBLEM POSSIBLE CAUSE AND SOLUTION The effect sound doesn’t • Make sure that the effect in question is enabled. change, even when the • This may happen when the Foot Controller is used for parameter parameter dials are adjusted. The Foot Controller •...
-
Page 48: Preset Effect Program/Parameter List
PRESET EFFECT PROGRAM/PARAMETER LIST This list shows the preset effect programs of the GW10 and their settings, along with a short description of each program. The Chart Key below indicates how the chart is to be read. BLOCK TYPE PARAMETER SETTINGS : Versatile, all-purpose Distortion with good response to picking techniques. - Page 49 No. 2 - 1 : British rock sound, with a powerful lower end. D S T C H O OD/DST TYPE HIGH DRIVE OUTPUT (DST-H) : Progressive rock sound updated for the 90’s. For best results, set the Foot Controller to roughly the midway position.
- Page 50 No. 3 - 1 : Hard-edged Distortion, ideal for screaming solos. D S T OD/DST TYPE DRIVE OUTPUT (DST-H) : This program has a fat Distortion sound, and lets you change the character of the Chorus with the Foot Controller. No.
- Page 51 No. 4 - 1 : This program adds a second pitch one octave below, creating a thick, fat sound. D S T C H O OD/DST P. SHIFT TYPE PITCH L PITCH R DRIVE OUTPUT (–OCT.) (DETUNE) (DST-H) No. 4 - 2 : Crunch distortion sound that responds well to various picking techniques.
-
Page 52: Blank Effect Parameter Chart
BANK No. MEMORY No. : ON Foot Controller Setting : MEMO : ON OFF GROUP / TUNER WRITE COPY A=44 BANK MEMORY TUNER VOLUME POSITION NOISE GATE OD / DST COMP CHORUS P . SHIFT TIME FEEDBACK DELAY TYPE BLOCK BANK No. -
Page 53: Specifications
L/MONO, R jacks Other Controls, Fittings POWER switch, DC IN jack, AC adaptor cable clip Power Supply YAMAHA PA-3 AC adaptor (or another YAMAHA-recommended adaptor) Dimensions (W x D x H) 229mm x 213mm x 69mm (9” x 8-3/8” x 2-3/4”) Weight 2.0 kg (4 lbs., 7 oz.) -
Page 54: Index
Amp Simulator ......30 Attack ........27 BANK LEDs . - Page 55 If you can not locate the appropriate retailer, please contact Yamaha Corporation of America, Electronic Service Division, 6600 Orangethorpe Ave, Buena Park, CA 90620 * The above statements apply ONLY to those products distributed by Yamaha Corporation of America or its subsidiaries. CANADA THIS DIGITAL APPARATUS DOES NOT EXCEED THE “CLASS B”...
- Page 56 Name des lmporteurs. • This applies only to products distributed by Yamaha Europa GmbH. • Dies bezieht sich nur auf die von der Yamaha Europa GmbH Vertriebenen Produkte. • Ceci ne s’applique qu’aux produits distribués par Yamaha Europa GmbH. • Esto se aplica solamente a productos distoribuidos por Yamaha Europa GmbH.
- Page 57 For details of products, please contact your nearest Yamaha or the author- ized distributor listed below. Pour plus de détails sur les produits, veuillez-vous adresser à Yamaha ou au distributeur le plus proche de vous figurant dans la liste suivante.