Miele M 6160 TC Manual
Hide thumbs
Also See for M 6160 TC:
- Operating instructions manual (64 pages) ,
- Installation instructions manual (8 pages) ,
- Operating and installation instructions (64 pages)

Related Manuals for Miele M 6160 TC


Summary of Contents for Miele M 6160 TC
- Page 1 Descriptive Technical Documentation - Model-dependent - DTD no. 24-6160 Model(s): M 6160 TC, M 6260 TC, M 6262 TC 01.10.2014, US_am This information should not be duplicated or passed on without Miele approval. All rights reserved.
-
Page 2: Table Of Contents
Control Electronic (N1) Removal......001-35 01.10.2014, US_am This information should not be duplicated or passed on without Miele approval. All rights reserved. - Page 3 Magnetron (G2) Earth Leakage Test ..... . 001-58 This information should not be duplicated or passed on without Miele approval. All rights reserved. 01.10.2014, US_am...
- Page 4 There may be a risk of injury due to sharp edges. Protective gloves should be worn and the edge protection, mat. no. 05057680, should be used. 01.10.2014, US_am This information should not be duplicated or passed on without Miele approval. All rights reserved.
- Page 5 When the microwave oven is connected to power, the following components have potentially lethal voltage applied to them: High-voltage transformer (T1) High-voltage capacitor (A4) Diode (V1) Magnetron (G2) This information should not be duplicated or passed on without Miele approval. All rights reserved. 01.10.2014, US_am...
- Page 6 Using the same insulated-handled screwdriver, touch the blade from each terminal on the capacitor to the frame (ground) of the appliance. 01.10.2014, US_am This information should not be duplicated or passed on without Miele approval. All rights reserved.
- Page 7 5cm (2 inches) from the oven with a water load of 275cm ±15cm (0.073 gallons ± 0.004 gallons). This information should not be duplicated or passed on without Miele approval. All rights reserved. 01.10.2014, US_am...
- Page 8 Note Touch current measurement should be carried out on the following accessible conductive parts: Stainless-steel door. 01.10.2014, US_am This information should not be duplicated or passed on without Miele approval. All rights reserved.
- Page 9 Version 5 02.12.2013 Martina Aßmann, Version 4 Sabine Hötte 16.10.2013 Sabine Hötte Version 3 12.06.2013 Sabine Hötte Version 2 15.05.2013 Sabine Hötte Version 1 01.10.2014, US_am This information should not be duplicated or passed on without Miele approval. All rights reserved.
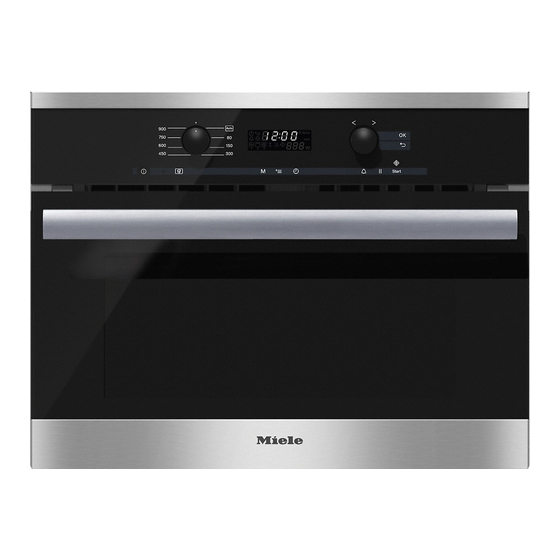
- Page 10 Descriptive Technical Documentation DTD no. 24-6160 Technical Data Fig. 1: M 6160 TC 01.10.2014, US_am This information should not be duplicated or passed on without Miele approval. All rights reserved.
- Page 11 Freestanding microwave oven Built-in microwave oven Design PureLine ContourLine SideControl TopControl Display EasyControl Fascia panel with symbols Retractable knobs Convenience features Electronically controlled microwave power This information should not be duplicated or passed on without Miele approval. All rights reserved. 01.10.2014, US_am...
- Page 12 Safety lock / "Door" in display Technical data Niche dimensions Width 22.0 - 22.4 22.0 - 22.4 Height 17.6 - 17.8 17.6 - 17.8 Depth 19.7 19.7 01.10.2014, US_am This information should not be duplicated or passed on without Miele approval. All rights reserved.
- Page 13 257°F 257°F Fine-wire fuse (F8) Fuse rating Dimensions ( x L) 0.2 x 0.8 0.2 x 0.8 Table 2: Technical Data - Components This information should not be duplicated or passed on without Miele approval. All rights reserved. 01.10.2014, US_am...
- Page 14 The illustration shows 3 door switches on the right side. This is for European models. US models have 4 door switches, 2 per side. Turntable motor (M22) Selector switch Cavity light (H3/2) 01.10.2014, US_am This information should not be duplicated or passed on without Miele approval. All rights reserved.
- Page 15 Descriptive Technical Documentation DTD no. 24-6160 Selector switch Selection electronic Control electronic (N1) Magnetron (G2) Magnetron temperature limiter, 257°F (F1/2) This information should not be duplicated or passed on without Miele approval. All rights reserved. 01.10.2014, US_am...
- Page 16 Transformer (T1), top left door switch, interference suppression board (Z1) Broil element (not US models) Cavity light (H3/2) Cavity temperature limiter (F1/1) 01.10.2014, US_am This information should not be duplicated or passed on without Miele approval. All rights reserved.
-
Page 17: 001 Overview
The door warning can be deactivated in the programming mode; see Programming Mode, 001 4.2. 01.10.2014, US_am This information should not be duplicated or passed on without Miele approval. All rights reserved. -
Page 18: Fault Repair
Cooking power level too high. Remedy A Reduce the power level. Cause Food being cooked not covered. Remedy A Cover the food being cooked. This information should not be duplicated or passed on without Miele approval. All rights reserved. 01.10.2014, US_am... -
Page 19: Rust Stains In Stainless-Steel Cavity
A Advise the customer that the gourmet plate should not be used on the rack but should be placed directly on the turntable. Cause The gourmet plate has less than 1 gap to the cavity walls. 01.10.2014, US_am This information should not be duplicated or passed on without Miele approval. All rights reserved. -
Page 20: Time Not Displayed And Appliance Is Switched Off
The service mode can only be accessed if the time-of-day display including operational readiness state is switched off. Remedy A Switch off the time-of-day display including operational readiness state; see Programming Mode, 001 4.2. This information should not be duplicated or passed on without Miele approval. All rights reserved. 01.10.2014, US_am... -
Page 21: Operation Not Possible
15 minutes. Remedy A None. Note Explain this safety feature to the customer, if appropriate. 01.10.2014, US_am This information should not be duplicated or passed on without Miele approval. All rights reserved. -
Page 22: Door Is Displayed
3 seconds followed by the set function. The cavity light and turntable function normally. Cause The demonstration mode has been activated. Remedy A Deactivate the demonstration mode; see Programming Mode, 001 4.2. This information should not be duplicated or passed on without Miele approval. All rights reserved. 01.10.2014, US_am... -
Page 23: Display Remains Blank
The door does not close correctly. The top door safety switch has not been activated. Remedy A Adjust the door; see Door Adjustment, 001 4.7. 01.10.2014, US_am This information should not be duplicated or passed on without Miele approval. All rights reserved. -
Page 24: Service
The display shows the time and A Deactivate the system lock as follows: A Press and hold the OK touchpad until an audible signal sounds and switched off. This information should not be duplicated or passed on without Miele approval. All rights reserved. 01.10.2014, US_am... -
Page 25: Programming Mode
The display shows S and the current setting. A Turn the right switch knob until the desired setting is indicated in the display. 01.10.2014, US_am This information should not be duplicated or passed on without Miele approval. All rights reserved. - Page 26 P2 above. Weight Food weight is displayed in grams units [g]. setting Food weight is displayed in pounds/ounces [lb/oz]. This information should not be duplicated or passed on without Miele approval. All rights reserved. 01.10.2014, US_am...
- Page 27 Standard settings have not been modified or have been reset. Table 1: Programming Mode Back (without saving) A Press the touchpad. 01.10.2014, US_am This information should not be duplicated or passed on without Miele approval. All rights reserved.
-
Page 28: Service Mode
A Turn the right switch knob until the desired service function is displayed. A Press the OK touchpad. The display shows S and the current activation state. This information should not be duplicated or passed on without Miele approval. All rights reserved. 01.10.2014, US_am... - Page 29 Quit (without saving) A Press the touchpad. The display shows the time of day again. A Press the touchpad. The machine is switched off. 01.10.2014, US_am This information should not be duplicated or passed on without Miele approval. All rights reserved.
-
Page 30: Removing The Microwave Oven From A Housing Unit
A Remove the 2 retaining screws, 001 Fig. 1. A Slide out the appliance from its housing unit. A Disconnect the appliance from power. This information should not be duplicated or passed on without Miele approval. All rights reserved. 01.10.2014, US_am... -
Page 31: Cover Removal
(flat end) are located in the correct positions, 001 Fig. 2, Pos. 1. The four shorter screws secure the air duct and the two longer ones secure the fascia panel. 01.10.2014, US_am This information should not be duplicated or passed on without Miele approval. All rights reserved. - Page 32 5cm (2 inches) from the oven with a water load of 275cm ±15cm (0.073 gallons ± 0.004 gallons). This information should not be duplicated or passed on without Miele approval. All rights reserved. 01.10.2014, US_am...
-
Page 33: Door Removal And Installation
A Remove the door with hinges. Fig. 3: Hinge Screws A Install the new door. A Loosely install the hinge screws. A Door Adjustment, 001 4.7. 01.10.2014, US_am This information should not be duplicated or passed on without Miele approval. All rights reserved. -
Page 34: Door Adjustment
A Loosen the 6 T20 screws securing the hinges; see 001 Fig. 4, Pos. 1. Do not remove them! A Open the door and install 3 blue magnetic strips on the door frame; see 001 Fig. 5, Pos. 1. This information should not be duplicated or passed on without Miele approval. All rights reserved. 01.10.2014, US_am... - Page 35 A Open the door and remove the magnetic strips. A Remove the screw securing the right service cover; see 001 Fig. 6, Pos. 1. A Remove the right service cover. 01.10.2014, US_am This information should not be duplicated or passed on without Miele approval. All rights reserved.
- Page 36 A Close the door so that all safety switches are activated and tighten the screw. A Reinstall the service cover and repeat for the left side. This information should not be duplicated or passed on without Miele approval. All rights reserved. 01.10.2014, US_am...
-
Page 37: Handle Replacement
A Use a lid opener to lever out the cover frame (001 Fig. 8, Pos. 2) with the door seal (001 Fig. 8, Pos. 1). 01.10.2014, US_am This information should not be duplicated or passed on without Miele approval. All rights reserved. - Page 38 Door Adjustment, 001 4.7. A Remove the 6 screws securing the door frame; see 001 Fig. 9, Pos. 1. A Remove the door frame. This information should not be duplicated or passed on without Miele approval. All rights reserved. 01.10.2014, US_am...
- Page 39 Fig. 9: Door Frame Screws A Remove the 2 T20 screws securing the door handle; see 001 Fig. 10, Pos. 1. A Remove the handle. 01.10.2014, US_am This information should not be duplicated or passed on without Miele approval. All rights reserved.
- Page 40 A Hold the cover frame with door seal at an angle. Starting at the cavity side, install it and press it into position; see 001 Fig. 11. A Smooth the door seal flat with a finger. This information should not be duplicated or passed on without Miele approval. All rights reserved. 01.10.2014, US_am...
- Page 41 5cm (2 inches) from the oven with a water load of 275cm ±15cm (0.073 gallons ± 0.004 gallons). 01.10.2014, US_am This information should not be duplicated or passed on without Miele approval. All rights reserved.
- Page 42 A Tip the microwave oven on its back. A Remove the 3 screws securing the motor cover plate; see 001 Fig. 12, Pos. 1. A Remove the cover plate. This information should not be duplicated or passed on without Miele approval. All rights reserved. 01.10.2014, US_am...
- Page 43 A Remove the 2 screws T20 screws (and washers, if applicable) securing the turntable motor; see 001 Fig. 13, Pos. 1. A Remove the motor. A Disconnect the wiring harness; see arrow, 001 Fig. 13. 01.10.2014, US_am This information should not be duplicated or passed on without Miele approval. All rights reserved.
- Page 44 5cm (2 inches) from the oven with a water load of 275cm ±15cm (0.073 gallons ± 0.004 gallons). This information should not be duplicated or passed on without Miele approval. All rights reserved. 01.10.2014, US_am...
- Page 45 2 T20 screws with thread for plastic (flat end) A Open the door. A Remove the fascia panel. A Release and disconnect the connection plugs; see 001 Fig. 15. 01.10.2014, US_am This information should not be duplicated or passed on without Miele approval. All rights reserved.
- Page 46 5cm (2 inches) from the oven with a water load of 275cm ±15cm (0.073 gallons ± 0.004 gallons). This information should not be duplicated or passed on without Miele approval. All rights reserved. 01.10.2014, US_am...
- Page 47 Fig. 16: Selection Electronic Screws A Lift the holder up and disconnect the ribbon cable, 001 Fig. 17. A Remove the selection electronic from the fascia panel. 01.10.2014, US_am This information should not be duplicated or passed on without Miele approval. All rights reserved.
- Page 48 (0.073 gallons ± 0.004 gallons). Note When installing: Slide the ribbon cable fully into the holder so that it cannot be trapped between the fascia and casing. This information should not be duplicated or passed on without Miele approval. All rights reserved. 01.10.2014, US_am...
- Page 49 5cm (2 inches) from the oven with a water load of 275cm ±15cm (0.073 gallons ± 0.004 gallons). 01.10.2014, US_am This information should not be duplicated or passed on without Miele approval. All rights reserved.
- Page 50 A Remove the knob holder from the fascia panel and take off the two plastic locking pieces. A Push the knob out through the back of the holder. Fig. 19 This information should not be duplicated or passed on without Miele approval. All rights reserved. 01.10.2014, US_am...
- Page 51 A Disconnect all connections from the control electronic. A Remove the 2 T10 screws securing the control electronic to the electronics mounting bracket; see 001 Fig. 20, Pos. 1. 01.10.2014, US_am This information should not be duplicated or passed on without Miele approval. All rights reserved.
- Page 52 5cm (2 inches) from the oven with a water load of 275cm ±15cm (0.073 gallons ± 0.004 gallons). This information should not be duplicated or passed on without Miele approval. All rights reserved. 01.10.2014, US_am...
-
Page 53: Power Electronic Removal
For safety reasons, it is important to ensure that the high-voltage capacitor is discharged by always short-circuiting it before starting any maintenance or repair work. See . 01.10.2014, US_am This information should not be duplicated or passed on without Miele approval. All rights reserved. - Page 54 5cm (2 inches) from the oven with a water load of 275cm ±15cm (0.073 gallons ± 0.004 gallons). This information should not be duplicated or passed on without Miele approval. All rights reserved. 01.10.2014, US_am...
-
Page 55: Door Safety Switch (F6/6) Removal
To ensure that no microwave energy can escape, the door must always be carefully adjusted after reinstalling the door lock, safety switches and/or hinges; see Door Adjustment, 001 4.7. 01.10.2014, US_am This information should not be duplicated or passed on without Miele approval. All rights reserved. -
Page 56: Interference Suppression Filter (Z1) Removal
Fig. 24, Pos. 2. A Remove the T20 screw securing the interference suppression filter; see 001 Fig. 24, Pos. 1. A Remove the interference suppression filter. This information should not be duplicated or passed on without Miele approval. All rights reserved. 01.10.2014, US_am... -
Page 57: Fine-Wire Fuse (F8) Removal
A Remove the 13 screws securing the air duct; see 001 Fig. 23. A Remove the air duct. A Remove the fine-wire fuse from the interference suppression filter; see 001 Fig. 25, Pos. 1. 01.10.2014, US_am This information should not be duplicated or passed on without Miele approval. All rights reserved. -
Page 58: Cooling Fan (M2) Removal
See . A Remove the 7 screws securing the 3 mounting brackets; see 001 Fig. 26, Pos. 1. A Remove the 3 mounting brackets. This information should not be duplicated or passed on without Miele approval. All rights reserved. 01.10.2014, US_am... - Page 59 A Disconnect all connections from the cooling fan; see 001 Fig. 27, Pos. 1. A Remove the 6 T20 screws securing the cooling fan; see 001 Fig. 27, Pos. 2. A Remove the cooling fan. 01.10.2014, US_am This information should not be duplicated or passed on without Miele approval. All rights reserved.
- Page 60 5cm (2 inches) from the oven with a water load of 275cm ±15cm (0.073 gallons ± 0.004 gallons). This information should not be duplicated or passed on without Miele approval. All rights reserved. 01.10.2014, US_am...
-
Page 61: High-Voltage Capacitor (A4) Removal
5cm (2 inches) from the oven with a water load of 275cm ±15cm (0.073 gallons ± 0.004 gallons). 01.10.2014, US_am This information should not be duplicated or passed on without Miele approval. All rights reserved. -
Page 62: Magnetron (G2) Removal
5cm (2 inches) from the oven with a water load of 275cm ±15cm (0.073 gallons ± 0.004 gallons). This information should not be duplicated or passed on without Miele approval. All rights reserved. 01.10.2014, US_am... -
Page 63: Transformer (T1) Removal
5cm (2 inches) from the oven with a water load of 275cm ±15cm (0.073 gallons ± 0.004 gallons). 01.10.2014, US_am This information should not be duplicated or passed on without Miele approval. All rights reserved. -
Page 64: Cavity Temperature Limiter (F1/1) Removal
A Remove the T10 screw securing the temperature limiter; see 001 Fig. 31, Pos. A Remove the temperature limiter. Fig. 31: Cavity Temperature Limiter This information should not be duplicated or passed on without Miele approval. All rights reserved. 01.10.2014, US_am... -
Page 65: Magnetron Temperature Limiter (F1/2) Removal
A Remove the T10 screw securing the temperature limiter; see 001 Fig. 32, Pos. A Remove the temperature limiter. Fig. 32: Magnetron Temperature Limiter 01.10.2014, US_am This information should not be duplicated or passed on without Miele approval. All rights reserved. -
Page 66: Lighting Assembly Removal
A Release the retaining tab securing the top of the lighting assembly. Remove the assembly from its mounting bracket and disconnect its 2-pin wiring harness at the connector. This information should not be duplicated or passed on without Miele approval. All rights reserved. 01.10.2014, US_am... -
Page 67: Microwave Power Test
A Use an ohmmeter (in accordance with IEC 61010-1) to measure the resistance between the two transformer terminals. A The measured resistance must be approx. 2 . 01.10.2014, US_am This information should not be duplicated or passed on without Miele approval. All rights reserved. -
Page 68: Transformer (T1) High-Voltage Secondary Winding Test
5cm (2 inches) from the oven with a water load of 275cm ±15cm (0.073 gallons ± 0.004 gallons). This information should not be duplicated or passed on without Miele approval. All rights reserved. 01.10.2014, US_am... -
Page 69: Transformer (T1) Low-Voltage Secondary Winding
5cm (2 inches) from the oven with a water load of 275cm ±15cm (0.073 gallons ± 0.004 gallons). 01.10.2014, US_am This information should not be duplicated or passed on without Miele approval. All rights reserved. -
Page 70: High-Voltage Capacitor (A4) Functional Test
5cm (2 inches) from the oven with a water load of 275cm ±15cm (0.073 gallons ± 0.004 gallons). This information should not be duplicated or passed on without Miele approval. All rights reserved. 01.10.2014, US_am... -
Page 71: High-Voltage Capacitor (A4) Earth Leakage Test
5cm (2 inches) from the oven with a water load of 275cm ±15cm (0.073 gallons ± 0.004 gallons). 01.10.2014, US_am This information should not be duplicated or passed on without Miele approval. All rights reserved. -
Page 72: Diode (V1) Test
5cm (2 inches) from the oven with a water load of 275cm ±15cm (0.073 gallons ± 0.004 gallons). This information should not be duplicated or passed on without Miele approval. All rights reserved. 01.10.2014, US_am... -
Page 73: Protective Diode (V6) Test
(heater filament). The ohmmeter must be able to measure in the m range. A The measured resistance must be < 1 . 01.10.2014, US_am This information should not be duplicated or passed on without Miele approval. All rights reserved. -
Page 74: Magnetron (G2) Earth Leakage Test
5cm (2 inches) from the oven with a water load of 275cm ±15cm (0.073 gallons ± 0.004 gallons). This information should not be duplicated or passed on without Miele approval. All rights reserved. 01.10.2014, US_am...