Table of Contents
Advertisement
Quick Links
Advertisement
Table of Contents

Related Manuals for Electrolux EWT7078K6WA


Summary of Contents for Electrolux EWT7078K6WA
- Page 1 54mm CTA标贴...
- Page 2 Products must be used, installed and operated in accordance with this manual. You may not be able to claim on the Electrolux manufacturer’s warranty in the event that your product fault is due to failure to adhere to this manual.
-
Page 3: Table Of Contents
CONTENT S 6. CARE AND CLEANING....20 SAFETY INFORMATION ..4 6.1 Cleaning The Dispenser ..20 1.1 Conditions Of Use...... 4 6.2 Cleaning The Drawer Recess...20 1.2 Child Safety....... 4 6.3 Clean The Inner Tub Filter..20 1.3 General Safety......5 6.4 Cleaning The Water Inlet Filter.20 1.4 Installation......... -
Page 4: Safety Information
SAFETY INFORMATION 1.1 Conditions Of Use This appliance is intended to be used in household and similar applications such as: ● staff kitchen areas in shops, offices and other working environtment; ● farm houses; ● by clients in hotels, motels, and other residential type environments;... -
Page 5: General Safety
1.3 General Safety 1.4 Installation Any objects such as coins, safety pins, When unpacking the appliance, check nails, screws, hairpin, toothpick, stones that it is not damaged. If in doubt, do or any other hard, sharp material can not use it and contact the Service cause extensive damage and must not Centre. -
Page 6: Use
1.5 Use This appliance is designed for domestic Never use the Top-load Washing use. It must not be used for purposes Machine if the power supply cable, the other than those for which it was control panel, the working surface or designed. -
Page 7: Product Description
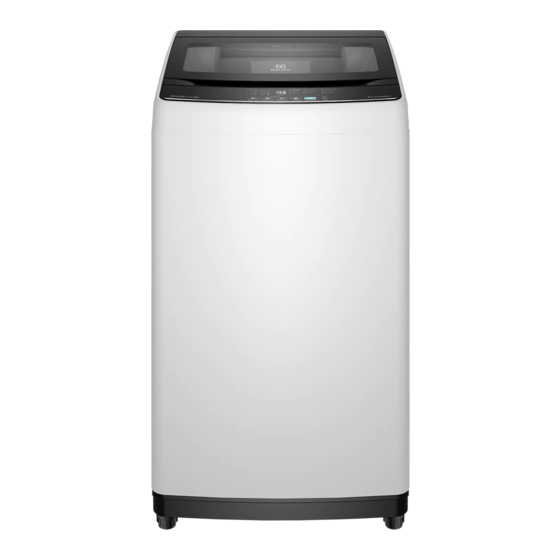
2.PRODUCT DESCRIPTION 2.1 Parts Front Feet... -
Page 8: Product Features
2.2 Product Features Power Failure Recovery Auto sensing water level Auto sensing is a feature where the When there is power failure while machine is washer fills automatically with water to washing or rinsing or spinning. The machine just the right level for your clothes load. -
Page 9: Control Panel
3.CONTROL PANEL 3.1 Control Panel Description Power Start Pause Program Delay Phase Select Water Level... -
Page 10: Program Chart
3.2 Program Chart (min) Model : EWT7078K6WA 7 kg EWT8078K6WA 8 kg EWT9078K6WA 9 kg EWT0H78K6WA 10.5 kg... -
Page 11: Program Options Compatibility.11
3.3 Program Options Compatibility Option Soak Wash Rinse Spin Delay Program Regular ■ ■ ■ ■ ■ Quick □ ■ ■ ■ ■ Heavy ■ ■ ■ ■ ■ Hand Wash ■ ■ ■ ■ ■ Delicates ■ ■ ■ ■... -
Page 12: Options
3.4 Options Delay End Button Power Button When choose “Delay End” button to s e l e c t s u i t a b l e d e l a y w a s h Push the “Power” button to switch on program. -
Page 13: Settingst
4. Operations after activating the Child Phase Select Button Lock function. Even if the Child Lock Touch the “Phase Select” button could function is activated, every button s e l e c t s i n g l e w a s h p r o c e s s o r works until the door opens. -
Page 14: Daily Use
Pouring onto the drawer. . Do not use gelatinous or thick liquid detergents. 3 Add Fabric Softener Clothes must be loaded evenly 1. EWT7078K6WA/EWT8078K6WA around the agitator. For best results EWT9078K6WA Model load small items first, followed by Measure the correct amount of fabric large items. -
Page 15: Setting A Program
NOTE Residues of softener and water may remain in the cup. It is recommended to tilted the washing clean the cup regularly to remove any tub to the right side residue. 4. Setting a Program Press Power ( button , turn the program selector to the required program. -
Page 16: Starting A Program
4. Starting a Program 4. Changing A Program Changing a running program is possible To start a program, press the Start/Pause only by switching off the appliance. button a default program duration will be displayed on the screen. Press the “P... -
Page 17: Washing Hints
5. WASHING HINTS These Washing Instructions are of a Never wash whites and coloureds general nature and you should get good together. Whites may lose their wash results by following them. “whiteness”in the wash. New coloured items may run in the first However, due to the variables of fabric types, soil levels, detergent types and wash;... -
Page 18: Detergent
Quantity of detergent to be used... -
Page 19: A Guide To Stain Removal
5.3 A Guide To Stain Removal Blood: treat fresh stains with cold water. Oil based paint: moisten with benzine Dried grease stains: moisten with Rust:... -
Page 20: Care And Cleaning
6. CARE AND CLEANING 6.1 Cleaning The Dispenser The dispenser needs to be cleaned regularly, preferably after each wash. Inspect the dispenser after each wash to see if there is any residue of detergent. To do this proceed as follows : Remove dispenser drawer from its places. -
Page 21: Cleaning Your Washing Machine
Important: Remove the inlet hose behind the appliance. Never use solvents, alcohol, aerosol cleaners, spray pack cleaners, glass cleaners, metal polishes, caustic materials, scourers or general household cleaners on or near the top panel and lid, control panel or other parts of your washing machine. -
Page 22: Troubleshooting
7.TROUBLESHOOTING 7.1 Possible Failures... -
Page 23: Yellowing Or Greying Clothes.23
7.2 Yellowing Or Greying Clothes Problem Possible causes What to do Greyness Yellowing... -
Page 24: Technical Data
525×560×950mm 550×592×965mm 575×610×1005mm 630×640×1015mm 31kg/35kg 32kg/37kg 550×592×965mm 580×620×980mm 630×640×1015mm 685×685×1040mm 34kg/39kg 39kg/44kg 1) Maximum capacity depended on the model of the Washing Machine. -
Page 25: Installation
9. INSTALLATION 9.1 Unpacking Remove the cardboard box and styrofoam packing.. Important: The top polystyrene must be removed LAST, for protecting the washing tub from hiting the cabinet when the machine is tilted. 3. Put one of the polystyrene packaging elements on the floor behind the appliance. - Page 26 4. Remove the polystyrene base. Pull up the appliance in vertical position. Open the lid. Remove the polystyrene piece from top panel and all the items from the washing tub. 5. Insert the Bottom Cover into slot at the bottom of the machine (as shown on picture).
-
Page 27: Positioning
9.2 Positioning It is important that your washing machine Install the machine on a flat hard floor. stands firm and level on the floor to Make sure that air circulation around the ensure correct operation. machine is not impeded by carpets, rugs etc. -
Page 28: Installation Of Drain Hose
9.4 Installation of drain hose 1. Please use the drain hose from the 3.2 if the sewage outlet is in same direc- accessory for installation, don’t use any tion with drainage exit on the side of the old drain hose. -
Page 29: Environment Concerns
10. ENVIRONMENT CONCERNS 10.1 Packaging Materials For more detailed information about recycling of this product, please contact The materials marked with the your local city office, your household symbol are recyclable. waste disposal service or the shop where >PE<=polyethylene you purchased the product. >PS<=polystyrene >PP<=polypropylene 10.3 Ecological Hints... - Page 30 NOTE...
- Page 31 NOTE...
- Page 32 www.electrolux.com...