Table of Contents
Advertisement
Quick Links
Advertisement
Table of Contents

Related Manuals for Acer SpatialLabs View Pro


Summary of Contents for Acer SpatialLabs View Pro
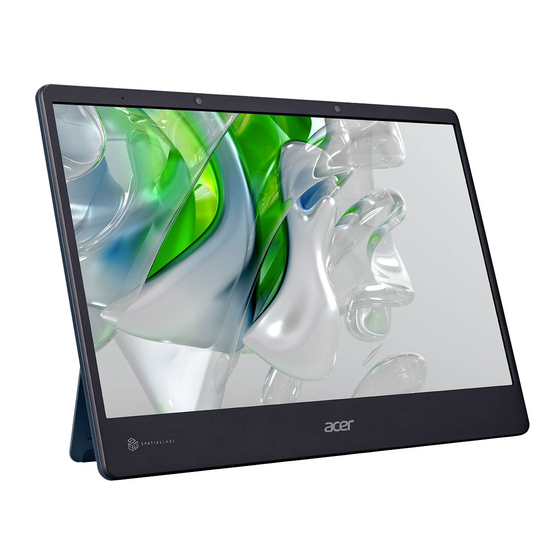
- Page 1 Acer SpatialLabs View Pro User Guide...
- Page 2 Special notes on LCD display Information for your safety and comfort 2.1.1 Safety instructions 2.1.2 Cleaning your display 2.1.3 Connecting/disconnecting the device 2.1.4 Accessibility 2.1.5 Warnings 2.1.6 Using electrical power 2.1.7 Product servicing Additional safety information IT equipment recycling information LCD pixel statement Tips and information for comfortable use Declaration of Conformity...
- Page 3 Serial number: ___________________________________ Date of purchase: ________________________________ Place of purchase: ________________________________ Acer and the Acer logo are registered trademarks of Acer Incorporated. Other companies' product names or trademarks are used herein for identification purposes only and belong to their respective companies.
-
Page 4: Information For Your Safety And Comfort
Special notes on LCD display The following are normal aspects of the LCD display and do not indicate a problem. • Due to the nature of the fluorescent light, the screen may flicker during initial use. Turn off the power switch and then turn it on again to make sure the flicker disappears. -
Page 5: Using Electrical Power
Accessibility Be sure that the power outlet you plug the power cord into is easily accessible and located as close to the equipment operator as possible. When you need to disconnect power from the equipment, be sure to unplug the power cord from the electrical outlet. -
Page 6: Product Servicing
rating. If power strips are used, the load should not exceed 80% of the power strip's input rating. This product's power cord is equipped with a three-wire grounded plug. The • plug only fits in a grounded power outlet. Make sure the power outlet is properly grounded before inserting the power cord plug. -
Page 7: Additional Safety Information
We at Acer are very conscious of the environmental effects of our business and strive to identify and provide the best working procedures to reduce the environmental impact of our products. -
Page 8: Lcd Pixel Statement
LCD pixel statement The LCD unit is produced with high-precision manufacturing techniques. Nevertheless, some pixels may occasionally misfire or appear as black or red dots. This has no effect on the recorded image and does not constitute a malfunction. Power Mode: •On •In Off mode, press the power button to enter On mode. - Page 9 • stiffness or tightness • coldness or weakness If you have these symptoms, or any other recurring or persistent discomfort and/or pain related to computer use, consult a physician immediately and inform your company's health and safety department. The following section provides tips for more comfortable computer use.
- Page 10 • using a display visor, such as a piece of cardboard extended from the display's top front edge • Avoid adjusting your display to an awkward viewing angle. • Avoid looking at bright light sources, such as open windows, for extended periods of time.
-
Page 13: Regulations And Safety Notices
Regulations and safety notices CE declaration of conformity Hereby, Acer Inc., declares that this f is in compliance with the essential requirements and other relevant provisions of EMC Directive 2014/30/EU, Low Voltage Directive 2014/35/EU, and RoHS Directive 2011/65/EU and Directive 2009/125/EC with regard to establishing a framework for the setting of ecodesign requirements for energy-related product. -
Page 14: Important Safety Instructions
user authority, which is granted by the Federal Communications Commission, to operate this product. Operation conditions This device complies with Part 15 of the FCC Rules. Operation is subject to the following two conditions: (1) this device may not cause harmful interference, and (2) this device must accept any interference received, including interference that may cause undesired operation. -
Page 15: Package Contents
Package contents LCD Display Quick Start Adaptor USB A to HDMI Cable Device Guide USB-C Cable Adjusting the display base 1. Carefully remove the display from its packaging. • The display base is attached onto the display before shipment and it is not detachable. -
Page 16: Battery Characteristics
• Power saving (Sleep mode) • The monitor will be switched to "power saving (sleep mode)" mode by the control signal from the display controller, as indicated by the amber-colored power LED. Mode LED light Blue power saving Amber • The power saving mode will be kept until a control signal has been detected or •... -
Page 17: Display Data Channel (Ddc)
Do not pierce, open or disassemble the battery. If the battery leaks and you come into contact with the leaked fluids, rinse thoroughly with water and seek medical attention immediately. For safety reasons, and to prolong the lifetime of the battery, charging will not occur at low (below 0° C/32° F) or high (over 45°... -
Page 18: Standard Timing Table
Standard timing table Mode Resolution 640 x 480 640 x 480 720 x 400 640 x 480 640 x 480 800 x 600 800 x 600 800 x 600 832 x 624 1024 x 768 1024 x 768 1024 x 768 1280 x 1024 1152 x 864 1280 x 960... -
Page 19: Download Software
Download software 1. Please visit https://www.acer.com to download “SpatialLabs Experience Center Pro” application. 2. Go to SUPPORT -> GET SUPPORT. 3. Type you device model name “ASV15-1BP”, or Type the serial number, or SNID to find the product. 4. In Drivers and Manuals -> Application to download “SpatialLabs Experience Center Pro”. - Page 20 Attaching/Removing the base (for VESA wall mount) We recommend that you cover the table surface with soft cloth to prevent damage to the display. 1. Have the front of the display face down on a table. 2. Completely open the hinge cover. 2.
-
Page 21: User Controls
User controls Item Description Power button Turns the display on/off Menu key Press to view the OSD menu. When the OSD menu is active, press this button to exit the OSD menu. Up/Down Wheel Up/Down: Scroll the button up or down to navigate to the desired function or to change the settings on the selected function. - Page 22 User tutorial for best 3D performance 1. Make sure the environment has enough of lighting. 2. Avoid placing the tracking camera in direct light. 3. Make sure your face is fully uncovered. Do not use a screen protector or cover the screen by other means, it may affect the 3D effect.
- Page 23 4. Align your body with the center of your display and make sure the camera is directed at your face. 5. For the best viewing experience, please position yourself between 35-75cm (approx. 14-30 inches) from the screen. Note: Lack of depth perception (stereopsis) may affect the 3D viewing effect.
- Page 24 6. Make sure your computer and display are plugged in. 7. Feel free to move your head to observe different angles, but avoid any sudden or large movements.
- Page 25 8. The SpatialLabs experience is best suited for one person at a time. 9. Please take a rest if you experience eye fatigue or discomfort.
-
Page 26: How To Adjust A Setting
How to adjust a setting Note: The following content is for general reference only. Actual product specifications may vary. The OSD (On Screen Display) can be used to adjust the settings of your LCD Display. Press the Menu key to open the OSD. You can use the OSD to adjust the picture quality, OSD position and general settings. - Page 27 1. Press the MENU key to open the OSD. 2. Scroll Up/Down Wheel key up or down to navigate to the item you wish to adjust and press the OK key to enter the selected item. Picture Settings – Mode: Standard 1.
- Page 28 wish to adjust and press the key to enter it. 4. Scroll Up/Down Wheel key up or down to adjust the sliding scales. 5. The Picture menu can be used to adjust the Brightness, Contrast, Blue Light, Black Boost, ACM and Super Sharpness. 6.
- Page 29 1. Press the MENU key to open the OSD. 2. Scroll Up/Down Wheel key up or down to select Color from the OSD. Then press the key to enter it. 3. Scroll Up/Down Wheel key up or down to navigate to the element you wish to adjust and press the key to enter it.
- Page 30 OSD Settings 1. Press the MENU key to open the OSD. 2. Scroll Up/Down Wheel key up or down to select OSD. Then press the key to enter it. 3. Scroll Up/Down Wheel key up or down to navigate to the element you wish to adjust and press the key to enter it.
- Page 31 Under normal display conditions, press the MENU key for more than 3 seconds to trigger "OSD Unlock". The "OSD Unlock" message will be displayed in the middle of the screen. System Settings 1. Press the MENU key to open the OSD. 2.
- Page 32 Information Screen 1. Press the MENU key to open the OSD. 2. Scroll Up/Down Wheel key up or down to select Information from the OSD. Then press the switch button to enter it. 3. Resolution: Shows the resolution of the video input. 4.
- Page 33 Battery Information: The system is powered by adapter and charging battery. The system is powered by battery. Low battery notification. When the system is powered by battery and battery capacity is less than 20%.
-
Page 34: Troubleshooting
If there are 2 or more monitors connected, it must set monitors to extend mode. ii. In monitor extend mode, it must set Acer SpatialLabs View Pro as main display. 2. Why I cannot see the contents in stereoscopic 3D mode? - Page 35 3. Do I have to plug in the AC Power for the host PC when using the device? Make sure the AC Power of the host PC is plugged in at all times when using the device to avoid Windows going into Power Saving Mode for optimal performance.