Table of Contents
Advertisement
Quick Links
Advertisement
Table of Contents
Troubleshooting

Related Manuals for Yamaha Xmax 250


Summary of Contents for Yamaha Xmax 250
- Page 1 OWNER’S MANUAL YP250R 1C0-F8199-E2...
- Page 3 EAU10110 Welcome to the Yamaha world of motorcycling! As the owner of the YP250R, you are benefiting from Yamaha’s vast experience and newest technology regarding the design and manufacture of high-quality products, which have earned Yamaha a reputation for dependability.
- Page 4 Yamaha continually seeks advancements in product design and quality. Therefore, while this manual contains the most current product information available at the time of printing, there may be minor discrepancies between your scooter and this manual. If you have any questions concerning this manual, please consult your Yamaha dealer. EWA12410 s WARNING PLEASE READ THIS MANUAL CAREFULLY AND COMPLETELY BEFORE OPERATING THIS SCOOTER.
- Page 5 IMPORTANT MANUAL INFORMATION EAUS1172 YP250R OWNER’S MANUAL ©2006 by YAMAHA MOTOR ESPAÑA S.A. 1st edition, February 2006 All rights reserved. Any reprinting or unauthorized use without the written permission of YAMAHA MOTOR ESPAÑA S.A. is expressly prohibited. Printed in Spain.
-
Page 6: Table Of Contents
TABLE OF CONTENTS SAFETY INFORMATION .....1-1 PRE-OPERATION CHECKS ....4-1 Checking the front and rear brake Further safe-riding points ....1-4 Pre-operation check list....4-2 pads..........6-18 Checking the brake fluid level ..6-19 Changing the brake fluid ....6-20 DESCRIPTION........2-1 OPERATION AND IMPORTANT RIDING Checking and lubricating the throttle Left view ...........2-1 POINTS ..........5-1 grip and cable ......6-20... -
Page 7: Safety Information
SAFETY INFORMATION EAU10261 Safe riding ved in accidents do not even SCOOTERS ARE SINGLE TRACK Always make pre-operation have a current driver’s license. VEHICLES. THEIR SAFE USE AND checks. Careful checks may help • Make sure that you are quali- OPERATION DEPENDENT prevent an accident. - Page 8 Modifications made to this scooter keep the following in mind: ries. The use of a safety helmet is the not approved by Yamaha, or the Cargo and accessory weight single most critical factor in the pre- removal of original equipment, may should be kept as low and close vention or reduction of head injuries.
- Page 9 Since Yamaha cannot handlebar or front fork area, loss of lights or engine power. test all other accessories that may be...
-
Page 10: Further Safe-Riding Points
SAFETY INFORMATION • Never refuel while smoking or If you should swallow any gasoli- EAU10371 Further safe-riding points in the vicinity of an open flame. ne, inhale a lot of gasoline vapor, Be sure to signal clearly when Never start the engine or let it run or allow gasoline to get into your making turns. - Page 11 SAFETY INFORMATION Always wear a helmet, gloves, trousers (tapered around the cuff and ankle so they do not flap), and a bright colored jacket. Do not carry too much luggage on the scooter. An overloaded scooter is unstable.
-
Page 12: Description
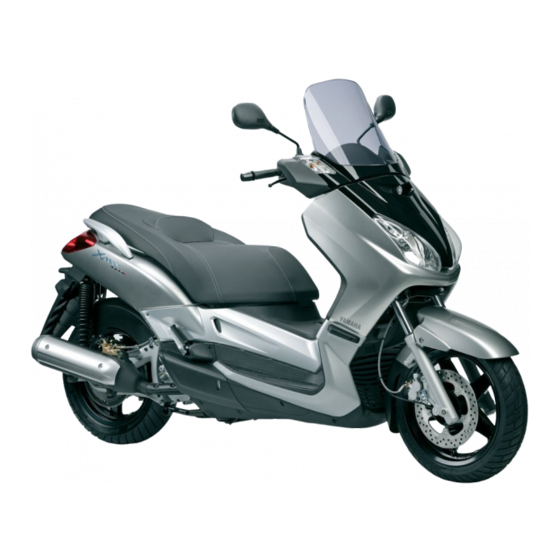
DESCRIPTION EAU10410 Left view 1. Headlight (page 6-25) 5. Storage compartment (page 3-14) 2. Fuel tank cap (page 3-11) 6. Air filter element (page 6-12) 3. Owner’s tool kit (page 6-1) 7. Centerstand (page 6-21) 4. V-belt case air filter (page 6-12) 8. -
Page 13: Right View
DESCRIPTION EAU10420 Right view 1. Grab bar (page 5-2) 5. Coolant level window (page 6-11) 2. Battery (page 6-23) 6. Coolant reservoir cap (page 6-11) 3. Fuses (page 6-24) 7. Engine oil filler cap (page 6-8) 4. Radiator... -
Page 14: Controls And Instruments
DESCRIPTION EAU10430 Controls and instruments 1. Rear brake lever (page 3-10) 6. Front brake lever (page 3-10) 2. Left handlebar switches (page 3-9) 7. Throttle grip (page 5-2) 3. Speedometer (page 3-5) 8. Main switch/Steering lock (page 3-2) 4. Multi-function display (page 3-6) 9. -
Page 15: Instrument And Control Functions
Since re-registering is a difficult pro- Do not submerse any key in cess, take the vehicle along with all water. three keys to a Yamaha dealer to have Do not expose any key to them re-registered. Do not use the excessively high temperatures. -
Page 16: Main Switch/Steering Lock
INSTRUMENT AND CONTROL FUNCTIONS Do not place heavy items on EAU10471 NOTE: Main switch/steering lock any key. The headlight, meter lighting and tai- The main switch/steering lock con- Do not grind any key or alter its llight come on automatically when the trols the ignition and lighting systems, shape. -
Page 17: Indicators, Indicator Lights And Warning Light
“ON”. If the warning light does not come on for a few seconds, then go off, have a Yamaha dealer check the electrical circuit. 1. Fuel level warning light “ ”... -
Page 18: Fuel Gauge
If the immobilizer system ring key and both standard keys is defective, the indicator light will to a Yamaha dealer and have the start flashing a pattern when the key standard keys re-registered. is turned to “ON”. When this occurs, have a Yamaha dealer check the self- 1. -
Page 19: Coolant Temperature Gauge
INSTRUMENT AND CONTROL FUNCTIONS NOTE: EAU12171 EAUS1340 Coolant temperature gauge Speedometer Do not allow the fuel tank to empty itself completely. 1. Red zone 1. Speedometer 2. Temperature gauge 2. Red zone With the key in the “ON” position, the The speedometer shows the riding coolant temperature gauge indicates speed. -
Page 20: Multi-Function Display
INSTRUMENT AND CONTROL FUNCTIONS EAUM1480 a clock Odometer and tripmeter modes Multi-function display an ambient temperature display Pushing the “MODE” button switches a service indicator (which is dis- the display between the odometer played when periodic maintenan- mode “Total” and the tripmeter ce and lubrication is necessary) modes “Trip”... - Page 21 INSTRUMENT AND CONTROL FUNCTIONS Pushing the “SET” button when in the To reset a tripmeter, select it by pus- tripmeter mode switches the display hing the “MODE” button, and then between the different tripmeter func- push the “SET” button for at least one tions in the following order: second.
-
Page 22: Anti-Theft Alarm (Optional)
This motorcycle can be equipped 3.), “Service” will appear in the dis- with an optional anti-theft alarm by a play until the Service indicator reset is Yamaha dealer. Contact a Yamaha made. dealer for more information. To reset the service indicator: 1. -
Page 23: Handlebar Switches
INSTRUMENT AND CONTROL FUNCTIONS EAU12344 EAUS1300 brake to crank the engine with the Pass switch “PASSING” Handlebar switches starter. Press this switch to flash the head- ECA10050 CAUTION: light. See page 5-1 for starting instruc- EAUS1020 tions prior to starting the engine. Dimmer switch “... -
Page 24: Front Brake Lever
INSTRUMENT AND CONTROL FUNCTIONS The hazard lighting is used in case of EAU12900 EAU12950 Front brake lever Rear brake lever an emergency or to warn other drivers when your scooter is stopped where it might be a traffic hazard. ECA10060 CAUTION: Do not use the hazard light for an extended length of time, otherwise... -
Page 25: Fuel Tank Cap
INSTRUMENT AND CONTROL FUNCTIONS EAUT1382 2. Turn the key clockwise to the ori- Fuel tank cap ginal position, and then remove To remove the fuel tank cap NOTE: The fuel tank cap cannot be installed unless the key is in the lock. In addi- tion, the key cannot be removed if the cap is not properly installed and loc- ked. -
Page 26: Fuel
INSTRUMENT AND CONTROL FUNCTIONS EAU13230 Before starting the engine, Your Yamaha engine has been desig- Fuel quickly wipe off any gasoline ned to use regular unleaded gasoline Make sure that there is sufficient fuel spilled on the engine or muffler. -
Page 27: Catalytic Converter
INSTRUMENT AND CONTROL FUNCTIONS EAU13431 EAU13932 NOTE: Catalytic converter Seat Make sure that the seat is properly This model is equipped with a cataly- To open the seat secured before riding. tic converter in the exhaust system. 1. Place the scooter on the centers- EWA10860 tand. -
Page 28: Front Storage Compartment
INSTRUMENT AND CONTROL FUNCTIONS EAU14540 To close the storage compartment EAUT1060 Front storage compartment Storage compartment Push the storage compartment lid into the original position, and then remove the key. EWA10960 s WARNING Do not exceed the load limit of 1 kg (2.205 lb) for the storage compartment. -
Page 29: Adjusting The Shock Absorber Assemblies
INSTRUMENT AND CONTROL FUNCTIONS Since the storage compart- EAU14890 Adjusting the shock ment accumulates heat when absorber assemblies exposed to the sun, do not sto- re anything susceptible to heat Each shock absorber assembly is equip- inside it. ped with a spring preload adjusting ring. To avoid humidity from sprea- ECA10100 CAUTION:... -
Page 30: Sidestand
Therefore, check this tool included in the owner’s tool system regularly as described kit to make this adjustment. below and have a Yamaha dealer 1. Sidestand switch repair it if it does not function pro- 2. Sidestand Spring preload setting: perly. -
Page 31: Ignition Circuit Cut-Off System
EWA10260 s WARNING The vehicle must be placed on the centerstand during this ins- pection. If a malfunction is noted, have a Yamaha dealer check the system before riding. 3-17... - Page 32 Does the engine start? The sidestand switch may be defective. The scooter should not be ridden until checked by a Yamaha dealer. With the engine still off: 6. Move the sidestand up. 7. Keep the front or rear brake applied.
-
Page 33: Pre-Operation Checks
PRE-OPERATION CHECKS EAU15591 The condition of a vehicle is the owner’s responsibility. Vital compo- nents can start to deteriorate quickly and unexpectedly, even if the vehicle remains unused (for example, as a result of exposure to the elements). Any damage, fluid leakage or loss of tire air pressure could have serious consequences. -
Page 34: Pre-Operation Check List
• If necessary, add recommended coolant to specified level. 6-11 • Check cooling system for leakage. • Check operation. • If soft or spongy, have Yamaha dealer bleed hydraulic system. • Check brake pads for wear. Front brake • Replace if necessary. - Page 35 • Check operation. — and switches • Correct if necessary. • Check operation of ignition circuit cut-off system. Sidestand switch • If system is defective, have Yamaha dealer check vehicle. 3-16 • If system is defective, have Yamaha dealer check vehicle.
-
Page 36: Operation And Important Riding Points
For maximum engine life, never their functions before riding. instructions prior to operating the accelerate hard when the engine is Consult Yamaha dealer vehicle for the first time. cold! regarding any control or func- 1. Turn the key to “ON”. -
Page 37: Starting Off
OPERATION AND IMPORTANT RIDING POINTS EAU16760 EAU16780 EAU16791 Starting off Acceleration and Braking deceleration NOTE: Before starting off, allow the engine to warm up. ZAUM0199 1. Close the throttle completely. 2. Apply both front and rear brakes The speed can be adjusted by ope- simultaneously while gradually ning and closing the throttle. -
Page 38: Tips For Reducing Fuel Consumption
OPERATION AND IMPORTANT RIDING POINTS areas and cross them with cau- EAU16820 EAU16841 Tips for reducing fuel Engine break-in tion. consumption There is never a more important Keep in mind that braking on a period in the life of your engine than wet road is much more difficult. -
Page 39: Parking
If any engine trouble should occur s WARNING during the engine break-in period, Since the engine and exhaust immediately have a Yamaha dealer system can become very hot, check the vehicle. park in a place where pedes- trians or children are not likely to touch them. -
Page 40: Periodic Maintenance And Minor Repair
The most important Consult a Yamaha dealer for proper points of inspection, adjustment, and maintenance intervals. lubrication are explained on the follo- wing pages. - Page 41 PERIODIC MAINTENANCE AND MINOR REPAIR have a Yamaha dealer perform it for you. EWA10350 s WARNING Modifications not approved by Yamaha may cause loss of perfor- mance and render the vehicle unsafe for use. Consult a Yamaha dealer before attempting any chan-...
-
Page 42: Periodic Maintenance And Lubrication Chart
The annual checks must be performed every year, except if a kilometer-based maintenance is performed instead. From 50000 km, repeat the maintenance intervals starting from 10000 km. Items marked with an asterisk should be performed by a Yamaha dealer as they require special tools, data and technical skills. ODOMETER READING (x 1000 Km) - Page 43 PERIODIC MAINTENANCE AND MINOR REPAIR ODOMETER READING (x 1000 Km) ANNUAL ITEM CHECK OR MAINTENANCE JOB CHECK √ √ √ √ √ •Check for cracks or damage. 8 * Brake hose •Replace. Every 4 years √ √ √ √ 9 * Wheels •Check runout and for damage.
- Page 44 PERIODIC MAINTENANCE AND MINOR REPAIR ODOMETER READING (x 1000 Km) ANNUAL ITEM CHECK OR MAINTENANCE JOB CHECK √ √ √ •Check vehicle for oil leakage. Final transmission oil √ √ √ •Change. 22 * V-belt •Replace. Every 20000 km Front and rear brake 23 * √...
-
Page 45: Removing And Installing Cowlings And Panels
PERIODIC MAINTENANCE AND MINOR REPAIR EAU18712 To install the cowling EAUM1250 Panel A Removing and installing 1. Connect the turn signal light lead To remove the panel cowlings and panels connectors. 1. Open the front storage compart- 2. Place the cowling in the original The cowlings and panels shown need ment. -
Page 46: Checking The Spark Plug
Do not attempt to diagnose such problems yourself. Instead, have periodic maintenance and lubrication a Yamaha dealer check the motorcy- chart. In addition, the condition of the cle. spark plug can reveal the condition of 3. -
Page 47: Engine Oil
PERIODIC MAINTENANCE AND MINOR REPAIR 1. Measure the spark plug gap with 5. Install the storage compartment EAUM1550 Engine oil a wire thickness gauge and, if by installing the bolts. The engine oil level should be chec- necessary, adjust the gap to spe- 6. - Page 48 PERIODIC MAINTENANCE AND MINOR REPAIR 5. Insert the dipstick into the oil filler hole, and then tighten the oil filler cap. To change the engine oil 1. Start the engine, warm it up for several minutes, and then turn it off.
-
Page 49: Final Transmission Oil
Oil change quantity: checked for oil leakage before each 1.2 L (1.27 US qt) (1.05 Imp.qt) ride. If any leakage is found, have a Yamaha dealer check and repair the ECA11670 CAUTION: scooter. In addition, the final trans- Do not use oils with a diesel mission oil must be changed as specification of “CD”... -
Page 50: Coolant
PERIODIC MAINTENANCE AND MINOR REPAIR EAU20070 Coolant Tightening torque: Final transmission oil drain bolt: The coolant level should be checked 22 Nm (2.2 m•kgf, 15.9 ft•lbf) before each ride. In addition, the coo- lant must be changed at the intervals specified in the periodic maintenance 6. -
Page 51: Air Filter And V-Belt Case Air Filter Elements
1. Screws sufficiently cooled and the coo- Have a Yamaha dealer change the 2. Air filter case cover ling system will not be protec- coolant. 3. Pull the air filter element out. - Page 52 PERIODIC MAINTENANCE AND MINOR REPAIR Cleaning the V-belt case air filter element 4. Insert a new air filter element into 2. Remove the air filter element, and the air filter case. then blow out the dirt with com- 5. Install the air filter case cover by pressed air as shown.
-
Page 53: Adjusting The Carburetor
Therefore, all car- case. buretor adjustments should be left to The engine should never be a Yamaha dealer, who has the neces- operated without the filter ele- sary professional knowledge and ments installed, otherwise the experience. -
Page 54: Valve Clearance
To prevent motorcycle, note the following points this from occurring, the valve clearan- regarding the specified tires. ce must be adjusted by a Yamaha Tire air pressure dealer at the intervals specified in the periodic maintenance and lubrication chart. - Page 55 PERIODIC MAINTENANCE AND MINOR REPAIR the riding speed and with the NEVER OVERLOAD THE VEHI- total weight of rider, passenger, CLE! Operation of an overloa- cargo, and accessories appro- ded vehicle may result in tire ved for this model. damage, loss of control, or severe injury.
-
Page 56: Cast Wheels
Michelin / GoldStandard ked for cracks, bends or warpage Rear tire: before each ride. If any damage Size: is found, have a Yamaha dealer 140/70 - 14 68S replace the wheel. Do not Manufacturer/model: Michelin / GoldStandard attempt even the smallest repair to the wheel. -
Page 57: Checking The Front And Rear Brake Pads
If the lining thickness is less than 0.5 mm (0.02 in), have a Yamaha dea- ler replace the brake pads as a set. 1. Lining thickeness Check each front brake pad for damage and measure the lining thick- ness. -
Page 58: Checking The Brake Fluid Level
Use only the recommended qua- the brake fluid level goes down lity brake fluid, otherwise the rub- suddenly, have a Yamaha dealer Observe these precautions: ber seals may deteriorate, cau- check the cause. sing leakage and poor braking performance. -
Page 59: Changing The Brake Fluid
EAU23111 EAU23170 Changing the brake fluid Checking and lubricating the Lubricating the front and Have a Yamaha dealer change the throttle grip and cable rear brake levers brake fluid at the intervals specified in The operation of the throttle grip the NOTE after the periodic mainte- should be checked before each ride. -
Page 60: Checking And Lubricating The Centerstand And Sidestand
The operation of the centerstand and at the intervals specified in the perio- othly, have a Yamaha dealer check sidestand should be checked before dic maintenance and lubrication or repair it. -
Page 61: Checking The Steering
2. Hold the lower ends of the front fork legs and try to move them for- ward and backward. If any free play can be felt, have a Yamaha dealer check or repair the steering. 6-22... -
Page 62: Battery
EWA10760 To charge the battery the battery, fully charge it, and s WARNING Have a Yamaha dealer charge the then place it in a cool, dry place. lectrolyte is poisonous and battery as soon as possible if it seems 2. If the battery will be stored for dangerous since it contains to have discharged. -
Page 63: Replacing The Fuses
Radiator fan fuse: the battery. If you do not have 10 A access to a sealed-type (MF) Backup fuse: battery charger, have a Yamaha The main fuse and the fuse box, Reserve fuse: dealer charge your battery. 30 A which contains the fuses for the indi-... -
Page 64: Replacing A Headlight Bulb
If a headlight bulb 4. If the fuse immediately blows burns out, replace it as follows. again, have a Yamaha dealer 1. Remove cowling B. (See page 6- check the electrical system. 2. Disconnect the headlight coupler, and then remove the headlight bulb cover. -
Page 65: Replacing A Front Turn Signal Light Bulb
ECA10670 6. Install the socket (together with CAUTION: the bulb) by turning it clockwise. It is advisable to have a Yamaha 7. Install the cowling. dealer perform this job. 1. Place the scooter on the centers- tand. -
Page 66: Replacing The Tail/Brake Light Bulb Or A Rear Turn Signal Light Bulb
PERIODIC MAINTENANCE AND MINOR REPAIR EAUS1250 Rear turn signal light bulb EAUS1150 Replacing the tail/brake light Replacing the license plate bulb or a rear turn signal light bulb light bulb Tail/brake light bulb 1. Remove the tail/brake light lens by removing the screw. 2. -
Page 67: Replacing The Auxiliary Light Bulb
The following troubleshooting charts represent quick and easy procedures for checking these vital systems your- self. However, should your scooter require any repair, take it to a Yamaha dealer, whose skilled technicians have the necessary tools, experience, and know-how to service the scooter properly. -
Page 68: Troubleshooting Charts
Remove the spark plug and check the electrodes. The engine does not start. Have a Yamaha dealer check the vehicle. Check the battery. 4. Battery The engine turns over The battery is good. - Page 69 Start the engine. If the engine overheats again, have a The coolant level Yamaha dealer check and repair the cooling system. is OK. NOTE: If coolant is not available, tap water can be temporarily used instead, provided that it is changed to the recommended coolant as soon as possible.
-
Page 70: Scooter Care And Storage
SCOOTER CARE AND STORAGE EAU26090 ducts onto seals, gaskets and thinner, fuel (gasoline), rust Care wheel axles. Always rinse the dirt removers or inhibitors, brake While the open design of a scooter and degreaser off with water. fluid, antifreeze or electrolyte. reveals the attractiveness of the tech- Cleaning Do not use high-pressure was-... - Page 71 SCOOTER CARE AND STORAGE After normal use ECA10790 6. Wax all painted surfaces. CAUTION: Remove dirt with warm water, a mild 7. Let the scooter dry completely Do not use warm water since it detergent, and a soft, clean sponge, before storing or covering it.
-
Page 72: Storage
SCOOTER CARE AND STORAGE NOTE: EAU26300 stabilizer (if available) to prevent Storage Consult a Yamaha dealer for advice the fuel tank from rusting and the Short-term on what products to use. fuel from deteriorating. Always store your scooter in a cool, 4. - Page 73 SCOOTER CARE AND STORAGE 5. Lubricate all control cables and the pivoting points of all levers and pedals as well as of the sidestand/centerstand. 6. Check and, if necessary, correct the tire air pressure, and then lift the scooter so that both of its wheels are off the ground.
-
Page 74: Specifications
SPECIFICATIONS Dimensions Oil type or grade Air filter Overall length Engine oil Air filter element 2210 mm (87.0 in) SAE 10W30 Oil-coated paper element Overall width Recommended engine oil grade Recommended fuel 790 mm (31.1 in) API service SE, SF, SG type or higher Recommended fuel Overall height Unleaded fuel... - Page 75 SPECIFICATIONS Operation Rear Front suspension Centrifugal automatic type 220 kPa (31 psi) (2.2 kgf/cm Type Chassis Loading condition Telescopic fork 90 kg (198 lb)–Maximum load Frame type Spring/shock absorber type Front Steel tube underbone Coil spring/oil damper 210 kPa (30 psi) (2.1 kgf/cm Caster angle Wheel travel Rear...
- Page 76 SPECIFICATIONS Rear turn signal light Reserve fuse 12 V, 10.0 W x 2 30 A License plate light 12 V, 5.0 W x 1 Meter lighting Fuel level warning lamp High beam Indicator light Turn signal indicator light LED x 2 Immobilizer light Fuses Main fuse...
-
Page 77: Consumer Information
Record the key identification number, vehicle identification number and model label information in the spaces provided below for assistance when ordering spare parts from a Yamaha dealer or for reference in case the vehicle is stolen. KEY IDENTIFICATION NUMBER: 1. Key tag The vehicle identification number is 2. - Page 78 1- Model label The model label is affixed to the bot- tom of the seat. (See page 3-13.) Record the information on this label in the space provided. This information will be needed when ordering spare parts from a Yamaha dealer.
- Page 79 INDEX Front fork, checking .........6-21 Fuel consumption, tips for reducing..5-3 Acceleration and deceleration ....5-2 Safe-riding points........1-4 Fuel gauge ..........3-4 Air filter and V-belt case air filter Safety information........1-1 Fuel level warning light ......3-3 elements ..........6-12 Seat ............3-13 Fuel tank cap ...........3-11 Anti-theft alarm (optional) ......3-8 Shock absorber assemblies, adjusting..3-15 Fuses, replacing........6-24...
- Page 80 INDEX Wheels .............6-17...
- Page 82 YAMAHA MOTOR ESPAÑA, S.A. PRINTED IN SPAIN 2006.02-NOVOPRINT, S.A.