Table of Contents
Advertisement
Quick Links
Advertisement
Table of Contents

Related Manuals for Makita DLM432PG2


Summary of Contents for Makita DLM432PG2
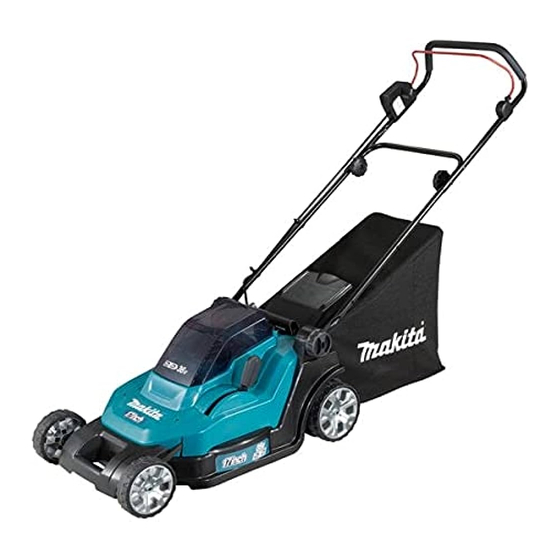
- Page 1 INSTRUCTION MANUAL Cordless Lawn Mower DLM382 DLM432 Read before use.
-
Page 2: Specifications
SPECIFICATIONS Model: DLM382 DLM432 Mowing width (blade diameter) 380 mm 430 mm No load speed 3,700 min 3,600 min Part number of replacement mower blade 191D41-2 191D43-8 Dimensions during operation L: 1,380 mm to 1,410 mm L: 1,435 mm to 1,490 mm (L x W x H) W: 450 mm W: 460 mm... -
Page 3: Ec Declaration Of Conformity
Children should be supervised to ensure that Vibration they do not play with the mower. Physical condition - Do not operate mower The vibration total value (tri-axial vector sum) deter- while under the influence of drugs, alcohol, or mined according to EN60335-2-77: any medication. - Page 4 22. Never attempt to make cutting height adjust- Stop the mower and remove the lock key, and make sure that all moving parts have come to ments while mower is running if the mower a complete stop: has cutting height adjustment feature. - whenever you leave the mower, 23.
- Page 5 Never service damaged battery packs. Service Check the blade mounting bolt at frequent intervals for proper tightness. of battery packs should only be performed by the manufacturer or authorized service providers. 10. Always allow the mower to cool down before storing. SAVE THESE INSTRUCTIONS. When servicing the blades be aware that, even though the power source is switched off, the WARNING: DO NOT let comfort or familiarity...
-
Page 6: Installing The Battery Cover
Place the battery cover with the protrusions on the SAVE THESE INSTRUCTIONS. mower aligned with the holes on the battery cover. CAUTION: Only use genuine Makita batteries. Use of non-genuine Makita batteries, or batteries that have been altered, may result in the battery bursting causing fires, personal injury and damage. It will also void the Makita warranty for the Makita tool and charger. Tips for maintaining maximum battery life Charge the battery cartridge before completely discharged. -
Page 7: Installing The Handle
Installing the handle Removing the mulching plug Optional accessory NOTICE: When installing handles, position the cords so that they are not caught by anything Open the rear cover. between the handles. If the cord is damaged, the mower switch may not work. Slide the both ends of lower handle into the grooves of the mower then fully tighten the clamping screws. -
Page 8: Functional Description
Hook the grass basket on the rod of the mower FUNCTIONAL body as shown in the figure. DESCRIPTION Installing or removing battery cartridge CAUTION: Always switch off the machine before installing or removing of the battery cartridge. CAUTION: Make sure that you lock the battery cover before use. -
Page 9: Overload Protection
Insert the lock key in the place shown in the figure Indicating the remaining battery capacity as far as it will go. ► 1 . Lock key ► 1 . Battery indicator When the remaining battery capacity gets low, the battery Close the battery cover and push it until it is indicator blinks on the applicable battery side. By further use, latched with the locking lever. the machine stops and the battery indicator lights up about To remove the battery cartridge from the mower; 10 seconds. In this situation, charge the battery cartridge. Slide the battery cover locking lever and open the Indicating the remaining battery capacity battery cover. -
Page 10: Adjusting The Mowing Height
NOTE: The mower does not start without pressing the switch button even the switch lever is pulled. NOTE: Mower may not start due to the overload when you try to mow long or dense grass at a time. Increase the mowing height in this case. This mower is equipped with the interlock switch and han- dle switch. If you notice anything unusual with either of these switches, stop operation immediately and have them checked by your nearest Makita Authorized Service Center. Install the battery cartridges. Insert the lock key into the interlock switch and then close the battery cover. ► 1 . Mowing height adjusting lever NOTE: The mowing height figures should be used just as a guideline. Depending on the conditions of the lawn or the ground, the actual lawn height may become slightly different from the set height. NOTE: Try a test mowing of grass in a less conspicu- ous place to get your desired height. -
Page 11: Operation
Firmly hold the handle with both hands when mowing. Using mulching plug The mowing speed guideline is approximately 1 meter per 4 seconds. Optional accessory The mulching plug allows you to return the cut grass to the ground without gathering the cut grass in the grass basket. When you operate the machine with the mulch- ing plug, be sure to remove the grass basket. NOTICE: When using the machine with the mulch- ing plug, make sure that the total length of grass is 30 mm or more, or the cut length is 15 mm or less. -
Page 12: Emptying The Grass Basket
NOTICE: Never use gasoline, benzine, thinner, alcohol or the like. Discoloration, deformation or cracks may result. To maintain product SAFETY and RELIABILITY, repairs, any other maintenance or adjustment should ► 1 . Clamping screw 2. Lower handle be performed by Makita Authorized or Factory Service Centers, always using Makita replacement parts. 12 ENGLISH... - Page 13 Removing the mower blade Loosen the clamping nuts and pivot the upper handle back while expanding the both sides. For DLM382 Put the mower on its side so that the mowing height adjusting lever comes to the upper side. To lock the blade rotation, insert a screwdriver or a similar tool into a hole on the mower body.
-
Page 14: Troubleshooting
When you replace the blades, always follow the instructions provided in this manual. ► 1 . Inner flange 2. Mower blade 3. Outer flange 4. Bolt TROUBLESHOOTING Before asking for repairs, conduct your own inspection first. If you find a problem that is not explained in the manual, do not attempt to dismantle the tool. Instead, ask Makita Authorized Service Centers, always using Makita replace- ment parts for repairs. State of abnormality Probable cause (malfunction) Remedy Mower does not start. Two battery cartridges are not installed. -
Page 15: Optional Accessories
OPTIONAL ACCESSORIES CAUTION: These accessories or attachments are recommended for use with your Makita tool specified in this manual. The use of any other accessories or attachments might present a risk of injury to persons. Only use accessory or attachment for its stated purpose. If you need any assistance for more details regard- ing these accessories, ask your local Makita Service Center. • Mower blade • Mulching plug •... - Page 16 Makita Europe N.V. Jan-Baptist Vinkstraat 2, 3070 Kortenberg, Belgium Makita Corporation 3-11-8, Sumiyoshi-cho, Anjo, Aichi 446-8502 Japan 885748-229 www.makita.com 20190902...