Table of Contents
Advertisement
Quick Links
ELECTRIC & GAS DRYER
SERVICE MANUAL
CAUTION
READ THIS MANUAL CAREFULLY TO DIAGNOSE
PROBLEMS PROPERLY AND TO PROVIDE
QUALITY SERVICE SAFELY ON THESE DRYERS.
FOR LG TECHNICIAN
MODEL :
Any reproduction, duplication, distribution (including by way of email, facsimile or other electronic means),
publication, modification, copying or transmission of this Service Manual is STRICTLY PROHIBITED unless
you have obtained the prior written consent of the LG Electronics entity from which you received this Service
Manual. The material covered by this prohibition includes, without limitation, any text, graphics or logos in this
Service Manual.
'
Copyright ©
2016 - 2017
LG Electronics Inc. All rights reserved. Only training and service purposes.
U.S.A. Website: http://us.lgservice.com
Canadian Website: http://lg.ca
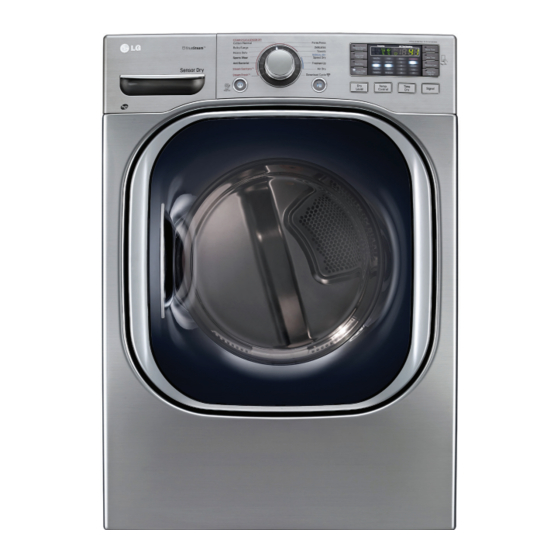
Electric
DLEX4270*/01
1
CONFIDENTIAL
Gas
DLGX4271*/01
Advertisement
Table of Contents

Related Manuals for LG DLEX4270 /01 Series


Summary of Contents for LG DLEX4270 /01 Series
- Page 1 Service Manual is STRICTLY PROHIBITED unless you have obtained the prior written consent of the LG Electronics entity from which you received this Service Manual. The material covered by this prohibition includes, without limitation, any text, graphics or logos in this Service Manual.
- Page 2 FOR LG TECHNICIAN IMPORTANT SAFETY NOTICE The information in this service guide is intended for use by individuals possessing skill and experience in electrical, electronic, and mechanical appliance repair. Any attempt to repair a major appliance may result in injury to persons, and property damage. The manufacturer or seller cannot be responsible for the interpretation of this information, nor can it assume any liability in connection with its use.
-
Page 3: Table Of Contents
13-3-2. CABINET AND DOOR ASSEMBLY: GAS TYPE ..........51 13-4-1. DRUM AND MOTOR ASSEMBLY: ELECTRIC TYPE ......... 52 13-4-2. DRUM AND MOTOR ASSEMBLY: GAS TYPE ............ 53 Copyright © 2016 - 2017 LG Electronics Inc. All rights reserved. Only training and service purposes. -
Page 4: Specifications
FOR LG TECHNICIAN SPECIFICATIONS DLEX4270*/01 DLGX4271*/01 Model Name Electric and Gas Dryer Power supply Please refer to the rating label regarding detailed information 27” (W) X 30” (D) X 38 / ” (H), 51” (D with door open) Size 68.6 cm (W) X 76.1 cm (D) X 98.3 cm (H), 129.7 cm (D with door open) - Normal Cycle IEC 7.4 cu.ft. - Page 5 FOR LG TECHNICIAN REMARK ITEM DLEX4270*/01 DLGX4271*/01 Color Blue White / Stainless Silver Material and Top Plate Powder coating Finish Door Trim Chrome 120 V / 240 V / 60 Hz (26 A) Elec. Power 120 V / 208 V / 60 Hz (23 A) Supply 120 V / 60 Hz (11.5 A)
-
Page 6: Features And Benefits
FOR LG TECHNICIAN FEATURES AND BENEFITS DLEX4270*/01, DLGX4271*/01 INSTALLATION INSTRUCTIONS Dryer Rack Installation Instructions Open the door. Put the dryer rack into Check and be sure that the Hold the dryer rack the drum front of the rack is properly with both hands. - Page 7 FOR LG TECHNICIAN Stacking Kit Installation Instructions To ensure safe and secure installation, please observe the instructions below. WARNING Secure the side bracket to the washer with a screw on the back of the bracket. Repeat Steps 2, 3, and 4 for the other side.
- Page 8 FOR LG TECHNICIAN Pedestal Installation Instructions Place the dryer on the • • For dryer Drawer divider (1) Wrench (1) pedestal. Make sure • • the front and back feet Screws (18) † T-clips (4) †† are in the correct positions.
- Page 9 FOR LG TECHNICIAN 3-1. Connecting Electric Dryers Review the following options to determine the appropriate electrical connection for your home 4-wire receptacle 4-wire connection : Direct wire (NEMA type14-30R) Important :Grounding through the neutral conductor is prohibited for (1) new branch-circuit installations,...
- Page 10 FOR LG TECHNICIAN 3-wire connection : Direct wire : 4-wire connection with a power supply cord. Important : Grounding through the neutral conductor is prohibited for (1) new branch-circuit installations, lf your local codes or ordinances do not allow the...
- Page 11 FOR LG TECHNICIAN : Optional 3-wire : 3-Wire connection with connection. a power supply cord • If your local codes or ordinances do not allow the lf your local codes or ordinances permit the connection of a frame-grounding conductor to the...
- Page 12 FOR LG TECHNICIAN 3-2. Connecting the gas supply For further assistance, refer to section on Gas Requirements. 1. Make certain your dryer is equipped for use with the 3. Connect to gas supply pipe using a new flexible type of gas in your laundry room. Dryer is equipped stainless steel connector.
-
Page 13: Dryer Cycle Process
FOR LG TECHNICIAN DRYER CYCLE PROCESS Default Conditions of operation and termination Drying Cooling Wrinkle care Cycle Temp- Display erature Level time Electro- Temp- Default Temp- Time sensor Control time Control** HIGH STEAM FRESH Saturation 5min 20min 66±4˚C 45± 5˚C... -
Page 14: Component Testing Information
FOR LG TECHNICIAN COMPONENT TESTING INFORMATION CAUTION When checking components, turn the power off and discharge voltage. Component Test Procedure Check result Remark 1. Thermal cut off Measure resistance of terminal If thermal fuse is open must • Heater case-... - Page 15 FOR LG TECHNICIAN Component Test Procedure Check result Remark 7. Heater Measure resistance of the • Electric type following terminal Terminal: 1 (COM) - 2 Resistance value: 10 Terminal: 1 (COM) - 3 Resistance value: 10 Terminal: 2 - 3 Resistance value: 20 8.
- Page 16 FOR LG TECHNICIAN Component Test Procedure Check result Remark 13. Outlet Thermostat Measure resistance of terminal • Gas type (Auto reset) to terminal • Gas funnel Open at 203 ± 41°F (95 ± 5°C) Resistance value Continuity < 1 Close at 158 ± 41°F (70 ± 5°C) •...
-
Page 17: Motor Diagram And Schematic
FOR LG TECHNICIAN MOTOR DIAGRAM AND SCHEMATIC When checking components, turn the power off and discharge voltage. NOTE Contact On / Off by Centrifugal Switch STOP MODE RUN MODE (When Motor does not operate) (Motor operates) Centrifugal switch Centrifugal switch... - Page 18 FOR LG TECHNICIAN MAIN PCB DISPLAY PCB Smart Modem Connector SMART READY model only STEAM model only MAIN PCB DISPLAY PCB Smart Modem Connector SMART READY model only STEAM model only...
- Page 19 Main PCB Picture (P/N : EBR76542925(Electric) EBR76542926 (Gas)) [Electric] [Gas]...
-
Page 20: Steam Function
FOR LG TECHNICIAN STEAM FUNCTION 8-1. Steam Cycle Guide TEMP. FABRIC MAXIMUM DEFAULT TIME FABRIC TYPE STEAM CONTROL LEVEL STATE AMOUNT Comforter STEAM Single (1 each) Bedding STEAM SANITARY SANITARY (39 minutes) Children’s clothing 3 lbs. Comforter Single (1 each) -
Page 21: Troubleshooting
FOR LG TECHNICIAN 8-2. Troubleshooting POSSIBLE CAUSES SOLUTIONS PROBLEM • Water supply error. • Check steam feeder drawer: (1) Make sure steam feeder is filled with water to MAX line. indicator lights is on (2) Make sure steam feeder is seated properly during the drying and drawer is fully closed. -
Page 22: Display Fault/Error Codes
FOR LG TECHNICIAN PROBLEM POSSIBLE CAUSES SOLUTIONS Cannot see steam • This is normal. • Steam is released at different stages of the cycle vapor at the for each option. beginning of cycle. • MORE TIME pressed. • Pressing the MORE TIME button adjusts the... - Page 23 Android OS version, the NFC activation To use the Tag On function: process may differ. Refer to the manual of 1. Download the LG Smart Laundry&DW App to your smart phone for details. your smart phone. 2. Turn on the NFC (Near Field Communication) •...
- Page 24 Symptom Check Point 1. Not heating 1.Check Electric Wiring. 2.Check the motor operation. 3.Voltage of the Main PWB. 4. Check Heater element’s Resistance. <Electric Dryer>...
- Page 25 <Electric Dryer> Table 1. Resistance for Thermistor Temperature.
- Page 26 Not heating (Electric) Unplug UNIT / Check heater Check lint Filter One or both elements. Heater elements Terminal: 1(COM) – 2 = 10Ω Clean if needed. defective. Terminal: 1(COM) – 3 = 10Ω Explain to owner responsibility Terminal: 2 – 3 = 20Ω formance and safety reason.
- Page 27 <Gas Dryer>...
- Page 28 <Gas Dryer> Table 1. Resistance for Thermistor Temperature.
- Page 29 Not heating (Gas) Unplug UNIT / Check gas valve Defective gas valve Check lint Filter Valve1 terminal > 1.5kΩ~2.5kΩ Clean if needed. Valve2 terminal > Explain to owner responsibility to 1.5kΩ~2.5kΩ and safety reason. Unplug UNIT / Check Igniter Defective Igniter Resistance value = 50~800Ω...
- Page 30 Symptom Check Point 2. Not tumbling 1.Check Electric Wiring. 2.Check the Door properly closed. 3.Voltage of the Main PWB. 4. Check Blower thermostat’s Resistance <Electric / Gas Dryer>...
- Page 31 Defective Belt Unplug UNIT / Check belt switch Not tumbling Switch 1.Lever open Resistance value 1Ω Case1. Motor doesn’t operate at all. 2.Lever push (Close) Case2. Motor operates but stops soon. Go to Resistance value ∞ Check the door Power on, press the start is not closed button.
-
Page 32: Flow Sensor Function
FOR LG TECHNICIAN FLOW SENSOR FUNCTION 9-1 Flow Sensor This FlowSense function detects the clogging or blocking of ducts. Clogged duct vents or hoses decrease efficiency in drying cloths. Clogged vents can also cause fire. This function alerts you to the need of cleaning the duct. -
Page 33: Installation Test (Exhaust Check)
FOR LG TECHNICIAN 9-2 Installation Test (Exhaust check) 4. Check the display for results. Once you have completed the installation of the dryer, During the test cycle, monitor the FLOW SENSE use this test to make sure the condition of the exhaust display on the control panel. - Page 34 FOR LG TECHNICIAN 9-3 Troubleshooting for flow sensor dryer Error Code Possible Causes Solutions or tE2 • Temperature sensor failure • • Humidity Sensor failure. • • Electric dryer power cord is not • Check the power supply or the connection of connected correctly, or house power power cord to the terminal block.
-
Page 35: Diagnostic Test
FOR LG TECHNICIAN DIAGNOSTIC TEST 1. This TEST should be used for factory test /service test. Do not use this DIAGNOSTIC TEST other than specified. 2. Activating the heater manually with the door open may trip the Thermostat attached to the heater, therefore do not activate it manually. - Page 36 FOR LG TECHNICIAN Test 1 120V AC Electrical Supply When measuring power, be sure to wear insulated gloves to Caution avoid an electric shock. No power was applied to controller. Display (LCD or LED) off. Trouble Symptom Measurement Dryer power on, collector plugged in.
- Page 37 FOR LG TECHNICIAN Caution When measuring power, be sure to wear insulated gloves to avoid an electric shock. Trouble Symptom Check the t ab relays connection properly. Measur ement Condition With dryer power on; connector linked to controller. 1. Power Connection <...
- Page 38 FOR LG TECHNICIAN < Table 2 > : Connection of Tap Relay with PCB ASSEMBLY (Gas) Remark Color Harness Blue Wire Check the matching color between harness wire and tap relay. Black Connector Housing (Black housing – black tap relay)
- Page 39 FOR LG TECHNICIAN Test 2 Thermistor Test --- Measure with Power Off Before measuring resistance, be sure to turn the power of f and discharge voltage. Caution (When discharging, contact the metal plug of power cord with the ground.) During diagnostic test, tE1 and tE2, an error occurs.
-
Page 40: Test 3 Motor Test
FOR LG TECHNICIAN Test 3 Motor Test Before measuring resistance, be sure to turn the power off and discharge voltage. Caution (When discharging, contact the metal plug of power cord with ground wire.) Trouble Symptom Drum dose not rotate; no blower function, no heater function. -
Page 41: Test 4 Moisture Sensor
FOR LG TECHNICIAN Test 4 Moisture Sensor NOTE: This test has two parts. The best test of the moisture sensing system is done in the diagnostic mode. This FUNCTIONAL TEST will test the sensor bars, wiring harness and PCB operation. If the results of this test are normal, the sensor system and PCB response are normal. -
Page 42: Test 5 Door Switch Test
FOR LG TECHNICIAN Test 5 Door Switch Test NOTE: This test has two parts. The best test of the door switch system is done in the diagnostic mode. This FUNCTIONAL TEST will test the door switch, wiring harness and PCB operation. If the results of this test are normal, the door switch system and PCB response are normal. -
Page 43: Test 6 Heater Switch Test - Electric Type
FOR LG TECHNICIAN Test 6 Heater Switch Test - Electric Type Before measuring resistance, be sure to turn the power off, and do voltage discharge. Caution (When discharging, contact the metal plug of the power cord with a ground line.) Trouble While operating, Heating will not work. - Page 44 FOR LG TECHNICIAN Test 7 Gas Valve test - Gas Type Caution When measuring power, be sure to wear insulated gloves to avoid electric shock. While operating, heating will not work. Trouble Symptom Drying time takes longer Measurement Condition With dryer power on Power on &...
- Page 45 FOR LG TECHNICIAN Test 8 Motor Assembly, DC, Pump Before measuring resistance, be sure to turn power off, and do voltage discharge. Caution (When discharging, contact the metal plug of power cord with the ground wire.) Trouble Symptom During the diagnostic test, E5 error occurs.
-
Page 46: Change Gas Setting (Natural Gas, Propane Gas)
FOR LG TECHNICIAN CHANGE GAS SETTING (NATURAL GAS, PROPANE GAS) Warning Initially, The burner is set for natural gas at the factory. The propane orifice Natural Gas mode is set. Propane Gas Orifice is on sale as a Service conversion kit is sold as a service part to autherized servicers only. - Page 47 FOR LG TECHNICIAN GAS VALVE FLOW START KEY PUSH IGNITER ON IGNITER TEMPERATURE ABOUT FLAME DETECT OPEN VALVE 2 ON GAS IGNITION FLAME DETECT CLOSE DRYING VALVE 2 OFF GAS IGNITION GAS V AL VE STRUCTURE Adjustment Screw START CLOSE...
-
Page 48: Disassembly Instructions
FOR LG TECHNICIAN DISASSEMBLY INSTRUCTIONS Unplug the dryer before servicing. WARNING ! TOP PLATE When you disassemble the top plate, be sure to disconnect the dryer from its electrical supply. Protect your hands and arms from sharp edges when working. - Page 49 FOR LG TECHNICIAN PANEL DRAWER ASSEMBLY Pull out the drawer Lift out the steam feeder Lift the hook and pull out the drawer. PCB ASSEMBLY Remove 2 screws on the frame body. Open the cover guide and disconnect the connectors.
- Page 50 FOR LG TECHNICIAN WARNING ! CONTROL PANEL ASSEMBLY When you disassemble the control panel, be sure to disconnect the dryer from its electrical supply. Protect your hands and arms from sharp edges when working. To reduce the risk of Injury to persons adhere to...
- Page 51 FOR LG TECHNICIAN COVER CABINET WARNING ! When you disassemble the door switch connector, be sure to disconnect the dryer from its electrical supply. Protect your hands and arms from sharp edges when working. To reduce the risk of Injury to...
- Page 52 FOR LG TECHNICIAN GUIDE ASM GUIDE ASM Remove 2 screws on the frame body . Push the guide assembly to the back side and then lift it. Separate 2 hoses from the pump and generator. Lift a pump and generator up.
- Page 53 FOR LG TECHNICIAN FRAME BODY & PANEL FRAME FRAME BODY & PANEL FRAME Remove 3 screws on the frame body and then disassemble the frame body Remove 4 screws on the panel frame and then remove it.
- Page 54 FOR LG TECHNICIAN WARNING ! TUB DRUM FRONT When you disassemble the lamp connector, be sure to disconnect the dryer from its electrical supply. Protect your hands and arms from sharp edges when working. To reduce the risk of Injury to...
- Page 55 FOR LG TECHNICIAN WARNING ! DRYER EXHAUST CHANGE Before performing this exhaust installation, be sure to disconnect the dryer from its electrical supply. Protect your hands and arms from sharp edges when working inside the cabinet. To reduce the risk of Injury to persons adhere to all industry recommended safety procedures including the use of long sleeved gloves and safety glasses.
- Page 56 FOR LG TECHNICIAN FILTER ASSEMBLY Remove the filter. Remove 3 screws. Remove the cover grid. Disconnect the electrode sensor. BLOWER HOUSING Disassemble the top plate. Remove the cabinet cover and front bulkhead. Remove the drum assembly. Remove 2 screws and cover (Air guide).
- Page 57 FOR LG TECHNICIAN AIR DUCT Disassemble the top plate. Remove the cover cabinet. Remove the filter. Remove the cover guide. Remove 2 screws. Remove the air duct. ROLLERS Disassemble the top plate. Remove the cover cabinet and front bulkhead. Remove the drum assembly and front bulkhead.
-
Page 58: Exploded View
FOR LG TECHNICIAN EXPLODED VIEW 13-1. Control Panel and Plate Assembly A213 A211 A210 ※ In case before April,2015 Production. If Part Assembly (AGM75370001) is replaced, - Main, PCB(A130) - Display, PCB(A120) have to be replaced all together. A150 A130... -
Page 59: Panel Drawer Assembly And Guide Assembly
FOR LG TECHNICIAN 13-2. Panel Drawer Assembly and Guide Assembly K503 K508 K502 K506 K501 K505 K504 K507 A090 A172 A161 A160 A171 A170 A350... -
Page 60: Cabinet And Door Assembly: Electric Type
FOR LG TECHNICIAN 13-3-1. Cabinet and Door Assembly: Electric T ype A590 A700 A800 A570 A390 A560 A610 A131 A600 A300 A330 A308 A325 A500 A320 A300 A530 A510 A310 A520 A525 A410 A430 A540 A400 A420 A450 A460... -
Page 61: Cabinet And Door Assembly: Gas Type
FOR LG TECHNICIAN 13-3-2. Cabinet and Door Assembly: Gas type A590 A700 A800 A390 A131 A600 A300 A330 A308 A550 A325 A500 A320 A300 A530 A510 A310 A520 A525 A540 A410 A430 A400 A420 A450 A460... -
Page 62: Drum And Motor Assembly: Electric Type
FOR LG TECHNICIAN 13-4-1. Drum and Motor Assembly: Electric Type F200 K400 K420 K410 K120 K140 K100 K130 K250 K251 K310 K320 K330 K222 K340 K221 K620 K224 K230 K210 K250 K360 K350 K610 K560 K550 K251 K336 K335 K240... -
Page 63: Drum And Motor Assembly: Gas Type
FOR LG TECHNICIAN 13-4-2. Drum and Motor Assembly: Gas type F200 K420 K400 K410 K120 K140 K100 K130 K250 K251 K320 K310 K330 K335 K340 K222 K221 K620 K224 K230 K336 K210 K250 K360 K350 K610 K560 K550 K251 K240... - Page 64 FOR LG TECHNICIAN MAR. 2017 PRINTED IN KOREA MFL62119982...