Table of Contents
Advertisement
Quick Links
Advertisement
Table of Contents

Related Manuals for Bosch HBF113BR0Y


Summary of Contents for Bosch HBF113BR0Y
- Page 1 Oven HBF113BR0Y [en] Instruction manual...
-
Page 3: Table Of Contents
Before using for the first time....12 www.bosch-home.com and in the online shop www.bosch-eshop.com Initial use ........12 Cleaning the cooking compartment and accessories 12 Operating the appliance . -
Page 4: Intended Use
Intended use 8Intended use (Important safety information R ead these instructions carefully. Only then I n t e n d e d u s e will you be able to operate your appliance G eneral information safely and correctly. Retain the instruction I m p o r t a n t s a f e t y i n f o r m a t i o n manual and installation instructions for future Warning –... -
Page 5: Halogen Lamp
Causes of damage Water in a hot cooking compartment may Risk of scalding! ]Causes of damage ■ create hot steam. Never pour water into the hot cooking compartment. G eneral information C a u s e s o f d a m a g e Warning –... -
Page 6: Installation And Connection
Installation and connection Measures to be noted during transport 5Installation and connection Secure all mobile parts in and on the appliance using an adhesive tape that can be removed without leaving T his appliance is only intended to be fully fitted in a any traces. -
Page 7: Environmental Protection
Environmental protection Open the appliance door as infrequently as possible 7Environmental protection ■ when the appliance is in use. Y our new appliance is particularly energy-efficient. E n v i r o n m e n t a l p r o t e c t i o n Here you can find tips on how to save even more energy when using the appliance, and how to dispose of your appliance properly. -
Page 8: Getting To Know Your Appliance
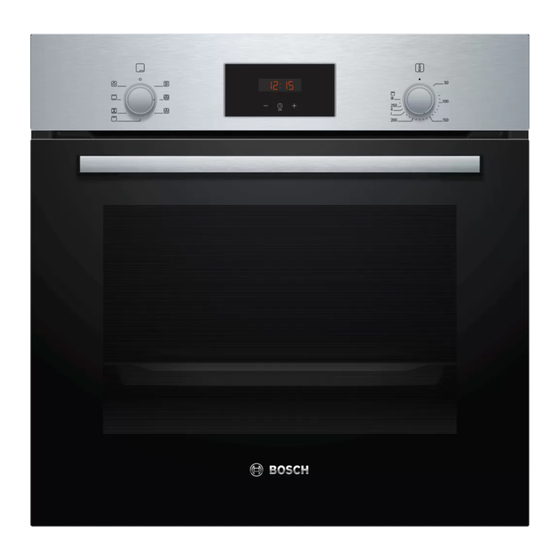
Getting to know your appliance Depending on the appliance model, individual Note: *Getting to know your details and colours may differ. appliance I n this chapter, we will explain the indicators and G e t t i n g t o k n o w y o u r a p p l i a n c e controls. -
Page 9: Types Of Heating And Functions
Getting to know your appliance Types of heating and functions Use the function selector to set the types of heating and To make sure you always use the right type of heating other functions. to cook your food, we have explained the differences and applications below. -
Page 10: Cooking Compartment
Accessories Cooking compartment _Accessories Various functions in the cooking compartment make your appliance easier to use. For example, the cooking Y our appliance is accompanied by a range of compartment is well lit and a cooling fan prevents the A c c e s s o r i e s accessories. -
Page 11: Optional Accessories
Accessories When sliding accessories into the cooking Baking tray, non-stick compartment, ensure that the kink in the side rail is at For tray bakes and small baked items. the back. Only then will they lock in place. Allows baked items to be removed more easily from the baking tray. Professional pan For preparing large quantities of food. -
Page 12: Before Using For The First Time
Before using for the first time KBefore using for the first 1Operating the appliance time Y ou have already learnt about the controls and how O p e r a t i n g t h e a p p l i a n c e they work. -
Page 13: Rapid Heating
Time-setting options Rapid heating OTime-setting options With Rapid heating, you can shorten the heat-up time. Y our appliance has different time-setting options. Then, for best results, use: T i m e - s e t t i n g o p t i o n s 3D hot air <... -
Page 14: Setting The End Time
Time-setting options Use the button to set the cooking time. Touch the button again. The end time will be highlighted on the display. The appliance will start heating after a few seconds. The remaining time will count down on the display. Use the button to delay the end time. -
Page 15: Setting The Timer
Childproof lock Setting the timer AChildproof lock You can use the timer whether or not the appliance itself is in use. However, it is not possible to set a Y our appliance is equipped with a childproof lock so cooking time or end time. C h i l d p r o o f l o c k that children cannot switch it on accidentally or change The maximum time that can be set is 23 hours and 59... -
Page 16: Cleaning
Cleaning DCleaning Door panels Hot soapy water: Clean with a dish cloth and then dry with a soft cloth. W ith good care and cleaning, your appliance will retain Do not use a glass scraper or a stainless steel C l e a n i n g its appearance and remain fully functioning for a long scouring pad. -
Page 17: Keeping The Appliance Clean
Rails Notes pRails Slight differences in colour on the front of the ■ appliance are caused by the use of different materials, such as glass, plastic and metal. W ith good care and cleaning, your appliance will retain R a i l s Shadows on the door panels, which look like its appearance and remain fully functional for a long ■... -
Page 18: Appliance Door
Appliance door Attaching the door qAppliance door Reattach the oven door in the reverse sequence to removal. W ith good care and cleaning, your appliance will retain A p p l i a n c e d o o r When attaching the oven door, ensure that both its appearance and remain fully functional for a long hinges are inserted straight into the opening... -
Page 19: Trouble Shooting
Trouble shooting Lift the panel up and pull it out (fig. C). 3Trouble shooting I f a fault occurs, there is often a simple explanation. T r o u b l e s h o o t i n g Before calling the after-sales service, please refer to the fault table and attempt to correct the fault yourself. -
Page 20: Replacing The Bulb In The Top Of The Cooking Compartment
Customer service Replacing the bulb in the top of the cooking 4Customer service compartment If the cooking compartment light bulb fails, it must be O ur after-sales service is there for you if your appliance replaced. Heat-resistant, 25 watt, 230 V halogen bulbs C u s t o m e r s e r v i c e needs to be repaired. -
Page 21: Tested For You In Our Cooking Studio
Tested for you in our cooking studio Baking on one level JTested for you in our When baking on one level, use the following shelf cooking studio positions: Position 2 – tall baked items and tins/dishes on the ■ wire rack H ere, you can find a selection of dishes and the ideal Position 3 –... -
Page 22: Cakes And Pastries
Tested for you in our cooking studio Cakes and pastries Frozen products Do not use frozen products that are heavily frosted. Your appliance offers you a range of heating types for Remove any ice on the food. the preparation of cakes and small baked items. You can find the ideal settings for many dishes in the Some frozen products may be unevenly pre-baked. - Page 23 Tested for you in our cooking studio Small baked items Dish Accessories/cookware Shelf posi- Heating Temperature Cooking tion function in °C time in mins Muffins Muffin tray 170-190 20-40 Muffins, 2 levels Muffin trays 160-170 30-40 < Small yeast cakes Universal pan 150-170 25-35...
- Page 24 Tested for you in our cooking studio Pizza, quiche and savoury cakes Dish Accessories/cookware Shelf posi- Heating Temperature Cooking tion function in °C time in min Pizza, fresh Universal pan 190-210 20-30 Pizza, fresh, 2 levels Universal pan + baking tray 160-180 35-45 <...
-
Page 25: Bakes And Gratins
Tested for you in our cooking studio Bakes and gratins Always use the shelf positions indicated. Your appliance offers a range of heating functions for You can cook food on one level in baking tins/dishes or cooking bakes. The settings tables list the optimal in the universal pan. - Page 26 Tested for you in our cooking studio When roasting, add a little liquid if the meat is lean. A Meat thermometer covering of approx. cm depth should be applied to Depending on your appliance's features, you may have the base of any glass cookware. a meat thermometer.
-
Page 27: Vegetables And Side Dishes
Tested for you in our cooking studio Meat Dish Accessories/cook- Shelf posi- Heating Step Temperature in Cooking time ware tion function °C in min Fillet of beef, medium, 1 kg Cookware, uncovered 3 210-220 45-55 Pot-roasted beef, 1.5 kg Cookware, uncovered 2 200-220 100-120 Sirloin, medium, 1.5 kg... -
Page 28: Yoghurt
Tested for you in our cooking studio Yoghurt It is sufficient to heat UHT milk to 40 °C. Stir in 30 g (approx. 1 tbsp) (chilled) yoghurt. You can use your appliance to make your own yoghurt. Pour into cups or small jars with lids and cover. Place the cups or jars onto the cooking Remove accessories and shelf supports from the compartment floor and use the settings indicated in... -
Page 29: Proving Dough
Tested for you in our cooking studio Proving dough Place the dough into a heat-resistant bowl and place this onto the wire rack. Use the settings indicated in the Your yeast dough will prove considerably more quickly table. using this heating function than at room temperature Do not open the appliance door during the proving and will not dry out. - Page 32 Robert Bosch Hausgeräte GmbH Carl-Wery-Straße 34 81739 München, GERMANY www.bosch-home.com *9001317435* 9001317435 180597(A)