Table of Contents
Advertisement
Acer Projector
PD1520/PD1520i/PD1320W/
PD1320Wi/LK-F200/LK-W200/
E5200/E3200/EF320/EW320/
DR520/DR320/FD-420/FD-220/
K651/K651i/K631/K631i/D1P1825/
DWX1826/XD1520i/XD1520/
XD1320Wi/XD1320W
User's Guide
Copyright © 2018. Acer Incorporated.
All Rights Reserved.
Acer Projector User's Guide
Original Issue: 10/2018
Advertisement
Table of Contents

Related Manuals for Acer XD1520i


Summary of Contents for Acer XD1520i
- Page 1 Acer Projector PD1520/PD1520i/PD1320W/ PD1320Wi/LK-F200/LK-W200/ E5200/E3200/EF320/EW320/ DR520/DR320/FD-420/FD-220/ K651/K651i/K631/K631i/D1P1825/ DWX1826/XD1520i/XD1520/ XD1320Wi/XD1320W User’s Guide Copyright © 2018. Acer Incorporated. All Rights Reserved. Acer Projector User’s Guide Original Issue: 10/2018...
- Page 2 Serial number: Date of purchase: Place of purchase: Acer and the Acer logo are registered trademarks of Acer Incorporated. Other companies’ product names or trademarks are used herein for identification purposes only and belong to their respective companies. HDMI™, the HDMI logo and High-Definition Multimedia Interface are trademarks or registered trademarks of HDMI Licensing LLC.
-
Page 3: Information For Your Safety And Comfort
Information for your safety and comfort Read these instructions carefully. Keep this document for future reference. Follow all warnings and instructions marked on the product. Turning the product off before cleaning Unplug this product from the wall outlet before cleaning. Do not use liquid cleaners or aerosol cleaners. - Page 4 Using electrical power y This product should be operated from the type of power indicated on the marking label. If you are not sure of the type of power available, consult your dealer or local power company. y Do not allow anything to rest on the power cord. Do not locate this product where people will walk on the cord.
- Page 5 Product servicing Do not attempt to service this product yourself, as opening or removing covers may expose you to dangerous voltage points or other risks. Refer all servicing to qualified service personnel. Unplug this product from the wall outlet and refer servicing to qualified service personnel when: y the power cord or plug is damaged, cut or frayed y liquid was spilled into the product...
- Page 6 y Do not face the projector lens to the sun. It can lead to fire. y When switching the projector off, suggest to ensure the projector completes its cooling cycle before disconnecting power. y Do not frequently turn off the main power abruptly or unplug the projector during operation.
- Page 7 Do not throw this electronic device into the trash when discarding. To minimize pollution and ensure utmost protection of the global environment, please recycle. For more information on the Waste from Electrical and Electronics Equipment (WEEE) regulations, http://www.acer-group.com/public/Sustainability/sustainability01.htm visit Do not stare into beam, RG2 As with any bright source, do not stare into the direct beam, RG2 IEC 62471-5:2015.
-
Page 8: First Things First
First things first Usage Notes y Turn off the product before cleaning. y Use a soft cloth moistened with mild detergent to clean the displayhousing. y Disconnect the power plug from AC outlet if the product is not being used for a long period of time. -
Page 9: Table Of Contents
Contents Information for your safety and comfort ......................3 First things first ................................8 Usage Notes .......................... 8 Precautions ..........................8 Introduction ................................11 Package Contents ....................... 11 About Your Projector ......................12 Main Unit ......................... 12 Input / Output Connections ..................13 Control Panel ...................... - Page 10 Multi-Media Introduction ...................... 34 Photo Format ......................34 Video Format ......................34 Audio Format ......................35 Office Viewer Format ....................35 How to set-up File Type for Multi-Media with USB ..........37 Multi-Media Main Menu ................... 43 Multi-Media Settings for System and USB .............. 44 System Settings .......................
-
Page 11: Introduction
Introduction Package Contents Your projector comes with all the items shown below. Ensure that you have all the items, and contact your local reseller or service center if anything is missing. Projector Lens cap Power cable HDMI cable CD user manual Quick Start Guide Warranty card Carrying case... -
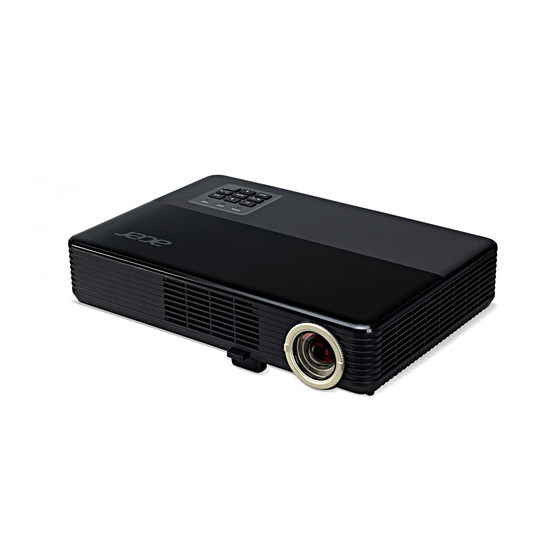
Page 12: About Your Projector
About Your Projector Main Unit Description Description Control panel Tilt-adjustment feet Ventilation (intake) Ventilation (intake) (WXGA model only) Input / Output connections Focus ring Ventilation (exhaust) 10 Lens IR sensor 11 Lens cap Ventilation (intake) (1080p model only) Note: - Do not block projector intake and exhaust vents. - When operating the projector in an enclosed space, allow at least 15cm clearance around the intake and exhaust vents. -
Page 13: Input / Output Connections
Input / Output Connections Description USB1 File Reader and Service* USB2 for optional Wireless Adapter* HDMI/MHL connector VGA/YPbPr connector VIDEO connector AUDIO IN connector AUDIO OUT connector Power socket Kensington Lock Port Note: - Both File Reader and Wireless Adapter USB A connectors support up to USB 2.0 and 5V/1A power. -
Page 14: Control Panel
Control Panel Name Description Power LED Indicates the projector’s power status. Please refer to “Status Indicators” for more information on Power LED behavior. Lamp LED Indicates the projector’s lamp status. Please refer to “Status Indicators” for more information on Lamp LED behavior. Keystone Adjusts the image to compensate for distortion caused by tilting the Correction... -
Page 15: Remote Control
Remote Control Name Description ReSync Press to automatically synchronize the projector to the input source. Source Press to select an input signal. Video Press to choose the video source. Keystone + Press to adjust image distortion caused by tilting the projector. Freeze Press to freeze and unfreeze the displayed image. -
Page 16: Installing The Remote Control Battery
Installing the Remote Control Battery 1. Remove the battery holder by holding down the side release firmly and pulling out the battery holder. 2. Insert a CR2025 coin cell battery and align the polarity correctly according to the marking in the battery holder. 3. -
Page 17: Installation
Installation Connecting the Projector USB flash drive Smart devices Display Video Output Speakers Screen 3D IR Emitter Audio Output English... - Page 18 Description Power cord Audio cable HDMI (MHL) cable VGA to component/HDTV adapter VGA cable 3 RCA component cable Composite video cable RS232 cable WirelessHD dongle 10 Wireless dongle 11 Wireless remote control 12 LAN cable 13 12V DC cable 14 3D SYNC cable 15 SPDIF cable 16 USB flash drive Note:...
-
Page 19: Turning On/Off The Projector
Turning On/Off the Projector Turning Your Projector On Note: Turn on the projector before you turn on the source (computer, DVD player, etc.). The Power LED is lighted solid red until the Power button is pressed. 1. Connect the power cord and appropriate signal cables to the projector. 2. -
Page 20: Adjusting The Projected Image
Adjusting the Projected Image The projector is equipped with tilt-adjustment feet for adjusting the image height. 1. Press the tilt-adjustment foot release button. Hold the release button to adjust the height then release to lock. 2. Rotate the rear feet counter clockwise to raise the projector or clockwise to lower it. Tilt-adjustment foot release button Tilt-adjustment feet... -
Page 21: Adjusting Projection Image Size
Adjusting Projection Image Size WXGA Series To obtain an image size of 80” set the projector at a distance 2.2 m from the screen. 80” Desired image size Height: 111 cm from base to top of image 2.2 m Desired Distance Desired image size Distance (m) Top (cm) - Page 22 1080p Series To obtain an image size of 80” set the projector at a distance 2.1 m from the screen. 80” Desired image size Height: 103 cm from base to top of image 2.1 m Desired Distance Desired image size Distance (m) Top (cm) Diagonal (inch)
-
Page 23: User Controls
User Controls Using the On-Screen Display 1. The projector has a multi-language On-Screen Display (OSD) Menu that can be displayed with or without an input source. 2. Press the Menu button to enter the Main Menu. 3. To select an option, press the button. -
Page 24: Image
Image Image Saturation Aspect Ratio Auto Zoom Color Temperature Warm Color Space Frequency Phase Select Exit Enter Saturation: Adjust the saturation of the image. Note: Not available with computer sources. Hue Adjust the hue of the image. Note: Not available with computer sources. -
Page 25: Display
Display Display Auto Keystone Keystone Projection Select Exit Enter Auto Keystone: Select On to automatically adjust image distortion caused by tilting the projector. Note: The Auto Keystone function can be only used to adjust the image distortion vertically. Keystone: Adjust image distortion caused by tilting the projector (+/-40 degrees). ... -
Page 26: Setup
Setup Setup Language English Boot-up Source Auto Direct Power On Sleep Timer (Hours) Advanced Reset Select Exit Enter Language: Set the language for the OSD. Boot-up Source: Select the projector’s boot-up source. Options are: Auto, VGA, Video, HDMI, and Media. Note: If set to Auto the last source used will be displayed. -
Page 27: Setup > Advanced
Setup > Advanced Advanced Mute 3D Sync. Invert High Altitude Select Exit Enter Mute: Turn the mute function on or off. 3D: Turn the 3D function on or off. 3D Sync. Invert: Turn the 3D sync. inverter option on or off. ... -
Page 28: Main Menu (Type 2)
Main Menu (Type 2) Menu Input Source HDMI Display Mode Bright Audio Color Image Setup Info Select Exit Enter Input Source: Select your projector’s input source. The options are: HDMI, VGA, Video, and Media. Display Mode: Optimize the display image. The options are: Bright, PC, sRGB, ... -
Page 29: Color
Color Color Brightness Contrast Saturation BrilliantColor Color Temperature Warm Gamma Color Space Auto Select Exit Enter Brightness: Adjust the display brightness. Contrast: Adjust the display contrast. Saturation: Adjust the saturation of the image. Note: Not available with computer sources. Hue Adjust the hue of the image. -
Page 30: Image
Image Image Projection Aspect Ratio Auto Zoom Sharpness H. Position V. Position Frequency Phase Select Exit Enter Projection: Select the projection mode, depending upon how the projector is mounted. Auto Keystone: On Direct projection Rear projection Auto Keystone: Off Direct projection Rear projection Ceiling mount projection... - Page 31 Phase: Synchronize the signal timing of the display with the graphic card. If the image appears to be unstable or flickers, use the Phase to correct it. This is a fine adjustment. Note: The Phase can be adjusted only in VGA mode. 3D Format Auto 3D Sync.
-
Page 32: Setup
Setup Setup Language English Source Lock Auto Keystone Keystone Sleep Timer (Hours) Auto Direct Power On DC 5V Out High Altitude HDMI EDID Reset Select Exit Enter Language: Set the language for the OSD. Source Lock: Select On to lock the current source as the only available source, ... -
Page 33: Info
Reset: Reset all settings to the factory default, including computer sources and video source settings. After choosing this option, a confirmation message appears on the screen. Select Yes to confirm or No to cancel reset. Reset Reset? Info Info Serial Number Signal Type 1920x1080 60Hz... -
Page 34: Multi-Media Introduction
Multi-Media Introduction Multi-media format supported: Photo Format Image Type Sub Type Encode Type Max Size (Ext Name) Jpeg / Jpg Baseline YUV420 6000x4000=24,000,000 pixels YUV422 YUV440 YUV444 Progressive YUV420 6000x4000=24,000,000 pixels YUV422 YUV440 YUV444 6000x4000=24,000,000 pixels Video Format File Format Video Format Decode Max Max Bit Rate... -
Page 35: Audio Format
File Format Video Format Decode Max Max Bit Rate Audio Format Profile res. (bps) VC-1 1920x1080 30M bps WMA8/9 SP (Simple 30fps Profile)/ MP (Main Profile) Audio Format Music Type (Ext Name) Sample Rate (KHz) Bit Rate (Kbps) 8-48 8-320 8-48 5-320 WAV (ADPCM-WAV) - Page 36 File Format Supported Version Page/Lines Limitation Size Limitation PowerPoint 97 Up to 100 pages (One File) Up to 19MB PowerPoint PowerPoint 2000, 2002, 2003 PowerPoint 2007(.pptx) PowerPoint 2010(.pptx) Office XP PowerPoint PowerPoint presentation 2003 and earlier (.ppx) PowerPoint presentation 2007 and 2010 (.ppsx) Note: - Animations are not supported when viewing MS PowerPoint files.
-
Page 37: How To Set-Up File Type For Multi-Media With Usb
How to set-up File Type for Multi-Media with USB Note: 1. A USB flash disk must be plugged into the projector if you want to use the multimedia USB function. 2. Please do not connect a camera to USB port in order to avoid compatibility issues. Follow these steps to playback the Photo, Video, Music, or Office files on your projector: 1. - Page 38 The EZ Media menu opens. Note: The USB icon indicates if a USB disk is inserted in connector USB1. 4. Access the USB menu and select the multimedia files: Photo, Video, Music, or Office. Or select the Settings option to change settings for Photo, Video, or Music. 5.
- Page 39 Photo Folder When Photo folder is selected, the image data and folder with image format data will be displayed. Only folders that contain photos will be displayed. Use the button to select the folder containing the photo you want to display, and then press the Enter button.
- Page 40 Video Folder When Video folder is selected, the video filename and folder with video content will be displayed. Only folders with video files will be displayed. Use the button to select the folder containing the video you want to view, and then press the Enter button.
- Page 41 Music Folder When Music folder is selected, the music filename and folder with music content will be displayed. Only folders with music files will be displayed. Use the button to select the folder containing the music file you want to hear, and then press the Enter button.
- Page 42 The commands are: : Goes to the previous music file. : Rewinds playback. : Pauses playback; : Restarts playback. : Goes to the next music file. : Opens settings page. : Exits playback and returns to the file list. Volume adjustment After the music is played for approximately 10 seconds, the control command bar will automatically disappear.
-
Page 43: Multi-Media Main Menu
Office Folder When Office folder is selected, office formatted filename and folder containing office files will be displayed. Only folders with office documents will be displayed. Note: If you cannot see the desired office file in the folder, make sure the file format is supported. Please refer to page 35. -
Page 44: Multi-Media Settings For System And Usb
Multi-Media Settings for System and USB The multi-media settings menu allows you to change settings for System, Photo, Video, and Music. System Settings Access the system settings menu. The system settings menu provides the following options: Version Displays the Media firmware version. Update ... -
Page 45: Photo Settings
Photo Settings Access the photo settings menu. The photo settings menu provides the following options: Effect Select the slide transition effect for the slideshow. Options are: Off, Mode A, Mode B, or Mode C. Display Interval Select the slideshow duration. Options are: 10 sec, 30 sec, or 1 min. The image will automatically switch to the next photo after the time out. -
Page 46: Music Setup
Display Ratio Select the display ratio of the video. Auto: The resolution of the video image is detected automatically. Full screen: Regardless the native aspect ratio, the video image is stretched non-linearly in the horizontal and vertical directions to exactly fit the 16:10 screen. You will not see the "black bars"... -
Page 47: Office Setup
Office Setup Access the office settings menu. The office settings menu provides the following option: Display Mode Select the document display mode. Options are: Fit to Width, Fit to Height, or Fit to Screen. English... -
Page 48: Mirroring The Screen Of A Portable Device
Mirroring the Screen of a Portable Device Follow these steps to mirror the screen of your portable device: 1. Connect the power cord to the projector and turn on the projector by pressing the Power button. Select the Media source using the remote control or control panel on the projector. The Multi-Media menu opens. - Page 49 The EZCast Pro menu opens. 3. Do one of the following: • Depending on the operating system of your mobile device, open the App Store (iOS) or Google Play (Android) and install the EZCast Pro app on your mobile device. •...
- Page 50 6. Open the EZCast Pro app on the portable device. iOS and Android Windows 7. Select what you want to display, local photos and documents, files from the Web or Cloud storage. The display of your device will be mirrored by the projector. 50 English...
-
Page 51: Wifi Display For Ios/Android
WiFi Display for iOS/Android 1. Select the Media source using the remote control or control panel on the projector. The Multi-Media menu opens. 2. Select the Wireless Display menu. English... - Page 52 3. Select operating system device. right key left key Menu Menu (back) Enter key Enter key (back) Note: The Wireless transmission must be activated on your device. Get New Firmware Notification 1. Auto-notice: Get new firmware notification in “EZCast Pro”. 52 English...
- Page 53 2. Manual Upgrading: Choose OTA to upgrade the new firmware by button in the OSD EZ Media > System > Update. Note: Choose and press the Enter button to save the settings and exit the menu or choose and press the Enter button to exit the menu without saving the settings. English...
-
Page 54: Appendices
If the image is still stretched, adjust the format in the Menu > Image > Aspect Ratio menu in the OSD. Power LED is flashing A projector LED has failed and the projector will automatically amber and Lamp LED is shut down. If the problem persists, contact Acer. solid amber. 54 English... -
Page 55: Status Indicators
The projector has overheated. The display automatically amber, is solid blue, and shuts down. Turn the display on again after the projector cools down. If the problem persists, contact Acer. Temp LED is flashing amber If the projector fan fails, the projector will automatically shut down. -
Page 56: Compatibility Modes (Hdmi/Vga)
Compatibility Modes (HDMI/VGA) A. VGA Analog V.Frequency H.Frequency WXGA 1080p Modes Resolution Model Model [Hz] [KHz] (1) VGA Analog - PC Signal 640x480 31.5 640x480 37.5 800x600 37.9 800x600 46.9 800x600 77.4 1024x768 48.4 1024x768 60.0 1024x768 99.0 SXGA 1280x1024 64.0 1280x1024 80.0... - Page 57 V.Frequency H.Frequency WXGA 1080p Modes Resolution Model Model [Hz] [KHz] (3) VGA Analog - Component Signal 480i 720x480(1440x480) 59.94(29.97) 15.734 576i 720x576(1440x576) 50(25) 15.625 480p 720x480 59.9 31.47 576p 720x576 50.0 31.25 720p 1280x720 60.0 720p 1280x720 50.0 37.5 1080i 1920x1080 60(30) 33.75...
- Page 58 V.Frequency H.Frequency WXGA 1080p Modes Resolution Model Model [Hz] [KHz] (2) HDMI - Extended Wide timing 720x480 59.94 31.5 WXGA 1280x768 47.8 1280x720 44.8 1280x720 16:9 120.0 1280x800 49.6 1440x900 59.9 WSXGA+ 1680x1050 65.3 1920x1080 67.5 (1080P) 1366x768 47.7 1920x1080 3840x2160 60.0 135.0...
- Page 59 V.Frequency H.Frequency WXGA 1080p Modes Resolution Model Model [Hz] [KHz] 3840x2160 30.0 67.5 3840x2160 50.0 112.5 3840x2160 60.0 135.0 4K2K 4096x2160 24.0 54.0 4K2K 4096x2160 25.0 56.3 4K2K 4096x2160 30.0 67.5 4K2K 4096x2160 50.0 112.5 4K2K 4096x2160 60.0 135.0 (4) HDMI – 1.4a 3D Timing 720p (Frame Packing) 1280x720 37.5...
-
Page 60: Ceiling Mount The Projector
Ceiling Mount the Projector 1. To prevent damage to your projector please use the Acer mount. 2. If you wish to use a third party ceiling mount kit, please ensure the screws used to attach a mount to the projector meet the following specifications: • Screw type: M4 x 3... -
Page 61: Specification
Specification Optical Description Maximum resolution - WXGA (1280 x 800) - 1080p (1920 x 1080) Lighting source RGB LED (LED life=20,000hrs) Lens Manual focus Image size (diagonal) - WXGA: 29.4" ~ 300" (75cm ~ 762cm) - 1080p: 30.1" ~ 300" (76cm ~ 762cm) Projection distance - WXGA: 0.8m ~ 8.2m (2.62'~26.8') - 1080p: 0.8m ~ 8.0m (2.62'~26.1') -
Page 62: Regulations And Safety Notices
Regulations and safety notices FCC notice This device has been tested and found to comply with the limits for a Class B digital device pursuant to Part 15 of the FCC rules. These limits are designed to provide reasonable protection against harmful interference in a residential installation. This device generates, uses, and can radiate radio frequency energy and, if not installed and used in accordance with the instructions, may cause harmful interference to radio communications. - Page 63 Compliant with Russian/ Ukraine regulatory certification Radio device regulatory notice Note: The regulatory information below is for models with wireless LAN and/or Bluetooth only. General This product complies with the radio frequency and safety standards of any country or region in which it has been approved for wireless use. Depending on configurations, this product may or may not contain wireless radio devices (such as wireless LAN and/or Bluetooth modules).
- Page 64 Acer Marketing name: UWA5 We, Acer Incorporated, hereby declare under our sole responsibility that the product described above is in conformity with the relevant Union harmonization legislations: Directive 2014/53/EU on Radio Equipment, RoHS Directive 2011/65/EU and ErP Directive 2009/125/EC. The following harmonized...
- Page 65 Marketing name: PD1520/PD1320W/LK-F200/LK-W200/E5200/E3200/EF320/EW320/ DR520/DR320/FD-420/FD-220/K651/K631 We, Acer Incorporated, hereby declare under our sole responsibility that the product described above is in conformity with the relevant Union harmonization legislations: Directive 2014/53/EU on Radio Equipment, RoHS Directive 2011/65/EU and ErP Directive 2009/125/EC. The following harmonized...
- Page 66 D1P1825/DWX1826 Marketing name: PD1520i/PD1320Wi/K651i/K631i We, Acer Incorporated, hereby declare under our sole responsibility that the product described above is in conformity with the relevant Union harmonization legislations: Directive 2014/53/EU on Radio Equipment, RoHS Directive 2011/65/EU and ErP Directive 2009/125/EC. The following harmonized...
- Page 67 Acer America Corporation 333 West San Carlos St., Suite 1500 San Jose, CA 95110 U. S. A. Tel: 254-298-4000 Fax: 254-298-4147 www.acer.com Federal Communications Commission Declaration of Conformity This device complies with Part 15 of the FCC Rules. Operation is subject to the...