Sharp PN-65TH1 Setup Manual
Hide thumbs
Also See for PN-65TH1:
- Software manual (19 pages) ,
- Operation manual (62 pages) ,
- Operation manual (71 pages)
Table of Contents
Advertisement
Available languages
Available languages
Quick Links
PN-85TH1
PN-75TH1
PN-65TH1
LCD MONITOR
MONITEUR LCD
MONITOR LCD
LCD FARBMONITOR
ЖК МОНИТОР
SETUP MANUAL
MANUEL D'INSTALLATION
MANUAL DE INSTALACIÓN
INSTALLATIONSANLEITUNG
РУКОВОДСТВО ПО УСТАНОВКЕ
ENGLISH ...... E1
FRANÇAIS ..... F1
ESPAÑOL .... S1
DEUTSCH ..... D1
РУССКИЙ...... Р1
.املرفقة
الدليل باللغة العربية يوجد يف أسطوانة
(
CD-ROM
)
Advertisement
Chapters
Table of Contents

Related Manuals for Sharp PN-65TH1


Summary of Contents for Sharp PN-65TH1
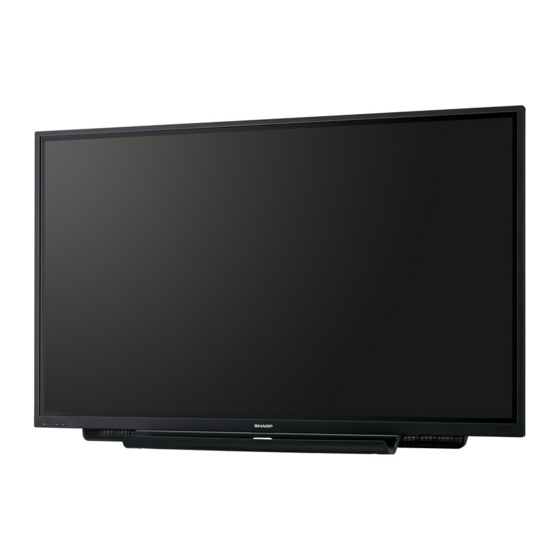
- Page 1 PN-85TH1 PN-75TH1 PN-65TH1 LCD MONITOR MONITEUR LCD MONITOR LCD LCD FARBMONITOR ЖК МОНИТОР SETUP MANUAL MANUEL D’INSTALLATION MANUAL DE INSTALACIÓN INSTALLATIONSANLEITUNG РУКОВОДСТВО ПО УСТАНОВКЕ ENGLISH ..E1 FRANÇAIS ..F1 ESPAÑOL ..S1 DEUTSCH ..D1 РУССКИЙ..Р1 .املرفقة الدليل باللغة العربية يوجد يف أسطوانة...
- Page 2 FOR CUSTOMERS IN U.K. IMPORTANT The wires in this mains lead are coloured in accordance with the following code: GREEN-AND-YELLOW: Earth BLUE: Neutral BROWN: Live As the colours of the wires in the mains lead of this apparatus may not correspond with the coloured markings identifying the terminals in your plug proceed as follows: •...
-
Page 3: Table Of Contents
D-sub input terminal, RS-232C input terminal, and DisplayPort input/output terminals. DEAR SHARP CUSTOMER Thank you for your purchase of a SHARP LCD product. To ensure safety and many years of trouble-free operation of your product, please read the Safety Precautions carefully before using this product. -
Page 4: Safety Precautions
SAFETY PRECAUTIONS Electricity is used to perform many useful functions, but it can also cause personal injuries and property damage if improperly handled. This product has been engineered and manufactured with the highest priority on safety. However, improper use can result in electric shock and/or fire. -
Page 5: Safety Instruction
Please request a cleaning of the inside of the monitor from - Set “Wireless Region” appropriately for your region. (See an authorized SHARP servicing dealer or service center. SOFTWARE GUIDE.) - The power outlet shall be installed near the equipment and shall be easily accessible. -
Page 6: Mounting Precautions
• Mounting the monitor on the wall requires special expertise exposed to direct sunlight or other strong light. Since this and the work must be performed by an authorized SHARP product operates with infrared rays, such light may cause a dealer. -
Page 7: Supplied Components
Setup Manual (this manual): 1 Place this sticker onto the SHARP logo to cover the logo. * SHARP Corporation holds authorship rights to the Utility Disk program. Do not reproduce it without permission. * For environmental protection! Do not dispose of batteries in household waste. Follow the disposal instructions for your area. -
Page 8: Connections
To install the software, see the manual for each. Touch Viewing Software setup program and SHARP Display Connect setup program can be downloaded using Information Display Downloader. • The terms HDMI, HDMI High-Definition Multimedia Interface, and the HDMI Logo are trademarks or registered trademarks of HDMI Licensing Administrator, Inc. -
Page 9: Turning Power On/Off
Turning Power On/Off Turning power on/off Caution • Turn on the monitor first before turning on the computer or Press the POWER button to turn the power ON/OFF. playback device. You can also turn the power ON/OFF by pressing the •... - Page 10 DATE/TIME SETTING the date and time. • Please contact an authorized SHARP servicing dealer - - / - - / - - - - - - - - : - - : - - or service center for assistance with internal battery replacement.
-
Page 11: Mounting Precautions (For Sharp Dealers And Service Engineers)
Mounting Precautions (For SHARP dealers and service engineers) • When installing, removing or moving the monitor, ensure that this is carried out by at least 4 people. (PN-65TH1: at least 2 people.) • Be sure to use a wall-mount bracket designed or designated for mounting the monitor. - Page 12 nAttaching the Tray Secure the tray using 5 tray mounting screws (M3x10) (supplied). nAttaching the speaker covers Speaker cover attachment screws (M3x10) (supplied) If you will use the monitor in a portrait orientation, the speaker cover is not used.
- Page 13 D-sub, borne d’entrée RS-232C, et bornes d’entrée/sortie DisplayPort. CHER CLIENT Nous vous remercions d’avoir acheté cet appareil SHARP à écran LCD. Afin de garantir le bon fonctionnement de ce moniteur, nous vous conseillons de lire attentivement cette brochure et de la conserver pour toute référence ultérieure.
-
Page 14: Précautions De Sécurité
PRÉCAUTIONS DE SÉCURITÉ L’électricité remplit de nombreuses fonctions utiles, mais elle peut provoquer des blessures et des dégâts matériels si elle n’est pas utilisée correctement. Cet appareil a été conçu et fabriqué en attachant la plus grande importance à la sécurité. Cependant, une utilisation inadéquate peut entraîner une décharge électrique et/ou un incendie. -
Page 15: Mesures De Sécurité
Faites nettoyer l’intérieur du moniteur par un revendeur région où vous l’avez acheté. SHARP ou un centre de services autorisé. - Les chaînes et les fréquences pouvant être utilisées pour - La prise d’alimentation secteur doit être installée près de le LAN sans fil varient selon le pays et selon la région. -
Page 16: Précautions Pour Le Montage
être recommandés par SHARP. Lorsque c’est le cas, veuillez fait par un revendeur agréé par SHARP. Vous ne devez vérifier la température de fonctionnement des accessoires jamais tenter de faire ce travail vous-même. Notre société... -
Page 17: Composants Fournis
Logo SHARP sur le couvercle : 1 Placez cet autocollant sur le logo SHARP pour le couvrir. * SHARP Corporation détient les droits d’auteur du programme de l’Utility Disc. Veuillez ne pas le reproduire sans autorisation de la société. -
Page 18: Connexions
Une fois le Information Display Downloader installé, vous pouvez consulter et télécharger les dernières versions des logiciels. Pour installer le logiciel, reportez-vous au manuel de chacun. Les programmes de configuration de Touch Viewing Software et de SHARP Display Connect peuvent être téléchargés à l’aide de Information Display Downloader. -
Page 19: Mise Sous Tension Et Hors Tension
Mise sous tension et hors tension Mise sous/hors tension Attention • Mettez sous tension le moniteur d’abord avant de mettre Appuyez sur le bouton POWER pour mettre sous/hors sous tension l’ordinateur ou l’équipement de lecture. tension. • Lors de la mise hors tension et de la remise sous tension, Vous pouvez également mettre sous/hors tension en appuyant ou lorsque vous appuyez sur l’interrupteur principal ou le sur le bouton MONITOR ON/bouton MONITOR OFF de la... - Page 20 DATE/TIME SETTING batterie interne, réglez la date et l’heure. • Contactez votre revendeur SHARP ou un centre de - - / - - / - - - - - - - - : - - : - - services autorisé pour le remplacement de la batterie interne.
-
Page 21: Précautions Pour Le Montage
Précautions pour le montage (À l’attention des revendeurs et techniciens SHARP) • L’installation, le démontage ou le déplacement du moniteur doit être fait par 4 personnes ou plus. (PN-65TH1 : au moins 2 personnes.) • Veillez à utiliser un support mural conçu ou prévu pour la fixation du moniteur. - Page 22 nFixation du plateau Fixez le plateau en utilisant 5 vis de montage de plateau (M3x10) (fournies). nFixation du cache de haut-parleur Vis de fixation du cache de haut-parleur (M3x10) (fournies) Si vous prévoyez d’utiliser le moniteur avec l’orientation verticale, le cache de haut-parleur n’est pas utilisé.
-
Page 23: Información Importante
HDMI, terminal de entrada D-sub, terminal de entrada RS-232C y terminales de entrada/salida DisplayPort. ESTIMADO CLIENTE DE SHARP Gracias por adquirir un producto LCD de SHARP. Para garantizar la seguridad y muchos años de funcionamiento sin problemas, lea atentamente las Precauciones de seguridad antes de utilizar este producto. -
Page 24: Precauciones De Seguridad
PRECAUCIONES DE SEGURIDAD La electricidad se emplea para muchas funciones útiles pero también puede causar lesiones personales y daños en la propiedad si se manipula de forma inadecuada. Este producto se ha diseñado y fabricado poniendo el máximo énfasis en la seguridad. -
Page 25: Instrucciones De Seguridad
Solicite la limpieza del interior del monitor a un distribuidor o LAN inalámbrica varían según el país y la región. servicio técnico autorizado de SHARP. - Defina “Wireless Region” <Región inalámbrica> como - La toma de corriente deberá estar instalada cerca del equipo corresponda según su región. -
Page 26: Precauciones De Montaje
SHARP, ya que Debido a que este producto funciona mediante rayos existen condiciones específicas de montaje. -
Page 27: Componentes Suministrados
Hoja de especificaciones tapar el logotipo. * SHARP Corporation posee los derechos de autor del programa Disco de utilidades. No lo reproduzca sin permiso. * ¡Para protección medioambiental! No vierta las pilas en la basura doméstica. Respete la normativa de vertido local. -
Page 28: Conexiones
Para instalar el software, consulte el manual correspondiente. El programa de instalación de Touch Viewing Software y el programa de instalación de SHARP Display Connect se pueden descargar mediante la Information Display Downloader. • Los términos HDMI y HDMI High-Definition Multimedia Interface, y el Logotipo HDMI son marcas comerciales o marcas registradas de HDMI Licensing Administrator, Inc. -
Page 29: Encendido/Apagado
Encendido/apagado Encendido/apagado Precaución • Encienda el monitor antes de encender el ordenador o el Pulse el botón POWER para encender/apagar. dispositivo de reproducción. También puede encender/apagar la alimentación pulsando el • Cuando apague el interruptor primario o el botón POWER botón MONITOR ON/botón MONITOR OFF de la control remoto. - Page 30 • Póngase en contacto con su distribuidor o servicio técnico - - / - - / - - - - - - - - : - - : - - autorizado de SHARP para obtener ayuda sobre la sustitución de la pila interna.
-
Page 31: Precauciones De Montaje (Para Distribuidores Y Técnicos De Servicio De Sharp)
Precauciones de montaje (para distribuidores y técnicos de servicio de SHARP) • Cuando instale, desinstale o traslade el monitor, asegúrese de sujetarlo entre 4 personas como mínimo. (PN-65TH1: al menos 2 personas.) • Asegúrese de utilizar un soporte de montaje mural diseñado para la instalación del monitor. - Page 32 nColocación de la bandeja Asegure la bandeja usando 5 tornillos de montaje de la bandeja (M3x10) (suministrados). nColocación de la tapa del altavoz Tornillos de fijación de la tapa del altavoz (M3x10) (suministrados) Si va a usar el monitor en orientación vertical, la tapa del altavoz no se usa.
- Page 33 D-Sub-Eingangsanschluss, RS-232C-Eingangsanschluss und DisplayPort-Eingangs-/Ausgangsanschlüsse. VEREHRTE KUNDIN, VEREHRTER KUNDE Wir danken Ihnen für den Kauf eines SHARP LCD-Gerätes. Um Ihre Sicherheit sowie einen jahrelangen, störungsfreien Betrieb dieses Produkts zu gewährleisten, lesen Sie bitte den Abschnitt “Sicherheitsvorkehrungen” vor der Verwendung des Produkts...
-
Page 34: Sicherheitsvorkehrungen
SICHERHEITSVORKEHRUNGEN Elektrizität erfüllt viele nützliche Aufgaben, kann aber auch Personen- und Sachschäden verursachen, wenn sie unsachgemäß gehandhabt wird. Dieses Produkt wurde mit Sicherheit als oberster Priorität konstruiert und hergestellt. Dennoch besteht bei unsachgemäßer Handhabung u.U. Stromschlag- und Brandgefahr. Um mögliche Gefahren zu vermeiden, befolgen Sie beim Aufstellen, Betreiben und Reinigen des Produkts bitte die nachstehenden Anleitungen. -
Page 35: Sicherheitsanleitung
Bitte lassen Sie das Innere des Monitors von einem autorisierten SHARP-Händler oder einem SHARP Servicecenter reinigen. - Die für WLAN verwendeten Kanäle und Frequenzen sind je nach Land und Region unterschiedlich. -
Page 36: Wichtige Hinweise Zur Befestigung
• Die Temperaturbedingungen können sich ändern, wenn der • Für die Wandbefestigung des Monitors sind Spezialkenntnisse Monitor zusammen mit von SHARP empfohlenem Zubehör erforderlich. Diese Arbeit darf daher nur von einem verwendet wird. Überprüfen Sie in diesem Fall bitte die für autorisierten SHARP-Händler durchgeführt werden. -
Page 37: Mitgelieferte Komponenten
Um das Logo zu verdecken, überkleben Sie das SHARP- Logo mit diesem Aufkleber. * Die SHARP Corporation besitzt die Autorenrechte am Utility Disk Programm. Eine Vervielfältigung dieses Programms ohne schriftliche Genehmigung ist daher nicht gestattet. * Der Umwelt zuliebe ! Batterien dürfen nicht mit den Hausmüll entsorgt werden, sondern verlangen Sonderbehandlung. -
Page 38: Anschlüsse
Für die Installation der Software wird auf die jeweilige Bedienungsanleitung verwiesen. Die Setup-Programme Touch Viewing Software und SHARP Display Connect können über den Information Display Downloader heruntergeladen werden. • Die Begriffe HDMI und HDMI High-Definition Multimedia Interface sowie das HDMI-Logo sind Marken oder eingetragene Marken von HDMI Licensing Administrator, Inc. -
Page 39: Ein- Und Ausschalten
Ein- und ausschalten Ein- und ausschalten Vorsicht • Schalten Sie zuerst den Monitor und erst danach den Drücken Sie auf die Taste POWER, um die Stromversorgung Computer oder ein anderes Wiedergabegerät ein. ein- oder auszuschalten. • Warten Sie zwischen dem Ein- und Ausschalten des Sie können die Stromversorgung auch ein- oder ausschalten, Hauptnetzschalters oder der Taste POWER immer indem Sie auf der Fernbedienung die Taste MONITOR ON/... - Page 40 Sie Datum und Uhrzeit ein. • Wenden Sie sich wegen des Austausches der internen The date/time setting must be set by APPLICATION. Batterie an einen autorisierten SHARP-Händler oder ein [SET] : Display "Date & time" on APPLICATION autorisiertes SHARP Servicecenter.
-
Page 41: Wichtige Hinweise Zur Befestigung
• Verwenden Sie für die Installation nur die Schraubenlöcher für Montagewinkel auf der Rückseite des Monitors. • Wenn dieser Monitor mehr als 20 Grad von der Senkrechten nach oben geneigt wird, in Bezug zur waagrechten Fläche, wenden Sie sich an einen autorisierten SHARP-Händler, da spezielle Montagebedingungen beachtet werden müssen. - Page 42 nAnbringen der Ablage Verwenden Sie zum Sichern der Ablage 5 Ablagenschrauben (M3x10) (im Lieferumfang enthalten). nMontage der Lautsprecherabdeckungen Befestigungsschrauben für Lautsprecherabdeckung (M3x10) (im Lieferumfang enthalten) Wenn der Monitor in vertikaler Ausrichtung verwendet wird, wird die Lautsprecherabdeckung nicht verwendet.
- Page 43 Включение/выключение питания .......7 ПРАВИЛА ТЕХНИКИ БЕЗОПАСНОСТИ ......2 Меры предосторожности при креплении (Для Инструкции по безопасности ........3 дилеров и инженеров по обслуживанию SHARP) ...9 МЕРЫ ПРЕДОСТОРОЖНОСТИ ПРИ КРЕПЛЕНИИ ..4 Комплектные принадлежности........5 Подготовка пульта дистанционного управления ..5 Прочитайте руководства c компакт-диска. (Для просмотра руководств необходим Adobe Acrobat Reader.) ВАЖНАЯ...
-
Page 44: Уважаемый Клиент Компании Sharp
УВАЖАЕМЫЙ КЛИЕНТ КОМПАНИИ SHARP Благодарим вас за приобретение ЖК монитора SHARP. Для обеспечения безопасности и многолетней беспроблемной эксплуатации приобретенного вами изделия внимательно прочтите правила по технике безопасности перед тем, как начать его эксплуатацию. ПРАВИЛА ТЕХНИКИ БЕЗОПАСНОСТИ Электричество используется для выполнения многих полезных функций, но оно также может причинять травмы персоналу и быть... -
Page 45: Инструкции По Безопасности
пределами страны или региона, где он был приобретен. Рекомендуем обратиться к авторизованному - Каналы и частоты, которые могут использоваться для представителю или в сервисный центр SHARP для беспроводной локальной сети, зависят от страны и региона. очистки внутренней части монитора. - Настройте параметр “Wireless Region” <Регион... -
Page 46: Меры Предосторожности При Креплении
другие меры для того, чтобы температура окружающей поэтому такая работа должна выполняться специалистами среды находилась в пределах требуемого диапазона. компании SHARP. Вам не следует предпринимать попыток • В случае установки двух или более мониторов рядом друг сделать эту работу самостоятельно. Наша компания... -
Page 47: Комплектные Принадлежности
Вертикальный стикер (Логотип): 1 Стикер для логотипа SHARP: 1 Наклейте стикер на логотип SHARP, чтобы закрыть его. * Права собственности на программы, содержащиеся на компакт-диске с утилитами, принадлежат корпорации SHARP Corporation. Запрещается воспроизводить их без ее разрешения. * Для защиты окружающей среды! Запрещается... -
Page 48: Соединения
приложений и загружать их. Информация об установке приведена в руководствах по эксплуатации. Программы установки приложений Touch Viewing Software и SHARP Display Connect можно загрузить с помощью приложения Information Display Downloader. • Термины HDMI и HDMI High-Definition Multimedia Interface и Логотип HDMI являются товарными знаками или... -
Page 49: Включение/Выключение Питания
Включение/выключение питания Включение/выключение питания Внимание • Включите монитор до того, как будет включен Нажмите кнопку POWER для включения или выключения компьютер или устройство воспроизведения. питания. • При отключении питания главным выключателем Включать или выключать питание можно также клавишей питания или кнопкой POWER повторное включение MONITOR ON/MONITOR OFF на... - Page 50 - - / - - / - - - - - - - - : - - : - - • Для замены внутреннего аккумулятора обратитесь к представителю или в сервисный центр SHARP. The date/time setting must be set by APPLICATION.
-
Page 51: Меры Предосторожности При Креплении (Для Дилеров И Инженеров По Обслуживанию Sharp)
Меры предосторожности при креплении (Для дилеров и инженеров по обслуживанию SHARP) • При установке, снятии или перемещении монитора следует убедиться, что эту работу выполняют не менее 4 человек. (PN-65TH1: не менее 2 человек.) • Убедитесь, что вы используете настенный кронштейн, спроектированный или предназначенный для крепления... - Page 52 nКрепление лотка Закрепите лоток с помощью 5 винтов для установки лотка (M3x10) (входит в комплект поставки). nКрепление крышек динамиков Крепежные винты крышки динамика (M3x10) (входит в комплект поставки) При эксплуатации монитора в вертикальной ориентации крышки динамиков не используются.
- Page 53 MEMO...
- Page 54 Puissance de transmission sans fil: Moins de 20 dBm / 23 dBm / 30 dBm (PIRE) Με την παρούσα ο/η Sharp, δηλώνει ότι ο ραδιοεξοπλισμός ΟΘΟΝΗ LCD Por la presente, Sharp declara que el tipo de equipo radioeléctrico MONITOR PN-65TH1/PN-75TH1/PN-85TH1 πληροί την οδηγία 2014/53/ΕΕ.
- Page 55 [Hrvatska (HR)] Uporaba samo u zatvorenom prostoru. [Česká republika (CZ)] Pouze k použití v interiérech. A abaixo assinada Sharp declara que o presente tipo de equipamento de rádio [Danmark (DK)] Kun indendørs brug. MONITOR LCD PN-65TH1/PN-75TH1/PN-85TH1 está em conformidade com a [Nederland (NL)] Alleen voor gebruik binnen.
- Page 56 Printed in China Imprimé en Chine Impreso en China Gedruckt in China Отпечатано в Китае...