Table of Contents
Advertisement
Available languages
Available languages
Quick Links
FM/AM
Bluetooth® Car Audio
To cancel the demonstration (DEMO) display, see
page 18.
To switch the FM/AM tuning step, see page 7.
For the connection/installation, see page 30.
Para cancelar la pantalla de demostración (DEMO),
consulte la página 20.
Para cambiar el paso de sintonización de FM/AM,
consulte la página 8.
Para la conexión/instalación, consulte la página 34.
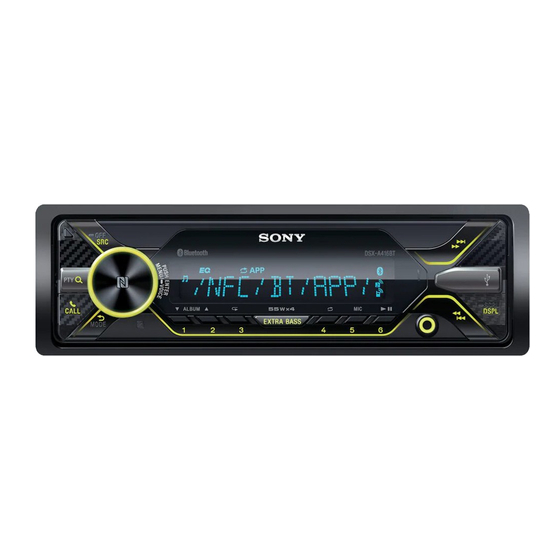
DSX-A416BT
4-739-631-21(1)
Operating Instructions
Manual de instrucciones
GB
ES
Advertisement
Chapters
Table of Contents

Related Manuals for Sony DSX-A416BT


Summary of Contents for Sony DSX-A416BT
- Page 1 To switch the FM/AM tuning step, see page 7. For the connection/installation, see page 30. Para cancelar la pantalla de demostración (DEMO), consulte la página 20. Para cambiar el paso de sintonización de FM/AM, consulte la página 8. Para la conexión/instalación, consulte la página 34. DSX-A416BT...
- Page 2 Services offered by third parties may be the unit becomes hot during use. changed, suspended, or terminated without For details, see “Connection/Installation” prior notice. Sony does not bear any (page 30). responsibility in these sorts of situations. The nameplate indicating operating voltage, etc., is located on the bottom of the chassis.
- Page 3 Important notice leakage of information during BLUETOOTH communication. Caution IN NO EVENT SHALL SONY BE LIABLE FOR If you have any questions or problems ANY INCIDENTAL, INDIRECT OR concerning your unit that are not covered in CONSEQUENTIAL DAMAGES OR OTHER...
-
Page 4: Table Of Contents
BLUETOOTH Setup (BLUETOOTH) ..21 “Sony | Music Center” Setup (SONY APP) ..... . 21... -
Page 5: Guide To Parts And Controls
Guide to Parts and Controls Main unit Front panel release button Display window SRC (source) (SEEK –/+) Turn on the power. Tune in radio stations automatically. Press and hold to tune manually. Change the source. / (prev/next) /... - Page 6 /// Select a setup item, etc. ENTER Enter the selected item. Press and hold for more than 2 seconds to establish or terminate the “Sony | Music Center” function. / (prev/next) +/– (album +/–) VOL (volume) +/– Remove the insulation film before use.
-
Page 7: Getting Started
Resetting the Unit Getting Started Before operating the unit for the first time, after replacing the car battery, or changing Detaching the Front Panel the connections, you must reset the unit. Press DSPL and (back)/MODE for You can detach the front panel of this unit to more than 2 seconds. -
Page 8: Setting The Clock
For a smartphone with Android OS 4.0 or Setting the Clock lower installed, downloading the app “NFC Easy Connect” available on Google Play is required. The app may not be downloadable Press MENU, rotate the control dial to select [GENERAL], then press it. in some countries/regions. - Page 9 Perform pairing on the BLUETOOTH device so it detects this unit. Select [DSX-A416BT] shown in the display of the BLUETOOTH device. Press MENU, rotate the control dial to If your model name does not appear, select [BLUETOOTH], then press it.
-
Page 10: Connecting A Usb Device
Note Connecting a USB Device While streaming BLUETOOTH audio, you cannot connect from this unit to the cellular phone. Connect from the cellular phone to this unit instead. Turn down the volume on the unit. Connect the USB device to the unit. With BLUETOOTH signal on: when the ignition is turned to on, this unit reconnects automatically to To connect an iPod/iPhone, use the USB... -
Page 11: Listening To The Radio
Using Radio Data System Listening to the Radio (RDS) Listening to the Radio Selecting program types (PTY) Tuning step setting is required (page 7). To listen to the radio, press SRC to select Press PTY during FM reception. [TUNER]. Rotate the control dial until the desired program type appears, then Storing automatically (BTM) press it. -
Page 12: Playback
Before making a connection, select the USB mode (Android mode or MSC/MTP mode) depending on the USB device (page 19). Playback Connect a USB device to the USB port (page 10). Playing a USB Device Playback starts. In these Operating Instructions, “iPod” is If a device is already connected, to start used as a general reference for the iPod playback, press SRC to select [USB] ([IPD]... -
Page 13: Searching And Playing Tracks
• [BT AUDIO] does not appear in the display while Playback starts. running the “Sony | Music Center” application via the BLUETOOTH function. To exit the “Quick-BrowZer” mode To match the volume level of the Press (browse). -
Page 14: Handsfree Calling (Via Bluetooth Only)
Rotate the control dial to select a name from the name list, then press Handsfree Calling (via Rotate the control dial to select a BLUETOOTH only) number from the number list, then press it. To use a cellular phone, connect it with this The phone call starts. -
Page 15: Available Operations During Call
To switch between handsfree mode By voice tags and handheld mode During a call, press MODE to switch the You can make a call by saying the voice tag phone call audio between the unit and stored in a connected cellular phone that cellular phone. -
Page 16: Useful Functions
• What you can control with “Sony | Music Center” Press SRC. varies depending on the connected device. • To make use of “Sony | Music Center” features, see Announcement of SMS by voice the details on your iPhone/Android smartphone. -
Page 17: Using Voice Recognition (Android Smartphone Only)
Making sound and display settings Activate the Siri function on the iPhone. You can adjust the settings relating to sound For details, refer to the operating and display via iPhone/Android instructions supplied with the iPhone. smartphone. Press and hold VOICE for more than For details on settings, refer to the help of 2 seconds. -
Page 18: Settings
(i.e. press and hold OFF General setup (GENERAL), Sound setup for 1 second): [ON] (30 minutes), [OFF]. (SOUND), Display setup (DISPLAY), BLUETOOTH setup (BLUETOOTH), “Sony | STEERING (steering) Music Center” setup (SONY APP) Registers/resets the setting of the steering wheel remote control. -
Page 19: Sound Setup (Sound)
EDIT CUSTOM (edit custom) FW VERSION (firmware version) Registers the functions (SOURCE, ATT, Displays current firmware version. VOL +/–, SEEK +/–, VOICE, ON HOOK, OFF FW UPDATE (firmware update) HOOK) to the steering wheel remote Enters firmware update process: [YES], control: [NO]. -
Page 20: Display Setup (Display)
– To set the brightness when the dimmer S.WOOFER (subwoofer) function is activated: SW LEVEL (subwoofer level) Set [DIMMER] to [ON], then adjust Adjusts the subwoofer volume level: [BRIGHTNESS]. [+6 dB] – [0 dB] – [-6 dB]. – To set the brightness when the dimmer ([ATT] is displayed at the lowest setting.) function is deactivated: SW PHASE (subwoofer phase) -
Page 21: Bluetooth Setup (Bluetooth)
(SONY APP) PAIRING (pairing) (page 8) AUTO LAUNCH (auto launch) Connects up to two BLUETOOTH devices: Activates the “Sony | Music Center” auto [DEVICE 1], [DEVICE 2]. launch: [ON], [OFF]. [DEVICE 1] or [DEVICE 2] will be changed to When [ON] is selected, “Sony | Music the paired device name after pairing is Center”... -
Page 22: Additional Information
Please note that the use of this accessory with an Apple product may affect wireless performance. If you have any questions or problems concerning your unit that are not covered in this manual, consult your nearest Sony dealer. -
Page 23: Maintenance
Maintenance Specifications Replacing the lithium battery (CR2025) Tuner section of the remote commander When the battery becomes weak, the range Tuning range: of the remote commander becomes shorter. 87.5 MHz – 108.0 MHz (at 50 kHz step) CAUTION 87.5 MHz – 108.0 MHz (at 100 kHz step) Danger of explosion if battery is incorrectly 87.5 MHz –... - Page 24 The Bluetooth® word mark and logos are registered Profile) 1.3 trademarks owned by the Bluetooth SIG, Inc. and AVRCP (Audio Video Remote Control any use of such marks by Sony Corporation is under Profile) 1.3 license. Other trademarks and trade names are HFP (Handsfree Profile) 1.6 those of their respective owners.
-
Page 25: Troubleshooting
libFLAC Troubleshooting Copyright (C) 2000-2009 Josh Coalson Copyright (C) 2011-2013 Xiph.Org Foundation The following checklist will help you remedy Redistribution and use in source and binary forms, with or without modification, are permitted problems you may encounter with your unit. provided that the following conditions are met: Before going through the checklist below, –... - Page 26 The display disappears while the unit is The sound cannot be output during operating. playback in Android mode. [BLK OUT] (black out) is set to [B.OUT-ON] Check the status of the audio playback (page 20). application on the Android smartphone. The display/illumination flashes.
- Page 27 No ringtone. The phone sound quality is poor. Adjust the volume by rotating the control Phone sound quality depends on dial while receiving a call. reception conditions of cellular phone. Depending on the connecting device, the – Move your car to a place where you can ringtone may not be sent properly.
-
Page 28: Messages
BLUETOOTH, the display automatically switches to [BT AUDIO]. NOT SUPPORT - ANDROID MODE The “Sony | Music Center” application or A USB device not supporting AOA BLUETOOTH function has failed. Run the application again. - Page 29 BTA NO DEV: The BLUETOOTH device is not connected or recognized. application to enable button operation. Make sure the BLUETOOTH device is OPEN APP: The “Sony | Music Center” securely connected, or the BLUETOOTH application is not running. connection is established with the ...
-
Page 30: Connection/Installation
Parts List for Installation Connection/Installation Cautions • Run all ground (earth) leads to a common ground (earth) point. × 2 • Do not get the leads trapped under a screw, or caught in moving parts (e.g., seat ... -
Page 31: Connection
Connection Subwoofer* Power amplifier* White White/black striped Front speaker* Gray Gray/black striped Green Green/black striped Rear speaker* Purple Purple/black striped Black Yellow For details, see “Making connections” (page 32). Blue/white striped Orange/white striped from a wired remote control (not supplied)* ... - Page 32 To a car’s illumination signal *1 Not supplied *2 Speaker impedance: 4 Ω – 8 Ω × 4 Be sure to first connect the black ground *3 RCA pin cord (not supplied) (earth) lead to a common ground (earth) *4 Depending on the type of car, use an adaptor for point.
-
Page 33: Installation
Installing the microphone Installation To capture your voice during handsfree calling, you need to install the microphone Removing the protection collar . and the bracket Before installing the unit, remove the protection collar and the bracket from the unit. - Page 34 You may not be able to install this unit in dashboard some makes of Japanese cars. In such a case, consult your Sony dealer. • Before installing, make sure the catches on both sides of the bracket are bent...
- Page 35 If the fuse blows, check the power connection and replace the fuse. If the fuse blows again after replacement, there may be an internal malfunction. In such a case, consult your nearest Sony dealer.
- Page 36 Los servicios prestados por otros aquellos países en los que la ley la impone, proveedores están sujetos a cambios, principalmente en los países del EEE anulaciones o interrupciones sin previo (Espacio económico europeo). aviso. Sony no asume responsabilidad alguna en estas situaciones.
- Page 37 BLUETOOTH para proporcionar una Precaución conexión segura al utilizar tecnología EN NINGÚN CASO SONY PODRÁ SER inalámbrica BLUETOOTH, pero es posible CONSIDERADO RESPONSABLE POR que no sea suficiente segura en función de CUALQUIER DAÑO CASUAL, INDIRECTO O la configuración establecida.
- Page 38 Cambio del paso de sintonización (SONY APP) ..... . 24 FM/AM......8 Ajuste del reloj .
-
Page 39: Guía Para Las Partes Y Los Controles
Guía para las partes y los controles Unidad principal Botón de desbloqueo del panel frontal Marca-N Toque el selector de control en el SRC (fuente) smartphone con sistema Android para Para encender la unidad. establecer la conexión BLUETOOTH. Para cambiar la fuente. - Page 40 Puerto USB /// Seleccione un elemento de configuración, etc. ENTER Ingresar el elemento seleccionado. Manténgalo presionado durante más de 2 segundos para establecer o finalizar la función “Sony | Music Center”. / (anterior/siguiente) +/– (álbum +/–) VOL (volumen) +/–...
-
Page 41: Procedimientos Iniciales
Retire la película de aislamiento antes del uso. Procedimientos iniciales Extracción del panel frontal Es posible extraer el panel frontal de la unidad para evitar que la roben. Mantenga presionado OFF hasta que la unidad se apague, presione el botón de desbloqueo del panel frontal , luego deslice el panel hacia usted para quitarlo. -
Page 42: Reinicio De La Unidad
Reinicio de la unidad Ajuste del reloj Antes de operar la unidad por primera vez, Presione MENU, gire el selector de luego de remplazar la batería del automóvil control para seleccionar [GENERAL] y, o cambiar las conexiones, debe reiniciar la a continuación, presiónelo. - Page 43 BLUETOOTH para que Asegúrese de que se encienda en la detecte esta unidad. pantalla de la unidad. Seleccione el [DSX-A416BT] que Para desconectar con NFC aparece en la pantalla del dispositivo Junte la parte con la Marca-N de la unidad BLUETOOTH.
- Page 44 Si el dispositivo BLUETOOTH requiere Conexión con un dispositivo una clave de acceso*, ingrese [0000]. BLUETOOTH emparejado * La clave de acceso puede ser denominada “código de acceso”, “código PIN”, “número PIN”, “contraseña”, etc., en función del Para utilizar un dispositivo emparejado, dispositivo.
-
Page 45: Conexión De Un Dispositivo Usb
Consejo Conexión de un dispositivo Mientras la señal BLUETOOTH está encendida: cuando encienda el automóvil, la unidad se volverá a conectar automáticamente al último teléfono móvil conectado. Baje el volumen de la unidad. Para instalar el micrófono Para obtener más información, consulte Conecte el dispositivo USB a la “Instalación del micrófono”... -
Page 46: Escuchar La Radio
Coincidencia del nivel de volumen del dispositivo conectado con otras fuentes Comience la reproducción del dispositivo de Escuchar la radio audio portátil en un nivel moderado y configure su nivel habitual de volumen en la Escuchar la radio unidad. Presione MENU, luego seleccione [SOUND] Se requiere el paso de sintonización [SET AUX VOL] (página 22). -
Page 47: Usar El Rds
Almacenamiento manual Ajuste de la hora del reloj (CT) Mientras recibe la emisora que desea Los datos CT de la transmisión RDS ajustan almacenar, mantenga presionado un el reloj. botón numérico (de 1 a 6) hasta que Establezca [SET CT-ON] en [GENERAL] aparezca [MEM]. -
Page 48: Reproducción
Antes de establecer una conexión, seleccione el modo USB (modo Android o modo MSC/MTP) en función del dispositivo Reproducción USB (página 21). Conecte el dispositivo USB a al puerto Reproducción de un USB (página 11). dispositivo USB Se inicia la reproducción. Si ya hay un dispositivo conectado, para En este manual de instrucciones, “iPod”... -
Page 49: Bluetooth
• [BT AUDIO] no aparecerá en la pantalla mientras búsqueda deseada. se reproduce la aplicación “Sony | Music Center” a través de la función BLUETOOTH. * Durante la reproducción USB, presione (navegar) durante más de 2 segundos para... -
Page 50: Llamadas Manos Libres
Gire el selector de control para seleccionar [PHONE BOOK] y luego presiónelo. Llamadas manos libres (solo Gire el selector de control para mediante BLUETOOTH) seleccionar una inicial de la lista de iniciales y luego presiónela. Para utilizar un teléfono móvil, conéctelo a la Gire el selector de control para unidad. -
Page 51: Operaciones Disponibles Durante Una
Gire el selector de control para Operaciones disponibles ingresar el número telefónico y, por último, seleccione [ ] (espacio) y durante una llamada presione ENTER*. La llamada telefónica comenzará. Para ajustar el volumen del tono de * Para mover la indicación digital, presione timbre /... -
Page 52: Funciones Útiles
Center” varía en función del dispositivo conectado. Puede operar para seleccionar la fuente o la • Para hacer uso de las funciones de “Sony | Music aplicación deseada en el iPhone o Center” puede consultar la información correspondiente en su iPhone o smartphone con smartphone con sistema Android. -
Page 53: Uso De Reconocimiento De Voz
ícono de respuesta. en modo de manos libres con solo hablarle al micrófono. Para utilizar esta función debe Active la aplicación “Sony | Music Center”, conectar un iPhone a la unidad mediante luego toque el ícono [Reply] (respuesta). La pantalla de ingreso de mensajes aparecerá en BLUETOOTH. -
Page 54: Cancelación Del Modo Demo
Configuración general (GENERAL), Configuración de sonido (SOUND), Configuración de pantalla (DISPLAY), Configuración de BLUETOOTH (BLUETOOTH), Configuración de “Sony | Music Center” (SONY APP) Presione MENU. Gire el selector de control para seleccionar la categoría de configuración y, a continuación, presiónela. -
Page 55: Configuración General (General)
PRESET (predeterminar) Configuración general Modo de entrada para el control remoto conectado con excepción del (GENERAL) control remoto del volante (seleccionado de forma automática al realizar [RESET CUSTOM]). LANGUAGE (excepto para los modelos de EDIT CUSTOM (editar personalización) India) Registra las funciones (SOURCE, ATT, Cambia el idioma de la pantalla: VOL +/–, SEEK +/–, VOICE, ON HOOK, OFF [ENGLISH], [SPANISH]. -
Page 56: Configuración De Sonido (Sound)
BTM (memoria de la mejor sintonía) EQ10 CUSTOM (Personalización de EQ10) (página 12) Ajuste [CUSTOM] de EQ10. (Solamente estará disponible cuando la Ajuste de la curva del equalizador: sintonización esté seleccionada). [BAND1] – [BAND10] (32 Hz, 63 Hz, 125 Hz, 250 Hz, 500 Hz, 1 kHz, 2 kHz, 4 kHz, 8 kHz, FIRMWARE (firmware) 16 kHz). -
Page 57: Configuración De Pantalla (Display)
BTA VOL (nivel de volumen del audio de BUTTON-C (botón color) BLUETOOTH) Establece un color predeterminado o Ajusta el nivel de volumen de cada personalizado para los botones. dispositivo BLUETOOTH conectado: COLOR (color) [+6 dB] – [0 dB] – [-6 dB]. Selecciona entre 15 colores Este ajuste elimina la necesidad de predeterminados, 1 color personalizado. -
Page 58: Ajustes De Bluetooth (Bluetooth)
Activa el inicio automático de El nombre de [DEVICE 1] o [DEVICE 2] “Sony | Music Center”: [ON], [OFF]. cambiará al del dispositivo emparejado Cuando se seleccione [ON], “Sony | Music una vez que el emparejamiento se haya Center” se conectará automáticamente completado. -
Page 59: Información Complementaria
Acerca del iPod Información complementaria • Puede conectarse a los siguientes modelos de iPod. Actualice sus dispositivos iPod a la Actualizar el Firmware última versión del software antes de utilizarlo. Para actualizar el firmware, visite el sitio de Modelos de iPhone e iPod compatibles soporte técnico que figura en la contratapa y siga las instrucciones en línea. -
Page 60: Mantenimiento
Sección del sintonizador Sony más cercano. Rango de sintonización: 87,5 MHz – 108,0 MHz (a pasos de 50 kHz) Mantenimiento 87,5 MHz –... - Page 61 La marca de la palabra y logotipos Bluetooth® son telefónica) marcas comerciales registradas y son propiedad de SPP (Perfil de puerto serie) Bluetooth SIG, Inc., y Sony Corporation posee licencia para utilizar cualquiera de dichas marcas. Códec correspondiente: Otras marcas registradas y nombres comerciales SBC (.sbc), AAC (.m4a)
-
Page 62: Solución De Problemas
libFLAC Solución de problemas Copyright (C) 2000-2009 Josh Coalson Copyright (C) 2011-2013 Xiph.Org Foundation La siguiente lista de comprobación le La redistribución y el uso en formas binarias y de fuente, con o sin modificación, están permitidos ayudará a solucionar los problemas que siempre y cuando se cumplan las siguientes puedan producirse con la unidad. - Page 63 Reproducción en dispositivo USB Las indicaciones desaparecen del visualizador o no aparecen en él. El dispositivo USB tarda en reproducirse. Los conectores están sucios (página 26). El dispositivo USB contiene archivos con una estructura de árbol compleja. La pantalla no podrá visualizarse mientras la unidad está...
- Page 64 Función BLUETOOTH Un interlocutor dice que el volumen está demasiado bajo o alto. El dispositivo de conexión no puede Ajuste el volumen de forma correcta detectar la unidad. mediante el ajuste de ganancia del Antes de realizar el emparejamiento, micrófono (página 17).
- Page 65 BLUETOOTH conectado sea compatible BLUETOOTH, la pantalla cambia con AVRCP. automáticamente a [BT AUDIO]. La aplicación “Sony | Music Center” o la Algunas funciones no se ejecutan. función BLUETOOTH ha fallado. Verifique que el dispositivo de conexión Vuelva a ejecuta la aplicación.
-
Page 66: Mensajes
NOT SUPPORT - ANDROID MODE Un dispositivo USB que no admite AOA (Android Open Accessory) 2,0 estará Para la operación de “Sony | Music conectado a la unidad mientras [USB Center”: MODE] se encuentre configurado en [ANDROID]. - Page 67 Establezca la conexión BLUETOOTH y la distribuidor Sony más cercano. conexión “Sony | Music Center” de nuevo Si entrega la unidad para su reparación a (página 18). causa de problemas en la reproducción del dispositivo, lleve el dispositivo que se utilizó...
-
Page 68: Conexión/Instalación
Lista de piezas para la Conexión/Instalación instalación Advertencias • Conecte todos los cables hacia un punto a tierra en común. • No deje que los cables queden atrapados debajo de un tornillo o que se enganchen × 2 en piezas móviles. -
Page 69: Conexión
Conexión Altavoz potenciador de graves* Amplificador de potencia* Blanco Blanco/negro a rayas Altavoz frontal* Gris Gris/negro a rayas Verde Verde/negro a rayas Altavoz posterior* Púrpura Púrpura/negro a rayas Negro Amarillo Para obtener más información, Rojo consulte “Hacer conexiones” Azul/blanco a rayas (página 36). - Page 70 A la señal de iluminación del automóvil *1 No suministrado *2 Impedancia del altavoz: 4 Ω – 8 Ω × 4 Asegúrese de conectar primero el cable a *3 Cable con clavija RCA (no suministrado) tierra negro a un punto de puesta a tierra. *4 Dependiendo del tipo de automóvil, utilice un adaptador para un control remoto conectado (no Conexión fácil de altavoz...
-
Page 71: Instalación
Instalación del micrófono Instalación Para capturar su voz durante llamadas de manos libres, debe instalar el micrófono . Quitar el marco de protección y el soporte Antes de instalar la unidad, quite el marco de protección y el soporte de la unidad. - Page 72 En soporte estén doblados hacia adentro dicho caso, consulte con su distribuidor 2 mm Sony. • Para los automóviles japoneses, consulte “Montar la unidad en un auto japonés” TOYOTA (página 38).
- Page 73 Si el fusible se quema, verifique la conexión eléctrica y reemplace el fusible. Si el fusible se quema nuevamente después de reemplazarlo, puede haber un mal funcionamiento interno. En dicho caso, consulte con su distribuidor Sony más cercano.
-
Page 74: Glosario De Términos
SOUND: Sonido Glosario de términos SOURCE: Fuente SRC: Fuente ACC: Control de crucero adaptativo STEERING: Registrar/inicios de la ALBUM: Álbum configuración del control remoto del AM: Modulación de amplitud volante AMP REMOTE IN: Entrada para amplificador SUB: Altavoz de subgraves opcional Subwoofer: Altavoz de subgraves AOA: Accesorio de protocolo abierto de... - Page 76 Web: Customers in Latin America/Clientes en Latinoamérica: http://esupport.sony.com/ES/LA/ Customers in Asia Pacific/Clientes en Asia-Pacífico: http://www.sony-asia.com/section/support http://www.sony-asia.com/caraudio/ ©2018 Sony Corporation Printed in Thailand http://www.sony.net/...