
Related Manuals for Samsung NQ50T8939BK


Summary of Contents for Samsung NQ50T8939BK
- Page 1 Combi Steam Built-in Oven User manual NQ50T8939BK NQ50T8939BK_EU_DG68-01261C-01_EN.indd 1 NQ50T8939BK_EU_DG68-01261C-01_EN.indd 1 2021-05-27 오후 4:05:57 2021-05-27 오후 4:05:57...
-
Page 2: Table Of Contents
Contents Cooking Smart Using this manual Auto Cook The following symbols are used in this user manual Auto Defrost Safety instructions Manual cooking Test dishes Important safety instructions Correct Disposal of This Product (Waste Electrical & Electronic Equipment) Maintenance Installation Cleaning Replacement (repair) What’s included... -
Page 3: Using This Manual
Using this manual Safety instructions Thank you for choosing SAMSUNG Built-In Oven. Important safety instructions This User Manual contains important information on safety and instructions intended to assist you in the operation and maintenance of your appliance. READ CAREFULLY AND KEEP FOR FUTURE REFERENCE. - Page 4 Safety instructions • by clients in hotels, motels and other residential Eggs in their shell and whole hard-boiled eggs should not be environments; heated in microwave ovens since they may explode, even after • bed and breakfast type environments. microwave heating has ended. Only use utensils that are suitable for use in microwave ovens.
- Page 5 This appliance is not intended for use by persons (including If supply cord without plug is installed on the appliance, the children) with reduced physical, sensory or mental capabilities, means for disconnection must be incorporated in the fixed or lack of experience and knowledge, unless they have wiring in accordance with the wiring rules.
- Page 6 Safety instructions WARNING: When the appliance is operated in the combination WARNING: The appliance and its accessible parts become hot mode, children should only use the oven under adult during use. supervision due to the temperatures generated. Care should be taken to avoid touching heating elements. During use the appliance becomes hot.
- Page 7 Please put the bent up frame side Do not insert fingers or foreign substances. If foreign substances enter the oven, unplug the power cord and contact a local Samsung service centre. to the back, in order to support Do not apply excessive pressure or impact to the oven.
- Page 8 Safety instructions Microwave warning Do not operate the oven when it is empty. The oven will automatically shut down for 30 minutes for safety purposes. We recommend placing a glass of water inside Microwave heating of beverages may result in delayed eruptive boiling; always the oven at all times to absorb microwave energy in case the oven is started use caution when handling the container.
-
Page 9: Correct Disposal Of This Product (Waste Electrical & Electronic Equipment)
Correct Disposal of This Product (Waste Electrical & Electronic Equipment) Samsung will charge a repair fee for replacing an accessory or repairing a cosmetic defect if the damage to the unit or accessory was caused by the customer. Items (Applicable in countries with separate collection systems) -
Page 10: Installation
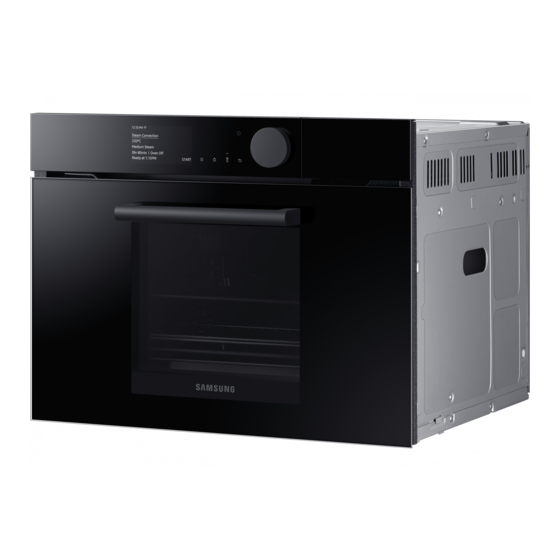
The oven comes with different accessories that help you prepare different types of Make sure all parts and accessories are included in the product package. If you food. have a problem with the oven or accessories, contact a local Samsung customer centre or the retailer. Oven at a glance... -
Page 11: Installation Instructions
Install in the cabinet Kitchen cabinets in contact with the oven must be heatresistant up to 100 °C. General technical information Samsung will take no responsibility for damage of cabinets from the heat. Electrical Supply 230 V ~ 50 Hz... - Page 12 Installation Oven (mm) Built-in cabinet (mm) Min. 564-568 Min. 550 Min. 446 / Max. 450 Min. 50 200 cm2 200 cm2 Space for power outlet Oven (mm) (30 Ø Hole) Under-sink cabinet (mm) Min. 550 Min. 564 / Max. 568 Min.
- Page 13 Installing with a hob Fasten the oven using the two screws (4 x 25 mm) provoded. To install a hob on top of the oven, check the installation guide of the hob for the installation space requirement ( ). Make the electrical connection. Check that the appliance works.
-
Page 14: Before You Start
The oven’s control panel features a display (non-touch), dial knob and touch When you turn on the oven for the first time, the Welcome screen appears with the Samsung logo. Follow the on-screen instructions to complete the initial buttons to control the oven. Please read the following information to learn about the oven’s control panel. -
Page 15: Side Racks
Side racks Set the time zone. Select your time zone, and then press the Dial Knob. Select Next, and then press the Dial Knob. • Insert the accessory to the correct Set the date. position inside of the oven. Select the day, month, and year. Press the Dial Knob after selecting each •... -
Page 16: Water Reservoir
Before you start Water reservoir NOTE The water reservoir is used for steam functions. Fill it with water in advance of Do not exceed the MAX line. steam cooking. Locate the water reservoir in the top- right corner. Push in the reservoir to open and remove. -
Page 17: Operations
Operations Oven modes Select Ready at, and then press the 12:00 Dial Knob to set the desired end time. Fan Conventional On the main screen, select Convection, • When you set the cooking time, 12:00 200°C and then press the Dial Knob. the oven displays the time cooking Convection 1hr 30min | Oven Off... - Page 18 Operations Oven mode descriptions Mode Temperature range (°C) Default temperature (°C) 40-250 Mode Temperature range (°C) Default temperature (°C) The bottom heating element generates heat, which 40-250 Bottom Heat + Convection is evenly distributed by the convection fan. Use this The rear heating element generates heat, which is mode for pizza, bread, or cake.
-
Page 19: Steam Assisted Modes
Steam assisted modes Select Cook Time, and then press the 12:00 Dial Knob to set the desired cooking Steam Convection CAUTION time. 200°C • Maximum cooking time is Make sure the water reservoir is filled before using the steam assisted modes. High Steam 10 hours. - Page 20 Operations Steam assisted mode descriptions NOTE • You can change the temperature and cooking time during cooking. Mode Temperature range (°C) Default temperature (°C) During cooking, select Pause, and then press the Dial Knob to pause. Once you • pause cooking, you can either end or continue cooking. Select OK, and then press the Dial Knob to end cooking.
-
Page 21: Special Function
Special Function Select Ready at, and then press the 12:00 Dial Knob to set the desired end time. < Multi-level Cook On the main screen, select Convection, • When you set the cooking time, 12:00 180°C and then press the Dial Knob. the oven displays the time the Convection 1hr 30min | Oven Off... -
Page 22: Auto Cook
Operations Auto Cook Pour the water in the water reservoir 12:00 as instructed on the screen, select The oven offers 35 Auto Cook programmes. Take advantage of this feature to save < Chicken pieces Next, and then press the Dial Knob. your time or shorten your learning curve. -
Page 23: Auto Defrost
Auto Defrost Timer The oven offers 5 Auto Defrost programmes. Take advantage of this feature to Adding the new Timer conveniently defrost items. The cooking time, power level and temperature will be adjusted according to the selected programme. Touch the button on the control panel. -
Page 24: Cleaning
Operations Cleaning Descale Clean inside the steam generator to prevent affecting the food quality and taste. Steam Clean NOTE This is useful for cleaning light soiling with steam. • The oven counts the time of steam assisted modes and notifies you to run the This automatic function saves you time by removing the need for regular manual Descale function when required. -
Page 25: Settings
Settings CAUTION • Do not cancel descaling in the process. Otherwise, you must restart the Touch the button on the control panel, select Settings, and then press the Dial descaling cycle and complete within the next three hours in order to enable Knob to change various settings for your oven. - Page 26 Operations Menu Submenu Description Menu Submenu Description Display Brightness You can change the brightness of the Date & time Automatic date and You can turn on or turn off to update display screen. time time from the Internet. You must be connected to the Wi-Fi network.
-
Page 27: Lock
Cooking Smart Auto Cook Menu Submenu Description The following table presents 35 Auto Programmes for Steam cooking, Baking, About device Model name You can check the model name of our oven. Grilling, Roasting and Reheat. The tables contains its quantities and appropriate recommendations. - Page 28 Cooking Smart Food Item Weight (kg) Accessory Shelf level Food Item Weight (kg) Accessory Shelf level Steam dishes, Steam dish, Steamed prawns Steeping dried fruit 0.2-0.5 0.1-0.5 perforated perforated Put prawn (raw / uncooked-peeled or unpeeled) on the Put dried fruits (apricots, plums, apple) on the steam dish. steam dishes.
- Page 29 2. Baking 3. Grilling Food Item Weight (kg) Accessory Shelf level Food Item Weight (kg) Accessory Shelf level Apple pie 1.2-1.4 Oven rack Beef steak, thin 0.3-0.6 Oven rack / 4 / 1 Baking tray Put apple pie into a round metal dish. Put on the oven rack.
- Page 30 Cooking Smart 4. Roasting Food Item Weight (kg) Accessory Shelf level Grilled fish fillet 0.3-0.6 Oven rack / 4 / 1 Food Item Weight (kg) Accessory Shelf level Baking tray Whole chicken 1.0-1.1 Oven rack / 2 / 1 Marinate fish fillet (1 cm) and put side by side on oven 1.2-1.3 Baking tray rack and baking tray.
- Page 31 5. Auto Reheat Food Item Weight (kg) Accessory Shelf level Food Item Weight (kg) Accessory Shelf level Whole fish 0.4-0.8 Oven rack / 2 / 1 Frozen pizza 0.3-0.4 Oven rack Baking tray 0.4-0.5 Brush skin of whole fish with oil and herbs and spices. Put frozen pizza in the middle of oven rack.
-
Page 32: Auto Defrost
Cooking Smart Auto Defrost Weight Standing Food Item Shelf level (kg) time (min.) Weight Standing Food Item Shelf level Frozen fruit 0.2-0.6 5-10 Distribute fruits evenly into (kg) time (min.) (-18 °C) baking tray, shelf level 2. This Frozen meat 0.2-0.5 10-30 Always shield the edges with... -
Page 33: Manual Cooking
Manual cooking Food Item Time (min.) Accessory (shelf level) White rice (basmati or 30-35 Steam dish, perforated (2) Steam assisted mode pandan) (Use a flat pyrex dish, add Steam Cook double quantity of water) Use settings and times in this table as guide lines for steaming. We recommend to always fill the water reservoir with fresh water to the maximum Milk rice 40-50... - Page 34 Cooking Smart Two level steam cooking Steam Convection / Steam Top Heat + Convection / Steam Bottom Heat + Convection Use settings and times in this table as guide lines for steam cooking. Use settings and times in this table as guide lines for baking and roasting. We recommend to always fill the water reservoir with fresh water to the maximum We recommend to always fill the water reservoir with fresh water to the maximum level.
- Page 35 Convection guide Top Heat + Convection Use temperatures and times in this table as guidelines for roasting. Convection We recommend to preheat the oven using Top Heat + Convection mode. Use temperatures and times in this table as guidelines for baking. Put meat on oven rack, follow shelf level advice in the table and use baking tray as We recommend to preheat the oven with Convection mode.
- Page 36 Cooking Smart Bottom Heat + Convection Grilling guide Use temperatures and times in this table as guidelines for baking and roasting. Large Grill We recommend to preheat the oven with Bottom Heat + Convection mode. Use temperatures and times in this table as guidelines for grilling. Set 220 °C grill temperature, preheat for 5 minutes.
- Page 37 Fan Grill Intensive Cook guide Use temperatures and times in this table as guidelines for grilling. Use temperatures and times in this table as guidelines for roasting. Set 220 °C grill temperature, preheat for 5 minutes. We recommend to preheat the oven with Intensive (Top + Bottom + Convection) mode. Food Item Time (min.) Accessory (shelf level)
- Page 38 Cooking Smart Eco Convection Multi-level Cook (Special) This mode uses the optimized heating system so that you save the energy during Use temperatures and times in this table as guidelines for baking. cooking your dishes. The times of this category are suggested to not be preheated We recommend to preheat the oven with Multi-level Cook mode.
-
Page 39: Test Dishes
Test dishes 2. Grilling Preheat the empty oven for 5 minutes using Grill function. According to standard EN 60350 Type of Shelf Cooking Dish & Notes Cooking mode Temp. (°C) food level time (min.) 1. Baking White Oven rack Grill The recommendations for baking refer to preheated oven. -
Page 40: Maintenance
Maintenance Cleaning Side racks (applicable models only) Clean the oven regularly to prevent impurities from building up on or inside the Lift up the front of the rack to release it oven. Also pay special attention to the door and the door sealing (applicable from the holder. -
Page 41: Replacement (Repair)
Samsung service centre for technical assistance. Problem Cause Action • If you want to replace the light bulb, contact a local Samsung service centre. Do not replace it yourself. General • If you encounter a problem with the outer housing of the oven, first unplug... - Page 42 Troubleshooting Problem Cause Action Problem Cause Action The oven does not work. Power is not supplied. Make sure power is There is no power to the Power is not supplied. Make sure power is supplied. oven. supplied. The door is open. Close the door and try There is a popping sound Cooking sealed food or...
- Page 43 Problem Cause Action Problem Cause Action A beeping sound occurs If the Auto Cook function Turn the food over when There is water left in the There may be water or Let the oven cool and during cooking. is being used, this the notification pops up, oven.
- Page 44 Troubleshooting Problem Cause Action Problem Cause Action Grill Oven Smoke comes out during During initial operation, This is not a malfunction, The oven does not heat. The door is open. Close the door and try operation. smoke may come from and if you run the oven again.
-
Page 45: Information Codes
Unplug the power cord for cooling enough time, and clean The touch key is malfunction. the button. (Dust, Water) C-d0 When appear same problem, contact a local Samsung service centre. English 45 NQ50T8939BK_EU_DG68-01261C-01_EN.indd 45 NQ50T8939BK_EU_DG68-01261C-01_EN.indd 45 2021-05-27 오후 4:06:06 2021-05-27 오후 4:06:06... -
Page 46: Technical Specifications
Technical specifications Appendix SAMSUNG strives to improve its products at all times. Both the design Product data sheet specifications and these user instructions are thus subject to change without notice. SAMSUNG SAMSUNG Power Source 230 V ~ 50 Hz Model identification... -
Page 47: Open Source Announcement
The full text of the EU declaration of conformity and the UK declaration of conformtiy is available at the following internet address: The official Declaration of conformity may be found at http://www.samsung.com. go to Support > Search Product Support and enter the model name. - Page 48 Please be advised that the Samsung warranty does NOT cover service calls to explain product operation, correct improper installation, or perform normal cleaning or maintenance. QUESTIONS OR COMMENTS? COUNTRY CALL OR VISIT US ONLINE AT AUSTRIA 0800 72 67 864 (0800-SAMSUNG) www.samsung.com/at/support...