Table of Contents
Advertisement
Quick Links
Advertisement
Table of Contents

Related Manuals for Haier HDHP80AN1


Summary of Contents for Haier HDHP80AN1
- Page 1 USER GUIDE HEAT PUMP CLOTHES DRYER HDHP80AN1 HDHP80ANB1 NZ AU...
- Page 2 Thank you NZ AU Thank you for purchasing a Haier Product. Please read these instructions carefully before using this appliance. The instructions con- tain important information which will help you get the best out of the appliance and ensure safe and proper installation, use and maintenance.
-
Page 3: Table Of Contents
CONTENT NZ AU Safety information .......................... 4 Intended use ............................. 7 Product description ........................8 Control panel ............................ 9 WiFi connection & Remote mode....................12 Dry cycles............................13 Dry Preparation..........................14 Getting started quickly........................16 Care and cleaning ..........................18 Before you call for sevice.......................21 Fault codes ............................22 Troubleshooting..........................23 Installation ............................26... -
Page 4: Safety Information
1-Safety Information NZ AU WARNING! Before use ˜ Make sure there is no transport damage. ˜ Remove all packaging and keep out of children. ˜ Handle the appliance always with at least two persons because it is heavy. Daily use ˜... - Page 5 1-Safety Information NZ AU WARNING! Daily use ˜ Do not dry following items in the appliance: ˜ Items which have been contaminated with inflammable sub- stances such as cooking oil, acetone, alcohol, benzine, petrol, kerosene, spot removers, turpentine, waxes, wax removers or other chemicals.
- Page 6 1-Safety Information NZ AU WARNING! Maintenance / cleaning ˜ Clean the lint filter and the condenser fi lter after each pro- gramme (refer to CARE AND CLEANING). ˜ Do not use water spray or steam to clean the appliance. ˜ Do not use industrial chemicals to clean the appliance. ˜...
-
Page 7: Intended Use
˜ Thorough spin: Spin the laundry with the maximum spin speed. ˜ Maximum load: Use the maximum filling amount according to the program table, but do not overload the dryer. HDHP80AN1 HDHP80ANB1 ˜ Loosen up the laundry: Shake out the laundry before putting them into the dryer. -
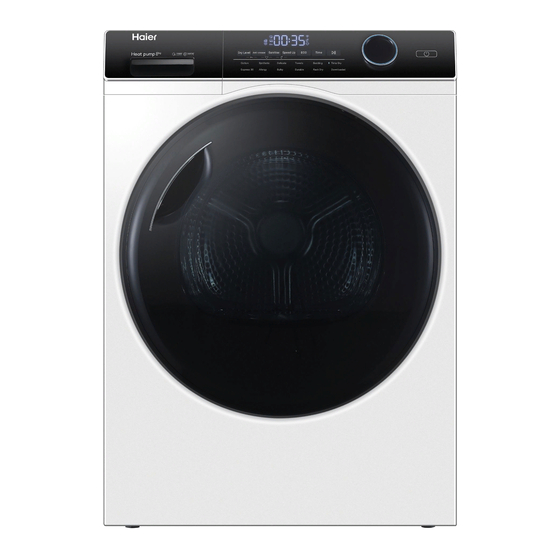
Page 8: Product Description
3-Product Description NZ AU Notice Due to technical changes and different models, the illustr ations in the following chapters may differ from your model. 3.1 Picture of appliance Front (Fig. 3-1): Rear side (Fig. 3-2): 3- 3-2 2 CONTROL PANEL Delay function for delay start, press the button to 1 Delay button set time (in 1 intervals up to 12 hours). -
Page 9: Control Panel
4-Control Panel NZ AU WiFi 13 Sanitise Sanitise indicator Anti-crease indicator Remote mode 14 Speed Up Speed Up indicator Memory mode 15 ECO ECO indicator 10 Power 16 Time Keylock 11 Dry Level 17 Start/Pause Digital display screen 12 Anti-crease 18 Control dial 4.1 Sanitise indicator Press the Sanitise button to select the sanitise function,... - Page 10 4-Control Panel NZ AU 4.6 Digital display screen Shows the following: Dry cycle options and machine settings Dry progress Notifications if an error is detected or warning is necessary. 4.7 WiFi This icon lights up when the dryer network is connected. 4.8 Remote mode In standby mode.
- Page 11 4-Control Panel NZ AU 4.12 Anti-crease 4-12 Press to set Anti-crease function. When the cycle finishes, your dryer will beep and then turn off automatically. If the Anti-crease option has been selected, the drum will rotate periodically to minimise wrinkling and creasing. This is particularly useful if you cannot remove the items immediately after the cycle ends.
-
Page 12: Wifi Connection & Remote Mode
1. Your product is WiFi connectable, please visit the webpage below to download the app and find out more: Australia https://www.haier.com.au/smart New Zealand https://www.haier.co.nz/smart 2. Register and create an account. 3. Add your appliance and set up the WiFi connection. -
Page 13: Dry Cycles
6-Dry Cycles NZ AU DEFAULT MAX. CYCLE DESIGNED FOR LOAD SIZE LEVEL (KG) Cotton Extra dry Cotton garments Synthetic Synthetic garments Delicate and heat Delicate sensitive garments Towels Extra dry Towels Clothes that need to Allergy Extra dry get rid of mites Extra dry Bedding Large bedding items... -
Page 14: Dry Preparation
7-Dry Preparation NZ AU Bedding or use drying rack for very delicate items. Ensure the items can safely withstand heat. Allergy Ensure the items can safely withstand heat. Cotton or Mixed clothes Synthetic... - Page 15 7-Dry Preparation NZ AU Allow enough room in the dryer for clothes to tumble freely. Load the dryer in terms of the space the garments take up when dry, rather than when they are wet. Shake clothes out and load individually to help items dry evenly and reduce tangling. Dry permanent press garments (business shirts) together on the Damp dryness level with Anti-crease option on.
-
Page 16: Getting Started Quickly
8-Getting Started Quickly NZ AU 三 8.1 Preparing the appliance 1. Connect the appliance to a power supply(220V to 240V~/50Hz) . 2. Make sure: the water tank is empty and properly installed. (Fig. 8-2). the lint filter is clean and properly installed. (Fig. - Page 17 8-Getting Started Quickly NZ AU 8.5 Start the cycle If you wish to change a cycle or select a different option once a drying cycle has started, you should shutdown and restart the dryer. cycle. 8-10 8.6 End of the cycle Press POWER to turn off your dryer and unplug the dry.
-
Page 18: Care And Cleaning
9-Care and Cleaning NZ AU 9.1 Lint filter cleaning Clean the lint filter after each dry cycle. PANEL 1. Remove the lint filter from the drum (Fig. 9-1). 2. Open up the lint filter (Fig. 9-2). Delay T emp. Wrinkle Free Dry Level Childl oc k i-Re fres h... - Page 19 9-Care and Cleaning NZ AU 9.3 Emptying the water tank YER RACK Empty the water tank after each drying cycle. 1. Pull out the water tank from its housing (Fig. 9-9). 4. Make sure the catches are 9-10 2. Empty the water tank (Fig. 9-10). 9-11 3.
- Page 20 9-Care and Cleaning NZ AU 9.5 Clean the dryer Wipe the outside of the tumble dryer and the control panel with a damp cloth. Do not use any organic solvent or corrosive agent to avoid damage to the device. 9.6 Clean the Drum After some operation time, fabric care agents or calcium contained in the water can form an almost invisible film on the inside of the drum.
-
Page 21: Before You Call For Sevice
10-Before you call for service NZ AU Dry level and Sanitise combination... -
Page 22: Fault Codes
11-Fault Codes NZ AU string of codes appears on the display, a fault has occurred. Please refer to the following instructions. Code Cause Solution Drain pump failure Contact the customer service. Contact the customer service. The condenser thermal sensor is open-circuited or short-circuited. -
Page 23: Troubleshooting
12-Troubleshooting NZ AU Refer to 'Emptying the water tank'. or on the inside of the door Adjust the adjustable foot under the dryer. Refer to 'Levelling the dryer'. Ensure the dryer is installed on a flat, stable surface. Ensure the dryer is correctly levelled. Choose appropriate cycle. - Page 24 12-Troubleshooting NZ AU Refer to 'Sorting'. 'Drying rack'. Temp. Wrinkle Free i-Re fresh...
- Page 25 12-Troubleshooting NZ AU Temp. Wrinkle Free i-Re fresh...
-
Page 26: Installation
1. The dryer stands on the floor and can easily be moved into position. 2. Your dryer has been designed to be able to be stacked on top of a Haier front loading washer. A stacking kit MUST BE USED between the products and fitted correctly to the washing machine and dryer, as per the stacking kit instructions. - Page 27 13-Installation NZ AU Temp. Wrinkle Free i-Re fresh...
- Page 28 13-Installation NZ AU Temp. Wrinkle Free i-Re fresh...
-
Page 29: Manufacturer's Warranty
14-Manufacturer's Warranty NZ AU Haier undertakes to: than a Haier trained and supported service technician or the selling dealer. installed outside the Haier trained and supported service technician's... - Page 30 14-Manufacturer's Warranty NZ AU Service under this Manufacturer's Warranty must be provided by a Haier trained...
-
Page 31: Customer Care
˜ the Service & Support area at www.haier.com where you can fi nd telephone numbers and FAQs and where you can activate the service claim. To contact our Service, ensure that you have the following data available.