Canon IMAGE FORMULA DR-2010C User Manual
Canon scanner user manual
Hide thumbs
Also See for IMAGE FORMULA DR-2010C:
- User manual (118 pages) ,
- Brochure & specs (26 pages) ,
- Easy start manual (2 pages)
Table of Contents
Advertisement
Cover
Document Scanner
User Manual
♦
Please read this manual before operating
this scanner.
♦
After you finish reading this manual, store
it in a safe place for future reference.
1
Back
Contents
Introduction
Contents
Chapter 1 Before Using the Scanner
Chapter 2 Setup
Chapter 3 Basic Operation
Chapter 4 ISIS/TWAIN Driver Settings
Chapter 5 Job Registration Tool Settings
Chapter 6 Maintenance
Chapter 7 Troubleshooting
Chapter 8 Appendix
INDEX
Next Page
DR-2010C / DR-2510C
DR-2010C / DR-2510C
Advertisement
Table of Contents

Related Manuals for Canon IMAGE FORMULA DR-2010C


Summary of Contents for Canon IMAGE FORMULA DR-2010C
- Page 1 After you finish reading this manual, store it in a safe place for future reference. Back Contents Introduction Contents Chapter 1 Before Using the Scanner Chapter 2 Setup Chapter 3 Basic Operation Chapter 4 ISIS/TWAIN Driver Settings Chapter 5 Job Registration Tool Settings Chapter 6 Maintenance...
- Page 2 Trademarks Canon and the Canon logo are registered trademarks of Canon Inc. in the United States and may also be trademarks or registered trademarks in other countries. Microsoft and Windows are registered trademarks of Microsoft Corporation in the United States and other countries.
-
Page 3: Table Of Contents
INTRODUCTION INTRODUCTION Introduction Thank you for purchasing the Canon DR-2010C/DR-2510C Document Scanner. Please read this manual thoroughly before using the scanner to familiarize yourself with its capabilities, and to make the most of its many functions. After reading this manual, store it in a safe place for future reference. - Page 4 Chapter 6 Maintenance ... 62 1. Regular Maintenance ... 62 Cleaning the Scanner... 62 Cleaning the Inside of the Scanner ... 62 Cleaning the Sensor Glass and the Rollers ... 63 2. Removing and Attaching the Rollers and Document Holding Guide ... 65 Roller Replacement Cycle...
- Page 5 1. Important Safety Instructions 1. Important Safety Instructions 1 Important Safety Instructions To ensure the safe operation of this scanner, be sure to read the safety warnings and precautions described below. Installation Location The performance of this scanner is affected by the environment in which it is installed.
-
Page 6: Ac Adapter
Keep the area around the power cord clear of objects so that the power cord can be disconnected easily in an emergency. • Do not use an AC adapter other than the one provided with the scanner. Do not use the AC adapter provided with the scanner with other products. •... -
Page 7: Handling
OFF, and disconnect the power plug from the power outlet. Then, contact your local authorized Canon dealer or service representative for further information. -
Page 8: Disposal
The dimensions of the scanner are as follows: 11.7" (298 mm)(W) x 9.8" (245 mm)(H) x 19.5" (490 mm)(D) (with the feed tray and eject tray open). (The size of the scanner with the feed tray and eject tray closed is 11.7" (298 mm)(W) x 6.3" (160 mm)(H) x 6.3" (160 mm)(D)). - Page 9 Compatible with Carbonless Duplicating Paper The scanner is able to scan carbonless duplicating paper. Sleep Mode The scanner is designed to save energy by entering the sleep mode when it is not scanning documents. DR-2010C / DR-2510C DR-2010C / DR-2510C...
-
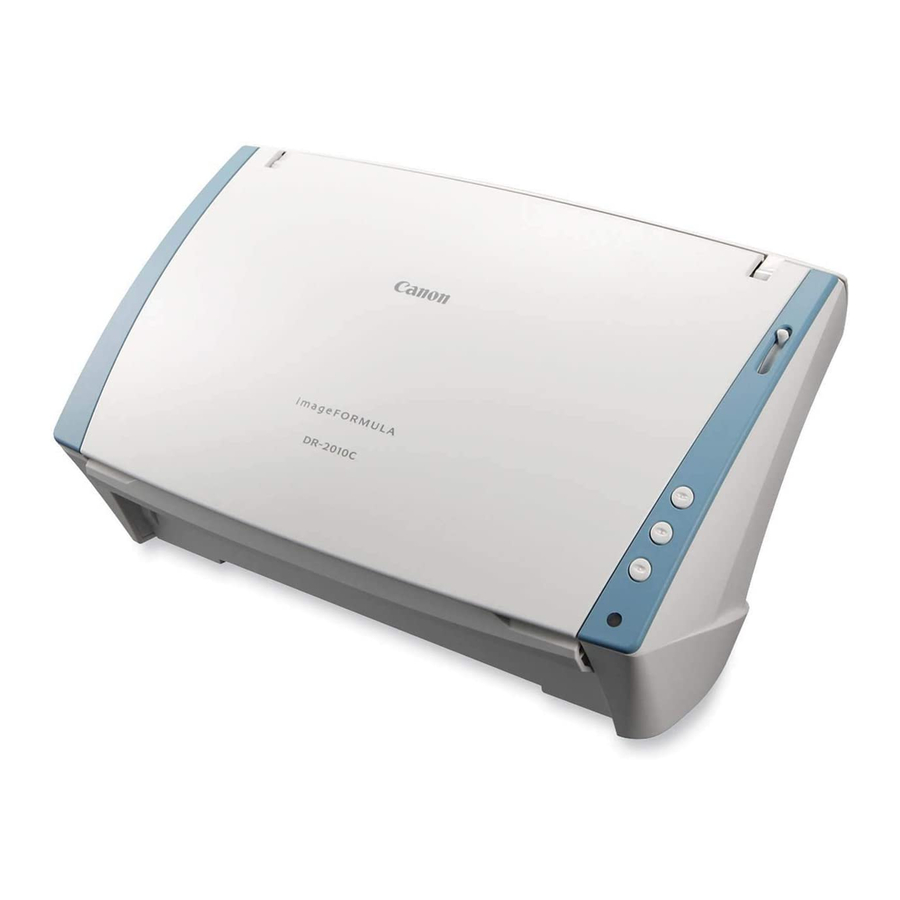
Page 10: Names And Functions Of Parts
3 Names and Functions of Parts 3. Names and Functions of Parts This section describes the name and function of each part. Make sure to read this section and familiarize yourself with the parts of the scanner before using the scanner. Front View/Right-Side View... -
Page 11: Setup
Contents 1. Scanner System Requirements 1 Scanner System Requirements 1. Scanner System Requirements To use the DR-2010C/DR-2510C scanner, your computer must satisfy the following system requirements. • One of the following operating systems: Microsoft Windows 2000 Professional SP4 or later... -
Page 12: Installing The Software
DR-2010C/DR-2510C Driver The scanner driver for using the DR-2010C/DR-2510C. • CapturePerfect 3.0 An ISIS compatible application developed for use with Canon document scanners. NOTE The Setup disc of the DR-2010C/DR-2510C is configured as follows. Install the software using either [Typical Installation] or [Custom Installation]. -
Page 13: Software Installation
Software Installation Follow the procedure below to install the software. IMPORTANT • Install the software before connecting the scanner to the computer. • Log on to Windows as an Administrator. • Close all other applications before installing the software. Turn the power of the computer ON. - Page 14 When the driver installation is complete, click [Finish]. Click [Next]. Read the license agreement → click [Yes] to accept it. Back Previous Page Next Page Contents Confirm the installation location → click [Next]. When the CapturePerfect 3.0 installation is complete, click [Finish]. Click [Next].
-
Page 15: Connecting The Scanner To The Computer
IMPORTANT Before connecting the scanner to the computer, verify that the power switch of the scanner is OFF. If the power switch is in the ON position, push the switch to set it to OFF. Verify that the power switch of the scanner is OFF (O side). -
Page 16: Turning The Power On
3. Turning the Power ON 3 Turning the Power ON When you turn the computer and the scanner ON for the first time, the Plug and Play function of Windows recognizes the scanner and automatically installs the required device driver. - Page 17 Windows automatically recognizes the DR-2010C/DR-2510C as new hardware. NOTE If you set the power switch on the back of the scanner to [AUTO], the scanner is linked to be automatically turned ON/OFF in accordance with the power of the computer.
-
Page 18: Chapter 3 Basic Operation
11 to 42 lb bond (40 to 157 g/m ) 0.002" to 0.0079" (0.05 mm to 0.20 mm) * You can scan documents up to 39.2" (1000 mm) long by setting the scanner to the Long Document mode. (See "Setting the Long Document Mode," on p. - Page 19 • Scanning documents before the ink is dry can cause problems with the scanner. Always make sure that the ink on a document is dry before scanning • Scanning documents that are written in pencil or similar material may make the rollers and scanning glass dirty, which can lead to smudges on the scanned image and transfer the dirt to subsequent documents.
-
Page 20: Preparing The Scanner
2. Preparing the Scanner 2 Preparing the Scanner 2. Preparing the Scanner Prepare the document feed tray according to the paper size and type. Preparing the Document Feed Tray Open the document feed tray. Preparing the Document Eject Tray Open the document eject tray. -
Page 21: Placing Documents
3. Placing Documents 3 Placing Documents 3. Placing Documents There are two methods for feeding documents, the Page Separation mode and Bypass mode. Feeding pages continuously from a stack of documents placed in the feed tray is called the Page Separation mode. Feeding documents one sheet at a time or feeding documents consisting of multiple pages that are attached, is called the bypass mode. - Page 22 • If feeding stops due to a system error or paper jam while the scanner is scanning, resolve the problem, make sure that the scanned image of the last page that was successfully fed has been stored, and then resume scanning the remaining document pages.
-
Page 23: Feeding In The Bypass Mode
Previous Page Next Page Contents IMPORTANT After you finish scanning, close the document feed tray and the document eject tray to prevent damage to the scanner while it is not being used. Placing Cards Switch the feed selection lever to (Bypass). CAUTION When scanning cards, make sure to set the feed selection lever to (Bypass), and scan the cards one at a time. -
Page 24: Placing Folded Documents
Place the card horizontally, with the reverse side facing you, and the top of the card facing down. CAUTION If you place cards to be fed vertically, they may not be ejected properly, and cards that get jammed may be damaged when you remove them. Take care of the orientation when placing cards. -
Page 25: Scanning Methods
Chapter 4, "ISIS/TWAIN Driver Settings." Scanning With CapturePerfect 3.0 This section describes how to start CapturePerfect 3.0, select the scanner, and scan documents. The Scan Batch to File function is used here as an example. - Page 26 Select [CANON DR-2510C] or [CANON DR-2010C] → click [OK]. NOTE If [Canon DR-2510C] or [Canon DR-2010C] is not displayed in the list of scanners, re-install the ISIS/TWAIN driver (See "2. Installing the Software," on p. 12.). Select the default page size from the drop-down list → click [OK].
-
Page 27: Job Registration Tool Settings
ISIS/TWAIN driver, and is used for registering the jobs that are executed when a job button is pressed. From the Windows task bar, click [Start] → point to [All Programs] → [Canon DR-2510C] or [Canon DR-2010C] → click [Job Registration Tool]. DR-2010C / DR-2510C DR-2010C / DR-2510C... -
Page 28: Using The Scan Panel
Register the job. For information on registering jobs, see Chapter 5, "Job Registration Tool Settings." NOTE • You can register jobs from No. 01 to No. 10. • The following jobs are registered in the job buttons by default: No. 01 Start: Performs scanning according to the application settings. No. -
Page 29: Special Scanning
Start button If Feeding Option is set to [Panel-Feeding], clicking this button starts scanning. Stop button Stops scanning. Job display When the Start and Stop functions are assigned to the job buttons, [Start] and [Stop] are shown here. If nothing is shown on the job display, the Start and Stop functions are not assigned to the job buttons. -
Page 30: Scanning Different Sized Documents Together
Click the [Basic] tab in the settings dialog box, and then click [Auto-detection] in the [Page Size] box. For more information on setting the scanning conditions, see Chapter 2, "Using the Scanner - Scanning Different Sized Documents," in the Reference Guide. IMPORTANT When scanning multiple documents of different sizes, place the documents so that they cover the entire span of the feed rollers. -
Page 31: Deskewing Documents
Deskewing Documents You can set the scanning conditions to detect slanted document pages and straighten the scanned images. Click the [Basic] tab in the settings dialog box, and then select the [Deskew] check box. For more information on setting the scanning conditions, see Chapter 4, "ISIS/TWAIN Driver Settings - Correcting Image Skewing."... -
Page 32: Creating Smaller Files
To scan a document that has too many pages to be loaded all at once as separate batches Click [Automatic Feeding] in the [Feeding Option] box. When this option is selected, the scanner detects documents and starts scanning as they are loaded, so continuous scanning is possible by loading the document batches repeatedly. -
Page 33: Clearing A Paper Jam
After each page is scanned, the [Scan Panel] dialog box is displayed. If you selected [Automatic Feeding] in the [Feeding Option] box, the scanner detects when the next document is placed and continues scanning. If you selected [Panel Feeding] in the [Feeding Option] box, press the Scan button after placing the next document to continue scanning. - Page 34 Make sure to pull the document out carefully, without applying too much force. If the jammed paper tears while you are pulling it out, make sure to remove any remaining pieces from inside the scanner. Close the front unit by gently pushing it up on both sides until clicks into place.
-
Page 35: Other Functions
When scanning in the Long Document mode, if the document is placed on the scanner in a skewed position, it may hit the edges of the feeding area and be damaged. Be careful to place the document so that it is not skewed. -
Page 36: Maintenance
Click the [Maintenance] tab → [Long Document Mode (1,000 mm)]. Click [Apply] → [OK]. Turn the scanner OFF and then ON again. Back Previous Page Next Page Contents DR-2010C / DR-2510C DR-2010C / DR-2510C... -
Page 37: Chapter 4 Isis/Twain Driver Settings
From the Windows task bar, click [Start] → point to [All Programs] → [CapturePerfect 3.0] → click [CapturePerfect 3.0]. From the [Scan] menu, select [Select Scanner]. Select [Canon DR-2510C] or [Canon DR-2010C] → click [OK]. DR-2010C / DR-2510C DR-2010C / DR-2510C... -
Page 38: Isis/Twain Driver Properties Dialog Box
NOTE If [Canon DR-2510C] or [Canon DR-2010C] is not displayed in the list of scanners, reinstall the ISIS/TWAIN driver. (See "Chapter 2 Setup - 2. Installing the Software," on p. 12) Select the default page size from the drop-down list → click [OK]. -
Page 39: Scan Mode Settings
NOTE If you are using a TWAIN driver, the two extra settings below are displayed on the [Basic] tab and [Image processing] tab. Refer to the Help for details. -[Basic] tab: Scan options -[Image processing]: Black/white reversion Scan Mode Settings This section describes the procedure for setting the scan mode to suit your needs. -
Page 40: Auto Color Detection
: Available for setting : Not available for setting or automatically set Contents Auto Color Detection This section describes the procedure for setting the scanner to automatically Image processing Others detect whether a document is in color or black-and-white when scanning. -
Page 41: Paper Size Settings
- [Mode in case of binary] Select the scanning mode when a page is detected as black and white. - [Brightness] This setting adjusts the brightness when [Advanced Text Enhancement] or [Advanced Text Enhancement II] is selected with the Black and White mode. For other modes, the brightness is set from the [Brightness] tab. -
Page 42: Scan Resolution Settings
Scan Resolution Settings This section describes the procedure for setting the resolution for scanning. In the ISIS/TWAIN driver properties dialog box, click the [Basic] tab → select the resolution for scanning from the [Dots per inch] drop-down list. NOTE • Higher resolutions provide clearer images, but produce larger files. -
Page 43: Correcting Image Skewing
- [Skip Blank Page] As each document page is scanned, the scanner detects whether it is blank, and if so, the image is not saved. Selecting [Skip Blank Page] enables the [Setting] button, which opens the [Blank Skip Setting] dialog box. -
Page 44: Moire Reduction
Moire Reduction This section describes the procedure for setting to reduce the moire effect (a shimmering, wavy pattern) that may appear when scanning color documents or scanning in grayscale. In the ISIS/TWAIN driver properties dialog box, click the [Basic] tab → select [High Quality Moire Reduction] from the [Moire Reduction] drop-down list. - Page 45 Scan Area Dialog Box (TWAIN Driver) This dialog box appears with application programs that display the [Scan] button in the Properties dialog box. The Area window and [Preview] button are not displayed when using applications like the Job Registration Tool that display the [OK] button in the Properties dialog box.
-
Page 46: Brightness/Contrast Adjustment
Brightness/Contrast Adjustment This section describes the procedure for adjusting the brightness and contrast for scanning. In the ISIS/TWAIN driver properties dialog box, click the [Brightness] tab → adjust the [Brightness] slider and [Contrast] slider to adjust the brightness and contrast for scanning. The settings you can specify are as follows: [Brightness] Adjusts the brightness of images to be scanned. -
Page 47: Gamma Curve Settings
Gamma Curve Settings This section describes the procedure for adjusting the gamma level for scanning documents. In the ISIS/TWAIN driver properties dialog box, click the [Brightness] tab → click [Gamma]. Select the [Custom] check box in the [Gamma Settings] dialog box → specify the settings as necessary. -
Page 48: Image Contour Adjustment
Image Contour Adjustment This section describes the procedure for adjusting the contours of the scanned image. In the ISIS/TWAIN driver properties dialog box, click the [Image processing] tab → adjust the [Edge emphasis] slider to adjust the contours of the scanned image. Move the slider toward [Soft] to soften the image contours, or toward [Sharp] to sharpen the image contours. -
Page 49: Correcting Text Orientation
Correcting Text Orientation This section describes the procedure for automatically correcting the orientation of the text when scanning. In the ISIS/TWAIN driver properties dialog box, click the [Image processing] tab → select the [Text Orientation Recognition] check box. NOTE • When the [Text Orientation Recognition] check box is selected, the [Image Rotation] and area settings in the [Scan Area] dialog box are disabled. -
Page 50: Omitting A Specific Color
Previous Page Next Page Contents Enhancing the Red Color This section describes the procedure for setting the scanner to enhance the red color when performing black-and-white scanning. NOTE If you select [24-bit Color] or [Auto Color Detection] from the [Mode] drop-down list of the [Basic] tab, you cannot specify this setting. -
Page 51: Rapid System Recovery
Rapid System Recovery This section describes the procedure for setting the system recovery method used by the scanner when document feeding stops due to a paper jam or other error during scanning. In the ISIS/TWAIN driver properties dialog box, click the [Others] tab →... -
Page 52: Feeding Options
This feeding method is good for scanning batches of documents of different sizes: after loading the documents, press the Job button (assigned as a Start button on the scanner) to start scanning, and press the assigned Stop button to stop scanning. -
Page 53: Prescan
Prescan This section describes the procedure for checking a scanned image and adjusting the brightness and contrast accordingly. In the ISIS/TWAIN driver properties dialog box, click the [Others] tab → select the [Prescan] check box. Specify the location, file name, and file format to save the image → click [Save] to start scanning. -
Page 54: Registering Scanning Conditions
Registering Scanning Conditions This section describes the procedure for registering specified scanning conditions. Specify the scanning conditions as necessary on the [Basic] tab, [Brightness] tab, [Image processing] tab, and [Others] tab of the ISIS/TWAIN driver properties dialog box. Click the [Basic] tab → click [Save]. Enter a name for [Save user preference as] →... -
Page 55: Chapter 5 Job Registration Tool Settings
ISIS/TWAIN driver. Use the following procedure to start the Job Registration Tool. From the Windows task bar, click [Start] → point to [All programs] → [Canon DR-2510C] or [Canon DR-2010C] → click [Job Registration Tool]. DR-2010C / DR-2510C DR-2010C / DR-2510C... -
Page 56: Job Registration Tool Settings Dialog Box
This dialog box appears when the Job Registration Tool is started from the Windows Start menu. Job Button Settings List The displayed job buttons correspond to those on the scanner, showing their currently assigned settings. Clicking on the job buttons ( , [New/Editing] in the [Editing] menu opens the [New/Editing] dialog box. - Page 57 Start Stop No Scan Job Back Previous Page Next Page Contents Settings Common to Each Function Job Number [No. 1 to No. 10] Displays the selected job button number. Settings are registered to the job button with the displayed number. Job title Enter the job title to be displayed for [Job title] in the [Job Registration Tool] dialog box.
- Page 58 Scanner setting When the [Save as file], [Print], or [Attach to E-mail] function is selected in the [Function] box, scanner settings are enabled, and you can press the [Setting] button to specify scanner settings. NOTE For more information on the scanner settings, see Chapter 4, "ISIS/TWAIN Driver Settings."...
- Page 59 Select [High Compression] to save files with high compression. Although file size is reduced, image quality may be slightly degraded. The Compression rate setting is enabled when the scanner is set to [256-level Gray] or [24-bit Color] mode. When the [Black and White] or [Error Diffusion] binary image scanning mode is selected, the file size depends on the content of the scanned document.
-
Page 60: Admin Dialog Box
Settings to Print Scanned Images [Printer] Shows the printer to use for printing images. Click [Printer setting] to change the printer settings. [Print format] Select whether to resize images for printing. Select [Actual size] to print images in the same size as their original documents. - Page 61 [Capacity Observed Folder] Specify a folder to monitor for available space. [Warning Size] Enter the maximum total size for all files saved to the specified folder. When saving to removable storage media such as a CD-R, specify the maximum capacity of the media. When folder monitoring ([Display Warning Dialog]) is enabled, a warning message appears when starting to scan if the total size of the files in the specified folder exceeds the specified limit.
-
Page 62: Chapter 6 Maintenance
Cleaning the Scanner To clean the exterior of the scanner, dampen a cloth with water or a mild detergent, wring the cloth out thoroughly, and then wipe the dirt away. Then use a dry, soft cloth to wipe away any moisture. -
Page 63: Cleaning The Sensor Glass And The Rollers
Cleaning the Sensor Glass and the Rollers If scanned images contain streaks, or if the scanned documents become dirty, the sensor glass or rollers inside the scanner may be dirty. Clean them periodically. Open the document feed tray (See p. 20). - Page 64 Remove the retard roller and feeding roller (See p. 65 and p. 67.). IMPORTANT Remove the retard roller and feeding roller from the scanner to clean them, and make sure to reattach them to the scanner when cleaning is finished.
-
Page 65: Removing And Attaching The Rollers And Document Holding Guide
Make sure to reset the counter after replacing the rollers (See "Resetting the Counter," on p. 70.). • For information about the exchange roller kit (feeding roller, retard roller,) contact your local authorized Canon dealer or service representative. Back Previous Page Next Page Contents Removing/Attaching the Feeding Roller To remove or attach the feeding roller, follow the procedure below. - Page 66 Open the roller cover on the main unit by placing your fingers in the grooves and pulling it down. Lift up the roller fixing lever ( ), and slide it to the left ( ). Remove the feeding roller by moving it to the left to detach it from its shaft, and pull it out of the slot.
-
Page 67: Removing/Attaching The Retard Roller
Close the roller cover. Make sure that the cover is completely closed by pushing until you hear a click. Close the front unit by gently pushing it up on both sides until it clicks into place. Make sure that the front unit is completely closed by pushing until you hear a click. - Page 68 Grasp the ends of the roller cover inside the front unit and pull it down to open it. Lift up the roller fixing lever ( ), and slide it to the right ( ). Remove the retard roller by moving it to the right to detach it from its shaft, and pull it out.
-
Page 69: Removing/Attaching The Document Holding Guide
Close the roller cover. Make sure that the cover is completely closed by pushing until you hear a click. Close the front unit by gently pushing it up on both sides until it clicks into place. Make sure that the front unit is completely closed by pushing until you hear a click. -
Page 70: Resetting The Counter
Control Panel (Classic View) Contents If the Control Panel is displayed with the Category View, switch to Classic View. Double-click [Scanners and Cameras]. Right-click [CANON DR-2510C USB] or [CANON DR-2010C USB] → click [Properties]. Printers and Other Hardware Back Previous Page Next Page... - Page 71 Click the [Maintenance] tab → [Reset]. Confirm that the counter for the selected roller is set to 0 → click [OK]. Back Previous Page Next Page Contents DR-2010C / DR-2510C DR-2010C / DR-2510C...
-
Page 72: Troubleshooting
For details on connecting the power cord, see "Chapter 2 Setup - Connecting the Scanner to the Computer," on p. 15. × The Scanner Is Not Recognized The following are possible causes of the PC failing to recognize the scanner. Check each possible cause. Problem... - Page 73 Re-install the scanner driver or application software. • When system errors result in the scanner not functioning at all, turn OFF the scanner and wait at least ten seconds before turning it ON again. If the error continues to occur, restart the computer. •...
- Page 74 Solution Clean the rollers (See p.63.). If the rollers are worn, then they need to be replaced. Contact your local authorized Canon dealer or service representative to purchase a roller replacement kit. For information on removing jammed documents, see "Clearing a Paper Jam," on p.
-
Page 75: Uninstalling Software
The [Add or Remove Programs] dialog box appears. Uninstalling the ISIS/TWAIN Driver and Job Registration Tool From the Programs list, click [Canon DR-2510C Driver] / [Canon DR- 2010C Driver] (or [DR-2510C Job Tool] / [DR-2010C Job Tool]) → click [Remove]. -
Page 76: Uninstalling Captureperfect 3.0
Click [Yes] in the [DR-2510C Setup] / [DR-2010C Setup] dialog box. NOTE To remove the Job Registration Tool, click [Yes] in the [Confirm File Deletion] dialog box. Click [Finish]. NOTE When removing the Job Registration Tool, click [Yes To All] in the [Remove Shared File?] dialog box →... -
Page 77: Appendix
11 to 42 lb bond (40 to 157 g/m (Bypass mode) (0.05 mm to 0.20 mm) *You can scan documents up to 39.2" (1000 mm) long by setting the scanner to the Long Document mode. (See "Setting the Long Document Mode," on p. 35.) Business Card Size: 1.97"x 2.12"... -
Page 78: Replacement Parts
For information on replacing the document holding guide, see "Removing/ 40 images/min.(DR-2010C) Attaching the Document Holding Guide," on p. 69. Contact your local authorized Canon dealer or service representative for 40 images/min.(DR-2010C) detailed information about the replacement parts. Product specifications are subject to change without notice. -
Page 79: External Dimensions
Back Previous Page Next Page Contents External Dimensions 11.7" (298mm) 6.3" (160mm) 19.5" (490mm) DR-2010C / DR-2510C DR-2010C / DR-2510C... - Page 80 If such changes or modifications should be made, you could be required to stop operation of the equipment. Canon U.S.A. Inc. One Canon Plaza, Lake Success NY 11042, U.S.A. Tel. No. (516)328-5000 RADIO INTERFERENCE REGULATIONS (For 120 V models)
-
Page 81: Index
INDEX AC Adapter ... 6 Batch Separation ... 52 Bypass mode ... 23 CapturePerfect 3.0 ... 12, 25 Cards, placing ... 23 Cleaning Document holding guide ... 64 Main body ... 62 Rollers ... 63 Sensor glass ... 63 Connecting to the Computer ... 15 Counter, resetting ... - Page 82 Practical examples ... 32 Preparing the scanner ... 20 Document eject tray ... 20 Document feed tray ... 20 Document stopper ... 20 Recognizing the scanner by computer ... 16 Replacement parts ... 78 Retard roller Attaching ... 68 Removing ... 67 Roller, replacing Counter, resetting ...