
Related Manuals for Siemens HX9R3AE50


Summary of Contents for Siemens HX9R3AE50
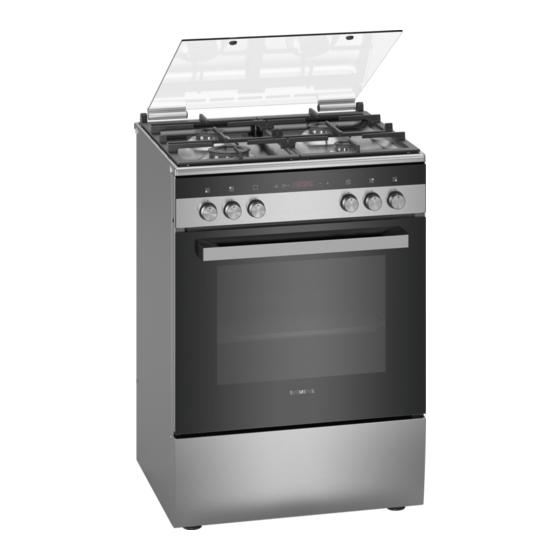
- Page 1 Translated from Dutch to English - www.onlinedoctranslator.com Oven HX9R3AE50 [en] User manual...
-
Page 3: Table Of Contents
Table of contents Use according to directions ... 4 en ] Usage hint Time functions ......20 Set duration. -
Page 4: Use According To Directions
More information about products, accessories, 8 Use according to the parts and services can be found on the internet: regulations www.siemens-home.bsh-group.com and in the online shop: www.siemens-home.bsh-group.com/eshops Read this manual carefully. Only then can you Usage according to the instructions operate your device properly and safely. -
Page 5: Important Safety Instructions
Important Safety Instructions Install a mechanical ventilation device (e.g. ( Important an extractor hood). safety regulations Intensive and prolonged use of the appliance may require additional ventilation, e.g. by Warning – Risk of fire! opening a window or additional ventilation, Call angr ijkev ei li ghei ds for sc hr ift en When the appliance door is opened, an air e.g. - Page 6 Important Safety Instructions If the liquefied gas bottle is not Never place flammable objects on the ■ ■ perpendicular, the liquid propane/butane/ cooking zones or keep them in the cooking compartment. Never open the door when may enter the unit. Violent flames can then occur at the burners.
-
Page 7: Halogen Lamp
Important Safety Instructions If the pans are incorrectly sized, damaged Warning – Risk of electric shock! ■ or incorrectly positioned, they can cause serious injury. Observe the instructions for Improper repairs are dangerous. Repairs ■ the cookware may only be carried out by technicians instructed by the customer service. -
Page 8: Table Of Contents
Causes of damage If moisture remains in the interior for a longer ] Causes of damage ■ period of time, this can lead to corrosion. Allow the interior to dry after use. Do not store food in the closed interior for a long time. Do not store food in Cooker Ear pockets of sc hade the interior. -
Page 9: Environmental Protection
Environmental protection 7 Environmental protection Your new appliance is particularly energy efficient. Mil li eubes c her mi ng Here you will find tips on how to save even more energy when using your appliance and how to dispose of the appliance correctly. -
Page 10: Place And Connect
Place and connect safety must be used with a suitable gas regulator. 5 Place and connect If you are unsure of the gas pressure in your electrical grid, please contact your local power company. The Do not install the appliance behind a decor or Place s and conn nect s connection, maintenance and adjustment of the gas furniture door. -
Page 11: The Cooker Horizontally With The Spirit Level
Place and connect Placing the device For the service department Attention! The device must be connected in accordance with ■ the specifications on the type plate. Only connect the appliance to an electrical ■ connection that complies with the applicable regulations. -
Page 12: Getting To Know The Device
Getting to know the device Note: Depending on the device type, color and detail Getting to know the device deviations are possible. In this chapter we explain the indications and L er and know the device controls. In addition, you will get to know different functions of your device. -
Page 13: Panel
Getting to know the device Control panel Depending on the device type, detailed deviations are Decrease setting values. possible. Plus Increase setting values. Keys and display - - - - - - - - Tests The keys allow you to set various additional functions of your device. -
Page 14: Space
Getting to know the device - - - - - - - - Open appliance door Temperature You set the temperature in the cooking If you open the appliance door while a program is compartment with the temperature knob. It also running, operation will continue. -
Page 15: To Belong
To belong _ To belong Various accessories come with your device. Here is an To belong overview of the supplied accessories and how they are used. Supplied accessories Your device is equipped with the following accessories: Clues Schedule Hold the baking sheet on both sides with both hands For crockery, cake and oven dishes. -
Page 16: Before First Use
Before first use k Before first use grill plate For grilling, instead of the grid, or as a splash guard. Use only in the roasting pan. Before you can use your new appliance, you must For the first use k Brick make a few settings: In addition, clean the interior and For homemade bread, rolls and pizzas that require... -
Page 17: Cooking Pots
cooking pots A cooking pots Burners cook pans power Diameter of Diameter of the pan, the pan, and kW Electric minimum maximum cooker* 1 kW Electric 14.5cm 14.5cm cooker* Wok burner* 3.5 kW 24 cm 28 cm Strong 3 kW 24 cm 28 cm burner*... -
Page 18: Gas Burners
gas burners Check if the flame is burning. If not, repeat the A gas burners process from step 2. To end cooking, turn the cooking zone knob to the right to the Turn off. In this chapter you can read how to set a cooking Gas br other s zone. -
Page 19: Operate Device
Operate device Dish Example cooking mode cooking zone To melt chocolate, butter, small flame auxiliary burner margarine To heat Broth, preserved vegetables Semi-rapid burner small flame Heating and warm soup small flame auxiliary burner to hold Fish steam Semi-rapid burner between large and small flame Steam* Potatoes and others... -
Page 20: Fast Preheating
Time functions Fast preheating O Time functions The Fast Preheat function allows you to shorten the heating time. Your device has several time functions. Ti j df unc ti es It is best to use the following: Usage Timekeeping 3D hot air ■... -
Page 21: The Time
Time functions With the key or @ set the time. With the @ or . button delay the end. After a few seconds, the device starts to heat up. The time counts down on the display. The time has elapsed A signal sounds. -
Page 22: Child Lock
Child lock With key or @ set the alarm time. The a Child lock alarm time starts after a few seconds. Tip: If the set time applies to the running time of the To prevent children from accidentally switching device, set the time. This will turn off the device Child lock on the device or changing settings, it is equipped automatically. -
Page 23: Cleaning
Cleaning d Cleaning Zone Cleaning products Control panel Hot soapy water: Clean with a cleaning cloth and dry When properly maintained and cleaned, your with a soft cloth. Do not use glass Don't get it appliance will continue to look good and function properly cleaner, metal or glass scraper for for a long time to come. - Page 24 Cleaning Zone Zone Cleaning products Cleaning products Glass hob Care: protection and care products Telescopic rail Hot soapy water: Clean with a cleaning cloth or brush. ramic* parts for glass ceramics. Cleaning: cleaning agents suitable (depending on for glass ceramics. You can remove the racks to clean type of device) Observe the cleaning instructions on...
-
Page 25: Surfaces
Cleaning The enamel is fired at very high temperatures. These stains are not harmful to health and do not affect ■ This may cause minor color differences. This is the cleaning ability of the self-cleaning surfaces. normal and will not adversely affect operation. Attention! The narrow edges of the baking trays cannot be Do not use oven sprays for the self-cleaning surfaces. -
Page 26: Cleaning Support Humidclean
racks Cleaning Support p racks humidClean When properly maintained and cleaned, your stretch you appliance will continue to look good and function properly for a long time to come. Here we explain how The cleaning support is a quick alternative for cleaning to remove and clean the racks. -
Page 27: Appliance Door
appliance door q appliance door When properly maintained and cleaned, your Device door appliance will continue to look good and function properly for a long time to come. Here we explain how to to remove and clean the appliance door. Remove and insert oven door To clean and disassemble the door windows, you can Both locking levers... -
Page 28: Additional Door Security
appliance door It is best to use a glass cleaner for cleaning Remove the top cover for cleaning. Hold the cover on both sides and pull it up. Clean the windows with glass cleaner and a soft cloth. Warning – Risk of injury! If there are scratches on the glass of the appliance door, it can jump. -
Page 29: What To Do In Case Of Malfunctions
What to do in case of malfunctions? after-sales service, specifying the exact error message and 3 What to do in case of malfunctions? the E-No. from your device. ~" Customer Service" on page Malfunctions are often caused by a trifle. Before What to do at jst or ingen? contacting the after-sales service, try to rectify the fault Replacing the interior lamp on the ceiling... -
Page 30: Service
customer service J For you in our cooking studio 4 customer service tested. When your device needs to be repaired, our service Ser vic edi ens t department is there for you. We always find a suitable Here you will find a variety of dishes and the solution, also to prevent unnecessary visits from service For you in our s e also st udi o ou t get es t . - Page 31 Tested for you in our cooking studio. open the oven door early during cooking or this effect Cake, cake and pastries disappears due to preheating. Your appliance offers numerous heating methods for Only use the original accessories that come with your baking cakes and small cakes.
- Page 32 Tested for you in our cooking studio. Pastry in molds Dish slide-in Accessories/shapes confuse Tempera- Length of time height mings- ture in °C in min. method Cake, simple 160-180 50-60 Wreath/rectangular shape Cake, easy, 2 levels 140-160 Wreath/rectangular shape 60-80 Cake, fine 150-170 60-80...
- Page 33 Tested for you in our cooking studio. Dish slide-in Accessories/shapes confuse Temperature Length of time height in °C mings- in min. method 190-210 35-50 Dough of e.g. profiteroles universal pan 190-210 35-45 Dough of e.g. profiteroles, 2 levels Roasting tray + baking tray Cookies Dish Shelf height...
- Page 34 Tested for you in our cooking studio. Dish slide-in Accessories/shapes confuse Temperature Length of time height in °C mings- in min. method Pizza, frozen, thin base, 1 piece 190-210 15-20 Schedule Pizza, frozen, thin base, 2 pieces 190-210 20-25 Universal pan + wire rack 180-200 20-25 Pizza, frozen, thick bottom, 1 piece...
- Page 35 Tested for you in our cooking studio. Oven dishes and au gratin dishes the dishes take longer and darken at the top. Your appliance offers numerous heating methods for Always use the indicated shelf heights. cooking casseroles. You will find optimal settings for many dishes in the setting tables.
- Page 36 Tested for you in our cooking studio. Meat Smoke may form when grilling. ■ When grilling, do not place the baking tray or the ■ Brush lean meats with fat as desired or top with universal pan higher than shelf level 3. They deform strips of bacon.
- Page 37 Tested for you in our cooking studio. Dish Temperature in Time in Retractable heating Accessories/shapes °C min. mings- method Turkey breast, boned, 1 kg 240-260 Closed shape 80-100 Turkey leg, boned, 1 kg 180-200 90-100 Schedule Meat Dish Step slide-in Accessories/shapes confuse Tempera-...
-
Page 38: Side Dishes
Tested for you in our cooking studio. The meat burns when stewing. The lid must fit snugly on the roasting pan and close tightly. Reduce the temperature and, if desired, add more liquid while stewing. Only salt the meat after grilling. Salt draws water from the meat. When turning, do not insert into the grill The grill product becomes too dry. -
Page 39: Drying
Tested for you in our cooking studio. To dry Use the following shelf heights for drying: 1 grid: height 3 ■ You can dry well with hot air. In this type of 2 grids: height 3+1 ■ preservation, flavorings are concentrated by removing water. -
Page 40: The Dough Rise
Tested for you in our cooking studio. Vegetables with cold liquid in one liter glass jars When the bubbling starts Reheating pickles Approx. 35 minutes Beetroot Approx. 35 minutes Approx. 30 minutes approx. 45 minutes Approx. 30 minutes Brussels sprouts Beans, kohlrabi, red Approx. -
Page 41: Dishes
Tested for you in our cooking studio. Test dishes These tables are made for research institutes to facilitate checking and testing of the device. According to EN 60350-1. Baking Cakes placed on baking trays or in tins do not have to be ready at the same time. - Page 44 *9001305789* 9001305789 001010(D)