
Related Manuals for JVC UX-G616W


Summary of Contents for JVC UX-G616W
-
Page 1: Fm Indoor Antenna
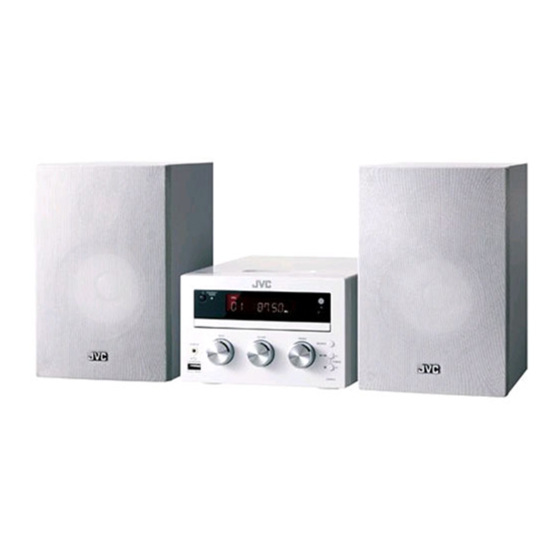
MICRO COMPONENT SYSTEM UX-G616W -Consists of CA-UXG616W and SP-UXG616W UX-G616S -Consists of CA-UXG616S and SP-UXG616S INSTRUCTIONS LVT2251-001A [US, UB, UX, UA]... -
Page 2: Table Of Contents
Random play ................20 to operate, notify your dealer immediately. If your unit was shipped to you directly, notify your shipper immediately. JVC recommends that you retain the original carton and packing materials in case you need to move or ship the unit in the future. - Page 3 Changing the battery of the remote control How to read this manual unit Most of the functions are designed to be able to Use a commercially available button battery operate from the remote control unit. (CR2025). CR2025 (+side) Preparing the remote control unit When you use the remote control unit for the first time, pull out the insulation sheet.
-
Page 4: Connections
Connections FM indoor antenna ANTENNA Right speaker Left speaker FM75 Component Video cord (commercially available) COMPONENT VIDEO OUT To TV with video input terminal ANTENNA The "DIGITAL OUT" DIGITAL OUT FM75 AUDIO OUT ( COAXIAL ) VIDEO OUT terminal of this unit puts out only the digital audio of the DVD/CD source. - Page 5 Connecting the FM antenna To remove Dock adapter • Insert a thin object such as the tip of a flat-blade screwdriver 1 Connect the lead to the [ANTENNA FM 75Ω] terminal. into the slit on the dock adapter and lift it to remove. 2 Find the location that gives the best reception.
-
Page 6: Disc Information
Disc information Types of Playable Discs The system this unit is using does not only play music from CD but can also play the discs listed below to offer you high-quality entertainment of video of movies and live concerts. DVD VIDEO Playable Disc CD (CD-R, CD-RW) VCD (SVCD*) -
Page 7: Handling Discs
• Contact the sales agent as to whether your USB device conforms to the USB mass storage class specs. • Using an unsupported USB device can result in abnormal Operation regulatory marks playback or display of the audio file. With this unit, some functions such as the play Even if you use the USB device conforming to the above specs, audio files cannot be played normally depending on function may be restricted depending on the... -
Page 8: About Mp3 And Wma
About MP3 and WMA The playable MP3/WMA file (hereafter called Audio Playable DVD±R/RW format file) and the media format have the following • UDF-Bridge limitation. The Audio file, which is not conforming to Playable CD-R/RW format the specification, may not play normally. •... -
Page 9: About Video File
About Video file About Picture file Acceptable video files Acceptable picture files Playable MPEG1, MPEG2 file Playable JPEG file • File formats: MPEG 1/2 • File formats: JPEG • Extension: .mpg, .mpeg, .m1v, .m2v, .dat, .vob, .mod, .avi • Extension: .jpg, .jpeg •... -
Page 10: Component Names And Functions
Component names and functions MULTI CONTROL 5/∞/2/3 buttons button To switch the system on or to standby mode. To select a setting item. 5/∞ buttons STANDBY/TIMER indicator Red lighting: Ordinary standby mode To tune to higher/lower radio frequency or search Orange lighting: Timer standby mode radio stations for TUNER. - Page 11 4/¢ buttons digit buttons 0 – 9 To search forward/backward to next/previous title/ To select a track/file number for CD and audio file. chapter/track for DVD. To select a preset radio station for TUNER. To search forward/backward or to skip to the next/ TIME SEARCH button previous files for audio files and iPod, iPhone.
-
Page 12: Basic Function
Basic function Switching the system on Adjusting the sound You can reinforce or weaken the bass and treble Press or SOURCE button. levels suitable for your favorite music. STANDBY/TIMER indicator will go out. The system will switch to the last selected source. To adjust the bass and treble levels Switching the system to standby mode For Remote control unit:... -
Page 13: Using The Dvd/Usb Device
Using the DVD/USB device Preparation Inserting a USB device Press button to select standby mode. Inserting a disc Press 0 button to open the disc tray. Insert a USB device to the USB connector on the front panel. Place a disc onto the disc tray with the label side facing up. -
Page 14: Playing A Dvd/Video Cd
Using the DVD/USB device DVD disc menu Playing a DVD/Video CD Operation type Operation For Remote control unit: Press DVD/CD 6 button To view the title Press TOP MENU button to display the to start playback. menu disc's title menu, if available. For Main unit: Press SOURCE button to select "DVD", To view the DVD Press MENU button to display the disc... -
Page 15: Direct Search (For Dvd, Video Cd, Cd, Audio File Only)
⁄ To select a file type if different types of playable files (audio/picture/video file) are • For audio file, video file; "T:xxx" appears on the display. "T:xxx" contained indicates the file number. • The digit buttons, 0–9 on the remote control unit, can also be During playing of video file/picture file, press 7 used to select a track/file. -
Page 16: Program Play
Using the DVD/USB device Program play Random play (except picture file) You can program the playback order on the TV You can play all the tracks/files in random order. screen. During playing, pause or stop mode, press FM Press FM MODE/PLAY MODE button repeatedly MODE/PLAY MODE button repeatedly to enable to enter program setting. -
Page 17: A-B Repeat
A-B Repeat Changing the display information You can play back a desired section repeatedly. To change information on the on-screen bar Press A-B button to select the starting point (A) Press ON SCREEN button. in play mode. Every time the button is pressed, the display changes in the following order: Press A-B button to select the ending point (B) For DVD :... -
Page 18: Dvd Setup
DVD Setup Selecting the scanning mode Setting a menu Press to select the video output suitable for the TV. Press SHIFT and SET UP buttons together. Press SHIFT and PROGRESSIVE buttons together. Press MULTI CONTROL 2 or 3 button to select Display "576I"... - Page 19 DOWNMIX LT/RT: Outputs the sound mixed to Menu Item Contents the Dolby Surround audio. TV SYSTEM You can select the TV system (PAL, STEREO: Outputs the sound mixed to NTSC or AUTO). the stereo sound. SCREEN SAVER You can set the screen saver function AUDIO OUT SPDIF/OFF: Digital output is disabled.
-
Page 20: Using The Ipod/Iphone
Using the iPod/iPhone Inserting an iPod/iPhone Repeat play Connect an iPod/iPhone to the iPod dock. You can play the current song or the all songs repeatedly. Playing an iPod/iPhone Press REPEAT button. For Remote control unit: Press iPod button. Each press switches the selection of iPod/iPhone For Main unit: Press SOURCE button to select "iPod", play mode. -
Page 21: Using The Aux
Using the AUX Using the radio Playing an external component Tuning in radio stations An external component can be connected to AUDIO For Remote control unit: Press TUNER/AUDIO IN IN of this unit and played back. to select "TUNER." For Main unit: Press SOURCE button to select Connect an external component. -
Page 22: Manual Preset
Clock/timer operation Using the radio Manual preset Clock setting You can store up to 20 radio stations in the memory. Press CLOCK/TIMER button. When a preset radio stations selected, the preset "SETCLOCK" appears and "CLOCK" starts flashing. number appears on the display. Press ENTER button. -
Page 23: To Deactivate The Timer
To deactivate the timer Press SOURCE button or DVD/CD iPod 6, or USB MEMORY TUNER/AUDIO IN Press CLOCK/TIMER button repeatedly to select button to select the desired source and press "CANCEL" and press ENTER button. ENTER button. ⁄ The source switches as follows : "TUNER"... -
Page 24: System Setup
System setup In case of difficulty Resetting the Microcomputer Setting Auto Power Save (A.P.S.) The microcomputer may malfunction (the unit A.P.S. stands for Auto Power Save, which is the cannot be operated, or shows an erroneous display) function that switches this unit OFF when it has not if the power cord is unplugged while the power been controlled for more than 30 minutes while its is ON, or due to some other external factor. - Page 25 DVD player operation Remote control unit “NO DISC” is displayed. Does not function properly. \ Insert a disc correctly (label side up). \ Replace the batteries. \ Clean the disc. \ Remove the obstacles. \ Use a new or readable disc. \ Move closer to the system when using the \ Wait until the moisture condensation at the remote control unit and make sure that you...
-
Page 26: General Information
General information Specifications Maintenance Main unit Cleaning the cabinet Amplifier section • Use a soft cloth slightly moistened with a mild detergent Rated output power solution. Do not use a solution containing alcohol, ammonia ......20 W + 20 W (1 kHz, 10% T.H.D., at 6 Ω) or abrasive. - Page 27 Speakers Enclosure ..............Bass-reflex type Speaker ..............Full-range: 89 mm Impedance .....................6 Ω Maximum input ................20 W Dimensions .................W : 136 mm H : 210 mm D : 180 mm Weight (net) ..............1.3 kg (1 piece) Notes: • Sufficient performance may not be exhibited at extremely cold locations (where water freezes).
- Page 28 Refer to the model and serial numbers whenever you call upon your dealer for information or service on this product. Model Serial Number © 2011 JVC KENWOOD Corporation 0911KMMMDWMTS...