Table of Contents
Advertisement
Available languages
Available languages
Quick Links
SEC.
적용모델
WORK
05
R*13U7*S8W
182
8
7
6
5
4
3
2page 목차 페이지 변경
EAGJ200207
EAGJ101053
2
UL2158 규격 개정 및 법인 감수 결과에 따른 매뉴얼 수정
매뉴얼 추가 수정
EAGJ100937
1
REV. NO.
REVISION DESCRIPTION
REF. NO.
기호
변경 사항
시방 번호
재
질
인쇄방법
표지 : 모조지 150g OFFSET 인쇄
무선 그로잉 인쇄
내지 : 모조지 80g OFFSET 인쇄
19/02/15
한그림
김재석
19/02/11
한그림
김재석
19/01/29
한그림
김재석
DATE
PREPARED
APPROVED
년/월/일
시방자
승인자
인 쇄 도 수
PAGE
표 지
내 지
124,B5
1도
1도
<< 주기 >>
1. 재질, 인쇄방법, 인쇄도수, 외곽치수등은 작업표에 준한다.
2. 인쇄내용, 문자크기 및 형상, 선의 굵기 등은 설계에서 제시된 FILM에 준함.
3. 외곽치수는 절단후 치수임.
4. 양산전에 설계 한도를 득할 것.
5. 본 부품에 금지물질이 포함되지 않도록 하고, 상세내용은 LG(63)-A-5501-34
를 만족할 것.
<< NOTES >>
1. Material, printing and exterier size are refer to work tables.
2. Printing, text size and line are based on LG design film.
3. Exterier size on the drawing is cutting line.
4. Before product controlled by criteria sample.
5. The part should not contain prohibited substances(Pb,Cd,Hg,Cr+6,PBB,
PBDE) and details should comply with LG standard of LG(63)-A-5501-34
TRIG.
UNIT
mm
MODELING
DESIGNED
REVIEWED
CHECKED APPROVED
윤 혜 진
윤 혜 진
19.01.03
19.01.03
LG 전자
(주)
LG Electronics Inc.
REMARK
EUS향
Enlish
Spanish
PDF
ILLUSTRATOR
SCALE 1
1
MANUAL,OWNER'S
T
I
T
김 재 석
L
TD Plus(D) EUS
E
19.01.03
MFL70442605
RELATED DWG.
DWG.
No.
RELEASING THIS DRAWING
WITHOUT PERMISSION LG
Electronics SHOULD BE
ACCUSED ACCORDING TO THE
LAWS AND COMPANY RULES.
이 도면은 LG전자의 자산으로 불법
유출시 관계법과 회사규정에 의해 처벌됨.
DR COMPLETED
도면 DR 완료
완료일 :
1/1
Advertisement
Table of Contents

Related Manuals for LG DLGX7801VE


Summary of Contents for LG DLGX7801VE
- Page 1 << NOTES >> 1. Material, printing and exterier size are refer to work tables. 2. Printing, text size and line are based on LG design film. 3. Exterier size on the drawing is cutting line. 4. Before product controlled by criteria sample.
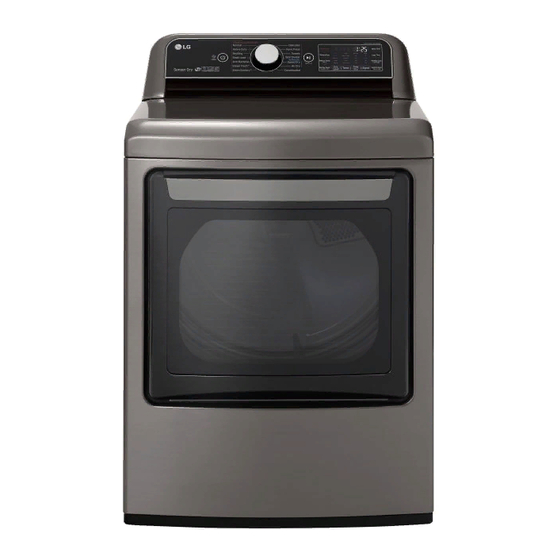
- Page 2 DRYER Read this owner’s manual thoroughly before operating the appliance and keep it handy for reference at all times. DLEX7900*E DLEX7800*E DLGX7901*E DLGX7801*E www.lg.com MFL70442605 Copyright © 2019 LG Electronics Inc. All Rights Reserved. Rev.03_021519 MFL70442605_en_190215.indd 1 2019-02-15 오후 2:38:13...
-
Page 3: Table Of Contents
Installation Test (Duct Check) OPERATION Using the Dryer Check the Lint Filter Before Every Load Sorting Loads Loading the Dryer Using the LG EasyLoad Control Panel Cycle Guide Cycle Settings and Options Steam Functions (Steam Models) Steam Cycle Guide MFL70442605_en_190215.indd 2... -
Page 4: Product Features
Two-Way Easy-Access Reversing Door The LG EasyLoad™ can be tilted open from the top, hamper-style, allowing you to easily load the dryer without items falling on the floor. The door still swings open to provide easy access for unloading or loading of bulkier items. The door hinge can be reversed to adjust to the installation location. -
Page 5: Safety Instructions
SAFETY INSTRUCTIONS SAFETY INSTRUCTIONS READ ALL INSTRUCTIONS BEFORE USE Your safety and the safety of others is very important. We have provided many important safety messages in this manual and on your appliance. Always read and obey all safety messages. This is the safety alert symbol. -
Page 6: Important Safety Instructions
SAFETY INSTRUCTIONS IMPORTANT SAFETY INSTRUCTIONS WARNINg To reduce the risk of fire, electric shock, or injury to persons when using your appliance, follow basic precautions, including the following: Installation • Remove all protective vinyl film from the product. Failure to do so may result in product damage, smoke, •... - Page 7 SAFETY INSTRUCTIONS Operation • Do not put any part of your body, such as your hands or feet, or metal objects under the product. • Read all instructions before using the appliance. • Do not let your hand get pinched when opening or •...
-
Page 8: Grounding Instructions
SAFETY INSTRUCTIONS gROUNDINg INSTRUCTIONS WARNINg Improper connection of the equipment-grounding conductor may result in a risk of electric shock. Check with a qualified electrician or service person if you are in doubt that the appliance is properly grounded. • This appliance must be grounded. In the event •... -
Page 9: Product Overview
(on some models) Hamper door Optional accessories Swing door The LG EasyLoad™ feature allows you to open the dryer door from the top, hamper-style, when loading the dryer to help guide clothes into the drum and prevent Drying rack Side vent kit them from falling onto the floor. -
Page 10: Installation
INSTALLATION INSTALLATION Installation Overview Please read the following installation instructions first after purchasing this product or transporting it to another location. Check and choose Level the dryer Vent the dryer the proper location Connect the inlet hose Connect electric dryers Connect gas dryers (steam models) Gas dryer... -
Page 11: Installation Location Requirements
10 INSTALLATION Installation Location Requirements WARNINg Read all installation instructions completely before installing and operating your dryer! It is important that you review this entire manual before installing and using your dryer. Detailed instructions concerning electrical connections, gas connections, and exhaust requirements are provided on the following pages. The installation requires: •... - Page 12 INSTALLATION Closet Ventilation Requirements Closets with doors must have both an upper and lower vent to prevent heat and moisture buildup in the closet. One upper vent opening with a minimum opening of 48 sq. in. (310 cm ) must be installed no lower than 6 feet above the floor.
-
Page 13: Leveling The Dryer
• A support video is also provided at http://www. lg.com/us/support/videos/video-tutorials-view, How to Reverse the Door – LG EasyLoad™ Dryer. Place level here Tools Required • Phillips screwdriver •... - Page 14 INSTALLATION Door Reversal Instructions c. Remove the hinge cover by gently prying it up with a flat blade screwdriver, being careful not NOTE to scratch the paint. Rotate the hinge cover The instructions here are for changing the door 180 degrees and install it on the opposite side, swing from a right to a left side hinge.
- Page 15 14 INSTALLATION Reinstall the door. Reverse the components on the cabinet. While supporting the door, install the four hinge screws removed in step 2. Test the swing of the door to make sure the hinges and latch are Hinge Upper properly aligned and that the door opens, closes cover hinge...
- Page 16 INSTALLATION e. Remove the three screws on the hinge at the Switch the door strike and the blank cover. bottom left. Remove the hinge and reinstall it Remove the two screws on the door cover that on the right side. The top screw will occupy secure the door strike.
- Page 17 16 INSTALLATION Reverse the components inside the door. You will now be removing and reversing various components inside the door. See below for a detailed diagram and identification of the inner structure and parts of the door. (The diagram shows the “before view” of the door, with the default set-up for a right side hinge swing.
- Page 18 INSTALLATION Lift out the gray interlock button in the side Remove the upper hinge pivot. of the door. Once the top lock rod has been removed, the Make sure to remove the spring with the hinge pivot can easily be removed from the interlock button and to keep the two together.
- Page 19 18 INSTALLATION c. Flip over the lower hinge bracket and Reinstall the top lock rod. release the tabs on the back locking the Rotate the top lock rod (removed in step 10) hinge filler to the hinge bracket. 180 degrees end for end from its original position and reinstall it.
- Page 20 INSTALLATION Reinstall the side interlock button. Now, pick up the upper hinge pivot removed earlier and rotate it 180 degrees. Reinstall the side interlock button removed in step 7. Center the spring in the compartment Install the hinge on the top left side of the and insert the interlock button on top of it.
-
Page 21: Installing The Side Vent Kit
(3.8 cm) side venting is not available on gas models). An adapter kit, part number 383EEL9001B, may be purchased from your LG retailer. This kit contains the Option 2: Bottom Venting necessary duct components to change the dryer vent location. -
Page 22: Venting The Dryer
INSTALLATION Venting the Dryer • DO NOT use sheet metal screws or other fasteners which extend into the duct that could catch lint and reduce the efficiency of WARNINg the exhaust system. Secure all joints with duct tape. Failure to follow these instructions may result To reduce the risk of fire or explosion, electric in fire or death. - Page 23 22 INSTALLATION Routing And Connecting Ductwork NOTE Follow the guidelines below to maximize drying performance and reduce lint buildup and condensation in the ductwork. Ductwork and fittings are NOT included and must be purchased separately. • Use 4-inch (10.2 cm) diameter rigid, semi-rigid or flexible metal ductwork.
- Page 24 INSTALLATION Connecting the Inlet hose d. Connect the long dryer hose to one side of the Y-connector and connect the washer hose to the (Steam Models) other side. The dryer must be connected to the cold water tap using a new water supply hose. Do not use old hoses. WIThOUT WAShER: If the dryer does not share the cold water tap with a washer.
-
Page 25: Connecting Gas Dryers
24 INSTALLATION Connecting gas Dryers • DO NOT use an open flame to inspect for gas leaks. Use a noncorrosive leak detection fluid. Failure to do so may result in fire, explosion, or WARNINg death. To reduce the risk of fire or explosion, electric •... - Page 26 INSTALLATION Connecting the gas Supply Securely tighten all connections between the dryer and your laundry room’s gas supply. • Installation and service must be performed by a qualified installer, service agency, or the Turn on your laundry room’s gas supply. gas supplier.
-
Page 27: Connecting Electric Dryers
26 INSTALLATION Connecting Electric Dryers Special Electrical Requirements for Mobile or Manufactured homes Electrical Requirements for Electric • Any installation in a manufactured or mobile Models Only home must comply with the Manufactured Home Construction and Safety Standards Title 24 CFR, WARNINg Part 3280 or Standard CAN/ CSA Z240 MH and To help prevent fire, electric shock, serious injury,... - Page 28 INSTALLATION WARNINg Attach the two hot leads of the power cord to the outer terminal block screws. Connect the power cord to the terminal block. Each colored wire should be connected to the Attach the white neutral wire to the center screw same color screw.
- Page 29 28 INSTALLATION Four-Wire Direct Wire Attach the two hot leads of the power cord to the outer terminal block screws. • A 4-wire connection is required for all mobile and manufactured home Attach the white neutral wire to the center screw installations, as well as all new of the terminal block.
- Page 30 INSTALLATION Three-Wire Power Cord Reinstall the terminal block access cover. • A 3-wire connection is NOT permitted Neutral (Black) (White) on new construction after January 1, 1996. (Red) Ground • A UL-listed strain relief is required. Screw • Use a 30-amp, 240-volt, 3-wire, UL-listed power cord with #10 AWG-minimum copper conductor and closed loop or forked terminals with upturned ends.
-
Page 31: Final Installation Check
30 INSTALLATION Three-Wire Direct Wire Reinstall the terminal block access cover. • A 3-wire connection is NOT permitted Neutral (Black) (White) on new construction after January 1, 1996. (Red) Ground • A UL-listed strain relief is required. Screw • Use UL-listed 3-wire, #10 AWG-minimum copper conductor cable. -
Page 32: Installation Test (Duct Check)
INSTALLATION Installation Test (Duct Check) Check the display for results. During the test cycle, monitor the Flow Sense™ Once you have completed the installation of the display on the control panel. If no bars are dryer, use this test to make sure the condition of the displayed, when the cycle ends, the exhaust exhaust system is adequate for proper operation of system is adequate. - Page 33 32 INSTALLATION Restricted or Blocked Airflow • Check the duct condition If the Flow Sense LED is turned on, check the Avoid long runs or runs with multiple elbows or bends. exhaust system for restrictions and damage. Repair or replace the exhaust system as needed. NOTE When the dryer is first installed, this test should be performed to alert you to any existing...
-
Page 34: Operation
OPERATION OPERATION WARNINg To reduce the risk of fire, electric shock, or injury to persons, read this entire manual, including the IMPORTANT SAFETY INSTRUCTIONS, before operating this dryer. Using the Dryer 1 Clean the Lint Filter If the lint filter has not already been cleaned, lift out the filter and remove the lint Lint from the last load. -
Page 35: Check The Lint Filter Before Every Load
34 OPERATION Check the Lint Filter Before group Similar Items Every Load For best results, sort clothes into loads that can be dried with the same drying cycle. Always make sure the lint filter is clean before starting Different fabrics have different care requirements, and a new load;... -
Page 36: Using The Lg Easyload
OPERATION Using the Lg EasyLoad hamper Door (on some models) Use the hamper door when loading. The hamper door Swing Door opens about 40 degrees and acts as a chute to help guide items into the drum and help prevent items from Use the swing door when unloading, or when loading falling onto the floor. -
Page 37: Control Panel
8 Steam Functions without losing the current settings. LG’s steam technology allows you to inject fabrics NOTE with a swirling jet of steam to refresh clothes, reduce static, and make ironing easier. Simply select the If you do not press the START/PAUSE button to Steam Fresh™... - Page 38 OPERATION 9 Control Lock Indicator 13 Estimated Time Remaining When Control Lock is set, the Control Lock indicator This display shows the estimated time remaining for appears and all buttons are disabled except the SENSOR DRY cycles or the actual time remaining for POWER button.
-
Page 39: Cycle Guide
38 OPERATION Cycle guide = default setting = allowable option More Damp Time/ Wrinkle Turbo Reduce Energy Cycle Fabric Type Dry Level Temp. Less Care Steam Static Saver Signal Time Med. Comforter, Shirts,Trousers Steam High (except especially delicate Fresh fabrics) Adjustable Steam Comforter, Bedding,... - Page 40 OPERATION Sensor Dry Cycles Manual Dry Cycles Sensor dry cycles utilize LG’s unique dual sensor Use manual dry cycles to select a specific amount system to detect and compare the moisture level of drying time and a drying temperature. When a...
-
Page 41: Cycle Settings And Options
40 OPERATION Cycle Settings and Options Cycle Option Buttons The dryer features several additional cycle options to Cycle Modifier Buttons customize cycles to meet individual needs. Certain option buttons also feature a special function that SENSOR DRY cycles have preset settings that can be activated by pressing and holding that option are selected automatically. - Page 42 OPERATION Special Functions Some cycle option buttons also activate secondary functions. These special functions are marked with an asterisk (*). Press and hold the option button marked with the special function to activate it. * Drum Light The drum is equipped with a blue LED that illuminates when the dryer is turned on.
-
Page 43: Steam Functions (Steam Models)
Steam Functions Using the Steam Option The Reduce Static option injects steam late in the LG’s new steam technology allows you to inject drying cycle to reduce the static electricity caused fabrics with a swirling jet of hot steam to refresh by dry fabrics rubbing together. -
Page 44: Steam Cycle Guide
OPERATION NOTE WARNINg • When Sensor Dry is selected with the Reduce • Do not open the dryer door during steam Static or Turbo Steam option, a dry level of Less cycles. Failure to follow this warning can cause or Damp cannot be selected. serious injury or death. -
Page 45: Smart Functions
To check your network frequency, contact your Internet service provider or refer to your wireless router manual. • LG SmartThinQ is not responsible for any network connection problems or any faults, malfunctions, or errors caused by network connection. • The surrounding wireless environment can make the wireless network service run slowly. - Page 46 NOTE • To verify the Wi-Fi connection, check that Wi-Fi icon on the control panel is lit. • LG Smart ThinQ is not responsible for any network connection problems or any faults, malfunctions, or errors caused by network connection. • The machine supports 2.4 GHz Wi-Fi networks only.
- Page 47 If this equipment does cause available for download. harmful interference to radio or television reception, LG Electronics will also provide open source code which can be determined by turning the equipment to you on CD-ROM for a charge covering the cost...
-
Page 48: Smart Diagnosis™ Function
Should you experience any problems with the appliance, it has the capability of transmitting data Use the Smart Diagnosis feature in the SmartThinQ via your telephone to the LG Customer Information application for help diagnosing issues with the Center. NFC or Wi-Fi equipped models can also... -
Page 49: Maintenance
48 MAINTENANCE MAINTENANCE Maintaining Ductwork Vent ductwork should be checked for lint buildup once per month and cleaned at least once per year. If any Regular Cleaning noticeable reduction in airflow or drying performance occurs, immediately check ductwork for obstructions WARNINg and blockages. -
Page 50: Troubleshooting
User Support Videos For further assistance, there are videos and tutorials available through the LG.com website. On the lg.com/us home page, hover over the Support menu tab to bring up the menu selections. Select Videos & Tutorials. Type Dryer in the search box on the new page and click the Search button. -
Page 51: Before Calling For Service
50 TROUBLESHOOTING Before Calling for Service This dryer is equipped with an automatic error-monitoring system to detect and diagnose problems at an early stage. If the dryer does not function properly or does not function at all, check the following before you call for service. - Page 52 TROUBLESHOOTING Problem Possible Cause Solutions Confirm that the exhaust duct is properly configured and free of debris, lint, and Exhaust ducts are blocked, dirty, obstructions. Make sure that outside wall or duct run is too long. dampers can open properly and are not blocked, jammed, or damaged.
- Page 53 52 TROUBLESHOOTING Problem Possible Cause Solutions If using the Cotton/Normal cycle, deselect Clothes take too long to Energy Saver option selected the Energy Saver option. This option (on some models) reduces energy use by adding an air dry section to the beginning of the cycle. The drying time for a load will vary depending on the type of heat used (electric, natural gas, or LP gas), the...
- Page 54 TROUBLESHOOTING Performance Problem Possible Cause Solutions Confirm and follow the instructions Fabric softener used incorrectly. provided with your fabric softener. Use your dryer to dry only clean items. Clean and dirty clothes are being Soil from dirty clothes can transfer to the dried together.
- Page 55 54 TROUBLESHOOTING Problem Possible Cause Solutions Use a fabric softener to reduce static electricity. Be sure to follow the manufacturer’s instructions. Overdrying Excess static in clothes. a load of laundry can cause a buildup of static electricity. Adjust settings and use a shorter drying time, or use SENSOR DRY Lint on clothes cycles.
- Page 56 TROUBLESHOOTING Steam Functions (Steam Models) Problem Possible Cause Solutions Water drips from nozzle This is steam condensation. The dripping when STEAM CYCLE This is normal. water will stop after a short time. starts Small loads of 1 to 5 items work best. garments still wrinkled Too many or overly different Load fewer garments.
- Page 57 56 TROUBLESHOOTING Error Codes Problem Possible Cause Solutions Error code: tE1 through Temperature sensor failure. Turn off the dryer and call for service. Display shows error Power cord is connected Check the connection of the power cord code: PS (electric incorrectly.
- Page 58 TROUBLESHOOTING Problem Possible Cause Solutions Check steam feeder drawer: (1) Make sure the steam feeder is filled with water to the MAX line. (2) Make sure the steam feeder is seated properly and the drawer is fully closed. Water supply error. (3) Turn the dryer off then restart the indicator light is on STEAM CYCLE.
-
Page 59: Warranty (Usa)
Should your LG Dryer (“Product”) fail due to a defect in materials or workmanship under normal home use, during the warranty period set forth below, LG will at its option repair or replace the product. This limited warranty is valid only to the original retail purchaser of the product and applies only when purchased and used within the United States including U.S. - Page 60 TO OBTAIN WARRANTY SERVICE AND ADDITIONAL INFORMATION For additional product information, visit the LG website at http://www.lg.com For assistance using this product or to schedule service, contact LG Electronics at 1-800-243-0000. For further assistance, write: LG Electronics, 201 James Record Road, Huntsville, Alabama 35813 MFL70442605_en_190215.indd 59...
- Page 61 The notice must provide your name, address, and telephone number; identify the product that is the subject of the claim; and describe the nature of the claim and the relief being sought. If you and LG are unable to resolve the dispute within 30 days, either party may proceed to file a claim for arbitration.
- Page 62 Lea atentamente este manual del propietario antes de poner el aparato en funcionamiento y téngalo a mano en todo momento para su referencia. DLEX7900*E DLEX7800*E DLGX7901*E DLGX7801*E www.lg.com Copyright © 2019 LG Electronics Inc. Todos los Derechos Reservados. MFL70442605_sp_190215.indd 1 2019-02-15 오후 2:38:19...
- Page 63 Cómo usar la secadora Revise el filtro de pelusa antes de cada carga Clasificación de cargas Carga de la secadora Uso de la función LG EasyLoad Panel de control Guía de ciclos Ajustes y opciones de ciclo Funciones de vapor (modelos de vapor) Guía de ciclo de vapor...
- Page 64 Funciones de vapor (modelos de vapor) La tecnología de vapor de LG permite inyectar un chorro de vapor en forma de remolino en los tejidos para refrescar la ropa, reducir la estática y facilitar el planchado. Simplemente, seleccione el ciclo Steam Fresh™ o el ciclo Prevención de arrugas.
- Page 65 INSTRUCCIONES DE SEGURIDAD INSTRUCCIONES DE SEGURIDAD LEA TODAS LAS INSTRUCCIONES ANTES DE USAR Su seguridad y la seguridad de los demás son muy importantes. Hemos proporcionado muchos mensajes de seguridad importantes en este manual y en su aparato. Siempre lea y obedezca todos los mensajes de seguridad.
- Page 66 INSTRUCCIONES DE SEGURIDAD INSTRUCCIONES IMPORTANTES DE SEGURIDAD ADVERTENCIA Para reducir el riesgo de incendio, descargas eléctricas o lesiones personales al usar su equipo, siga las precauciones básicas, incluso lo siguiente: Instalación • Quite toda la película vinílica que protege al producto. Si no lo hace puede ocasionar daños en el equipo, humo o un •...
- Page 67 INSTRUCCIONES DE SEGURIDAD Funcionamiento • No meta animales vivos como mascotas dentro del aparato. • Lea todas las instrucciones antes de usar el aparato. • No coloque ninguna parte de su cuerpo, ya sean manos o pies, ni objetos de metal debajo del aparato. •...
- Page 68 INSTRUCCIONES DE SEGURIDAD INSTRUCCIONES DE CONEXIÓN A TIERRA ADVERTENCIA La conexión inadecuada del conductor para la conexión a tierra del equipo puede producir un riesgo de descarga eléctrica. Consulte a un electricista calificado o a personal de mantenimiento si tiene dudas sobre si el aparato se encuentra conectado a tierra apropiadamente.
- Page 69 Accesorios opcionales superior Puerta abatible La función LG EasyLoad™ le permite abrir la puerta de la secadora desde la parte superior (como la puerta de un canasto de ropa) cuando carga la secadora, lo que le permite guiar Kit de ventilación lateral...
- Page 70 INSTALACIÓN INSTALACIÓN Descripción general de la instalación Lea las siguientes instrucciones de instalación en primer lugar, después de comprar este producto o transportarlo a otra ubicación. Verifique y elija la Nivele la secadora Ventile la secadora ubicación adecuada Conecte la manguera de Conecte las secadoras Conecte las secadoras entrada (modelos de vapor) de gas...
- Page 71 10 INSTALACIÓN Requisitos del lugar de instalación ADVERTENCIA ¡Lea todas las instrucciones de instalación antes de instalar y operar su secadora! Es importante que revise este manual por completo antes de instalar y usar su secadora. En las siguientes páginas, se proporcionan instrucciones detalladas con respecto a las conexiones eléctricas, a las conexiones de gas y a los requisitos de escape.
- Page 72 INSTALACIÓN Requisitos de ventilación para armarios Los armarios con puertas deben tener ventilación tanto en la parte superior como en la inferior para evitar la acumulación de calor y humedad dentro del armario. Se debe instalar una abertura de ventilación superior con una apertura mínima de 48 pulgadas cuadradas (310 cm ) a no menos de 6 pies del suelo.
- Page 73 • Encontrará también un video de soporte en http://www.lg.com/us/support/videos/video-tutorials- view, How to Reverse the Door – LG EasyLoad Dryer. Herramientas necesarias Coloque el nivel aquí • Destornillador Phillips •...
- Page 74 INSTALACIÓN Instrucciones para la puerta reversible c. Retire la cubierta de la bisagra mediante un suave movimiento de palanca con un destornillador de NOTA punta plana, cuidando de no rayar la pintura. Gire la Las instrucciones que aquí se ofrecen son para modificar cubierta de la bisagra 180 grados e instálela en el lado la abertura de la puerta de una posición con las bisagras a opuesto, donde estaba sujeta la bisagra.
- Page 75 14 INSTALACIÓN Reinstale la puerta. Invierta los componentes del gabinete. Mientras sujeta la puerta, instálela con los cuatro tornillos de bisagra retirados en el paso 2. Pruebe el movimiento de apertura y cierre de la puerta para asegurarse de que Cubierta de la Bisagra las bisagras y el pestillo están correctamente alineados...
- Page 76 INSTALACIÓN e. Extraiga los tres tornillos de la bisagra inferior Intercambie la cerradura de la puerta y la cubierta izquierda. Extraiga la bisagra y vuelva a instalarla en ciega. el lado derecho. El tornillo superior ocupará el agujero Extraiga los dos tornillos de la cubierta de la puerta que de donde extrajo el tornillo detrás del soporte de la sujetan la cerradura de la puerta.
- Page 77 16 INSTALACIÓN Invierta los componentes de la parte interior de la puerta. Ahora retirará e invertirá varios componentes de la parte interior de la puerta. Aquí abajo encontrará un diagrama detallado con la identificación de la estructura interna y las partes de la puerta. (El diagrama muestra la “vista anterior” de la puerta, con la distribución predeterminada para una apertura con la bisagra del lado derecho.
- Page 78 INSTALACIÓN Retire el botón de bloqueo de color gris del costado Extraiga el pivote de la bisagra superior. de la puerta. Una vez que haya extraído la barra de bloqueo Asegúrese de extraer el resorte con el botón de bloqueo superior, el pivote de la bisagra puede extraerse y de conservar las dos piezas juntas.
- Page 79 18 INSTALACIÓN c. Voltee el soporte de la bisagra inferior y suelte las Vuelva a instalar la barra de bloqueo superior. lengüetas que se encuentran en la parte posterior y Gire la barra de bloqueo superior (extraída en el que sujetan la pieza de relleno de la bisagra con el paso 10) 180 grados en la posición contraria a su soporte de la bisagra.
- Page 80 INSTALACIÓN Vuelva a instalar el botón de bloqueo lateral. Ahora, tome el pivote de la bisagra superior que Vuelva a instalar el botón de bloqueo lateral extraído extrajo anteriormente y gírelo 180 grados. Instalar la bisagra en el lado superior izquierdo de en el paso 7.
- Page 81 Puede adquirir un kit adaptador, número de pieza Introduzca a presión el conducto adaptador en la carcasa 383EEL9001B, de su distribuidor LG. Este kit contiene del ventilador y fíjelo a la base de la secadora como se los componentes de conducto necesarios para cambiar la indica.
- Page 82 INSTALACIÓN Ventilación de la secadora • NO utilice tornillos para chapa metálica ni ningún otro tipo de sujetadores que se extiendan dentro del conducto y puedan atrapar pelusa, y, así, reducir ADVERTENCIA la eficiencia del sistema de escape. Asegure todas las uniones con cinta adhesiva para conductos.
- Page 83 22 INSTALACIÓN Recorrido y conexión de los conductos NOTA Siga las pautas a continuación para maximizar el rendimiento de secado, para reducir la acumulación de pelusa y la condensación en los conductos. Los conductos y las conexiones NO están incluidos y deben adquirirse por separado.
- Page 84 INSTALACIÓN Conexión de la manguera de entrada d. Conecte la manguera larga de la secadora en un extremo del conector en "Y" y conecte la manguera de la lavadora (modelos de vapor) en el otro extremo. La secadora debe conectarse al grifo de agua fría mediante una manguera de suministro de agua nueva.
- Page 85 24 INSTALACIÓN Conexión de secadoras de gas • Utilice únicamente una línea de suministro de gas nueva certificada por AGA o CSA con conectores flexibles de acero inoxidable. Si esto no se cumple, se podrá producir ADVERTENCIA una explosión, un incendio o la muerte. Para reducir el riesgo de incendio o explosión, descargas •...
- Page 86 INSTALACIÓN Conexión del suministro de gas Ajuste bien todas las conexiones entre la secadora y el suministro de gas de su cuarto de lavado. • La instalación y el mantenimiento deben ser realizados por un instalador, una agencia de mantenimiento o una Abra el suministro de gas de su cuarto de lavado.
- Page 87 26 INSTALACIÓN Conexión de secadoras • La secadora deberá conectarse a una toma de corriente de 4 agujeros. eléctricas • Si el enchufe no coincide con la toma de corriente, un electricista calificado deberá instalar una toma de corriente Requisitos eléctricos para modelos adecuada.
- Page 88 INSTALACIÓN Conecte los dos conductores vivos del cable de ADVERTENCIA alimentación a los tornillos exteriores del bloque de Conecte el cable de alimentación al bloque de bornes. bornes. Cada alambre de color debe conectarse al tornillo del mismo color. El alambre del color indicado en el manual Conecte el alambre neutro de color blanco al tornillo se conecta al tornillo del bloque del mismo color.
- Page 89 28 INSTALACIÓN Conexión directa de cuatro hilos Conecte los dos conductores vivos del cable de alimentación a los tornillos exteriores del bloque de • Se requiere una conexión de 4 hilos en bornes. todas las instalaciones de casas móviles y prefabricadas, así como en todas las Conecte el alambre neutro de color blanco al tornillo construcciones nuevas posteriores al 1 de central del bloque de bornes.
- Page 90 INSTALACIÓN Cable de alimentación de tres hilos Reinstale la cubierta de acceso al bloque de bornes. • NO se permite una conexión de 3 hilos en Neutro Vivo (negro) (blanco) construcciones nuevas posteriores al 1 de Vivo enero de 1996. (rojo) Tornillo de •...
- Page 91 30 INSTALACIÓN Conexión directa de tres hilos Reinstale la cubierta de acceso al bloque de bornes. • NO se permite una conexión de 3 hilos en Vivo Neutro (negro) construcciones nuevas posteriores al 1 de (blanco) enero de 1996. Vivo (rojo) Tornillo de •...
- Page 92 INSTALACIÓN Prueba de instalación Verifique la pantalla para ver los resultados. Durante el ciclo de prueba, observe la pantalla de (Revisión de conductos) Flow Sense™ en el panel de control. Si cuando termina el ciclo no se observan barras, el sistema de escape está Después de completar la instalación de la secadora, haga esta en condiciones adecuadas.
- Page 93 32 INSTALACIÓN Flujo de aire restringido o bloqueado • Verifique las condiciones del conducto Si el LED de Flow Sense está encendido, revise el Evite tendidos largos o con muchos codos o curvas. sistema de escape para verificar que no haya restricciones ni daños.
- Page 94 FUNCIONAMIENTO FUNCIONAMIENTO ADVERTENCIA Para reducir el riesgo de incendio, descargas eléctricas o lesiones personales, lea este manual por completo, incluso las INSTRUCCIONES IMPORTANTES DE SEGURIDAD, antes de operar esta secadora. Cómo usar la secadora 1 Limpie el filtro de pelusa Si el filtro de pelusa no se ha limpiado aún, extráigalo y elimine las pelusas de la última carga.
- Page 95 34 FUNCIONAMIENTO Revise el filtro de pelusa antes Agrupe prendas similares de cada carga Para lograr mejores resultados, clasifique las prendas en cargas que puedan secarse con el mismo ciclo de secado. Asegúrese siempre de que el filtro de pelusa esté limpio antes Los diferentes tipos de tejidos tienen diferentes requisitos de de iniciar una carga nueva;...
- Page 96 FUNCIONAMIENTO Uso de la función LG Puerta de apertura superior (en algunos modelos) EasyLoad La puerta de tipo cesto se abre de aproximadamente 40 grados Puerta abatible y actúa como un conducto para ayudarle a colocar la ropa en el tambor y evitar que las prendas caigan al suelo. También es Utilice la puerta abatible para cargar o descargar prendas más...
- Page 97 8 Funciones de vapor Presione este botón para iniciar el ciclo seleccionado. Si la La tecnología de vapor de LG permite inyectar un chorro de secadora está funcionando, use este botón para pausar el ciclo vapor en forma de remolino en los tejidos para refrescar la sin perder los ajustes actuales.
- Page 98 FUNCIONAMIENTO 9 Indicador de bloqueo Infantil 13 Tiempo restante estimado Cuando se ha establecido Control Lock(bloqueo Infantil), Esta pantalla muestra el tiempo restante estimado de los ciclos SENSOR DRY o el tiempo restante efectivo de los ciclos Time el indicador Control Lock(bloqueo Infantil) aparece y Dry o MANUAL DRY.
- Page 99 38 FUNCIONAMIENTO Guía de ciclos = configuración por defecto = opción permisible de Más Sonido Cuidado Reduc- Nivel de tiempo/ Turbo ahorro Ciclo Tipo de tela Temperatura ción secado Menos Steam secado arrugas estática tiempo húmedo energía Acolchados, camisas, Steam Medio Alta pantalones (excepto prendas Apagado...
- Page 100 Los ciclos de secado con sensor utilizan el sistema exclusivo Use los ciclos de secado manual para seleccionar una de sensor doble de LG para detectar y comparar el nivel de cantidad especifica de tiempo y temperatura de secado. humedad en las prendas y en el aire, y programar el tiempo...
- Page 101 40 FUNCIONAMIENTO Ajustes y opciones de ciclo botones de opciones de ciclo Su secadora cuenta con varias opciones de ciclo adicionales Botones de modificación de ciclo para personalizar los ciclos y satisfacer sus necesidades individuales. Algunos botones de opciones también incorporan Los ciclos SENSOR DRY tienen ajustes predefinidos que una función especial (ver la siguiente página para obtener más se seleccionan de manera automática.
- Page 102 FUNCIONAMIENTO Funciones especiales Algunos botones de opciones de ciclo también activan funciones secundarias. Estas funciones especiales están indicadas con un asterisco (*). Mantenga presionado el botón de opción que indica la función especial para activarla. * DRUM LIGHT (ILUMINACIÓN DEL TAMbOR) El tambor está...
- Page 103 Cómo usar las opciónes de vapór La opcíon Reducción Estática (Reduce Static) nyecta vapor La nueva tecnologia de vapor de LG le permite inyectar las al final del ciclo de secado para reducir la electricidad estatica telas con un chorro giratorio de vapor caliente para refrescar producida por la friccion de telas.
- Page 104 FUNCIONAMIENTO NOTA ADVERTENCIA • Puede que el vapor no sea claramente visible • No abra la puerta de la secadora durante ciclos de durante los ciclos de vapor. Esto es normal. vapor. Si no se cumple con esto se podrá producir una explosión, incendio, quemaduras o muerte.
- Page 105 Desactive los Datos Móviles o Datos Celulares Instalando la Aplicación LG en su teléfono inteligente. SmartThinQ Busque la aplicación LG Smart ThinQ en la tienda Google Play Store o Apple App Store desde un teléfono inteligente. Sigue las instrucciones para descargar e instalar la aplicación.
- Page 106 Inicio Remoto. artefacto. Una vez que se completa la descarga de un ciclo en Inicie un ciclo desde la aplicación LG Smart ThinQ el artefacto, el producto mantiene el ciclo descargado en su teléfono inteligente.
- Page 107 Sin embargo, no se garantiza que dicha derechos de autor. interferencia no pueda ocurrir en instalaciones LG Electronics también le proporcionará el código particulares. Si este equipo causa interferencia dañina fuente abierto en un CD-ROM con un cargo que cubra a la recepción de radio o televisión, que se puede...
- Page 108 SmartThinQ para ayudar a diagnosticar problemas sin datos a través de su teléfono al Centro de información la ayuda del Centro de información del cliente de LG. del cliente de LG. Los modelos equipados con NFC o Siga las instrucciones en la aplicación SmartThinQ para Wi-Fi pueden también transmitir datos a un teléfono...
- Page 109 48 MANTENIMIENTO MANTENIMIENTO Mantenimiento de los conductos Se deben revisar los conductos de ventilación para verificar Limpieza regular que no tengan acumulación de pelusa una vez por mes y se deben limpiar, al menos, una vez por año. Si se percibe una reducción notoria del flujo de aire o del desempeño de secado, ADVERTENCIA revise los conductos de inmediato para verificar que no estén...
- Page 110 SOLUCIÓN DE PROBLEMAS SOLUCIÓN DE PRObLEMAS Preguntas frecuentes Cuando presiono un botón, ¿por qué la secadora emite un pitido y luego no sucede nada? La función Control Lock está activada. Para desactivar Control Lock, encienda la secadora y, luego, mantenga presionado el botón con la indicación *Control Lock en él o debajo de él durante 3 segundos.
- Page 111 50 SOLUCIÓN DE PROBLEMAS Antes de llamar al servicio técnico Su secadora está equipada con un sistema de monitoreo de errores automático para la detección y el diagnóstico de problemas en una etapa temprana. Si su secadora no funciona correctamente o no funciona en absoluto, consulte la siguiente información antes de llamar al servicio técnico.
- Page 112 SOLUCIÓN DE PROBLEMAS Problema Causa posible Soluciones Verifique que los conductos de escape se encuentren configurados correctamente y no Los conductos de escape están tengan desechos, pelusa ni obstrucciones. bloqueados, sucios o el tendido de los Asegúrese de que los reguladores de tiro de la conductos es demasiado extenso.
- Page 113 52 SOLUCIÓN DE PROBLEMAS Problema Causa posible Soluciones Si utiliza el ciclo Algodon/Normal, desactive la La opción de ahorro de energia (Energy opcion de ahorro de energia. Esta opcion permite La ropa tarda demasiado Saver) está seleccionada (sur certains reducir el consumo de energia, ya que incorpora tiempo en secarse.
- Page 114 SOLUCIÓN DE PROBLEMAS Rendimiento Problema Causa posible Soluciones No se usó correctamente el suavizante Confirme y siga las instrucciones provistas por el de ropa. fabricante del suavizante. Use la secadora para secar prendas limpias Se están secando juntas ropa limpia y solamente.
- Page 115 54 SOLUCIÓN DE PROBLEMAS Problema Causa posible Soluciones Use suavizante de ropa o la opción STATIC No se usó suavizante de ropa o no se SHIELD, si su secadora la incluye, para reducir lo usó adecuadamente. la electricidad estática. Asegúrese de seguir las instrucciones del fabricante.
- Page 116 SOLUCIÓN DE PROBLEMAS Funciones de vapor (modelos de vapor) Problema Causa posible Soluciones Gotea agua de la boquilla Se trata de condensación de vapor. El agua cuando comienza el ciclo Es normal. dejará de gotear después de unos momentos. STEAM CYCLE. Las cargas pequeñas de 1 a 5 prendas funcionan Las prendas aún están mejor.
- Page 117 56 SOLUCIÓN DE PROBLEMAS Códigos de error Problema Causa posible Soluciones Código de error: tE1 a tE7. Falla del sensor de temperatura. Apague la secadora y llame al servicio técnico. La pantalla muestra el El cable de alimentación no está bien Revise la conexión del cable de alimentación al código de error: PS (solo conectado.
- Page 118 SOLUCIÓN DE PROBLEMAS Problema Causa posible Soluciones Revise el cajón alimentador de vapor: (1) Asegúrese de que el alimentador de vapor esté lleno de agua hasta la línea máxima (MAX). (2) Asegúrese de que el alimentador de vapor esté bien colocado y que el cajón esté bien Error de suministro de agua.
- Page 119 RESOLVER CONFLICTOS". Si su secadora LG (el “Producto”) fallara debido a defectos de materiales o de fabricación en el uso doméstico normal, durante el período de garantía que se establece a continuación, LG tendrá la opción de reparar o reemplazar el producto. Esta garantía limitada solo es válida para el comprador minorista original del producto y será...
- Page 120 PARA OBTENER SERVICIO EN GARANTÍA E INFORMACIÓN ADICIONAL Para obtener más información sobre el producto, visite el sitio web de LG en http://www.lg.com Para obtener ayuda sobre el uso de este producto o para programar un servicio técnico, comuníquese con LG Electronics al 1-800- 243-0000 (EE. UU.).
- Page 121 Normas de la AAA están disponibles en línea en www.adr.org/consumer. Envíe una copia de su solicitud de arbitraje por escrito, así como una copia de esta disposición, a la AAA de la forma descrita en las Normas de la AAA. También debe enviar una copia de su solicitud por escrito a LG en LG Electronics, USA, Inc. Atención: Legal Department- Arbitration 1000 Sylvan Ave, Englewood Cliffs 07632. Si hay un conflicto entre las Normas de la AAA y las reglas establecidas...
- Page 122 Memo MFL70442605_sp_190215.indd 61 2019-02-15 오후 2:38:34...
- Page 123 Memo MFL70442605_sp_190215.indd 62 2019-02-15 오후 2:38:34...
- Page 124 MFL70442605_sp_190215.indd 63 2019-02-15 오후 2:38:34...
- Page 125 LG Customer Information Center For inquiries or comments, visit www.lg.com or call: 1-800-243-0000 1-888-542-2623 This product qualifies for ENERGY STAR in the “factory CANADA default (Home Use)” setting. Changing the factory default Register your product Online! settings or enabling other features may increase power consumption that could exceed the limits necessary to www.lg.com...