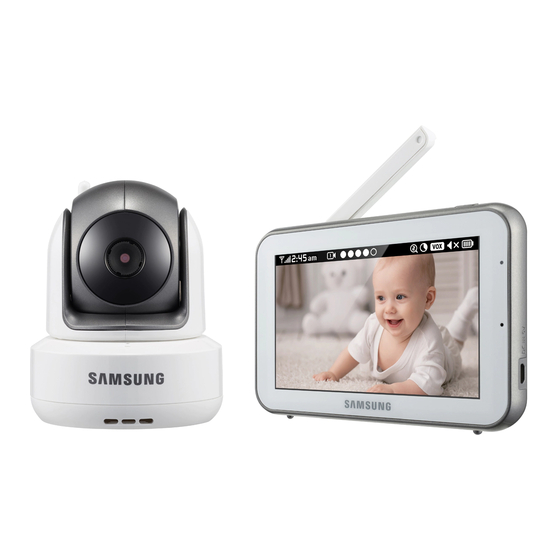
Table of Contents
Advertisement
Quick Links
V
M
IeWInG
ode
Indicator Description
How to use the indicator
a
b
c
a signal Indicator
The signal indicator shows the strength of the signal being received from the
camera.
The number of bars in the signal indicator shows the strength of the signal –
One or no bars indicate the signal is poor, and 5 bars indicate a strong signal.
b Digital Clock
Displays the time that is set on the monitor. It only provides AM / PM time
format and no 24hour format.
c Camera Number
Indicates which camera is being displayed on the current screen. When scan mode
is selected, this icon will flash.
d sound level Indicator
Indicate the sound level of the Active Camera.
8 · Viewing Mode Display
d
Isplay
d
ef g h i j
k
e x1/x1.5/x2 Zoom mode
Indicates that current screen is Zoomed in. Press [
zoom back out.
f Night Vision Indicator
Indicates camera night vision mode is turned on.
The screen will appear in Black/White in this mode.
g Vox on
Indicates you select Low Sound level detection or High Sound level detection in
VOX menu.
h Monitor speaker Mute
Indicates the monitor speaker is muted. Once the monitor's speaker is muted,
no sound from the camera is produced.
i Battery Capacity Level
Indicates remaining battery charge. Indicated in 4 levels, and one discharge
warning.
j Charging
Indicates the battery is charging by DC input power. If battery nearly empty,
it will flash to alert user to charge up the unit.
k Two-way talk
Press the [
] icon while talking.
No signal Warnings
The "out of Range" message means the monitor cannot access the camera.
Please reposition the camera, or check the camera power.
] icon on the monitor to
Advertisement
Table of Contents

Summary of Contents for Samsung SEW3043WN
- Page 1 e x1/x1.5/x2 Zoom mode IeWInG Isplay Indicates that current screen is Zoomed in. Press [ ] icon on the monitor to zoom back out. Indicator Description f Night Vision Indicator Indicates camera night vision mode is turned on. How to use the indicator The screen will appear in Black/White in this mode.
-
Page 2: Menu Operation
How to use the setup icon Menu Operation 설정을 완료한 후 아이콘을 눌러 저장하세요 How to use the function tools Live 화면으로 돌아오려면 아이콘을 누르세요 Press the screen of the monitor to display the menu screen. a b c d Settings e f g Settings... - Page 3 Settings e Camera Vox sensitivity If not in “Vox” mode, [ ] icon is not displayed. In VOX mode, you can select “Low sound Level Detection” or “High sound Level Detection”. If set to “Low sound Level Detection”, monitor can be triggered by lower audio level than “High sound Level Detection”...
-
Page 4: Getting To Know Your Monitoring System
VerVIeW Getting to know your Monitoring system Wireless Monitor After opening the box, fully charge the monitor before use. After initial charge, recharge as needed. Front Controls Power LeD Monitor Antenna When the monitor is being recharged or monitor has low Receives and sends signals from or to the camera. - Page 5 Back Controls Power on/off Belt Clip Turn on/off the wireless monitor. When you carry the monitor, use the belt hanger to hold the monitor onto your belt. Kick stand speaker Use to hold the monitor onto a table. Produces the sound transmitted from the camera(s). DC 5V Power Input Connect the included AC power adapter to power and/or charge the monitor battery.
- Page 6 Wireless Camera Front & Back Controls IR LeDs Night Light Button Infrared LED’s provide viewing in no / low light Turns Night Light ON or OFF. conditions. When the camera is powered on, Night Light would be automatically turned on. Microphone Receives sounds for the area near the camera, and Camera Antenna...
-
Page 7: Installation
Carefully unpack the camera. nstallatIon If you are installing cameras that did not come with the system, please see the pairing camera section of this manual for details on installation. Mount the camera to the wall. How to Install Mark the position of the screw hole on the wall, and drill hole and insert 1 screw, then firmly attach the CAUTION: If you use the system to watch a young child, do not place the camera in the camera to the wall by placing the stand over the... -
Page 8: Specifications
Item Details ppendIx Operating Temperature Range 0°C~+40°C Operating Humidity Range 85% RH Specifications Environment Rating Indoor use only Pan Angle 300° Item Details Tilt Angle 110° System General Regulation Compliance FCC/CE Operating Frequency Range 2400 MHz~2483.5 MHz RoHS Compliance Yes for CE version only Transmitting Power 17dBm Max Audio... -
Page 9: Troubleshooting
Item Details Troubleshooting Audio Built in Microphone/ Speaker Problem Solution Other Special Feature Volume control, Pairing Battery Type Li-on No picture from a 1. Check all connections to the camera. Make sure the adapter is plugged in. camera 2. Make sure that the cameras and monitor are both ON. Battery Capacity 2500mAh, Replaceble 3. - Page 10 Correct Disposal of This Product Samsung cares for the environment at all product manufacturing stages, and is taking measures to provide customers with more environmentally friendly products. (Waste Electrical & Electronic Equipment) The Eco mark represents Samsung devotion to creating environmentally friendly products, and indicates that the product satisfies the EU RoHS Directive.
-
Page 11: Camera Front
TEMPLATE Screw holes for This template is used to install the Camera the camera on the wall. installation CAMERA FRONT... - Page 12 SAMSUNG TECHWIN AMERICA Inc. SAMSUNG TECHWIN EUROPE LTD. 100 Challenger Rd. Suite 700 Ridgefield Park, NJ 07660 Samsung House, 1000 Hillswood Drive, Hillswood Business Park Chertsey, Customer support : +1-877-349-3149 Surrey, UNITED KINGDOM KT16 OPS www.samsungsv.com Customer support : 00800-8010-8022...


