Epson Stylus Photo RX680 Quick Manual
Ultra hi-definition photo all-in-one printer
Hide thumbs
Also See for Stylus Photo RX680:
- Start here manual (8 pages) ,
- Important information (3 pages) ,
- Specification sheet (2 pages)

Related Manuals for Epson Stylus Photo RX680


Summary of Contents for Epson Stylus Photo RX680
- Page 1 Quick Guide Basic Copying, Printing, and Scanning Maintaining Your All-in-One Solving Problems...
-
Page 2: Table Of Contents
Contents Introduction ......... . . 4 Printer Parts . - Page 3 Maintaining Your All-in-One ......31 Checking the Print Head Nozzles ......31 Cleaning the Print Head .
-
Page 4: Introduction
Introduction After you set up your Epson Stylus turn to this Quick Guide and your on-screen User’s Guide for instructions. Features Copy documents or photos (including red-eye reduction, automatic restoration of faded photos, and instant photo reprints) Copy onto a CD or DVD... -
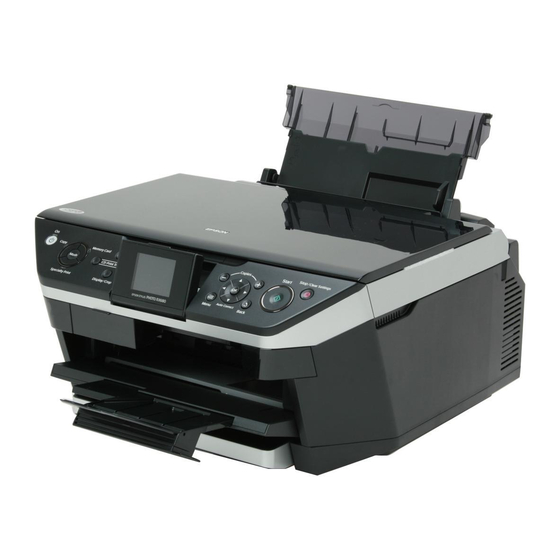
Page 5: Printer Parts
Printer Parts Edge guide Control panel buttons EXT. IF port for external devices Memory card slots Auto duplexer Lower rear cover Paper support Rear sheet feeder Document cover Scanner glass Display screen Front paper cassette Output tray and extensions Power inlet (for power cable) Printer Parts... -
Page 6: Loading Paper
Loading Paper The Epson Stylus Photo RX680 Series all-in-one allows you to have two different types of paper loaded at the same time. For example, you can keep plain paper loaded in the front paper cassette and use the rear sheet feeder for various sizes of photo paper. - Page 7 4. Replace the paper cassette cover and insert the cassette back into the printer. 5. Open the output tray and its extensions. Always load paper face-down, with the short edge facing the back of the paper cassette. Load letterhead or pre-printed paper with the top edge facing the back of the cassette.
-
Page 8: Loading In The Rear Sheet Feeder
Loading in the Rear Sheet Feeder 1. Open the paper support and pull up the extension. 2. Insert the paper, glossy or printable side up, short edge first, against the right side. Letter-size paper Smaller photo paper 3. Slide the edge guide against the paper. Loading Paper... -
Page 9: Using Special Papers
User’s Guide. Using Special Papers Epson offers a wide array of high quality papers, making it easy to maximize the impact of your photos, presentations, and creative projects. You can purchase genuine Epson ink and paper at Epson Supplies Central www.epson.com/ink3 (U.S. - Page 10 Epson Special Papers Paper name Epson Ultra Premium Photo Paper Glossy Epson Ultra Premium Photo Paper Luster Epson Premium Photo Paper Glossy Epson Premium Photo Paper Semi-gloss Epson Photo Paper Glossy Epson Bright White Paper Epson Premium Presentation Paper Matte...
-
Page 11: Copying A Photo Or Document
Copying a Photo or Document Follow the instructions in this section to position your originals correctly on the glass, and make color or black-and-white copies. To copy directly onto ink jet- printable CDs or DVDs, see the on-screen User’s Guide. Placing the Original on the Glass 1. -
Page 12: Copying A Document
Copying a Document You can copy documents using your all-in-one just like a copy machine. Select Copy mode 1. Make sure you have letter- or A4-size plain paper loaded in the front paper cassette. For instructions, see page 6. 2. Place the document on the glass (see page 11) and close the cover. 3. -
Page 13: Copying A Photo
You can make copies of your photos on 4 × 6-inch, 5 × 7-inch, 8 × 10-inch, letter-size, or A4-size photo paper using a variety of layouts. 1. Load Epson photo paper in the rear sheet feeder. See page 8 for instructions. 2. Place your photo on the glass (see page 11) and close the cover. -
Page 14: Editing Photos While You Copy
You can restore colors in faded photos, correct poorly exposed photos, reduce red- eye, and even crop while you copy photos. 1. Load Epson photo paper in the rear sheet feeder. See page 10 for a list of the papers and sizes available. - Page 15 To auto-correct your photo, reduce red-eye, or select different paper settings, press x . (See page 13 for a list of paper types; you can’t select Menu when you’re copying photos.) Paper ■ To correct a photo that is too light or too dark, press d until highlighted, then press r to select page 16 for more information about automatic photo correction.
-
Page 16: Printing From A Memory Card, Camera, Or Other Device
Printing From a Memory Card, Camera, or Other Device The Epson Stylus Photo RX680 Series all-in-one lets you print photos from: ■ Your digital camera’s memory card (see below) ■ A connected USB flash drive or other external storage device (see page 19) ■... -
Page 17: Compatible Cards And Image Formats
Compatible Cards and Image Formats You can use the following cards with your RX680 Series: Top slot Bottom slot Memory card access light Your all-in-one supports image files that meet these requirements: File format JPEG with the Exif version 2.21 standard Image size 80 ×... -
Page 18: Inserting The Card
Inserting the Card 1. Make sure your RX680 Series is turned on. Note: If you see a message on your computer screen when you insert a card, cancel the operation and close the message window. 2. Open the memory card door. 3. -
Page 19: Printing From A Usb Flash Drive
Printing From a USB Flash Drive When your photos are saved on a USB flash drive, you can print directly from the drive. 1. Make sure the RX680 Series is turned on and there are no memory cards inserted in its memory card slots. Note: If a memory card is inserted, the RX580 Series will not recognize the external USB drive. -
Page 20: Viewing And Selecting Photos
After you insert your memory card or USB flash drive as described above, you’re ready to select and print your photos. 1. Load Epson photo paper in the rear sheet feeder. See page 8 for instructions. 2. Press the Memory Card 3. -
Page 21: Automatically Correcting Photos
Automatically Correcting Photos Your RX680 Series automatically analyzes your photos, and, if necessary, adjusts the brightness, contrast, and saturation. Auto Photo Correction (also called PhotoEnhance) is enabled by default. To preview the correction on the display screen: 1. Follow the instructions on page 20 to view your photos. You see in the lower left corner of the screen. - Page 22 4. Load Epson photo paper in the rear sheet feeder (either 4 × 6 or letter-size paper, depending on the template you selected).
-
Page 23: Printing From A Digital Camera
Note: Epson cannot guarantee the compatibility of any cameras. Some combinations of paper type, size, and layout may not be supported, depending on your camera and the Epson Stylus Photo RX680 Series settings. 1. Make sure the RX680 Series is turned on and there are no memory cards inserted in its memory card slots. -
Page 24: Printing From Your Computer
See the on-screen User’s Guide for details. Tip: It’s a good idea to check for updates to your Epson Stylus Photo RX680 Series software. See “Checking for Software Updates” on page 37 for instructions. Printing in Windows 1. - Page 25 4. Make sure you select the source for the paper you want to print on. To use the Source setting, you need to click Automatic paper cassette. See your on-screen User’s Guide for more information. 5. To print double-sided (on plain paper or Epson Bright White Paper), click the tab, then click Page Layout Settings...
-
Page 26: Printing With A Macintosh
File Printing From Your Computer Advanced to start printing. This window appears and shows the Print tab. Cancel printing menu, and File Paper Size option. Select Stylus Photo RX680 Select your Paper Size Select your document or image orientation... - Page 27 To use the Automatic paper cassette in the Epson Printer Utility. Click Option Information 7. To print double-sided (on plain paper or Epson Bright White Paper), select Auto Duplex Printing Settings . Select other settings as necessary. Duplex Printing 8. Choose any other printing options you may need from the pop-up menu. See the on-screen User’s Guide for details.
-
Page 28: Selecting The Correct Paper Type
For this paper/media Plain paper Epson Bright White Paper Epson Presentation Paper Matte Epson Ultra Premium Photo Paper Glossy Epson Premium Photo Paper Glossy Epson Photo Paper Glossy Epson Premium Photo Paper Semi-gloss Epson Ultra Premium Photo Paper Luster... -
Page 29: Scanning A Photo Or Document
Scanning a Photo or Document You can use your Epson Stylus Photo RX680 Series all-in-one to scan a photo or document and save it on your computer or other device. You can even restore and correct photographs as you scan (see page 30). -
Page 30: Restoring And Correcting Photos
OK, and click Scan. Note: For detailed instructions, see the on-screen User’s Guide. You can also click Help on the Epson Scan screen for information about all the available settings. Scanning a Photo or Document , click Full Auto Mode Customize options in Epson Scan’s Full Auto mode. -
Page 31: Maintaining Your All-In-One
Maintaining Your All-in-One Follow the steps here to check and clean the print head, and replace ink cartridges. To align the print head, if necessary, see your on-screen User’s Guide. You can also perform these maintenance tasks through your RX680 Series software. -
Page 32: Cleaning The Print Head
Cleaning the Print Head If print quality has declined and the nozzle check indicates clogged nozzles, you can clean the print head. Print head cleaning uses ink, so clean it only if necessary. Note: You cannot clean the print head if an ink cartridge is expended, and may not be able to clean it when a cartridge is low. -
Page 33: Checking The Ink Cartridge Status
This window can optionally display ink offers and other updates retrieved from an Epson website. On a Windows computer that is connected to the Internet, you may see a screen asking if you want to receive these Epson offers the first time you try to print when ink is low. Click... -
Page 34: Purchasing Epson Ink Cartridges
You can use any combination of cartridge sizes. (If you’ve installed a 77 black cartridge, you can still use a 78 magenta cartridge, for example). We recommend that you use genuine Epson cartridges and do not refill them. The use of other products may affect your print quality and could result in printer damage. -
Page 35: Replacing Ink Cartridges
Replacing Ink Cartridges Make sure you have a new ink cartridge before you begin. You must install new cartridges immediately after removing the old ones. Caution: Do not open ink cartridge packages until you are ready to install the ink. Cartridges are vacuum packed to maintain reliability. - Page 36 4. Remove the cartridge from the package, but be careful not to touch the green chip on the edge. 5. Remove the yellow tape from the bottom of the ink cartridge. Caution: Do not remove any other labels or seals, or ink will leak. 6.
-
Page 37: Solving Problems
User’s Guide for more detailed help. Checking for Software Updates Periodically, it’s a good idea to check Epson’s support website for free updates to your Epson Stylus Photo RX680 Series software. Open your on-screen User’s Guide and select Download the Latest Software at epson.com/support (U.S.) or epson.ca (Canada). -
Page 38: Problems And Solutions
Check the card or other media and try again. Turn the RX680 Series off and back on and try cleaning the print head again. If the error recurs, contact Epson for help (see page 41). , and... -
Page 39: Paper Feeding Problems
■ Make sure your paper is loaded short edge first against the right side of the rear sheet feeder with the edge guide against it. Don’t load paper above the arrow mark inside the guide. ■ Make sure the paper size settings are correct for the paper you loaded. Paper Feeding Problems ■... -
Page 40: Print Quality Problems
Make sure the type of paper you loaded matches the paper size and type settings on the control panel (see page 13) and in your software (see page 28). ■ For the best print quality, use Epson special paper (see page 10) and genuine Epson ink cartridges (see page 35). ■... -
Page 41: Where To Get Help
Toll or long distance charges may apply. Purchase Supplies and Accessories You can purchase genuine Epson ink and paper at Epson Supplies Central at www.epson.com/ink3 (U.S. sales) or www.epson.ca (Canadian sales). You can also purchase supplies from an Epson authorized reseller. To find the nearest one, call 800-GO-EPSON (800-463-7766). -
Page 42: Notices
Notices Important Safety Instructions Before using your all-in-one, read and follow these safety instructions: ■ Be sure to follow all warnings and instructions marked on the RX680 Series. ■ Use only the type of power source indicated on the RX680 Series label. ■... -
Page 43: Ink Cartridge Safety Instructions
■ If the LCD screen is damaged, contact Epson. If the liquid crystal solution gets on your hands, wash them thoroughly with soap and water. If the liquid crystal solution gets into your eyes, flush them immediately with water. If discomfort or vision problems remain after a thorough flushing, see a doctor immediately. - Page 44 Epson is not responsible for warranty service should the Epson label or logo or the rating label or serial number be removed or should the product fail to be properly maintained or fail to function properly as a result of misuse,...
- Page 45 Epson Authorized Servicer. If a claimed defect cannot be identified or reproduced, you will be held responsible for the costs incurred.
-
Page 46: Declaration Of Conformity
Declaration of Conformity According to 47CFR, Part 2 and 15 for: Class B Personal Computers and Peripherals; and/or CPU Boards and Power Supplies used with Class B Personal Computers: Epson America, Inc. Located at: MS 3-13 3840 Kilroy Airport Way... -
Page 47: For Canadian Users
(excluding the U.S.) failure to strictly comply with Seiko Epson Corporation’s operating and maintenance instructions. Seiko Epson Corporation shall not be liable for any damages or problems arising from the use of any options or any consumable products other than those designated as Original Epson Products or Epson Approved Products by Seiko Epson Corporation. - Page 48 CPD-23846 Printed in XXXXXX XX.XX-XX XXX...