
Related Manuals for Siemens SISTORE AX4


Summary of Contents for Siemens SISTORE AX4
- Page 1 CCTV SISTORE AX4 (V2.5) User’s Manual Fire & Security Products Siemens Building Technologies...
- Page 2 Data and design subject to change without notice. / Supply subject to availability. © 2004 Copyright by Siemens Building Technologies AG Wir behalten uns alle Rechte an diesem Dokument und an dem in ihm dargestellten Gegenstand vor. Der Empfänger anerkennt diese Rechte und wird dieses Dokument nicht ohne unsere vorgängige schriftliche Ermächtigung ganz oder teilweise Dritten zugänglich machen...
-
Page 3: Table Of Contents
System Shutdown................3 Configuring Input Devices ..............3 3.6.1 Camera Setup Screen ................ 3 3.6.2 Alarm In Setup Screen ............... 3 3.6.3 Motion Detector ................. 3 3.6.4 Text-In Setup Screen ................. 3 Siemens Building Technologies SISTORE AX4_EN.doc Fire & Security Products 09.2004... - Page 4 Enter/Pause Button................3 4.5.3 Camera Buttons (1 to 4) ..............3 4.5.4 Quad/Seq Button ................3 4.5.5 Digital Zoom Playback Mode ...............3 Searching Video .................3 4.6.1 Date/Time Search................3 4.6.2 Calendar Search.................3 4.6.3 Event Search..................3 Siemens Building Technologies SISTORE AX4_EN.doc Fire & Security Products 09.2004...
- Page 5 Appendix C — Connector Pin Outs..........3 I/O Connector Pin Outs ..............3 RS485 Connector Pin Outs..............3 Appendix D — Map of Screens............3 Appendix E — Specifications............3 Keyword index................. 3 Siemens Building Technologies SISTORE AX4_EN.doc Fire & Security Products 09.2004...
-
Page 7: Introduction
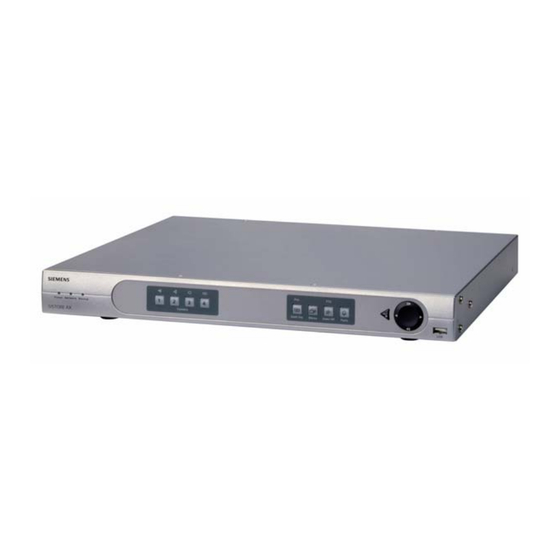
4 Ch. Audio Recording and 1 Ch. Playback Alarm Connections Include: Input, Output and Reset Input Built-in Alarm Buzzer Live or Recorded Video Access via Ethernet or Modem Fig. 1 Typical DVR installation. Siemens Building Technologies SISTORE AX4_EN.doc Fire & Security Products 09.2004... -
Page 8: Technical Overview
No special tools are required to install the DVR. Refer to the installation manuals for the other items that make up part of your system. Fig. 2 DVR rear panel. Siemens Building Technologies SISTORE AX4_EN.doc Fire & Security Products 09.2004... -
Page 9: Connecting The Video Source
Fig. 6 CVBS (SVHS) / VGA switch. Set the switch to CVBS (SVHS) or VGA for monitor output. Select CVBS (SVHS) for spot monitor, and select VGA for RGB monitor. Siemens Building Technologies SISTORE AX4_EN.doc Fire & Security Products 09.2004... -
Page 10: Connecting The Monitor
VGA connector if required. Connect an RGB cable with a DB-15 (male) connector, which is usually less than 10 feet, to the DVR connector. NOTE: For RGB monitor output, set the CVBS (SVHS)/VGA selector switch to the VGA. Siemens Building Technologies SISTORE AX4_EN.doc Fire & Security Products 09.2004... -
Page 11: Connecting Alarms
Connect RX-/ TX- and RX+/ TX+ of the control system to the TX-/RX- and TX+/RX+ (respectively) of the DVR. See Chapter 3 — Configuration and the PTZ camera or remote controller manufacture’ s manual for configuring the RS-485 connection. Siemens Building Technologies SISTORE AX4_EN.doc Fire & Security Products... -
Page 12: Connecting To The Network Port
The DVR has a Factory Reset switch to the right of the RS-232C connector. This switch will only be used on the rare occasions that you want to return all the settings to the original factory settings. Siemens Building Technologies SISTORE AX4_EN.doc Fire & Security Products... -
Page 13: Connecting To The Usb Port
DO NOT OVERLOAD THE CIRCUIT BY PLUGGING TOO MANY DEVICES IN TO ONE CIRCUIT. Your DVR is now ready to operate. Refer to Chapter 3: Configuration and Chapter 4: Operation. Siemens Building Technologies SISTORE AX4_EN.doc Fire & Security Products 09.2004... -
Page 14: Configuration
CAMERA 2 CAMERA 3 the PTZ camera in the PTZ mode. is used to control far focus of the PTZ CAMERA 4 camera in the PTZ mode. Siemens Building Technologies SISTORE AX4_EN.doc Fire & Security Products 09.2004... -
Page 15: Quad/Seq Button
Enter/Pause monitoring mode. In the digital zoom mode, pressing the button enlarges a specific area of the screen. A displays on the enlarged screen.. Siemens Building Technologies SISTORE AX4_EN.doc Fire & Security Products 09.2004... -
Page 16: 3.1.10 Arrow Buttons
Enter the password by pressing the appropriate combination of camera number buttons and then the button. The factory default password is 4321. There are two Setup screens: Quick Setup and Normal Setup. The factory default is the Quick Setup screen. Siemens Building Technologies SISTORE AX4_EN.doc Fire & Security Products 09.2004... -
Page 17: Quick Setup Screen
NOTE: The Quick Setup mode will be released automatically w hen the user changes the DVR settings remotely using the RAS (Remote Administration System) program. Siemens Building Technologies SISTORE AX4_EN.doc Fire & Security Products 09.2004... -
Page 18: Normal Setup Screen
In the System Information screen, you can name the site location, assign a unit ID number, select the language to use and upgrade the software. Highlight Change and press the button. The System Information Change screen appears. Siemens Building Technologies SISTORE AX4_EN.doc Fire & Security Products 09.2004... - Page 19 Upgrade screen appears. The screen displays the upgrade package file name. NOTE: If the file system on the USB-IDE hard disk drive or USB flash drive is NOT FAT16 or FAT32 format, format device using FAT16 or FAT32 format. Siemens Building Technologies SISTORE AX4_EN.doc Fire & Security Products 09.2004...
-
Page 20: Date/Time Setup
Highlight the first box beside Date/Time and press the button. The individual sections of the date highlight. Use the arrow buttons to adjust the numbers. Once you have the correct date, press the button. Siemens Building Technologies SISTORE AX4_EN.doc Fire & Security Products 09.2004... - Page 21 You can set up time synchronization between the DVR and standard time servers that are available in most time zones and countries, or between the DVR and another DVR. Fig. 28 Time Sync screen. Siemens Building Technologies SISTORE AX4_EN.doc Fire & Security Products 09.2004...
- Page 22 The DVR toggles between 12 Hours (AM/PM) and 24 Hours (military time). You can save your changes by highlighting OK and pressing the button . Selecting Cancel exits the screen without saving the changes. Siemens Building Technologies SISTORE AX4_EN.doc Fire & Security Products 09.2004...
-
Page 23: System Check Screen
A drop menu displays the available alarm outputs for the recording problem. Highlight the desired alarm output from no alarm output, external alarm out terminal or internal buzzer, and press the button. Siemens Building Technologies SISTORE AX4_EN.doc Fire & Security Products 09.2004... -
Page 24: Storage Screen
Notify. Highlight the S.M.A.R.T. Setup… and press the button. The S.M.A.R.T. Setup screen appears. Fig. 31 S.M.A.R.T. Setup screen. Siemens Building Technologies SISTORE AX4_EN.doc Fire & Security Products 09.2004... -
Page 25: System Log Screen
This shuts the DVR down. When shutting down the DVR, you need to confirm that you want to shut down the unit, and you will be asked for an administrator password. Siemens Building Technologies SISTORE AX4_EN.doc Fire & Security Products... -
Page 26: Configuring Input Devices
Select your camera from the list and press the button. You will need to connect the camera to the RS-485 terminal on the back of the DVR following the camera manufacturer’s instructions. Siemens Building Technologies SISTORE AX4_EN.doc Fire & Security Products 09.2004... -
Page 27: Alarm In Setup Screen
On (via Alarm I/O or Camera Alarm) or Off. Each input can be given a title, and the inputs can be set as NO (normally open) or NC (normally closed) independently. Siemens Building Technologies SISTORE AX4_EN.doc Fire & Security Products... -
Page 28: Motion Detector
Once 4 cells are highlight, you can select individual cells by using the camera buttons. Exit with save Closes the menu after saving the changes. Exit without save Closes the menu without saving the changes. Siemens Building Technologies SISTORE AX4_EN.doc Fire & Security Products 09.2004... -
Page 29: Text-In Setup Screen
Line Count field, it will be considered one complete transaction. At this time, the character string next to the Keyword 1 or Keyword 2 is saved as a key value and used for searching the text-in log. Siemens Building Technologies SISTORE AX4_EN.doc Fire & Security Products... - Page 30 When set to On, the Alarm Out is active during the scheduled time. When set to Event, the Alarm Out is only active when there is an Event during the scheduled time. Siemens Building Technologies SISTORE AX4_EN.doc Fire & Security Products...
- Page 31 The DVR will NOT record audio when the recording speed is set to less 15 ips (12.5 ips for PAL). The DVR may not record audio depending on the Transfer Speed when the RAS (Remote Administration System) Watch application program is connected. Siemens Building Technologies SISTORE AX4_EN.doc Fire & Security Products...
- Page 32 NOTE: Selecting the PTZ Control in the RS485 field only defines the RS-485 port as being used for PTZ camera connections. Select the PTZ device in the Camera Setup screen. Siemens Building Technologies SISTORE AX4_EN.doc Fire & Security Products 09.2004...
- Page 33 Panic mode. NOTE: When the DVR is in the Panic Recording mode, it ignores the time-lapse or event recording settings and follows the panic recording settings. Siemens Building Technologies SISTORE AX4_EN.doc Fire & Security Products 09.2004...
- Page 34 NOTE: The maximum storage time is only an estimate because the amount of space required to store video varies depending on many factors such as motion and image complexity. Siemens Building Technologies SISTORE AX4_EN.doc Fire & Security Products 09.2004...
- Page 35 The Holiday (H) schedule applies to the dates you established as holidays when setting Date/Time. You can save your changes by highlighting OK and pressing the button . Selecting Cancel exits the screen without saving the changes. Siemens Building Technologies SISTORE AX4_EN.doc Fire & Security Products 09.2004...
- Page 36 Time. You can set the Dwell Time from 1 to 300 seconds. NOTE: When the DVR is in the Time-Lapse mode, it ignores the pre-event settings and follows the time-lapse settings. Siemens Building Technologies SISTORE AX4_EN.doc Fire & Security Products 09.2004...
- Page 37 Highlight the Quality box and select the image quality you want to record from the drop-down menu. Highlight the Dwell Time box and set the length of time you would like to record for the associated event. Siemens Building Technologies SISTORE AX4_EN.doc Fire & Security Products 09.2004...
- Page 38 Highlight the Notify box and press the button. This toggles between On and Off. When it is On, the DVR notifies the remote site when certain events occur based on a defined schedule. Siemens Building Technologies SISTORE AX4_EN.doc Fire & Security Products 09.2004...
- Page 39 Highlight the Quality box and select the image quality you want to record from the drop-down menu. Highlight the Dwell Time box and set the length of time you would like to record for the associated motion event. Siemens Building Technologies SISTORE AX4_EN.doc Fire & Security Products 09.2004...
- Page 40 Highlight the Notify box and press the button. This toggles between On and Off. When it is On, the DVR notifies the remote site when certain events occur based on a defined schedule. Siemens Building Technologies SISTORE AX4_EN.doc Fire & Security Products 09.2004...
- Page 41 Highlight the Quality box and select the image quality you want to record from the drop-down menu. Highlight the Dwell Time box and set the length of time you would like to record for the text input. Siemens Building Technologies SISTORE AX4_EN.doc Fire & Security Products 09.2004...
- Page 42 This toggles between On and Off. When it is On, the DVR notifies the remote site when it has text input from a text-in device based on a defined schedule. Siemens Building Technologies SISTORE AX4_EN.doc Fire & Security Products...
- Page 43 Highlight the Quality box and select the image quality you want to record from the drop-down menu. Highlight the Dwell Time box and set the length of time you would like to record for the associated video loss. Siemens Building Technologies SISTORE AX4_EN.doc Fire & Security Products 09.2004...
- Page 44 This toggles between On and Off. When it is On, the DVR notifies the remote site when it loses video input from a camera based on a defined schedule. Siemens Building Technologies SISTORE AX4_EN.doc Fire & Security Products 09.2004...
- Page 45 The margins can be set from 1 to 24. Highlight the box beside Top/Bottom Margin and press the button to adjust the top and bottom margins. The margins can be set from 1 to 24. Siemens Building Technologies SISTORE AX4_EN.doc Fire & Security Products 09.2004...
- Page 46 Highlight the box beside Event Monitoring Dwell Time and press the button. You can adjust the event monitoring dwell time from 3 to 60 seconds. Siemens Building Technologies SISTORE AX4_EN.doc Fire & Security Products 09.2004...
- Page 47 You can program the image quality for transferring to the RAS (Remote Administration System). Highlight the box beside Remote Quality and press the button. The image quality can be selectable from Very High, High, Standard and Low. Siemens Building Technologies SISTORE AX4_EN.doc Fire & Security Products 09.2004...
- Page 48 Subnet Mask: 255.255.255.0 You can save your changes and return to the Network Setup screen by highlighting OK and pressing the button . Selecting Cancel exits the screen without saving the changes. Siemens Building Technologies SISTORE AX4_EN.doc Fire & Security Products 09.2004...
- Page 49 Selecting Cancel exits the screen without saving the changes. NOTE: An internal modem may have compatibility problem with the modem used for the RAS (Remote Administration System). Please contact y our dealer/installer for available models for the RAS. Siemens Building Technologies SISTORE AX4_EN.doc Fire & Security Products 09.2004...
- Page 50 Use the virtual keyboard to enter the e-mail address. Highlight the box beside E-mail sender and enter the sender’ s e-mail address. NOTE: The e-mail address must include the character “@” to be a valid address. Siemens Building Technologies SISTORE AX4_EN.doc Fire & Security Products 09.2004...
- Page 51 DVR to call a remote site to give notice of an event. You can save your changes by highlighting OK and pressing the button . Selecting Cancel exits the screen without saving the changes. Siemens Building Technologies SISTORE AX4_EN.doc Fire & Security Products 09.2004...
- Page 52 The Key Lock password is 4321. The Administrator password also can be used to unlock the keys. You can save your changes by highlighting OK and pressing button . Selecting Cancel exits the screen without saving the changes. Siemens Building Technologies SISTORE AX4_EN.doc Fire & Security Products 09.2004...
- Page 53 (for example “01”) and “.exe” to the file name. If you want to save the file in a specific folder, enter the folder name followed by a “/”. For example: “folder/filename” Siemens Building Technologies SISTORE AX4_EN.doc Fire & Security Products...
- Page 54 Highlighting and selecting Clear All Data will bring up screen asking you if you really want to clear all data and confirm it with a password. CAUTION: Selecting Clear All Data will erase all recorded video. Siemens Building Technologies SISTORE AX4_EN.doc Fire & Security Products 09.2004...
- Page 55 Quad/Seq monitoring and displays the selected camera or return to the previous screen format. NOTE: The DVR will not play audio in the Quad mode. Siemens Building Technologies SISTORE AX4_EN.doc Fire & Security Products 09.2004...
- Page 56 Once you have set the camera presets, you can go directly to desired views. Press the button to load the Preset View dialog box. Selecting the desired Quad/Seq preset number loads the preset. Fig. 72 Preset vi ew screen. Siemens Building Technologies SISTORE AX4_EN.doc Fire & Security Products 09.2004...
- Page 57 If the DVR was set up to record audio, it will record audio when video is recording. NOTE: Make certain you comply with all local and federal laws and regulations when recording audio. Siemens Building Technologies SISTORE AX4_EN.doc Fire & Security Products...
- Page 58 Pressing the button will pause the video on the screen. The screen Enter/Pause displays . 4.5.3 Camera Buttons (1 to 4) Pressing a camera button will display that camera full screen. Siemens Building Technologies SISTORE AX4_EN.doc Fire & Security Products 09.2004...
- Page 59 The enlarged screen displays . Pressing the button again releases the Digital Zoom Playback mode and returns to the playback mode. Fig. 74 Digital Zoom screen. Fig. 75 Enlarged Digital Zoom screen. Siemens Building Technologies SISTORE AX4_EN.doc Fire & Security Products 09.2004...
- Page 60 The selected date and time will display. (If no video was recorded at the selected time, a blank screen will display.) The arrow buttons can now be used to review the surrounding video. Siemens Building Technologies SISTORE AX4_EN.doc Fire & Security Products...
- Page 61 Enter/Pause returns to live monitoring. You can also narrow your event search by selecting the Query… button and setting up the new search condition. Siemens Building Technologies SISTORE AX4_EN.doc Fire & Security Products 09.2004...
- Page 62 Once you set your desired search conditions, highlight Find and press the button to display the search results in the Event Log screen. Selecting Cancel exits the screen without saving the changes. Siemens Building Technologies SISTORE AX4_EN.doc Fire & Security Products...
- Page 63 The partition size should be less than 32GB because of Windows OS limitations. After formatting is complete, the USB-IDE hard disk drive will be added to My Computer. Connect the USB-IDE hard disk drive to the DVR. Siemens Building Technologies SISTORE AX4_EN.doc Fire & Security Products 09.2004...
- Page 64 Right click the newly created hard disk drive icon and select “Format” . In the Format Screen, select “Full” as the “Format type” and click “Start” . After formatting is complete, connect the USB-IDE hard disk drive to the DVR. Siemens Building Technologies SISTORE AX4_EN.doc Fire & Security Products...
- Page 65 If the correct time and date is earlier than the last recorded image, date and time setting of the any video with a later time and date will be lost when resetting the DVR. correct time and date. Siemens Building Technologies SISTORE AX4_EN.doc Fire & Security Products 09.2004...
- Page 66 Alarm Inputs 1 to 4 Chassis Ground Alarm Reset In Normally Closed Common Normally Open RS485 Connector Pin Outs Master Unit Slave Unit RX-/TX- ? To ? TX-/RX- RX+/TX+ To ? TX+/RX+ Siemens Building Technologies SISTORE AX4_EN.doc Fire & Security Products 09.2004...
- Page 67 Appendix D — Map of Screens Appendix D — Map of Screens Siemens Building Technologies SISTORE AX4_EN.doc Fire & Security Products 09.2004...
- Page 68 41 °F to 104 °F (5 °C to 40 °C) Operating Humidity 0 to 90% Power 100 to 240 V AC, 0.7 A, 50/60 Hz APPROVAL UL, CB, CE, FCC Specifications are subject to change without notice. Siemens Building Technologies SISTORE AX4_EN.doc Fire & Security Products 09.2004...
- Page 69 Loop Through Video, 9 USB Hard Disk Drive Preparation, 63 USB Port, 13 Main Monitoring Setup, 46 Map of Screens, 67 VGA, 9 Modem Port, 12 Video Source, 9 Modem Setup, 49 Siemens Building Technologies SISTORE AX4_EN.doc Fire & Security Products 09.2004...
- Page 70 Issued by © 2004 Copyright by Siemens Building Technologies Siemens Building Technologies AG Fire & Security Products GmbH & Co. oHG Data and design subject to change without notice. D-76181 Karlsruhe Supply subject to availability. Printed in the Federal Republic of Germany www.sbt.siemens.com/fsp...