Table of Contents
Advertisement
Quick Links
Advertisement
Table of Contents

Related Manuals for Panasonic VL-SDM200A


Summary of Contents for Panasonic VL-SDM200A
- Page 1 Operating Instructions Wireless Door Camera VL-SDM200A Model No. Including: VL-CM851A VL-DM200A VL-MDM200A VL-CM851A VL-DM200A VL-MDM200A Thank you for purchasing a Panasonic product. Please read this manual before using the unit and save for future reference.
-
Page 2: Table Of Contents
Table of Contents Introduction Product descriptions ...........3 Accessory information ........4 Important Information For your safety ............5 Important safety instructions .......7 For best performance .........8 Other information ..........9 Getting Started Location of controls ...........11 Monitor display ..........13 Charging the Wireless Monitor ......15 Setting the date and time ........16 Attaching the Wireless Camera ......17 How to use... -
Page 3: Introduction
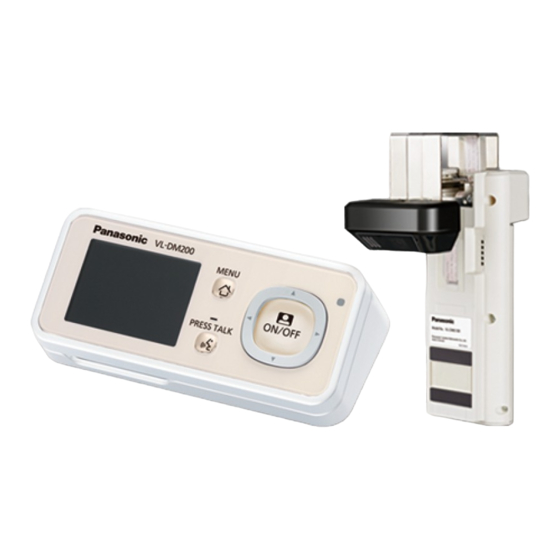
Introduction Product descriptions Product figure VL-MDM200A VL-DM200A VL-CM851A Description in this Wireless Camera Base Unit Wireless Monitor manual *1 The Wireless Camera is used by attaching it to the front door of a house or apartment (page 17). *2 The Base Unit is needed in order to view images from the Wireless Camera on the Wireless Monitor. Always use the Base Unit with it connected to a power supply. -
Page 4: Accessory Information
R Portions of this software are based in part on the work of the Independent JPEG Group. Trademarks: R All other trademarks identified herein are property of their respective owners. This product is not designed to be used to prevent theft or intrusions. Panasonic assumes no liability for any accidents or damages occurring in such cases. -
Page 5: Important Information
Important Information For your safety To prevent severe injury and loss of life/property, read this section carefully before using the product to ensure proper and safe operation of your product. WARNING Power connection R Use only the power source marked on the unit. If you are not sure of the type of power supplied to your home, consult your dealer or local power company. - Page 6 Important Information – If the Base Unit or the Wireless Monitor has been exposed to rain or water, or liquid has been spilled into the unit, do not use a microwave oven to speed up the drying process of any parts of the unit to avoid permanent damage.
-
Page 7: Important Safety Instructions
Important Information R In order to prevent the risk of heat generation, fire, an explosion, or leaking liquids, do not do the following. – Charge, heat up, or disassemble batteries, or dispose of batteries in the fire. – Connect metal objects to batteries’ terminals. –... -
Page 8: For Best Performance
– The power is turned off during use. (We might not be liable for the damage.) R Panasonic may not be liable for damages due to external factors such as power failures. Location/avoiding noise (Base Unit/Wireless Camera/Wireless Monitor) The Base Unit (A), Wireless Camera (B), and Wireless Monitor (C) use radio waves to communicate with each other. -
Page 9: Other Information
Others R Panasonic assumes no liability for injuries or property damage resulting from failures arising out of improper installation or operation inconsistent with the Operating Instructions. R If you stop using the Wireless Camera, remove the Wireless Camera from the door to prevent them from falling off. - Page 10 Important Information – Even if the unit is sent for repairs without performing “RESET + DEL ALL PICS”, the memory (including recorded data and contents of the settings) of the Base Unit may be cleared and set to factory default after repair. R If operations cannot be performed with the Wireless Monitor because of damage to the unit, consult with the place of purchase for the appropriate action.
-
Page 11: Getting Started
Getting Started Location of controls Wireless Camera R Bottom view Fixing screw Camera unit Microphone Camera lens Speaker Cable protection sheet R Do not remove this sheet. Magnet/rubber R The magnet and rubber are used to stop the Wireless Camera from moving. Wireless unit Battery case Power slide switch (ON/OFF) - Page 12 Getting Started Pair indicator R Flashes/lights when pairing (not normally performed). R When you turn the Wireless Camera’s power ON, you can check the pair indicator to check if the power is actually turned on (page 19). Slide lever R Use the slide lever when removing the battery case. Wireless Monitor R Bottom view MENU...
-
Page 13: Monitor Display
Getting Started Base Unit (Shown on the Base Unit as: MAIN UNIT) R Bottom view Electrical parts Power plug Charge contacts (metal parts) Pair indicator (page 29, 35) Pair button (page 29, 35) Monitor display R The following display is an example for description purposes, and it may differ from the actual display. R To display the top menu when it is off (not displayed), press MMENUN. - Page 14 Getting Started Displays the current status with symbols. Displayed when displaying the Zoom display (page 23). The displayed arrows indicate which direction the Zoom position can be moved when displaying the Zoom display. Displayed when recording images (page 24). Displayed when MPRESS TALKN is pressed while talking (page 23). Displayed when the signal between the Base Unit and Wireless Camera/Wireless Monitor is weak.
-
Page 15: Charging The Wireless Monitor
Getting Started R When the Wireless Camera is (Out of range), the remaining battery power symbol of the Wireless Camera is not displayed. Charging the Wireless Monitor Charge the Wireless Monitor before using it. Insert the battery pack. R Open the cover (A), insert the battery pack (B), and then close the battery cover (A). Battery cover Plug the power plug into the power outlet (120 V AC, 60 Hz) (A). -
Page 16: Setting The Date And Time
Getting Started Note: R In order to maintain battery pack performance and prevent the battery pack from discharging, remove the battery pack when the Wireless Monitor is off the Base Unit or the power plug is unplugged from the power outlet for a week or longer. –... -
Page 17: Attaching The Wireless Camera
Getting Started Attaching the Wireless Camera Before attaching the Wireless Camera (Installation preparation) Wireless Camera range R Views when the camera is set “WIDE” (default). When using with a door with a height of 2 m (6 ft 7 in.) Side view Top view approx. - Page 18 Getting Started Doors the Wireless Camera can be attached to R Steel doors that open to the inside that meet the following requirements. – A gap of 2.5 mm (3/32 in.) or more for A and 3 mm (1/8 in.) or more for B between the door and door frame.
- Page 19 Getting Started Inserting batteries into the wireless unit Before attaching the Wireless Camera to the door, insert the batteries by performing the following procedure. Slide the slide lever (A) across and take out the battery case (B) from the wireless unit. R Be careful not to drop the battery case when taking it out.
- Page 20 Getting Started R Use Alkaline AA (LR6) batteries. The batteries’ lifetime will be reduced if different types of batteries are used together. R To prevent the Wireless Camera from falling down when replacing the batteries, make sure to close the door and turn off the power of the Wireless Camera before replacing batteries. Attaching the Wireless Camera to a door Note: R Be careful not to get your fingers caught in the door when attaching the Wireless Camera.
- Page 21 Getting Started Carefully take the Wireless Camera off the door without loosening the fixing screw, and then remove the silicon paper from the double-sided tape on the back of the metal plate. R Wipe dirt and moisture from the surface of the door, then attach the Wireless Camera to a flat area on the surface of the door.
- Page 22 Getting Started R If the door is made of wood, make sure to use the included screws to fix the metal plate to the top side of the door. Make sure to get permission from the owner before fixing screws to the door. Important: R Because the Wireless Camera uses double-sided tape with strong adhesion to prevent it from falling down, care is needed when removing the Wireless Camera from the door.
-
Page 23: How To Use
How to use Monitoring the outside You can monitor the sounds and images from outside taken by the Wireless Camera. R The sound from your end will not be heard at the Wireless Camera. You can perform the following operations during monitoring: R Switching between Wide/Zoom (page 23) R Recording images (page 24) R Adjusting brightness (display)/Audio output volume/Audio input volume (page 23) -
Page 24: Recording Displayed Images
How to use Wide display Zoom display (default setting) Press and hold M N (Monitor button) for about 3 seconds when in the Wide display. R The display is switched to the Zoom display. R To switch back to the Wide display, press and hold M N (Monitor button) for about 3 seconds again. -
Page 25: Viewing Recorded Images
How to use R Recorded images are saved to the Base Unit. R Images recorded by additional Wireless Monitors are also saved to the Base Unit. Press MMENUN while monitoring images. Press MEN (“RECORD”). is displayed on the screen. Note: R Images are recorded according to the current display setting. - Page 26 How to use Note: R A maximum of 5 images can be protected. If you want to protected an image when 5 images are already protected, you must remove protection from 1 of the images. R Protected images cannot be deleted. Remove the protection in order to delete protected images.
-
Page 27: Programming Function Settings
How to use Programming function settings You can change the function settings to suit your needs. How to change the function settings Press MMENUN, then select the “ALL SETTINGS” by pressing MDN, MCN, MFN, or MEN. Press M N (monitor button) (“OK”), then select the desired item by pressing MDN or MCN. Press M N (monitor button) (“OK”). - Page 28 How to use Item Function Setting RESET + DEL ONLY DELETE DELETE ALL PICTURES / DEL NON-PROTECTED PICS ALL PICS R Images saved on the Base Unit are deleted. ALL PICS RESET + DEL YES / NO *1*2 R If YES is selected, all images recorded to the Base Unit ALL PICS (including protected images) are deleted, and the entire Wireless Door Camera system settings, including the...
-
Page 29: Useful Information
Useful Information Adding extra Wireless Monitors (Pairing) R By adding separately sold Wireless Monitors (page 4), a total of 4 Wireless Monitors (including the included Wireless Monitor) can be used with a single Wireless Camera. R Pair additional Wireless Monitors to the Base Unit. R Place the additional Wireless Monitor near the Base Unit and then perform operations on the additional Wireless Monitor ( ) within about 2 minutes of performing operations on the Base Unit... -
Page 30: Canceling Unused Wireless Monitors
Useful Information Canceling unused Wireless Monitors R These operations are performed on the included Wireless Monitor, and can also be performed on the additionally paired Wireless Monitor. R The pairing of the Wireless Monitor performing operations cannot be canceled. Press MMENUN. Select “ALL SETTINGS”... - Page 31 Useful Information R Wipe the charge contacts (A) about once a month with a dry cloth. (If the charge contacts become dirty, it may take longer to charge, or charging may not be possible.) – Press B so that the charge contacts (A) come out from Base Unit. R Remove any moisture from the Wireless Camera’s microphone (C) with a cotton bud or similar product.
-
Page 32: Help
Help Troubleshooting Display issues Problem Cause & Solution Page Images appear slightly R This is a characteristic of camera lenses and is not a – distorted. malfunction. The image of a person’s R When there is a backlight in the place where the Wireless face is dark. - Page 33 Help Base Unit/Wireless Monitor Problem Cause & Solution Page Even when the Wireless R The power plug is unplugged from the power outlet. Monitor is placed on the – Plug the power plug into the power outlet firmly. Base Unit (or the charger R The Wireless Monitor is not placed on the Base Unit of additional Wireless correctly.
- Page 34 Help Problem Cause & Solution Page The unit does not work R Perform the following operations. with correct operations. Wireless Camera: (The unit does not work Replace the batteries. properly.) Wireless Monitor: Remove the battery pack and insert it again. –...
-
Page 35: Error Messages
Help Error messages Problem Cause & Solution Page CANNOT CONNECT TO The following may be causing the problem. CAMERA R The Wireless Camera is turned off. – Turn the Wireless Camera on. R The batteries of the Wireless Camera have run out of power. - Page 36 Help Problem Cause & Solution Page Protected pics R The maximum number of protected images (5 images) has full. already been reached. Can’t protect pics. – Remove the protection from other images before setting protection for the current image. Images that had their protection removed will be deleted in order as new images are recorded.
-
Page 37: General Information
General Information Specifications Wireless Monitor (VL-DM200A) n Power supply: Lithium ion battery (part number: CGA-LB102), @DC 3.7 V, 940 mAh@ n Dimensions (Height ´ Width ´ Depth): in.) ´ 126 mm (4 in.) ´ 59 mm (2 Approx. 21 mm ( in.) @(excluding protruding sections)@ 13/16 15/16... - Page 38 General Information n Operating temperature: 5 °C to 40 °C (41 °F to 104 °F) n Operating humidity: Up to 90 % RH (Relative Humidity) non condensing n Wireless transmission method: 1.9 GHz TDMA-WB n Transmission frequency: 1921.536 MHz - 1928.448 MHz n Transmitting range: Approx.
- Page 39 General Information n Transmission frequency: 1921.536 MHz - 1928.448 MHz n Transmitting range: Approx. 70 m (229 ft 8 in.) (line-of-sight distance)
-
Page 40: For Users In The United States Only (Fcc And Other Information)
General Information For users in the United States Only (FCC and other information) This device complies with Part 15 of the FCC Rules. Operation is subject to the following two conditions: (1) This device may not cause harmful interference, and (2) this device must accept any interference received, including interference that may cause undesired operation. -
Page 41: For Users In Canada Only (Industry Canada Notices And Other Information)
General Information For users in Canada Only (Industry Canada Notices and other information) NOTICE: This product meets the applicable Industry Canada technical specifications. RF Exposure Warning: R This product complies with IC radiation exposure limits set forth for an uncontrolled environment. R To comply with IC RF exposure requirements, the unit must be installed and operated 20 cm (8 inches) or more between the product and all person’s body (excluding extremities of hands, wrist and feet). -
Page 42: Quick Reference Guide (In Spanish)
Quick Reference Guide (in Spanish) Quick Reference Guide (in Spanish) Quick Reference Guide Location of controls VL-CM851A Fixing screw Camera unit Microphone Camera lens Speaker Cable protection sheet Magnet/rubber Wireless unit Battery case Power slide switch (ON / OFF) Pair button Pair indicator Slide lever Bottom view... - Page 43 Quick Reference Guide (in Spanish) VL-DM200A Microphone B Menu button MENU C Charger indicator PRESS TALK D Monitor button E Navigator key F Talk button Bottom view Monitor display Speaker Charge contacts (metal parts) Battery cover Electrical parts VL-MDM200A Power plug Charge contacts (metal parts) N Pair indicator...
- Page 44 Quick Reference Guide (in Spanish) Basic Operations The number after the button shows the location of the button described in the previous page. To monitor Press M (Monitor button) ( D ). Press M (Monitor button) to finish. To switch the displayed image between Wide display and Zoom display (The default is wide.) Press M ( D ) for about 3 seconds to switch between...
-
Page 45: Appendix
Appendix Customer services (For United States) -
Page 46: Warranty (For United States)
Appendix Warranty (For United States) - Page 47 Appendix...
-
Page 48: Warranty (For Canada)
Appendix Warranty (For Canada) - Page 49 Appendix...
-
Page 50: Index
Index Pair indicator: 12, 13, 19, 29, 35 Index Pairing (Wireless Monitor): 29 Pan/Tilt (switching zoom position): 24 A Adjusting the display brightness: 23 Power slide switch: 11, 19 Adjusting the volume Protecting images (removing protection): 25 Listening volume: 23 Q Quick Reference Guide: 42 Talking volume: 23 R Recording: 24... - Page 51 Notes...
- Page 52 Dealer’s name and address Dealer’s telephone number Attach your sales receipt here. For customers in the U.S.A: One Panasonic Way, Secaucus, New Jersey 07094 For assistance, visit our website: http://www.panasonic.com for customers in the U.S.A. and Puerto Rico. For customers in Canada: 5770 Ambler Drive, Mississauga, Ontario L4W 2T3 ©...